Products
-
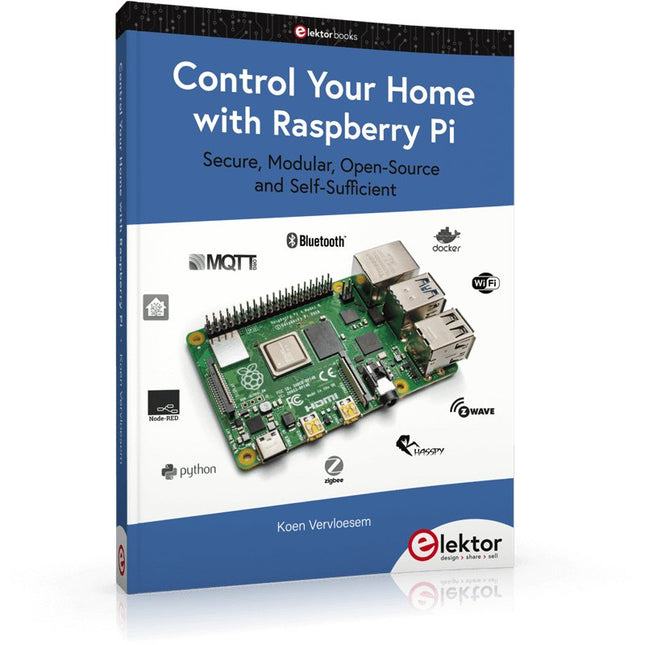
Elektor Publishing Control Your Home with Raspberry Pi
Secure, Modular, Open-Source and Self-Sufficient Ever since the Raspberry Pi was introduced, it has been used by enthusiasts to automate their homes. The Raspberry Pi is a powerful computer in a small package, with lots of interfacing options to control various devices. This book shows you how you can automate your home with a Raspberry Pi. You’ll learn how to use various wireless protocols for home automation, such as Bluetooth, 433.92 MHz radio waves, Z-Wave, and Zigbee. Soon you’ll automate your home with Python, Node-RED, and Home Assistant, and you’ll even be able to speak to your home automation system. All this is done securely, with a modular system, completely open-source, without relying on third-party services. You’re in control of your home, and no one else. At the end of this book, you can install and configure your Raspberry Pi as a highly flexible home automation gateway for protocols of your choice, and link various services with MQTT to make it your own system. This DIY (do it yourself) approach is a bit more laborious than just installing an off-the-shelf home automation system, but in the process, you can learn a lot, and in the end, you know exactly what’s running your house and how to tweak it. This is why you were interested in the Raspberry Pi in the first place, right? Turn your Raspberry Pi into a reliable gateway for various home automation protocols. Make your home automation setup reproducible with Docker Compose. Secure all your network communication with TLS. Create a video surveillance system for your home. Automate your home with Python, Node-RED, Home Assistant and AppDaemon. Securely access your home automation dashboard from remote locations. Use fully offline voice commands in your own language. Downloads Errata on GitHub
€ 44,95
Members € 40,46
-
Elektor Digital Control Your Home with Raspberry Pi (E-book)
Secure, Modular, Open-Source and Self-Sufficient Ever since the Raspberry Pi was introduced, it has been used by enthusiasts to automate their homes. The Raspberry Pi is a powerful computer in a small package, with lots of interfacing options to control various devices. This book shows you how you can automate your home with a Raspberry Pi. You’ll learn how to use various wireless protocols for home automation, such as Bluetooth, 433.92 MHz radio waves, Z-Wave, and Zigbee. Soon you’ll automate your home with Python, Node-RED, and Home Assistant, and you’ll even be able to speak to your home automation system. All this is done securely, with a modular system, completely open-source, without relying on third-party services. You’re in control of your home, and no one else. At the end of this book, you can install and configure your Raspberry Pi as a highly flexible home automation gateway for protocols of your choice, and link various services with MQTT to make it your own system. This DIY (do it yourself) approach is a bit more laborious than just installing an off-the-shelf home automation system, but in the process, you can learn a lot, and in the end, you know exactly what’s running your house and how to tweak it. This is why you were interested in the Raspberry Pi in the first place, right? Turn your Raspberry Pi into a reliable gateway for various home automation protocols. Make your home automation setup reproducible with Docker Compose. Secure all your network communication with TLS. Create a video surveillance system for your home. Automate your home with Python, Node-RED, Home Assistant and AppDaemon. Securely access your home automation dashboard from remote locations. Use fully offline voice commands in your own language. Download the software and view the errata for the book on GitHub.
€ 34,95
Members € 27,96
-

Elektor Digital Controller Area Network Projects (E-book)
The Controller Area Network (CAN) was originally developed to be used as a vehicle data bus system in passenger cars. Today, CAN controllers are available from over 20 manufacturers, and CAN is finding applications in other fields, such as medical, aerospace, process control, automation, and so on. This book is written for students, for practising engineers, for hobbyists, and for everyone else who may be interested to learn more about the CAN bus and its applications. The aim of this book is to teach you the basic principles of CAN networks and in addition the development of microcontroller based projects using the CAN bus. In summary, this book enables the reader to: Learn the theory of the CAN bus used in automotive industry Learn the principles, operation, and programming of microcontrollers Design complete microcontroller based projects using the C language Develop complete real CAN bus projects using microcontrollers Learn the principles of OBD systems used to debug vehicle electronics You will learn how to design microcontroller based CAN bus nodes, build a CAN bus, develop high-level programs, and then exchange data in real-time over the bus. You will also learn how to build microcontroller hardware and interface it to LEDs, LCDs, and A/D converters. The book assumes that the reader has some knowledge on basic electronics. Knowledge of the C programming language will be useful in later chapters of the book, and familiarity with at least one member of the PIC series of microcontrollers will be an advantage, especially if the reader intends to develop microcontroller based projects using the CAN bus.
€ 29,95
Members € 23,96
-

Elektor Digital Controller Area Network Projects with ARM and Arduino (E-book)
This book details the use of the ARM Cortex-M family of processors and the Arduino Uno in practical CAN bus based projects. Inside, it gives a detailed introduction to the architecture of the Cortex-M family whilst providing examples of popular hardware and software development kits. Using these kits helps to simplify the embedded design cycle considerably and makes it easier to develop, debug, and test a CAN bus based project. The architecture of the highly popular ARM Cortex-M processor STM32F407VGT6 is described at a high level by considering its various modules. In addition, the use of the mikroC Pro for ARM and Arduino Uno CAN bus library of functions are described in detail. This book is written for students, for practising engineers, for hobbyists, and for everyone else who may need to learn more about the CAN bus and its applications. The book assumes that the reader has some knowledge of basic electronics. Knowledge of the C programming language will be useful in later chapters of the book, and familiarity with at least one microcontroller will be an advantage, especially if the reader intends to develop microcontroller based projects using CAN bus. The book should be useful source of reference to anyone interested in finding an answer to one or more of the following questions: What bus systems are available for the automotive industry? What are the principles of the CAN bus? What types of frames (or data packets) are available in a CAN bus system? How can errors be detected in a CAN bus system and how reliable is a CAN bus system? What types of CAN bus controllers are there? What are the advantages of the ARM Cortex-M microcontrollers? How can one create a CAN bus project using an ARM microcontroller? How can one create a CAN bus project using an Arduino microcontroller? How can one monitor data on the CAN bus?
€ 32,95
Members € 26,36
-

Elecrow CrowBot BOLT – Smart Robot Car Kit (with Joystick)
CrowBot BOLT is an ESP32-controlled, intelligent, simple and easy-to-use open source robot car. It is compatible with the Arduino and MicroPython environments, with graphical programming via Letscode. 16 learning courses with interesting experiments are available. Features 16 lessons in three languages (Letscode, Arduino, Micropython), fast learning and fun experiments Compatible with Arduino, MicroPython development environment, using Letscode graphical programming, easy to use Strong scalability, with a variety of interfaces, can be expanded and used with Crowtail modules A variety of remote control modes, you can use the infrared remote control and joystick to control the car Specifications Processor ESP32-Wrover-B (8 MB) Programming Letscode, Arduino, Micropython Control method Bluetooth Remote Control/Infrared Remote Control Input Button, Light sensor, Infrared Receiving Module, Ultrasonic Sensor, Line Tracking Sensor Output Buzzer, Programmable RGB Light, Motor Wifi & Bluetooth Yes Light sensor Can realize the function of chasing light or avoiding light Ultrasonic Sensor When an obstacle is detected, the driving route of the car can be corrected to avoid the obstacle Line Tracking Sensor Can make the car move along the dark/black lines, intelligently judge and correct the driving path Buzzer Can make the car sound/whistle, bringing a more direct sensory experience Programmable RGB Light Through programming, it can show colorful lights in different scenes Infrared receiver Receive infrared remote control signals to realize remote control Interfaces 1x USB-C, 1x I²C, 1x A/D Motor type GA12-N20 Micro DC Gear Motor Operating temperature -10℃~+55℃ Power supply 4x 1.5 V batteries (not included) Battery life 1.5 hours Dimensions 128 x 92 x 64 mm Weight 900 g Included 1x Chassis 1x Ultrasonic Sensor 1x Battery Holder 2x Wheels 4x M3x8 mm Screws 2x M3x5 mm Copper Column 2x Side Acrylic Plates 1x Front Acrylic Plates 1x Screwdriver 2x 4 Pin Crowtail Cable 1x USB-C Cable 1x Infrared remote control 1x Instructions & Line Track Map 1x Joystick Downloads Wiki CrowBot-BOLT_Assembly-Instruction Joystick-for-CrowBot-BOLT_Assembly-Instruction CrowBot_BOLT_Beginner’s_Guide Designing Documents of CrowBot Designing Documents of Joystick Lesson Code 3D Model Factory Source Code
-

Elecrow Crowtail-4G SIM A7670E Module GPS Breakout Board
This Crowtail series 4G module is a high-performance LTE Cat1 wireless module. It uses the SIM A7670E communication module from Simcom and communicates through a UART interface, which enables 4G data transmission and voice communication. The module supports multiple LTE bands, including B1/B3/B5/B7/B8/B20, as well as WCDMA and GSM networks. In addition, it supports various protocols such as TCP/IP, FTP, HTTP, and multiple satellite navigation systems such as GPS, GLONASS, and BDS. The module comes with a charging interface and can be powered by a 3.7 V lithium battery or a 5 V USB-C interface. It also has a 3.5 mm headphone jack, and by connecting a headphone with a microphone, it can be used for making and receiving phone calls. Its compact size makes it easy to integrate into various IoT devices and meet various application requirements. Furthermore, its low power consumption and reliable performance are also the reasons why it is widely used in IoT, smart home, automotive, and industrial control fields. Features Integrate the A7670E communication module, enabling 4G data transmission and voice communication with low power consumption and high reliability Supports multiple LTE bands, including B1/B3/B5/B7/B8/B20, as well as WCDMA and GSM networks Supports various protocols such as TCP/IP, FTP, HTTP, and multiple satellite navigation systems such as GPS, GLONASS, and BDS Comes with a charging interface and a headphone jack, which can be used for making and receiving phone calls by connecting a headphone with a microphone Small but powerful, compact size makes it easy to integrate into various IoT devices. Specifications Main Chip: SIM A7670E LTE-FDD: B1/B3/B5/B7/B8/B20 GSM: 900/1800 MHz GSM/GPRS power class EGSM900: 4 (33 dBm ±2 dB) DCS1800: 1 (30 dBm ±2 dB) EDGE power class: EGSM900: E2 (27 dBm ±3 dB) DCS1800 : E1 (26 dBm +3 dB/-4 dB) LTE power class: 3 (23 dBm ±7 dB) Supply Voltage: 4 V ~ 4.2 V Power: 3.8 V LTE(Mbps): 10 (DL)/5 (UL) GPRS/EDGE(Kbps): 236.8 (DL)/236.8 (UL) Protocol: TCP/IP/IPV4/IPV6/Multi-PDP/FTP/FTPS /HTTP/HTTPS/DNS Communication interface: USB / UART Firmware Upgrade: USB/FOTA Support phonebook types: SM/FD/ON/AP/SDN Interfaces: 1x Power button, 1x BAT, 1x UART, 1x USB-C, 1x SIM Card slot Dimensions: 35 x 50 mm Included 1x Crowtail-4G SIM-A7670E 1x 4G GSM NB-IoT Antenna 1x GPS ceramic antenna Downloads Wiki A7670 AT Command Manual A7670 Datasheet Source Code
-
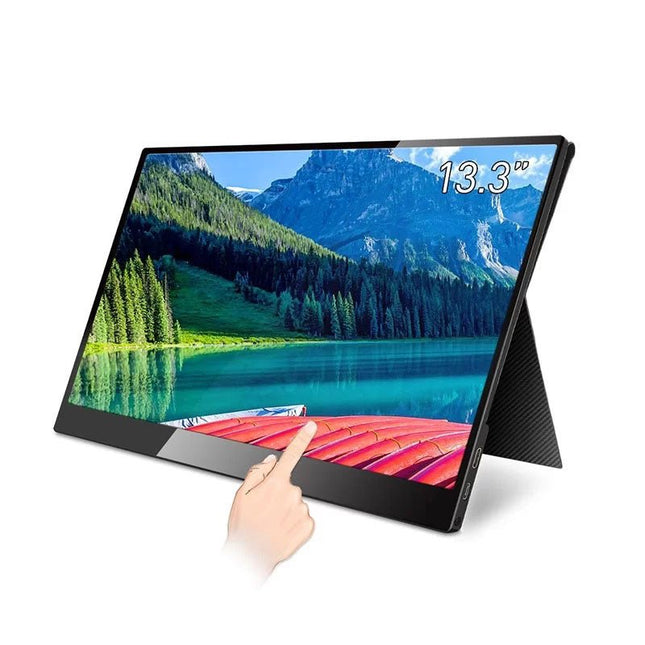
Elecrow CrowVi 13.3" IPS HD Touch Display (1920x1080)
Nowadays, more and smarter phones and laptops adopt USB-C ports for its powerful function that can transmit power, data, and video information. USB-C solution can also make the device much thinner compared to the Thunderbolt 3 or HDMI-compatible port. That’s why we the CrowVi portable USB-C monitor was created. The super thin CrowVi 13.3' monitor has 2 USB-C ports, one is for power delivery, and the other is for data transmission of video and touch screen commands. The screen also can be connected through the mini HDMI-compatible port. The resolution of CrowVi is 1920x1080, which will provide a better experience for gaming and watching movies. Features CrowVi shell is made of aluminum alloy, its thickness is as thin as 5 mm, and the screen border is as narrow as 6 mm. The whole monitor looks exquisite and elegant. CrowVi can not only act as the dual monitor for smartphones, and laptops but also as the single monitor for gaming devices and some computer mainframes like Mac mini, Raspberry Pi, etc. CrowVi brings you a much larger view compared to the phone. It enables better experiences for gaming and watching movies. Specifications Screen 13.3' TFT IPS LCD Screen Size 294.5 x 164 mm Thickness 5-10 mm Resolution 1920 x 1080 Brightness 300 nits Refresh Rate 60 Hz Color Gamut 16.7M, NTSC 72%, sRGB up to 100% Contrast 800:1 Backlight LED Viewing Angle 178° Aspect Ratio 16:9 Speaker Dual speakers 8 Ω, 2 W Shell Aluminum alloy Input Mini-HD, Type-C, PD Output 3.5 mm headphone jack Power PD 5-20 V or USB-C 3.0 Operating Temperature 0-50°C Dimensions 313 x 198 x 10 mm Weight (Smart Case) 350 g Weight (Monitor) 700 g Included 13.3-inch Touch screen monitor Smart case USB-C to USB-C cable (1 m) USB-A to USB-C power cable (1 m) HDMI to mini-HDMI cable (1 m) Power adapter (5 V/2 A) HDMI to mini-HDMI adapter Dust cloth User manual Downloads User manual
-

Heltec Automation CubeCell HTCC-AB01 (V2) LoRa Development Board (EU868)
The CubeCell series is designed primarily for LoRa/LoRaWAN node applications. Built on the ASR605x platform (ASR6501, ASR6502), these chips integrate the PSoC 4000 series MCU (ARM Cortex-M0+ Core) with the SX1262 module. The CubeCell series offers seamless Arduino compatibility, stable LoRaWAN protocol operation, and straightforward connectivity with lithium batteries and solar panels. The HTCC-AB01 (V2) is an upgraded version of the HTCC-AB01 board. Features Arduino compatible Based on ASR605x (ASR6501, ASR6502), those chips are already integrated the PSoC 4000 series MCU (ARM Cortex-M0+ Core) and SX1262 LoRaWAN 1.0.2 support Ultra low power design, 3.5 uA in deep sleep Onboard SH1.25-2 battery interface, integrated lithium battery management system (charge and discharge management, overcharge protection, battery power detection, USB/battery power automatic switching) Good impendence matching and long communication distance. Onboard solar energy management system, can directly connect with a 5.5~7 V solar panel Micro USB interface with complete ESD protection, short circuit protection, RF shielding, and other protection measures Integrated CP2102 USB to serial port chip, convenient for program downloading, debugging information printing Specifications Main Chip ASR6502 (48 MHz ARM Cortex-M0+ MCU) LoRa Chipset SX1262 Frequency 863~870 MHz Max. TX Power 21 ±1 dBm Max. Receiving Sensitivity −134 dBm Hardware Resource 1x UART1x SPI1x I²C1x SWD1x 12-bit ADC input8-channel DMA engine8x GPIO2x PWM Memory 128 Kb FLASH16 Kb SRAM Power consumption Deep Sleep 3.5 uA Interfaces 1x USB-C1x LoRa Antenna (IPEX 1.0)SH1.25; 11x 2x 2.54 Pin header1x (2x 2.54 Pin header) Solar Energy VS pin can be connected to 5.5~7 V solar panel Battery 3.7 V Lithium battery (power supply and charging) Operating temperature −20~70°C Dimensions 40.6 x 22.9 x 7.6 mm Included 1x CubeCell HTCC-AB01 (V2) Development Board 1x Antenna 1x 2x SH1.25 battery connector Downloads Datasheet Schematic Quick start GitHub
-

Heltec Automation CubeCell HTCC-AB02 LoRa Development Board (EU868)
The CubeCell series is designed primarily for LoRa/LoRaWAN node applications. Built on the ASR605x platform (ASR6501, ASR6502), these chips integrate the PSoC 4000 series MCU (ARM Cortex-M0+ Core) with the SX1262 module. The CubeCell series offers seamless Arduino compatibility, stable LoRaWAN protocol operation, and straightforward connectivity with lithium batteries and solar panels. The HTCC-AB02 is a developer-friendly board, ideal for quickly testing and validating communication solutions. Features Arduino compatible Based on ASR605x (ASR6501, ASR6502), those chips are already integrated the PSoC 4000 series MCU (ARM Cortex M0+ Core) and SX1262 LoRaWAN 1.0.2 support Ultra low power design, 3.5 uA in deep sleep Onboard SH1.25-2 battery interface, integrated lithium battery management system (charge and discharge management, overcharge protection, battery power detection, USB/battery power automatic switching) Good impendence matching and long communication distance Onboard solar energy management system, can directly connect with a 5.5~7 V solar panel Micro USB interface with complete ESD protection, short circuit protection, RF shielding, and other protection measures Integrated CP2102 USB to serial port chip, convenient for program downloading, debugging information printing Onboard 0.96-inch 128x64 dot matrix OLED display, which can be used to display debugging information, battery power, and other information Specifications Main Chip ASR6502 (48 MHz ARM Cortex-M0+ MCU) LoRa Chipset SX1262 Frequency 863~870 MHz Max. TX Power 22 ±1 dBm Max. Receiving Sensitivity −135 dBm Hardware Resource 2x UART1x SPI2x I²C1x SWD3x 12-bit ADC input8-channel DMA engine16x GPIO Memory 128 Kb FLASH16 Kb SRAM Power consumption Deep sleep 3.5 uA Interfaces 1x Micro USB1x LoRa Antenna (IPEX)2x (15x 2.54 Pin header) + 3x (2x 2.54 Pin header) Battery 3.7 V lithium battery (power supply and charging) Solar Energy VS pin can be connected to 5.5~7 V solar panel USB to Serial Chip CP2102 Display 0.96" OLED (128 x 64) Operating temperature −20~70°C Dimensions 51.9 x 25 x 8 mm Included 1x CubeCell HTCC-AB02 Development Board 1x Antenna 1x 2x SH1.25 battery connector Downloads Datasheet Schematic Quick start GitHub
-

Heltec Automation CubeCell HTCC-AB02S LoRa Development Board with GPS (EU868)
The CubeCell series is designed primarily for LoRa/LoRaWAN node applications. Built on the ASR605x platform (ASR6501, ASR6502), these chips integrate the PSoC 4000 series MCU (ARM Cortex-M0+ Core) with the SX1262 module. The CubeCell series offers seamless Arduino compatibility, stable LoRaWAN protocol operation, and straightforward connectivity with lithium batteries and solar panels. The HTCC-AB02S is a developer-friendly board with an integrated AIR530Z GPS module, ideal for quickly testing and validating communication solutions. Features Arduino compatible Based on ASR605x (ASR6501, ASR6502), those chips are already integrated the PSoC 4000 series MCU (ARM Cortex M0+ Core) and SX1262 LoRaWAN 1.0.2 support Ultra low power design, 21 uA in deep sleep Onboard SH1.25-2 battery interface, integrated lithium battery management system (charge and discharge management, overcharge protection, battery power detection, USB/battery power automatic switching) Good impendence matching and long communication distance Onboard solar energy management system, can directly connect with a 5.5~7 V solar panel Micro USB interface with complete ESD protection, short circuit protection, RF shielding, and other protection measures Integrated CP2102 USB to serial port chip, convenient for program downloading, debugging information printing Onboard 0.96-inch 128x64 dot matrix OLED display, which can be used to display debugging information, battery power, and other information Using Air530 GPS module with GPS/Beidou Dual-mode position system support Specifications Main Chip ASR6502 (48 MHz ARM Cortex-M0+ MCU) LoRa Chipset SX1262 Frequency 863~870 MHz Max. TX Power 22 ±1 dBm Max. Receiving Sensitivity −135 dBm Hardware Resource 2x UART1x SPI2x I²C1x SWD3x 12-bit ADC input8-channel DMA engine16x GPIO Memory 128 Kb FLASH16 Kb SRAM Power consumption Deep sleep 21 uA Interfaces 1x Micro USB1x LoRa Antenna (IPEX)2x (15x 2.54 Pin header) + 3x (2x 2.54 Pin header) Battery 3.7 V lithium battery (power supply and charging) Solar Energy VS pin can be connected to 5.5~7 V solar panel USB to Serial Chip CP2102 Display 0.96" OLED (128 x 64) Operating temperature −20~70°C Dimensions 55.9 x 27.9 x 9.5 mm Included 1x CubeCell HTCC-AB02S Development Board 1x Antenna 1x 2x SH1.25 battery connector Downloads Datasheet Schematic GPS module (Manual) Quick start GitHub
€ 49,95€ 24,95
Members identical
-

Cytron Cytron Maker Line Sensor
Maker Line is a line sensor with 5 x IR sensors array that is able to track line from 13 mm to 30 mm width. The sensor calibration is also simplified. There is no need to adjust the potentiometer for each IR sensor. You just have to press the calibrate button for 2 seconds to enter calibration mode. Afterwards you need to sweep the sensors array across the line, press the button again and you are good to go. The calibration data is saved in EEPROM and it will stay intact even if the sensor has been powered off. Thus, calibration only needs to be carried out once unless the sensor height, line color or background color has changed. Maker Line also supports dual outputs: 5 x digital outputs for the state of each sensor independently, which is similar to conventional IR sensor, but you get the benefit of easy calibration, and also one analog output, where its voltage represents the line position. Analog output also offers higher resolution compared to individual digital outputs. This is especially useful when high accuracy is required while building a line following robot with PID control. Features Operating Voltage: DC 3.3 V and 5 V compatible (with reverse polarity protection) Recommended Line Width: 13 mm to 30 mm Selectable line color (light or dark) Sensing Distance (Height): 4 mm to 40 mm (Vcc = 5 V, Black line on white surface) Sensor Refresh Rate: 200 Hz Easy calibration process Dual Output Types: 5 x digital outputs represent each IR sensor state, 1 x analog output represents line position. Support wide range of controllers such as Arduino, Raspberry Pi etc. Downloads Datasheet Tutorial: Building A Low-Cost Line Following Robot
€ 14,95€ 7,50
Members identical
-

Cytron Cytron Maker pHAT for Raspberry Pi
The Maker pHAT is the solution to the most common problems beginners face starting with Raspberry PI. Its intelligent and simple design makes it easy to attach to your Pi, and it helps you avoid all the tedious work of connection various other accessories. Additionally, the LEDs corresponding to each pin makes it extremely easy to see where a potential problem lies The Maker pHat has the same size as the Raspberry Pi Zero with all 4mounting holes aligned. However, it can be used with Raspberry Pi 3B, 3B+ and 3A+, by inserting a 2 x 20 stacking header. Features Raspberry Pi Zero size, stack perfectly on to Raspberry Pi Zero Compatible with standard size Raspberry Pi 3B / 3B+, medium size Raspberry Pi 3A+ and smaller size Raspberry Pi Zero / W / WH. Standard Raspberry Pi GPIO footprint. LED array for selected GPIO pins (GPIO 17, 18, 27, 22, 25, 12, 13, 19). 3x on board programmable push buttons (GPIO 21, 19 and 20, need to configure as input pull up). Onboard active buzzer (GPIO 26). Proper labels for all GPIOs, including SPI, UART, I2C, 5V, 3.3V, and GND. Utilize USB Micro-B socket for 5V input and USB to UART communication. USB serial facilitated by the FT231X Input voltage: USB 5 V, from a computer, power bank or a standard USB adapter.
€ 14,95€ 7,50
Members identical
-
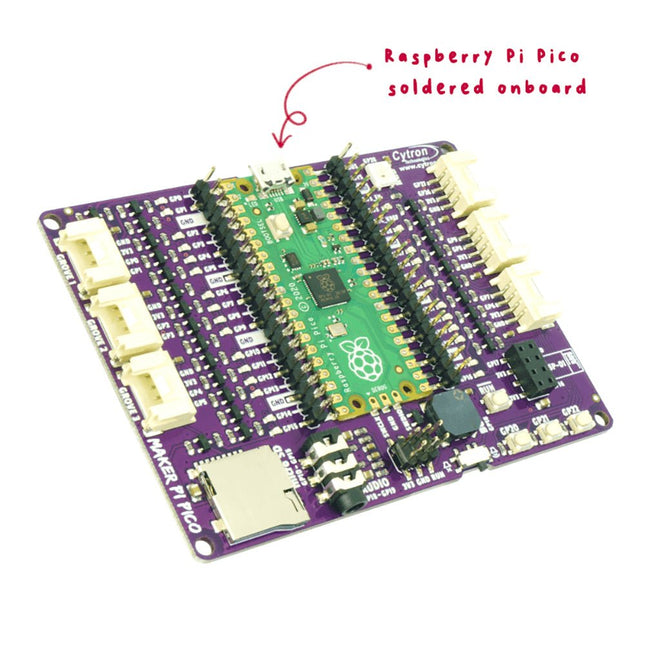
Cytron Cytron Maker Pi Pico (with pre-soldered Raspberry Pi Pico)
The Cytron Maker Pi Pico (with Raspberry Pi Pico RP2040 soldered on Board) incorporates the most wanted features for your Raspberry Pi Pico and gives you access to all GPIO pins on two 20 ways pin-headers, with clear labels. Each GPIO is coupled with an LED indicator for convenient code testing and troubleshooting. The bottom layer of this board even comes with a comprehensive pinout diagram showing the function of each pin. Features Work out-of-the-box. No soldering! Access to all Raspberry Pi Pico's pins on two 20 ways pin headers LED indicators on all GPIO pins 3x programmable push button (GP20-22) 1x RGB LED – NeoPixel (GP28) 1x Piezo buzzer (GP18) 1x 3.5 mm stereo audio jack (GP18-19) 1x Micro SD card slot (GP10-15) 1x ESP-01 socket (GP16-17) 6x Grove port Specifications Core 32-bit ARM Cortex-M0+ CPU Clock 48 MHz, up to 133 MHz Flash Size 2 MByte Q-SPI Flash Programming Language MicroPython, C++ Board Power Input 5 VDC via MicroUSB Alternative Board Power 2-5 VDC via VSYS Pin (Pin 39) MCU Voltage 3.3 VDC GPIO Voltage 3.3 VDC USB Interface USB 1.1 Device Host Program Loading MicroUSB, USB Mass Storage GPIO 26x Input/Output ADC 3x 12-bit 500 ksps Temperature Sensor Built-in, 12-bit UART 2x UART I²C 2x I²C SPI 2x SPI PWM 16x PWM Timer 1x Timer with 4 x Alarm Real-Time Counter 1x Real Time Counter PIO 2x Programmable High-Speed I/O On-Board LED 1x Programmable LED On-Board Button 1x BOOTSEL Button
€ 24,95€ 12,50
Members identical
-
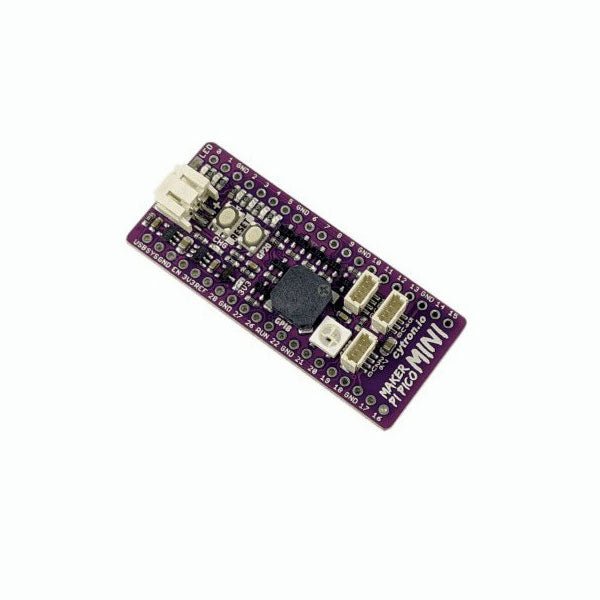
Cytron Cytron Maker Pi Pico Mini W (with pre-soldered Raspberry Pi Pico W & preloaded CircuitPython)
Love the Cytron Maker Pi Pico (SKU 19706) but can't fit it into your project? Now there is the Cytron Maker Pi Pico Mini W. Powered by the awesome Raspberry Pi Pico W, it also inherited most of the useful features from its bigger sibling such as GPIO status LEDs, WS2812B Neopixel RGB LED, passive piezo buzzer, and not forget the user button and reset button. Features Powered by Raspberry Pi Pico W Single-cell LiPo connector with overcharge / over-discharge protection circuit, rechargeable via USB. 6x Status indicator LEDs for GPIOs 1x Passive piezo buzzer (Able to play musical tone or melody) 1x Reset button 1x User programmable button 1x RGB LEDs (WS2812B Neopixel) 3x Maker Ports, compatible with Qwiic, STEMMA QT, and Grove (via conversion cable) Support Arduino IDE, CircuitPython and MicroPython Dimension: 23.12 x 53.85 mm Included 1x Maker Pi Pico Mini W (pre-soldered Raspberry Pi Pico W with preloaded CircuitPython) 3x Grove to JST-SH (Qwiic / STEMMA QT) Cable Downloads Maker Pi Pico Mini Datasheet Maker Pi Pico Mini Schematic Maker Pi Pico Mini Pinout Diagram Official Raspberry Pi Pico Page Getting started with Raspberry Pi Pico CircuitPython for Raspberry Pi Pico Raspberry Pi Pico Datasheet RP2040 Datasheet Raspberry Pi Pico Python SDK Raspberry Pi Pico C/C++ SDK
€ 19,95€ 9,95
Members identical
-
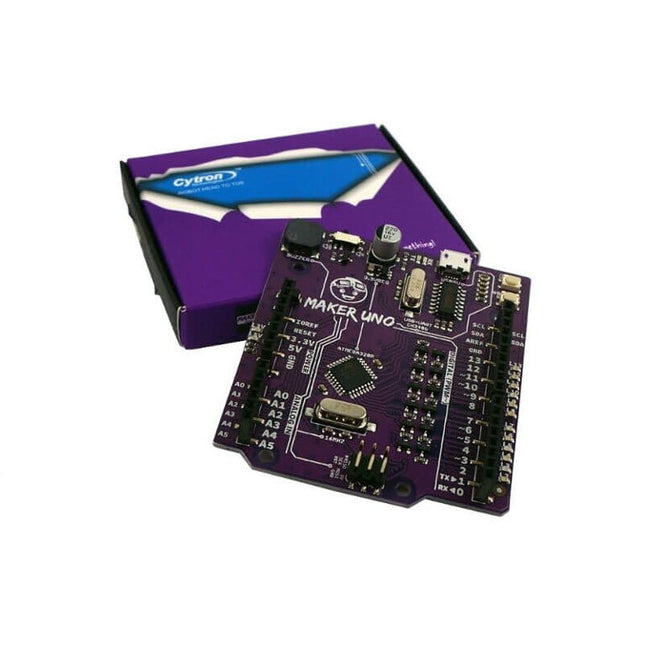
Cytron Cytron Maker Uno
Features Piezo Buzzer: Acts as a simple audio output Micro USB Port Programmable Button 12 x LED: Provides visual output on board Specifications Microcontroller ATmega328P Programming IDE Arduino IDE Operating Voltage 5 V Digital I/O 20 PWM 6 Analog Input 6 (10-bit) UART 1 SPI 1 I2C 1 External Interrupt 2 Flash Memory 32 KB SRAM 2 KB EEPROM / Data Flash 1 KB Clock Speed 16 MHz DC Current I/O Pin 20 mA Power Supply USB only DC Current for 5 V USB Source DC Current for 3.3 V 500 mA USB to Serial Chip CH340G Programmable LED 12 at digital Pin 2 to 13 Programmable Push Button 1 at digital Pin 2 Piezo Buzzer 1 at digital Pin 8 Arduino vs Maker Uno
€ 14,95
Members € 13,46
-
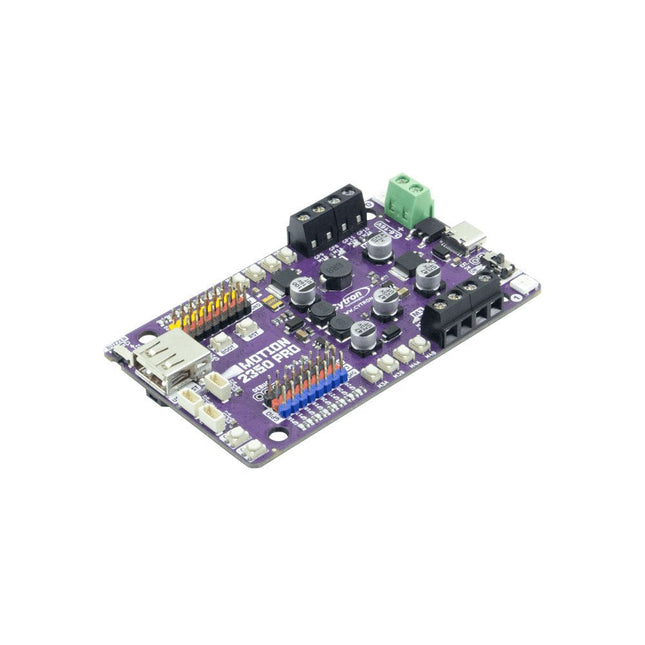
Cytron Cytron Motion 2350 Pro Robotics Controller
The Cytron Motion 2350 Pro is a robust 4-channel DC motor driver (3 A per channel, 3.6-16 V) ideal for building powerful robots, including mecanum wheel designs. It features 8-channel 5 V servo ports, 8-channel GPIO breakouts, 3 Maker Ports, and a USB host for plug-and-play joystick/gamepad support. Powered by Raspberry Pi Pico 2, it integrates seamlessly with the Pico ecosystem, supporting Python (MicroPython, CircuitPython), C/C++, and Arduino IDE. Pre-installed with CircuitPython, it comes with a demo program and quick test buttons for immediate use. Simply connect via USB-C, and start exploring! Included 1x Cytron Motion 2350 Pro Robotics Controller 1x STEMMA QT/Qwiic JST SH 4-pin Cable with Female Sockets (150 mm) 2x Grove to JST-SH Cable (200 mm) 1x Set of Silicone Bumper 4x Building Block Friction Pin 1x Mini Screwdriver
€ 29,95€ 14,95
Members identical
-
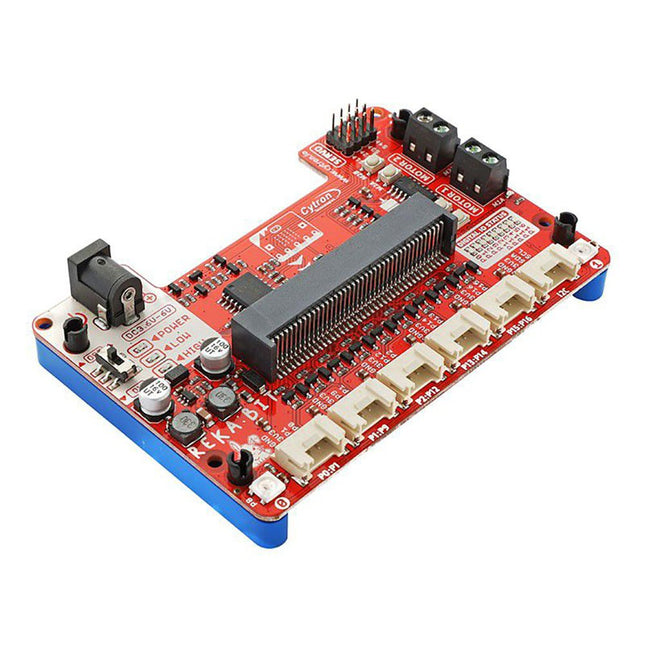
Cytron Cytron REKA:BIT – Robotics with micro:bit
Program your REKA:BIT with Microsoft MakeCode Editor. Just add REKA:BIT MakeCode Extension and you’re good to go. If you’re a beginner, you can start with the block programming mode; simply drag, drop and snap the coding blocks together. For more advanced users, you can easily switch into JavaScript or Python mode on MakeCode Editor for text-based programming. REKA:BIT possesses a lot of indicator LEDs to assist your coding and troubleshooting. It covers the IO pins connected to all six Grove ports and DC motor outputs from the co-processor. One is able to check his/her program and circuit connection easily by monitoring these LEDs. Besides, REKA:BIT also has a power on/off indicator, undervoltage, and overvoltage LEDs built-in to give appropriate warnings should there be any problem with the power input. REKA:BIT features a co-processor to handle multitasking more efficiently. Playing music while controlling up to 4x servo motors and 2x DC motors, animating micro:bit LED matrix, and even lighting up RGB LEDs in different colors, all at the same time, is not a problem for REKA:BIT. Features 2x DC motor terminals Built-in motor quick test buttons (no coding needed) 4x Servo motor ports 2x Neopixel RGB LEDs 6x Grove port (3.3 V) 3x Analog Input / Digital IO ports 2x Digital IO ports 1x I²C Interface DC jack for power input (3.6-6 V DC) ON/OFF switch Power on indicator Undervoltage (LOW) indicator & protection Over-voltage (HIGH) indicator & protection Dimensions: 10.4 x 72 x 15 mm Included 1x REKA:BIT expansion board 1x USB power and data cable 1x 4xAA battery holder 1x Mini screwdriver 3x Grove to female header cable 2x Building block 1x9 lift arm 4x Building block friction pin Please note: micro:bit board not included
€ 22,95€ 11,50
Members identical
-
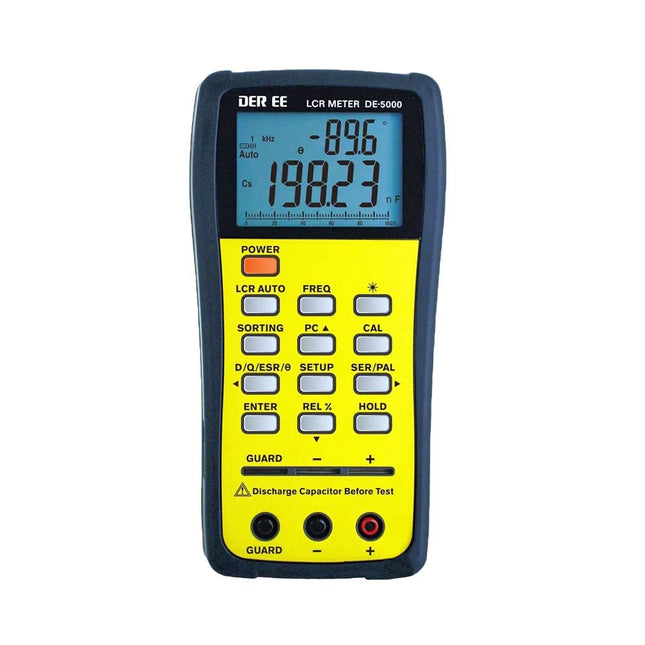
DER EE DER EE DE-5000 LCR Meter (100 kHz)
The DE-5000 is a smart, high-accurate, flexible and easy-to-use portable LCR meter. It features automatic LCR check, 4-wire Kelvin measurement, backlit display with 19999/1999 counts, multiple measurement modes and selectable test frequencies (100 Hz, 120 Hz, 1 kHz, 10 kHz or 100 kHz). The DE-5000 LCR meter is a practical helper for engineers or technicians. Features Auto L.C.R. check Ls/Lp/Cs/Cp/Rs/Rp/DCR with D/Q/θ/ESR measurement 4-wire Kelvin measurement 20,000 / 2,000 counts display Backlight Relative mode Series / Parallel modes Components sorting function Low battery indication Auto power off Specifications Test frequency 100 Hz / 120 Hz / 1 kHz / 10 kHz / 100 kHz Resistance range 20.000 Ω – 200.0 MΩ DCR range 200.00 Ω – 200.0 MΩ Capacitance range 200.00 pF – 20.00 mF Inductance range 20.000 µH – 2.000 KH Display (backlit LCD) 19999 / 1999 counts Selectable tolerance ±0.25%, ±0.5%, ±1%, ±2%, ±5%, ±10%, ±20% Power supply 9 V battery Dimensions 188 x 95 x 52 mm Weight 350 g (excluding battery) Included DE-5000 LCR meter Alligator test lead case (TL-21) AC/DC adaptor Guard line (TL-23) TL-22 SMD tweezers 9 V battery Carrying case Manual Downloads Datasheet
-

DER EE DER EE DE-5050 Insulation Tester
The DE-5050 Insulation Tester is a versatile instrument designed for measuring insulation resistance, low resistance, and AC/DC voltage. Its user-friendly features make it suitable for various electrical testing applications. Features Offers five selectable test voltages for different test requirements Automatically detects AC/DC voltage and displays frequency when AC voltage exceeds 10 V Stores up to 100 sets of test results with date and time Switches off automatically after 10 minutes of inactivity Equipped with a backlit display Enables zero adjustment for low resistance measurements Automatic calculation and display of the Dielectric Absorption Ratio (DAR) and Polarization Index (PI) during the insulation resistance test Specifications Test Voltages 50 V, 100 V/125 V, 250 V, 500 V, 1000 V Insulation Resistance Range Up to 20 GΩ at 500 VUp to 40 GΩ at 1000 V Voltage Measurement Accuracy ±1%rdg±4dgt (sine wave) Dimensions 160 x 100 x 46 mm Weight 380 g (excluding batteries) Downloads Datasheet
-
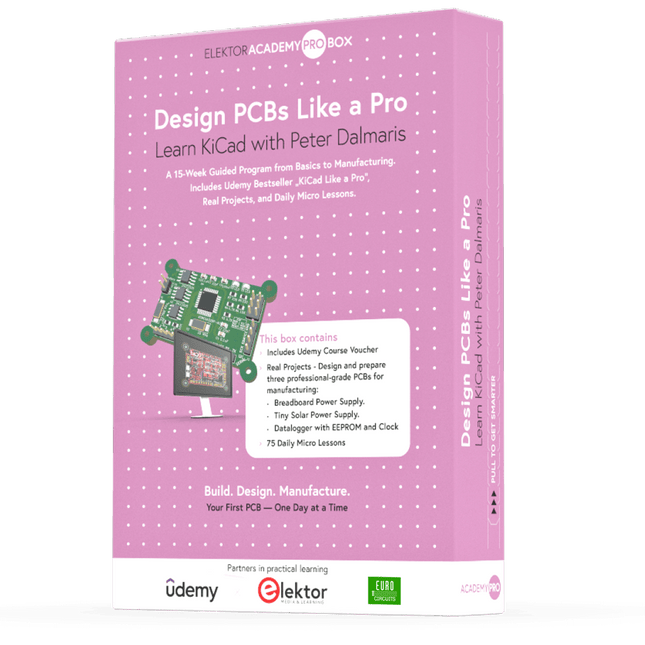
Elektor Academy Pro Design PCBs Like a Pro
Learn KiCad with Peter Dalmaris The Academy Pro Box "Design PCBs like a Pro" offers a complete, structured training programme in PCB design, combining online learning with practical application. Based on Peter Dalmaris’ KiCad course, the 15-week programme integrates video lessons, printed materials (2 books), and hands-on projects to ensure participants not only understand the theory but also develop the skills to apply it in practice. Unlike standard courses, the Academy Pro Box provides a guided learning path with weekly milestones and physical components to design, test, and produce working PCBs. This approach supports a deeper learning experience and better knowledge retention. The box is ideal for engineers, students, and professionals who want to develop practical PCB design expertise using open-source tools. With the added option to have their final project manufactured, participants complete the programme with real results – ready for use, testing, or further development. Learn by doing Build skills. Design real boards. Generate Gerbers. Place your first order. This isn’t just a course – it’s a complete project journey from idea to product. You’ll walk away with: Working knowledge of KiCad’s tools Confidence designing your own PCBs A fully manufacturable circuit board – made by you What's inside the Box (Course)? Both volumes of "KiCad Like a Pro" (valued at €105) Vol 1: Fundamentals and Projects Vol 2: Advanced Projects and Recipes Coupon code to join the bestselling KiCad 9 online course by Peter Dalmaris on Udemy, featuring 20+ hours of video training. You'll complete three full design projects: Breadboard Power Supply Tiny Solar Power Supply Datalogger with EEPROM and Clock Voucher from Eurocircuits for the production of PCBs (worth €85 excl. VAT) Learning Material (of this Box/Course) 15-Week Learning Program ▶ Click here to open Week 1: Setup, Fundamentals, and First Steps in PCB Design Week 2: Starting Your First PCB Project – Schematic Capture Week 3: PCB Layout – From Netlist to Board Design Week 4: Design Principles, Libraries, and Workflow Week 5: Your First Real-World PCB Project Week 6: Custom Libraries – Symbols, Footprints, and Workflow Week 7: Advanced Tools – Net Classes, Rules, Zones, Routing Week 8: Manufacturing Files, BOMs, and PCB Ordering Week 9: Advanced Finishing Techniques – Graphics, Refinement, and Production Quality Week 10: Tiny Solar Power Supply – From Schematic to Layout Week 11: Tiny Solar Power Supply – PCB Layout and Production Prep Week 12: ESP32 Clone Project – Schematic Design and Layout Prep Week 13: ESP32 Clone – PCB Layout and Manufacturing Prep Week 14: Final Improvements and Advanced Features Week 15: Productivity Tools, Simulation, and Automation KiCad Course with 18 Lessons on Udemy (by Peter Dalmaris) ▶ Click here to open Introduction Getting started with PCB design Getting started with KiCad Project: A hands-on tour of KiCad (Schematic Design) Project: A hands-on tour of KiCad (Layout) Design principles and PCB terms Design workflow and considerations Fundamental KiCad how-to: Symbols and Eeschema Fundamental KiCad how-to: Footprints and Pcbnew Project: Design a simple breadboard power supply PCB Project: Tiny Solar Power Supply Project: MCU datalogger with build-in 512K EEPROM and clock Recipes KiCad 9 new features and improvements Legacy (from previous versions of KiCad) KiCad 7 update (Legacy) (Legacy) Gettings started with KiCad Bonus lecture About the Author Dr. Peter Dalmaris, PhD is an educator, an electrical engineer and Maker. Creator of online video courses on DIY electronics and author of several technical books. As a Chief Tech Explorer since 2013 at Tech Explorations, the company he founded in Sydney, Australia, Peter's mission is to explore technology and help educate the world. What is Elektor Academy Pro? Elektor Academy Pro delivers specialized learning solutions designed for professionals, engineering teams, and technical experts in the electronics and embedded systems industry. It enables individuals and organizations to expand their practical knowledge, enhance their skills, and stay ahead of the curve through high-quality resources and hands-on training tools. From real-world projects and expert-led courses to in-depth technical insights, Elektor empowers engineers to tackle today’s electronics and embedded systems challenges. Our educational offerings include Academy Books, Pro Boxes, Webinars, Conferences, and industry-focused B2B magazines – all created with professional development in mind. Whether you're an engineer, R&D specialist, or technical decision-maker, Elektor Academy Pro bridges the gap between theory and practice, helping you master emerging technologies and drive innovation within your organization.
€ 199,95€ 164,95
Members identical
-

Elektor Digital Design your own Embedded Linux Control Centre (E-book)
This book is all about building your own DIY home control system. It presents two innovative ways to assemble such a system: By recycling old PC hardware – possibly extending the life of an old PC, or by using Raspberry Pi. In both cases, the main system outlined in this book will consist of a computer platform, a wireless mains outlet, a controller and a USB webcam – All linked together by Linux. By using the Raspberry Pi in conjunction with Arduino (used as an advanced I/O system board), it is possible to construct a small, compact, embedded control system offering enhanced capacity for USB integration, webcams, thermal monitoring and communication with the outside world. The experience required to undertake the projects within this book are minimal exposure to PC hardware and software, the ability to surf the internet, burn a CD-ROM and assemble a small PCB.
€ 34,95
Members € 27,96
-

Elektor Digital Designing Tube Amplifiers (E-book)
This book focuses more on practical aspects than on theory, and it has an contemplative nature, as though the author were viewing amplifiers from above. Knowledge elements are integrated and placed in the context of a broad overview. Even now tube amplifiers still sound great perhaps better than ever before. In part that is because we now have access to modern components such as toroidal output transformers, extremely high-quality resistors and capacitors, and many sorts of wire with good acoustic properties. Modern audio sources, such as CD players, and the latest top-end loudspeakers also enable us to appreciate how well tube amplifiers reproduce music even better than before. This new book from Menno van der Veen looks at tube amplifiers from more than just a theoretical perspective. It focuses primarily on the design phase, where decisions must be taken with regard to the purpose and requirements of the amplifier, and it addresses the following questions: How do these aspects relate to subjective and objective criteria? Which circuits sound the best, and why? If you want to develop and market an amplifier, what problems should you expect? What are the significance and meaning of measurements? Are they still meaningful, or have they lost their relevance? Thanks to the enormous processing power of computers, we can now measure more details than ever before. How can these new methods be applied to tube amplifiers? Previously it was sufficient to measure the frequency range, power and distortion of an amplifier in order to characterize the amplifier. Are these measurements still sufficient, or should we start measuring according to how we hear, using real music signals instead of waveforms from signal generators? The author sketches a future where amplifier measurements that conform to our sense of hearing enable us to arrive at new insights. This book focuses more on practical aspects than on theory, and it has an contemplative nature, as though the author were viewing amplifiers from above. Knowledge elements are integrated and placed in the context of a broad overview.
€ 29,95
Members € 23,96
-

Zhongdi Desoldering Tip Set for ZD Models
This set contains 3 desoldering tips for digital desoldering stations such as ZD-915 or ZD-8965. Included 1x Desoldering tip N5-1 (0.8 mm) 1x Desoldering tip N5-2 (1.0 mm) 1x Desoldering tip N5-3 (1.3 mm)
€ 9,95
Members € 8,96
-
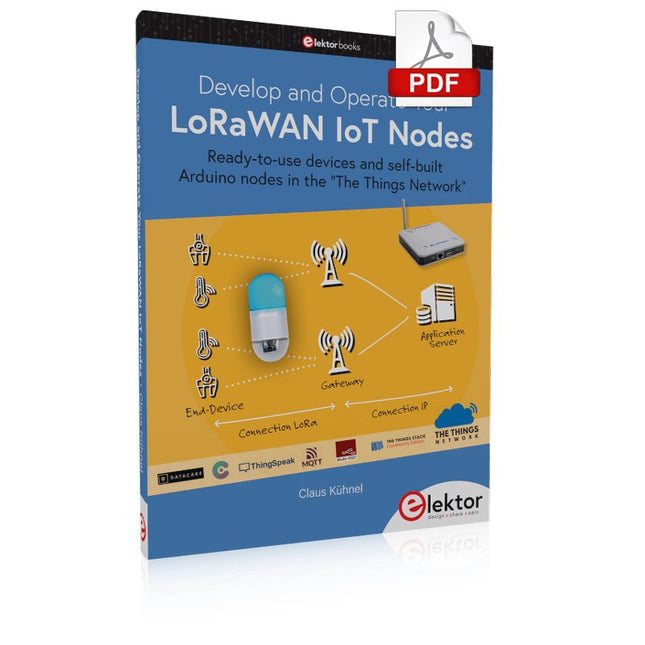
Elektor Digital Develop and Operate Your LoRaWAN IoT Nodes (E-book)
Ready-to-use devices and self-built Arduino nodes in the 'The Things Network' LoRaWAN has developed excellently as a communication solution in the IoT. The Things Network (TTN) has contributed to this. The Things Network was upgraded to The Things Stack Community Edition (TTS (CE)). The TTN V2 clusters were closed towards the end of 2021. This book shows you the necessary steps to operate LoRaWAN nodes using TTS (CE) and maybe extend the network of gateways with an own gateway. Meanwhile, there are even LoRaWAN gateways suitable for mobile use with which you can connect to the TTN server via your cell phone. The author presents several commercial LoRaWAN nodes and new, low-cost and battery-powered hardware for building autonomous LoRaWAN nodes. Registering LoRaWAN nodes and gateways in the TTS (CE), providing the collected data via MQTT and visualization via Node-RED, Cayenne, Thingspeak, and Datacake enable complex IoT projects and completely new applications at very low cost. This book will enable you to provide and visualize data collected with battery-powered sensors (LoRaWAN nodes) wirelessly on the Internet. You will learn the basics for smart city and IoT applications that enable, for example, the measurement of air quality, water levels, snow depths, the determination of free parking spaces (smart parking), and the intelligent control of street lighting (smart lighting), among others.
€ 32,95
Members € 26,36


