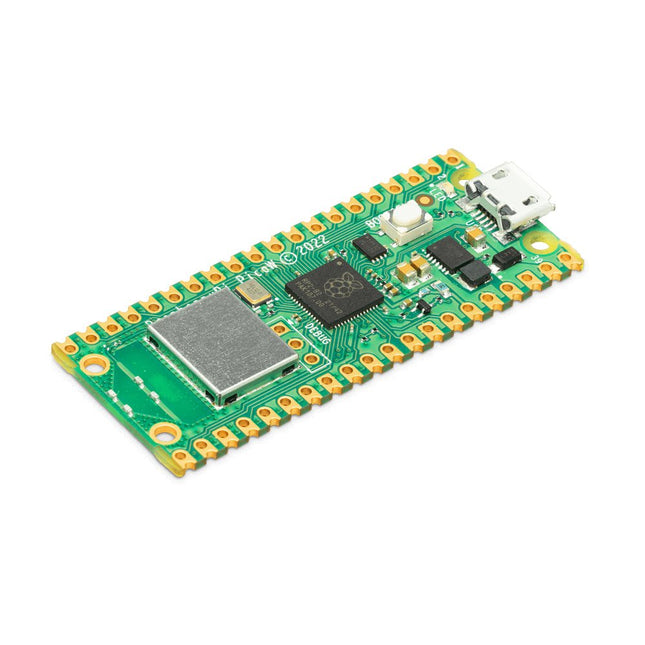
Raspberry Pi Pico W is a microcontroller board based on the Raspberry Pi RP2040 microcontroller chip.
The RP2040 microcontroller chip ('Raspberry Silicon') offers a dual-core ARM Cortex-M0+ processor (133 MHz), 256 KB RAM, 30 GPIO pins, and many other interface options. In addition, there is 2 MB of on-board QSPI flash memory for code and data storage.
Raspberry Pi Pico W has been designed to be a low cost yet flexible development platform for RP2040 with a 2.4 GHz wireless interface using an Infineon CYW43439. The wireless interface is connected via SPI to the RP2040.
Features of Pico W
RP2040 microcontroller with 2 MB of flash memory
On-board single-band 2.4 GHz wireless interfaces (802.11n)
Micro USB B port for power and data (and for reprogramming the flash)
40 pin 21 x 51 mm 'DIP' style 1 mm thick PCB with 0.1' through-hole pins also with edge castellations
Exposes 26 multi-function 3.3 V general purpose I/O (GPIO)
23 GPIO are digital-only, with three also being ADC capable
Can be surface mounted as a module
3-pin ARM serial wire debug (SWD) port
Simple yet highly flexible power supply architecture
Various options for easily powering the unit from micro USB, external supplies or batteries
High quality, low cost, high availability
Comprehensive SDK, software examples and documentation
Features of the RP2040 microcontroller
Dual-core cortex M0+ at up to 133 MHz
On-chip PLL allows variable core frequency
264 kByte multi-bank high performance SRAM
External Quad-SPI Flash with eXecute In Place (XIP) and 16 kByte on-chip cache
High performance full-crossbar bus fabric
On-board USB1.1 (device or host)
30 multi-function general purpose I/O (four can be used for ADC)
1.8-3.3 V I/O voltage
12-bit 500 ksps analogue to digital converter (ADC)
Various digital peripherals
2x UART, 2x I²C, 2x SPI, 16x PWM channels
1x timer with 4 alarms, 1x real time clock
2x programmable I/O (PIO) blocks, 8 state machines in total
Flexible, user-programmable high-speed I/O
Can emulate interfaces such as SD card and VGA
Note: Raspberry Pi Pico W I/O voltage is fixed at 3.3 V.
Downloads
Datasheet
Specifications of 3-pin Debug Connector
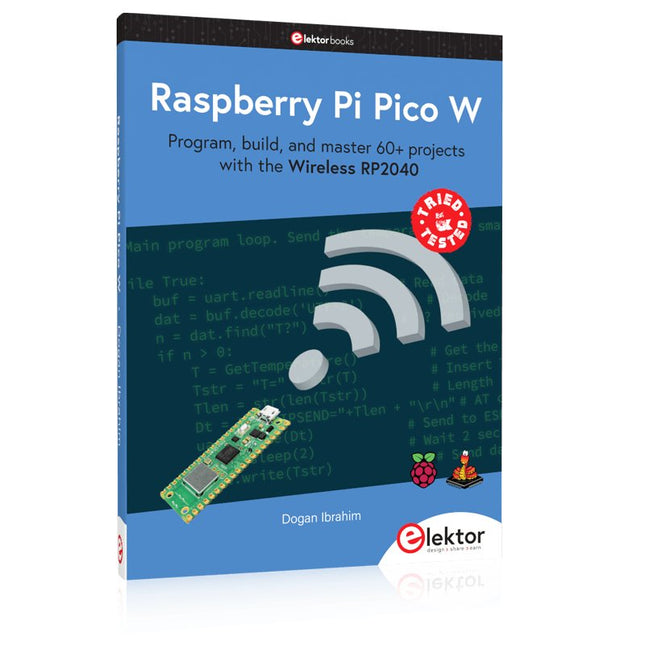
Program, build, and master 60+ projects with the Wireless RP2040
The Raspberry Pi Pico and Pico W are based on the fast, efficient, and low-cost dual-core ARM Cortex M0+ RP2040 microcontroller chip running at up to 133 MHz and sporting 264 KB of SRAM and 2 MB of Flash memory. Besides spacious memory, the Pico and Pico W offer many GPIO pins, and popular peripheral interface modules like ADC, SPI, I²C, UART, PWM, timing modules, a hardware debug interface, and an internal temperature sensor.
The Raspberry Pi Pico W additionally includes an on-board Infineon CYW43439 Bluetooth and Wi-Fi chipset. At the time of writing this book, the Bluetooth firmware was not yet available. Wi-Fi is however fully supported at 2.4 GHz using the 802.11b/g/n protocols.
This book is an introduction to using the Raspberry Pi Pico W in conjunction with the MicroPython programming language. The Thonny development environment (IDE) is used in all of the 60+ working and tested projects covering the following topics:
Installing the MicroPython on Raspberry Pi Pico using a Raspberry Pi or a PC
Timer interrupts and external interrupts
Analogue-to-digital converter (ADC) projects
Using the internal temperature sensor and external sensor chips
Using the internal temperature sensor and external temperature sensor chips
Datalogging projects
PWM, UART, I²C, and SPI projects
Using Bluetooth, WiFi, and apps to communicate with smartphones
Digital-to-analogue converter (DAC) projects
All projects are tried & tested. They can be implemented on both the Raspberry Pi Pico and Raspberry Pi Pico W, although the Wi-Fi-based subjects will run on the Pico W only. Basic programming and electronics experience are required to follow the projects. Brief descriptions, block diagrams, detailed circuit diagrams, and full MicroPython program listings are given for all projects.
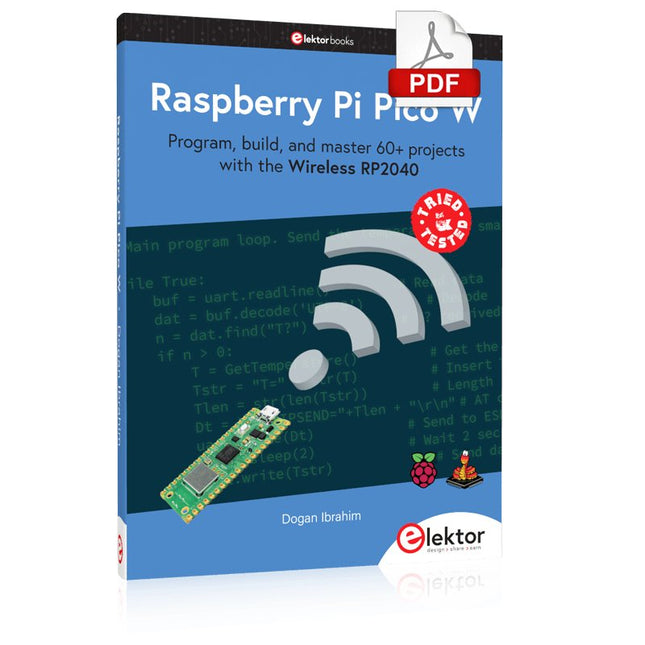
Program, build, and master 60+ projects with the Wireless RP2040
The Raspberry Pi Pico and Pico W are based on the fast, efficient, and low-cost dual-core ARM Cortex M0+ RP2040 microcontroller chip running at up to 133 MHz and sporting 264 KB of SRAM and 2 MB of Flash memory. Besides spacious memory, the Pico and Pico W offer many GPIO pins, and popular peripheral interface modules like ADC, SPI, I²C, UART, PWM, timing modules, a hardware debug interface, and an internal temperature sensor.
The Raspberry Pi Pico W additionally includes an on-board Infineon CYW43439 Bluetooth and Wi-Fi chipset. At the time of writing this book, the Bluetooth firmware was not yet available. Wi-Fi is however fully supported at 2.4 GHz using the 802.11b/g/n protocols.
This book is an introduction to using the Raspberry Pi Pico W in conjunction with the MicroPython programming language. The Thonny development environment (IDE) is used in all of the 60+ working and tested projects covering the following topics:
Installing the MicroPython on Raspberry Pi Pico using a Raspberry Pi or a PC
Timer interrupts and external interrupts
Analogue-to-digital converter (ADC) projects
Using the internal temperature sensor and external sensor chips
Using the internal temperature sensor and external temperature sensor chips
Datalogging projects
PWM, UART, I²C, and SPI projects
Using Bluetooth, WiFi, and apps to communicate with smartphones
Digital-to-analogue converter (DAC) projects
All projects are tried & tested. They can be implemented on both the Raspberry Pi Pico and Raspberry Pi Pico W, although the Wi-Fi-based subjects will run on the Pico W only. Basic programming and electronics experience are required to follow the projects. Brief descriptions, block diagrams, detailed circuit diagrams, and full MicroPython program listings are given for all projects.
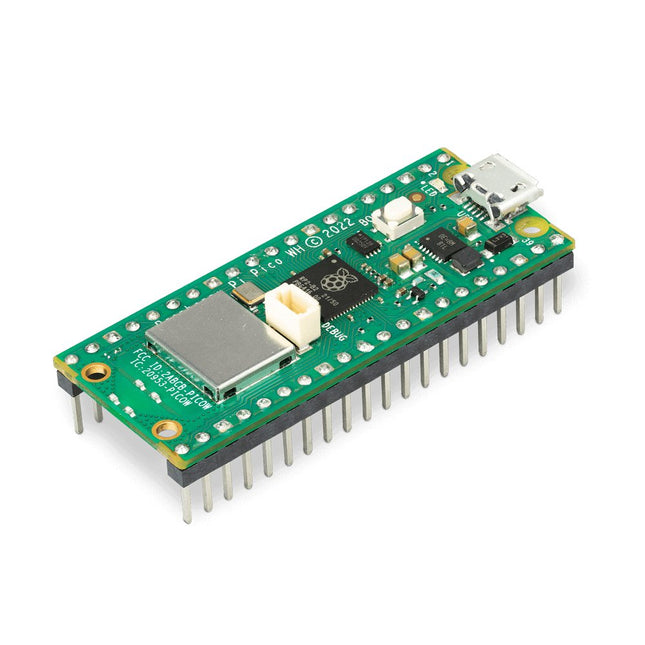
Raspberry Pi Pico WH is a microcontroller board based on the Raspberry Pi RP2040 microcontroller chip.
The RP2040 microcontroller chip ('Raspberry Silicon') offers a dual-core ARM Cortex-M0+ processor (133 MHz), 256 KB RAM, 30 GPIO pins, and many other interface options. In addition, there is 2 MB of on-board QSPI flash memory for code and data storage.
Raspberry Pi Pico WH has been designed to be a low cost yet flexible development platform for RP2040 with a 2.4 GHz wireless interface using an Infineon CYW43439. The wireless interface is connected via SPI to the RP2040.
Features of Pico WH
RP2040 microcontroller with 2 MB of flash memory
On-board single-band 2.4 GHz wireless interfaces (802.11n)
Micro USB B port for power and data (and for reprogramming the flash)
40 pin 21 x 51 mm 'DIP' style 1 mm thick PCB with 0.1' through-hole pins also with edge castellations
Exposes 26 multi-function 3.3 V general purpose I/O (GPIO)
23 GPIO are digital-only, with three also being ADC capable
Can be surface mounted as a module
3-pin ARM serial wire debug (SWD) port
Simple yet highly flexible power supply architecture
Various options for easily powering the unit from micro USB, external supplies or batteries
High quality, low cost, high availability
Comprehensive SDK, software examples and documentation
Pre-populated headers and 3-pin debug connector
Features of the RP2040 microcontroller
Dual-core cortex M0+ at up to 133 MHz
On-chip PLL allows variable core frequency
264 kByte multi-bank high performance SRAM
External Quad-SPI Flash with eXecute In Place (XIP) and 16 kByte on-chip cache
High performance full-crossbar bus fabric
On-board USB1.1 (device or host)
30 multi-function general purpose I/O (four can be used for ADC)
1.8-3.3 V I/O voltage
12-bit 500 ksps analogue to digital converter (ADC)
Various digital peripherals
2x UART, 2x I²C, 2x SPI, 16x PWM channels
1x timer with 4 alarms, 1x real time clock
2x programmable I/O (PIO) blocks, 8 state machines in total
Flexible, user-programmable high-speed I/O
Can emulate interfaces such as SD card and VGA
Note: Raspberry Pi Pico W I/O voltage is fixed at 3.3 V.
Downloads
Datasheet
Specifications of 3-pin Debug Connector
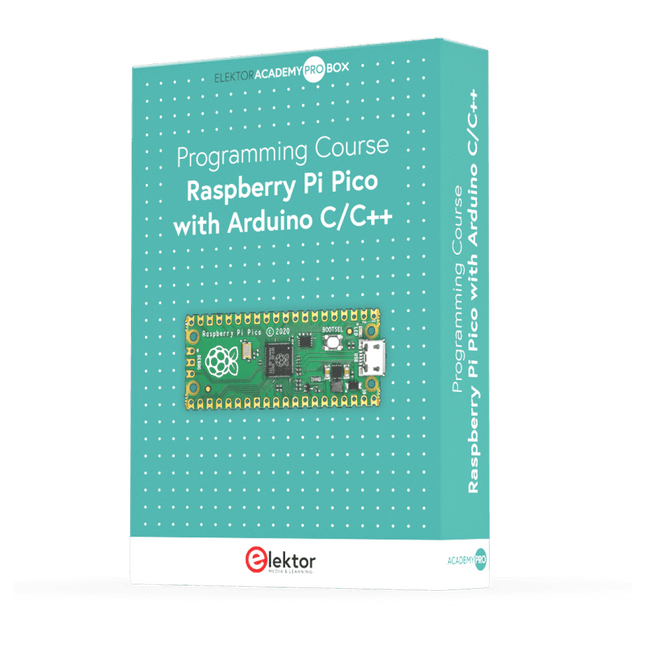
This complete Raspberry Pi Pico microcontroller programming course features a textbook, a component kit, hands-on projects, and a comprehensive online course with simulations. It is ideal for step-by-step learning of embedded systems programming with Arduino using a practical, hands-on approach.
A Practical Introduction to Embedded Systems with the Raspberry Pi Pico
This course is designed for people who are new to embedded systems and looking for a structured, example-driven way to get started.
A kit of parts comprising LEDs and resistors, switches, sensors and actuators, displays, a breadboard and wires, and more is included. These are used in the course to illustrate example applications.
No prior experience with Arduino or embedded development is required. Each section features hands-on examples and mini projects designed to reinforce key concepts and inspire deeper exploration. By the end of the course, you’ll be able not only to reproduce the examples but also to build on them with your own ideas and applications.
What Will You Learn?
Microcontroller programming in C/C++ with the Raspberry Pi Pico using the Arduino IDE
Working with Digital I/O, read buttons and encoders, control LEDs and relays
Read analog inputs, voltages, and analog sensors
Generating analog output signals and PWM
Use serial communication like UART, I²C and SPI to control displays and read digital sensors and SD cards
Managing time
Working with interrupts
Real-time sensor input and control via buttons, LEDs, and displays
Control actuators like relays and servo motors
Who Is It For?
Students and self-learners exploring embedded systems
Makers and IoT enthusiasts looking to improve their hardware skills
Educators and trainers seeking ready-to-teach material
What's Inside the Box?
Access to the full course on the Elektor Academy Pro Learning Platform
Raspberry Pi Pico microcontroller board + USB cable
Book: Programming Microcontrollers in C/C++ Using Arduino
Downloadable project files for every module
Component Box:
2× LED, red, 5 mm
LED, green, 5 mm
3× Resistor, 470 Ω, 0.25 W
LDR
Potentiometer, 10 kΩ, linear
Pushbutton
Rotary encoder module
Relay module
DHT22 Humidity & Temperature Sensor
TM1637-compatible 4-digit 7-segment display
MPU-6050 IMU with headers
SSD1306-compatible I²C OLED display
Micro SD card adapter with header
Buzzer
SG90 Micro Servo
ILI9341-compatible SPI 240×320 TFT display
20× Jumper wires
Breadboard
All Programming Courses (and differences in content)
Course
Arduino
Raspberry Pi Pico with Arduino C/C++
ESP32 with Arduino C/C++
Raspberry Pi Pico with MicroPython
ESP32 with MicroPython
Online Course
Access to Arduino Course
Access to Pico with Arduino C/C++ Course
Access to ESP32 with Arduino C/C++ Course
Access to Pico with MicroPython Course
Access to ESP32 with MicroPython Course
Board
Uno R3
Raspberry Pi Pico
ESP32
Raspberry Pi Pico
ESP32
Book
Programming Microcontrollers in C/C++ Using Arduino
Programming Microcontrollers in C/C++ Using Arduino
Programming Microcontrollers in C/C++ Using Arduino
Programming Microcontrollers in MicroPython
Programming Microcontrollers in MicroPython
Kit
40-piece Component Box
40-piece Component Box
40-piece Component Box
40-piece Component Box
40-piece Component Box
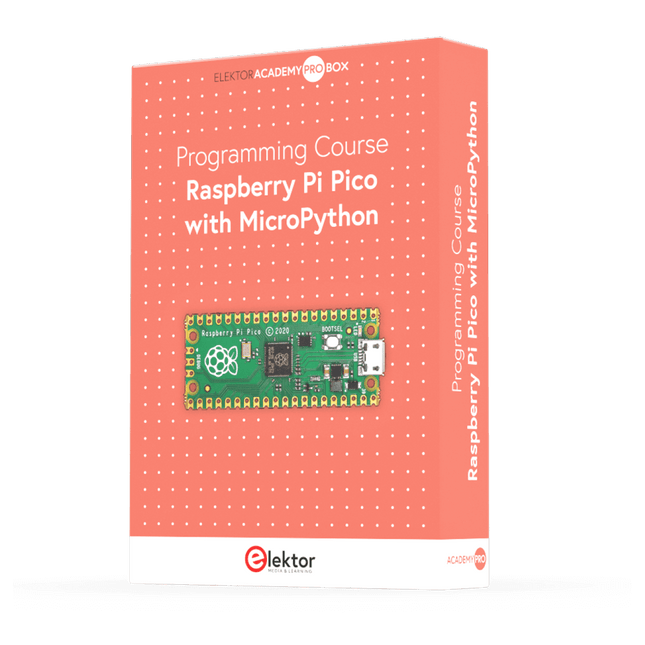
This complete Raspberry Pi Pico microcontroller programming course features a textbook, a component kit, hands-on projects, and a comprehensive online course with simulations. It is ideal for step-by-step learning of embedded systems programming in MicroPython using a practical, hands-on approach.
A Practical Introduction to Embedded Systems with the Raspberry Pi Pico
This course is designed for people who are new to embedded systems and looking for a structured, example-driven way to get started.
A kit of parts comprising LEDs and resistors, switches, sensors and actuators, displays, a breadboard and wires, and more is included. These are used in the course to illustrate example applications.
No prior experience with Arduino or embedded development is required. Each section features hands-on examples and mini projects designed to reinforce key concepts and inspire deeper exploration. By the end of the course, you’ll be able not only to reproduce the examples but also to build on them with your own ideas and applications.
What Will You Learn?
Microcontroller programming in MicroPython with the Raspberry Pi Pico using the Thonny IDE
Working with Digital I/O, read buttons and encoders, control LEDs and relays
Read analog inputs, voltages, and analog sensors
Generating analog output signals and PWM
Use serial communication like UART, I²C and SPI to control displays and read digital sensors and SD cards
Managing time
Working with interrupts
Real-time sensor input and control via buttons, LEDs, and displays
Control actuators like relays and servo motors
Who Is It For?
Students and self-learners exploring embedded systems
Makers and IoT enthusiasts looking to improve their hardware skills
Educators and trainers seeking ready-to-teach material
What's Inside the Box?
Access to the full course on the Elektor Academy Pro Learning Platform
Raspberry Pi Pico microcontroller board + USB cable
Book: Programming Microcontrollers in MicroPython
Downloadable project files for every module
Component Box:
2× LED, red, 5 mm
LED, green, 5 mm
3× Resistor, 470 Ω, 0.25 W
LDR
Potentiometer, 10 kΩ, linear
Pushbutton
Rotary encoder module
Relay module
DHT22 Humidity & Temperature Sensor
TM1637-compatible 4-digit 7-segment display
MPU-6050 IMU with headers
SSD1306-compatible I²C OLED display
Micro SD card adapter with header
Buzzer
SG90 Micro Servo
ILI9341-compatible SPI 240×320 TFT display
20× Jumper wires
Breadboard
All Programming Courses (and differences in content)
Course
Arduino
Raspberry Pi Pico with Arduino C/C++
ESP32 with Arduino C/C++
Raspberry Pi Pico with MicroPython
ESP32 with MicroPython
Online Course
Access to Arduino Course
Access to Pico with Arduino C/C++ Course
Access to ESP32 with Arduino C/C++ Course
Access to Pico with MicroPython Course
Access to ESP32 with MicroPython Course
Board
Uno R3
Raspberry Pi Pico
ESP32
Raspberry Pi Pico
ESP32
Book
Programming Microcontrollers in C/C++ Using Arduino
Programming Microcontrollers in C/C++ Using Arduino
Programming Microcontrollers in C/C++ Using Arduino
Programming Microcontrollers in MicroPython
Programming Microcontrollers in MicroPython
Kit
40-piece Component Box
40-piece Component Box
40-piece Component Box
40-piece Component Box
40-piece Component Box
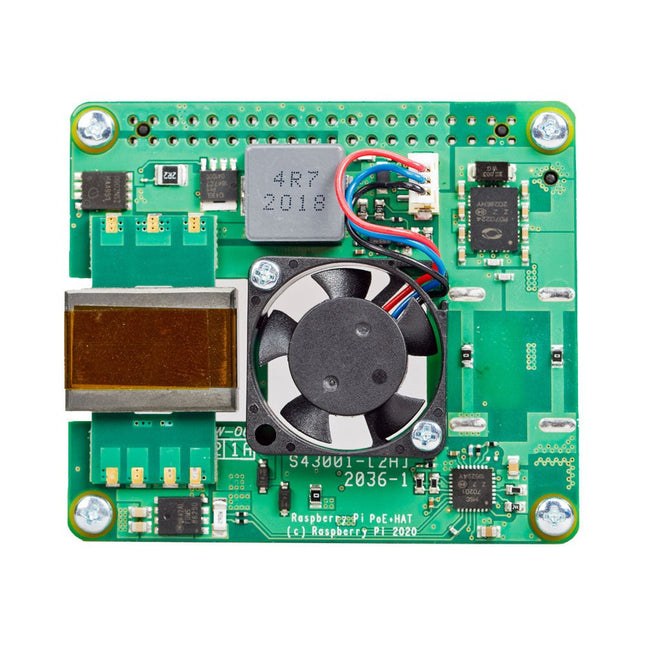
The Raspberry Pi PoE+ HAT is an add-on board designed for Raspberry Pi 3 B+ and Raspberry Pi 4 equipped with PoE pins. It powers the Raspberry Pi through an Ethernet cable, provided that compatible Power-Sourcing Equipment (PSE) is present on the Ethernet network. Additionally, the HAT includes an integrated fan to cool the Raspberry Pi processor.
Specifications
Standard
IEEE 802.3at-2003 PoE
Input voltage
37-57 V DC, Class 4 device
Output voltage
5 V DC/4 A
Cooling
25 x 25 mm brushless fan delivering 2.2 CFM for processor cooling
Operating temperature
0°C to +50°C
Downloads
Datasheet
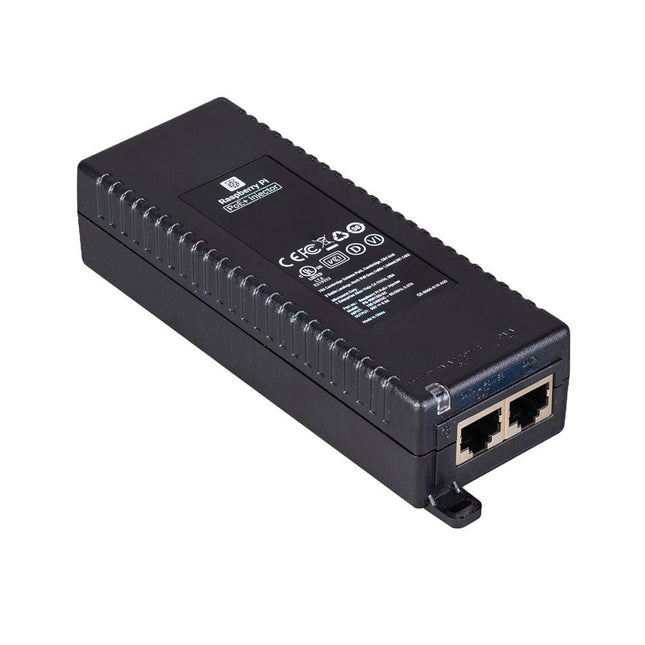
The Raspberry Pi PoE+ Injector adds Power-over-Ethernet (PoE) functionality to a single port of a non-PoE Ethernet switch, delivering both power and data through one Ethernet cable. It provides a plug-and-play, cost-effective solution for incrementally introducing PoE capability into existing Ethernet networks.
The PoE+ Injector is a single-port, 30 W device suitable for powering equipment compliant with IEEE 802.3af and 802.3at standards, including all generations of Raspberry Pi PoE HATs. It supports network pass-through speeds of 10/100/1000 Mbps.
Note: A separate IEC mains cable is required for operation (not included).
Specifications
Data rate
10/100/1000 Mbps
Input voltage
100 to 240 V AC
Output power
30 W
Power output on pins
4/5 (+), 7/8 (–)
Nominal output voltage
55 V DC
Data connectors
Shielded RJ-45, EIA 568A and 568B
Power connector
IEC c13 mains power input (not included)
Storage humidity
Maximum 95%, non-condensing
Operating altitude
–300 m to 3000 m
Operating ambient temperature
10°C to +50°C
Dimensions
159 x 51.8 x 33.5 mm
Downloads
Datasheet
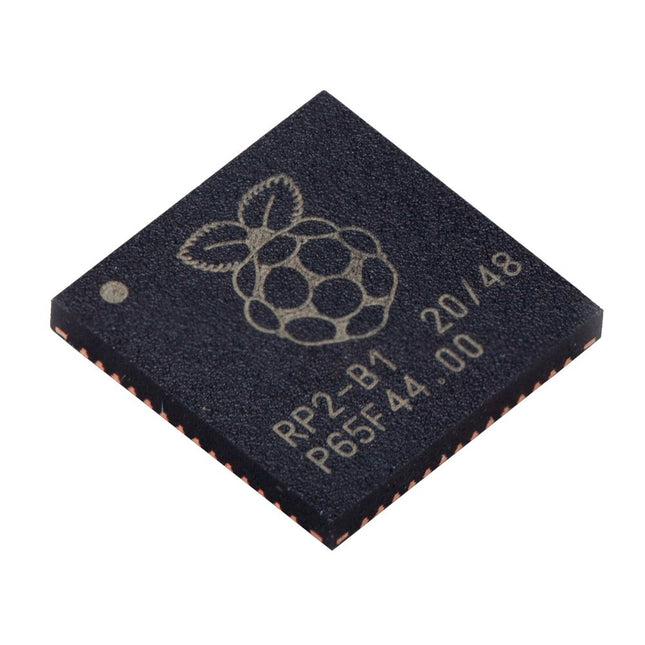
Specifications
Dual ARM Cortex-M0+ @ 133 MHz
264 kB on-chip SRAM in six independent banks
Support for up to 16 MB of off-chip Flash memory via dedicated QSPI bus
DMA controller
Fully-connected AHB crossbar
Interpolator and integer divider peripherals
On-chip programmable LDO to generate core voltage
2x on-chip PLLs to generate USB and core clocks
30x GPIO pins, 4 of which can be used as analogue inputs
Peripherals
2x UARTs
2x SPI controllers
2x I²C controllers
16x PWM channels
USB 1.1 controller and PHY, with host and device support
8x PIO state machines
What you'll get
10x bare RP2040 chips
The official Sense HAT from the Raspberry Pi Foundation is an add-on board for Raspberry Pi (4, 3, 2, B+ and A+). The Sense HAT has the following sensors: 8x8 RGB LED matrix display Accelerometer Gyroscope Magnetometer Air pressure sensor Temperature Humidity sensor Five-button joystick
The Raspberry Pi SSD unlocks outstanding performance for I/O intensive applications on Raspberry Pi 5 and other devices, including super-fast startup when booting from SSD.
It is a reliable, responsive, and high-performance PCIe Gen 3-compliant SSD capable of fast data transfer, available also with 512 GB capacity.
Features
40k IOPS (4 kB random reads)
70k IOPS (4 kB random writes)
Downloads
Datasheet
The Raspberry Pi SSD unlocks outstanding performance for I/O intensive applications on Raspberry Pi 5 and other devices, including super-fast startup when booting from SSD.
It is a reliable, responsive, and high-performance PCIe Gen 3-compliant SSD capable of fast data transfer, available also with 256 GB capacity.
Features
50k IOPS (4 kB random reads)
90k IOPS (4 kB random writes)
Downloads
Datasheet
The Raspberry Pi SSD Kit bundles a Raspberry Pi M.2 HAT+ with a Raspberry Pi NVMe SSD. It unlocks outstanding performance for I/O intensive applications on Raspberry Pi 5, including super-fast startup when booting from SSD.
The Raspberry Pi SSD Kit is also available with 512 GB capacity.
Features
40k IOPS (4 kB random reads)
70k IOPS (4 kB random writes)
Conforms to the Raspberry Pi HAT+ specification
Included
256 GB NVMe SSD
M.2 HAT+ for Raspberry Pi 5
16 mm GPIO stacking header
Mounting hardware kit (spacers, screws)
Downloads
Datasheet
The Raspberry Pi SSD Kit bundles a Raspberry Pi M.2 HAT+ with a Raspberry Pi NVMe SSD. It unlocks outstanding performance for I/O intensive applications on Raspberry Pi 5, including super-fast startup when booting from SSD.
The Raspberry Pi SSD Kit is also available with 256 GB capacity.
Features
50k IOPS (4 kB random reads)
90k IOPS (4 kB random writes)
Conforms to the Raspberry Pi HAT+ specification
Included
512 GB NVMe SSD
M.2 HAT+ for Raspberry Pi 5
16 mm GPIO stacking header
Mounting hardware kit (spacers, screws)
Downloads
Datasheet
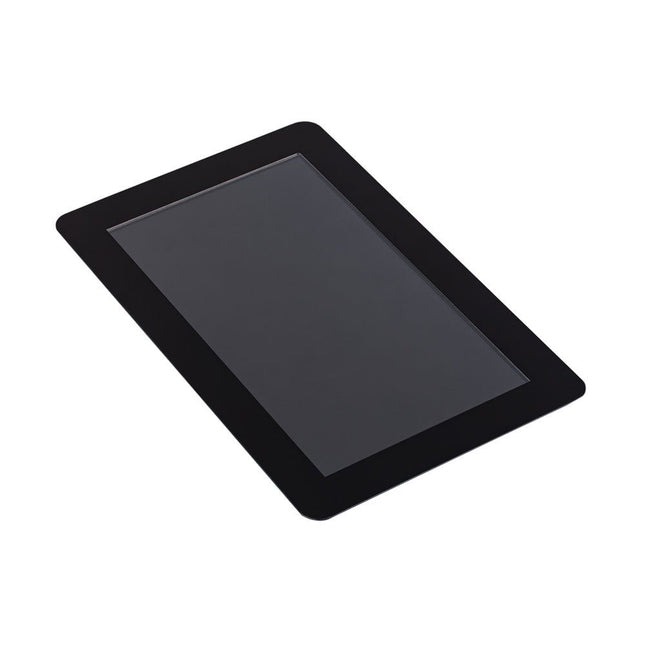
The Raspberry Pi Touch Display 2 is a 7-inch touchscreen designed for Raspberry Pi, perfect for interactive projects like tablets, entertainment systems, and information dashboards. Raspberry Pi OS includes touchscreen drivers that support five-finger touch and an on-screen keyboard, allowing complete functionality without a physical keyboard or mouse.
Connecting the 720 x 1280 display to your Raspberry Pi requires just two connections: power from the GPIO port and a ribbon cable to the DSI port, compatible with all Raspberry Pi models except the Raspberry Pi Zero line.
Specifications
Display
7 inch TFT (720 x 1280 pixels)
Active area
88 x 155 mm
Touch panel
True multi-touch capacitive touch panel, supporting five-finger touch
Surface treatment
Anti-glare
Color configuration
RGB-stripe
Backlight type
LED B/L
Included
1x Raspberry Pi Touch Display 2
1x 22-way to 15-way FFC for Raspberry Pi 5
1x 15-way to 15-way FFC for Raspberry Pi 4 and older
1x GPIO connector cable
8x M2.5 screws
Downloads
Datasheet
The Raspberry Pi USB 3 Hub expands your device connectivity by converting a single USB-A port into four USB 3.0 ports. With an optional external USB-C power input, it can support high-power peripherals, while lower-power peripherals work without additional power. The USB 3 Hub is fully tested for seamless compatibility with all Raspberry Pi products.
Features
Single Upstream Connection: USB 3.0 Type-A connector with an 8 cm captive cable
Four Downstream Ports: USB 3.0 Type-A ports for multiple device connections
High-Speed Data Transfer: Supports speeds up to 5 Gbps
Compatibility: Works with USB 3.0 Type-A host ports and is backward-compatible with USB 2.0 ports
Downloads
Datasheet
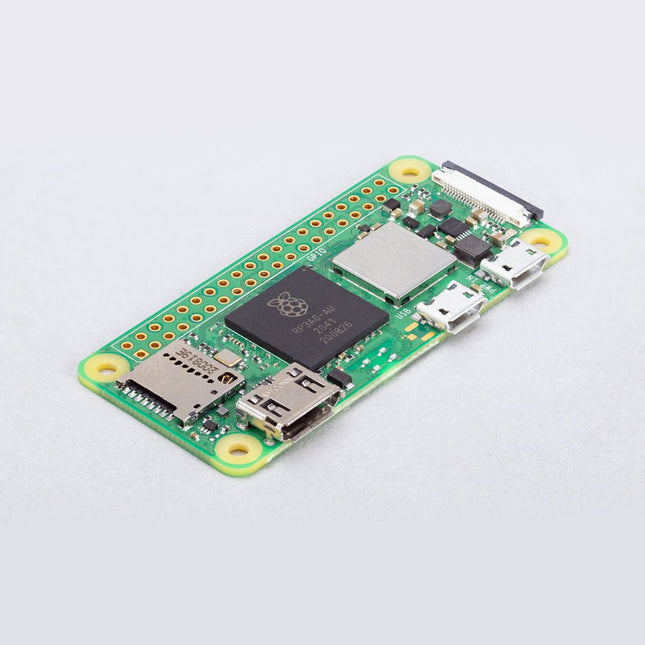
Raspberry Pi Zero 2 W is the successor to the breakthrough Raspberry Pi Zero W. The board incorporates a quad-core 64-bit Arm Cortex-A53 CPU, clocked at 1 GHz. At its heart is a Raspberry Pi RP3A0 system-in-package (SiP), integrating a Broadcom BCM2710A1 die with 512 MB of LPDDR2 SDRAM. The upgraded processor provides Raspberry Pi Zero 2 W with 40% more single-threaded performance, and five times more multi-threaded performance, than the original single-core Raspberry Pi Zero.
Features
64-bit quad-core processor
VideoCore IV GPU
512 MB LPDDR2 DRAM
802.11b/g/n wireless LAN
Bluetooth 4.2 / Bluetooth Low Energy (BLE)
MicroSD card slot
Mini HDMI and USB 2.0 OTG ports
Micro USB power
HAT-compatible 40-pin header
Composite video and reset pins via solder test points
CSI camera connector
Specifications
SoC
Broadcom BCM2710A1
CPU
64-bit ARM Cortex-A53 (4x 1 GHz)
GPU
Broadcom VideoCore VI
RAM
512 MB LPDDR2
Wireless LAN
2.4 GHz IEEE 802.11b/g/n
Bluetooth
Bluetooth 4.2, BLE
USB
1x micro USB (for data)1x micro USB (for power supply)
GPIO
HAT-compatible 40-pin GPIO header
Video & Audio
1080P HD video & stereo audio via mini-HDMI connector
SD card
microSD (for operating system and storage)
Power
5 VDC / 2.5 A (supplied via micro USB connector)
Dimensions
65 x 30 x 5 mm
Raspberry Pi Zero 2 W is footprint-compatible with earlier Zero models.
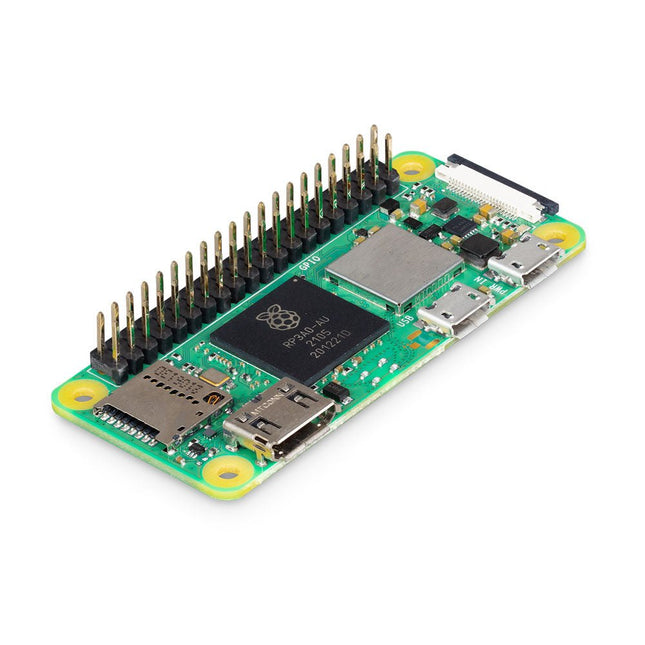
Raspberry Pi Zero 2 WH is the successor to the breakthrough Raspberry Pi Zero W(H). The board incorporates a quad-core 64-bit Arm Cortex-A53 CPU, clocked at 1 GHz. At its heart is a Raspberry Pi RP3A0 system-in-package (SiP), integrating a Broadcom BCM2710A1 die with 512 MB of LPDDR2 SDRAM. The upgraded processor provides Raspberry Pi Zero 2 WH with 40% more single-threaded performance, and five times more multi-threaded performance, than the original single-core Raspberry Pi Zero.
Features
64-bit quad-core processor
VideoCore IV GPU
512 MB LPDDR2 DRAM
802.11b/g/n wireless LAN
Bluetooth 4.2 / Bluetooth Low Energy (BLE)
MicroSD card slot
Mini HDMI and USB 2.0 OTG ports
Micro USB power
With mounted 40-pin header
Composite video and reset pins via solder test points
CSI camera connector
Specifications
SoC
Broadcom BCM2710A1
CPU
64-bit ARM Cortex-A53 (4x 1 GHz)
GPU
Broadcom VideoCore VI
RAM
512 MB LPDDR2
Wireless LAN
2.4 GHz IEEE 802.11b/g/n
Bluetooth
Bluetooth 4.2, BLE
USB
1x micro USB (for data)1x micro USB (for power supply)
GPIO
HAT-compatible 40-pin GPIO header
Video & Audio
1080P HD video & stereo audio via mini-HDMI connector
SD card
microSD (for operating system and storage)
Power
5 VDC / 2.5 A (supplied via micro USB connector)
Dimensions
65 x 30 x 5 mm
Raspberry Pi Zero 2 WH is footprint-compatible with earlier Zero models.
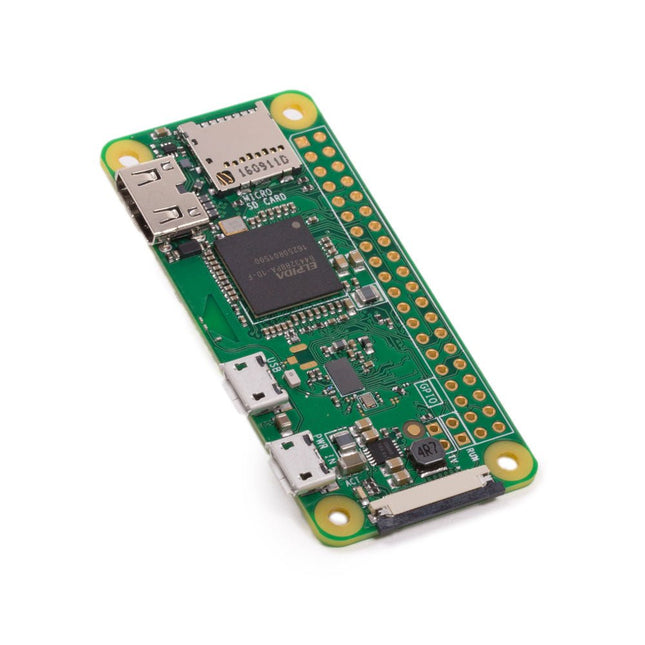
The Raspberry Pi Zero W extends the Raspberry Pi Zero family. The Raspberry Pi Zero W has all the functionality of the original Raspberry Pi Zero, but comes with added connectivity consisting of:
802.11 b/g/n wireless LAN
Bluetooth 4.1
Bluetooth Low Energy (BLE)
Other Features
1 GHz, single-core CPU
512 MB RAM
Mini HDMI and USB On-The-Go ports
Micro-USB power
HAT-compatible 40-pin header
Composite video and reset headers
CSI camera connector
Downloads
Mechanical Drawing
Schematics
The Red Pitaya (STEMlab) is a credit card-sized, open-source test and measurement board that can be used to replace most measurement instruments used in electronics laboratories. With a single click, the board can transform into a web-based oscilloscope, spectrum analyser, signal generator, LCR meter, Bode plotter, and microcontroller.
The Red Pitaya (STEMlab) can replace the many pieces of expensive measurement equipment found at professional research organisations and teaching laboratories. The device, that based on Linux, includes an FPGA, digital signal processing (DSP), dual core ARM Cortex processor, signal acquisition and generation circuitry, micro USB socket, microSD card slot, RJ45 socket for Ethernet connection, and USB socket – all powered from an external mains adaptor.
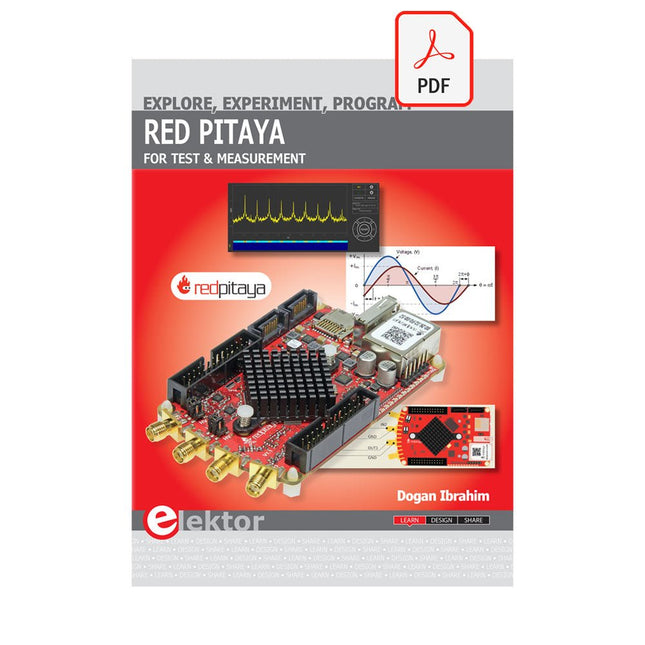
This book is an introduction to electronics. It aims to teach the principles and applications of basic electronics by carrying out real experiments using the Red Pitaya (STEMlab). The book includes many chapters on basic electronics and teaches the theory and use of electronic components including resistors, capacitors, inductors, diodes, transistors, and operational amplifiers in electronic circuits. Many fun and interesting Red Pitaya (STEMlab) experiments are included in the book. The book also makes an introduction to visual programming environment.
The book is written for college level and first year university students studying electrical or electronic engineering.
This bundle includes the Red Pitaya STEMlab 125-14 PRO Gen 2 Starter Kit and the new book "Experimenting with Red Pitaya STEMlab Gen 2".
The Red Pitaya STEMlab 125-14 PRO Gen 2 Starter Kit is a powerful and flexible platform for signal processing, data acquisition, and electronic measurement applications. Designed for engineers, developers, researchers, and educators, this kit provides everything required to start building advanced measurement and control systems.
At the core of the kit is the STEMlab 125-14 PRO Gen 2 board, an upgraded and ultra-lightweight development platform. Powered by the Xilinx Zynq-7010 SoC with 512 MB of RAM, it combines FPGA programmability with ARM processing power to enable high-performance instrumentation and custom signal-processing solutions.
The board offers 14-bit ADC and DAC resolution, a 125 MS/s sampling rate, an input range of ±20 V, and up to 60 MHz bandwidth. Its improved low-noise analog front-end, USB-C connectivity, and compact design make it suitable for demanding applications such as RF development, radar systems, photonics research, software-defined radio (SDR), and industrial automation.
The Starter Kit includes all essential accessories for immediate use: a microSD card with preinstalled operating system, power supply, Ethernet cable for remote access, two 100 MHz oscilloscope probes, and SMA-to-BNC adapters for flexible signal connections.
The Red Pitaya STEMlab 125-14 PRO Gen 2 Starter Kit is an excellent platform for rapid prototyping, FPGA development, measurement instrumentation, and advanced electronics experimentation.
Features
14-bit ADC and DAC resolution
125 MS/s sampling rate
±20 V input range
Up to 60 MHz bandwidth
Xilinx Zynq-7010 SoC (FPGA + ARM processor)
512 MB RAM
Low-noise analog front- and back-ends
Applications
RF development and testing
Radar and wireless systems
Software-defined radio (SDR)
Photonics and optical research
Industrial automation and control systems
Signal analysis and instrumentation
Rapid prototyping of electronic measurement systems
Specifications
Processor
Dual-core ARM Cortex-A9
FPGA
AMD Xilinx Zynq-7010 SoC
RAM
512 MB (4 Gb)
Storage
microSD card (up to 32 GB)
Operating System
Linux-based Red Pitaya OS
ADC Resolution
14-bit
DAC Resolution
14-bit
Bandwidth
60 MHz (DC)
Sampling Rate
125 MS/s
Analog Input Channels
2
Analog Output Channels
2
Input Voltage Range
±1 V (LV) / ±20 V (HV)
Input Impedance
1 MΩ / 10 pF
Output Voltage Range
±1 V
Ethernet
1x Gigabit Ethernet (RJ45)
USB
2x USB-C 2.0 (for power and console)
Digital I/O
16x GPIO (3.3 V)
Communication Interfaces
I²C, SPI, UART, CAN
Power Supply
5 V/3 A via USB-C
Dimensions
106.8 x 60.0 x 17.9 mm
Included
1x Red Pitaya STEMlab 125-14 PRO Gen 2 board
2x 100 MHz oscilloscope probes
2x SMA-to-BNC adapters
1x microSD card with preinstalled OS
1x USB-C Power supply
1x Ethernet cable
Downloads
Documentation
Schematics
Book: Experimenting with Red Pitaya STEMlab Gen 2
With this new book, Red Pitaya goes beyond a versatile board. It becomes a powerful laboratory instrument for precision measurement, analysis, and control.
From the fundamentals of electronic project development, monitoring, control, and design to testing, this book walks you step-by-step through everything you need to know to harness the full potential of Red Pitaya hardware and software.
The book presents real-time, FPGA-based projects that are developed on a PC using the Vivado environment, then transferred to the Red Pitaya for execution and testing.
You will learn about enhanced performance, expanded I/O capabilities, improved FPGA features, and advanced connectivity options that open up new frontiers for precision measurement, monitoring, and control in your embedded applications.
Inside the book you will discover:
A deep dive into Red Pitaya architecture and hardware design
Electronic experiments using Red Pitaya for measurement and monitoring
Hands-on projects using the Python programming language
Practical guidance for FPGA programming using Red Pitaya
Red Pitaya FPGA projects using the Verilog HDL under Vivado IDE
Practical design of electronic projects including measurement and testing
Step-by-step examples that bridge theory and real-world implementation
Whether you are designing your own electronic circuits, developing signal analysis tools, or creating real-time control or monitoring systems, this book provides you the knowledge and confidence you need to fully learn and customize the Red Pitaya platform.
A Hands-on Guide to Crafting Your Own Power Plant
The book you are about to read provides a step-by-step guide for building a renewable energy power plant at home. Our goal was to make the book as practical as possible. The material is intended for immediate application with a small amount of theory. Yet, the theory is important as a foundation that saves time and effort by disabusing the readers of potential misconceptions. Specifically, upon having a firm understanding of photovoltaic physics, you will not be inclined to fruitlessly search for 90% efficient solar panels!
We want our readers to be the “doers”. If the book gets covered in grime and some pages become torn while you are building your power plant – this is the best compliment to us. The book covers solar and wind energy. Also, a curious power source based on manure is discussed as well, giving the doers an opportunity to further develop the manure fuel cell.
It is important to note that there are many companies offering installation of complete solar solutions. Upon installing the panels, the system is not owned by the customer. Therefore, there is no freedom for experimentation and optimization. Also, none can beat the cost of a DIY solution as well as the ultimate satisfaction.
All that is written here is a result of us building a renewable energy solution in Southern California. As the book was completed, the energy began flowing!
A Hands-on Guide to Crafting Your Own Power Plant
The book you are about to read provides a step-by-step guide for building a renewable energy power plant at home. Our goal was to make the book as practical as possible. The material is intended for immediate application with a small amount of theory. Yet, the theory is important as a foundation that saves time and effort by disabusing the readers of potential misconceptions. Specifically, upon having a firm understanding of photovoltaic physics, you will not be inclined to fruitlessly search for 90% efficient solar panels!
We want our readers to be the “doers”. If the book gets covered in grime and some pages become torn while you are building your power plant – this is the best compliment to us. The book covers solar and wind energy. Also, a curious power source based on manure is discussed as well, giving the doers an opportunity to further develop the manure fuel cell.
It is important to note that there are many companies offering installation of complete solar solutions. Upon installing the panels, the system is not owned by the customer. Therefore, there is no freedom for experimentation and optimization. Also, none can beat the cost of a DIY solution as well as the ultimate satisfaction.
All that is written here is a result of us building a renewable energy solution in Southern California. As the book was completed, the energy began flowing!
The intention of this book is to offer the reader understandings, ideas and solutions from the perspective of a workbench technician and electronics hobbyist. It is a descriptive text with many tables of useful data, servicing tips and supplementary notes of not so common knowledge.
Today there is a re-emerging, nostalgic interest in vinyl records and associated music entertainment gear. With this interest, there is a paralleled market for the repair of this gear.
This ‘hands-on’ servicing guide opens with fundamental considerations of the work space of repair and servicing. This includes a comprehensive discussion of essential test equipment and tools. Two chapters are devoted to obtaining servicing information about repair and obtaining spare parts. A key chapter is on general diagnosis and testing and includes the discussion of resistance, capacitance and inductance. These electrical properties are regularly in the mind of the repairer, so understanding of them is a key objective of this book. The next chapter is about time saving repair techniques and ensuring quality repair. The remaining chapters discuss entertainment equipment itself. Each of the chapters begins with an orderly discussion of the theory of operation and common and not so common problems specific to the equipment. All chapters conclude with a summary.