Physical Products
-
Elektor Publishing Object-Oriented PLC Programming in CODESYS
Modular and Scalable Control Systems Using Structured Text This book offers a structured and practical approach to modern PLC development using object-oriented principles. It is a guide for engineers, programmers, and students seeking to harness the power of object-oriented programming (OOP) in the context of industrial automation with PLCs. The content focuses on the CODESYS development environment and Structured Text (ST), both of which support modern programming techniques while maintaining compatibility with real-time automation requirements. Through step-by-step demos and instructional examples, it demonstrates how modular, reusable code can enhance development efficiency, simplify ongoing maintenance, and enable scalable and flexible control system architectures. Key topics include: Structured Text fundamentals: conditions, loops, arrays, and functions Object-oriented concepts: classes, methods, and inheritance Advanced techniques: polymorphism, interfaces, and access control Modular design with reusable components and structured program flow Implementation of finite state machines and scalable application design Built around instructional demos and clear explanations, this book helps readers develop maintainable and modern control software in the CODESYS environment using proven programming techniques.
€ 34,95
Members: € 31,46
-
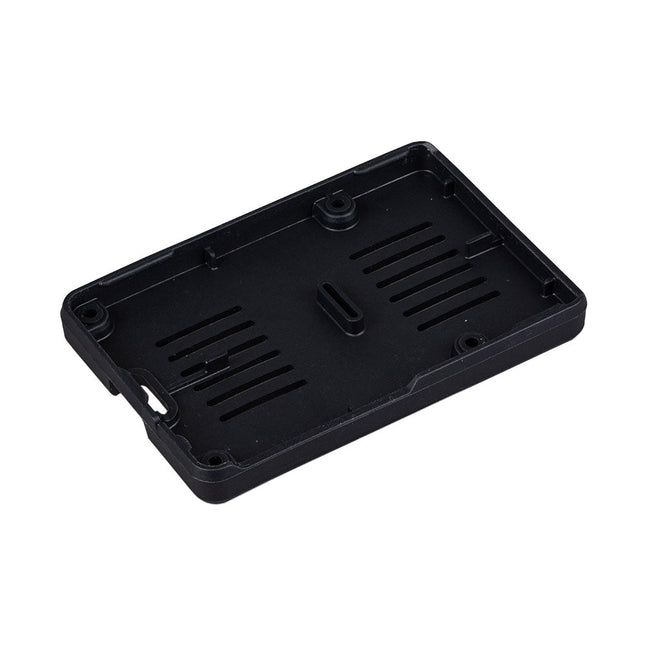
Raspberry Pi Foundation Bumper for Raspberry Pi 5
The Raspberry Pi Bumper is a snap-on silicone cover that protects the bottom and edges of the Raspberry Pi 5. Features One-piece flexible silicone rubber bumper Enables easy access to the power button Mounting holes remain accessible underneath the bumper Downloads Datasheet
€ 3,50€ 1,40
Best Price
-
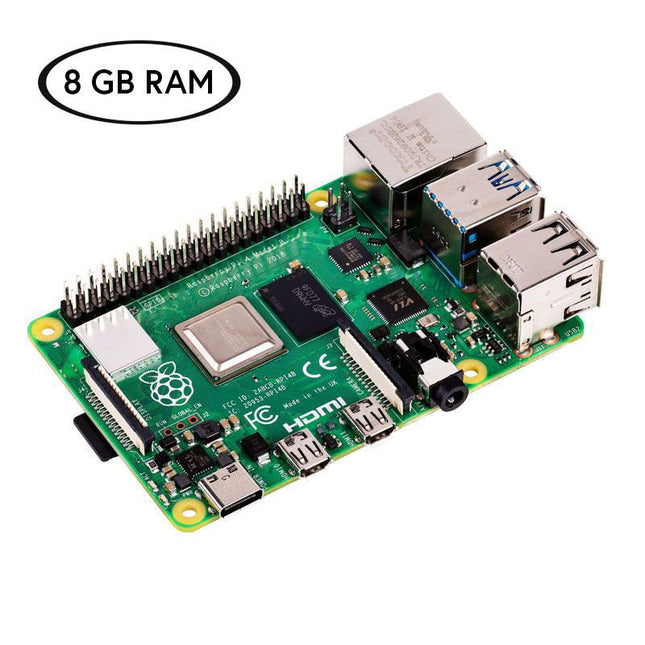
Raspberry Pi Foundation Raspberry Pi 4 (8 GB) Official Starter Kit
Now save €10 with this Starter Kit compared to buying them separately! This special Raspberry Pi 4 Starter Kit includes everything you need to get started right away with the world's most popular mini computer as a development and multimedia device. Kit Contents Raspberry Pi 4 B (8 GB RAM)The Raspberry Pi 4 is a complete computer system in a small package that provides multimedia and desktop performance comparable to an entry-level x86 PC system. Broadcom BCM2711 SoC 64-bit quad-core ARM Cortex-A72 (1.5 GHz) VideoCore VI @ 500 MHz 8 GB LPDDR4 SDRAM Gigabit Ethernet 802.11ac Wi-Fi Bluetooth 5.0 2x USB 3.0, 2x USB 2.0 and 1x USB-C (for power supply) 2x micro-HDMI (up to 4Kp60) 1x MicroSD (for storage) Official EU Power Supply (5.1 V, 3 A) for Raspberry Pi 4 (white)The official Raspberry Pi USB-C power supply (15.3 W) is designed specifically to power the Raspberry Pi 4. microSD Card (32 GB, Class 10) with SD Adapter (Pre-Installed with NOOBS)This microSD with pre-installed NOOBS (New Out Of Box Software) is an easy-to-use operating system installation manager for the Raspberry Pi. Official Case for Raspberry Pi 4 (white/red)This well-designed case protects the Raspberry Pi 4. Official HDMI Cable for Raspberry Pi 4 (white, 1 m)The official Raspberry Pi micro-HDMI to HDMI (A/M) cable (white, 1 m) is designed for the Raspberry Pi 4. Heatsink Set for Raspberry PiThese aluminum heatsinks cool the board and prevent the Raspberry Pi from overheating.
-

Elektor Publishing Hands-on Microcontroller Course for Advanced Arduino Users
32 new Projects, Practical Examples and Exercises with the Elektor Arduino Nano MCCAB Training Board Electronics and microcontroller technology offer the opportunity to be creative. This practical microcontroller course provides you with the chance to bring your own Arduino projects and experience such moments of success. Ideally, everything works as you imagined when you switch it on for the first time. In practice, however, things rarely work as expected. At that point, you need knowledge to efficiently search for and find the reason for the malfunction. In this book for advanced users, we delve deep into the world of microcontrollers and the Arduino IDE to learn new procedures and details, enabling you to successfully tackle and solve even more challenging situations. With this book, the author gives the reader the necessary tools to create projects independently and also to be able to find errors quickly. Instead of just offering ready-made solutions, he explains the background, the hardware used, and any tools required. He sets tasks in which the reader contributes their own creativity and writes the Arduino sketch themselves. If you don’t have a good idea and get stuck, there is, of course, a suggested solution for every project and every task, along with the corresponding software, which is commented on and explained in detail in the book. This practical course will teach you more about the inner workings of the Arduino Nano and its microcontroller. You will get to know hardware modules that you can use to realize new and interesting projects. You will familiarize yourself with software methods such as ‘state machines,’ which can often be used to solve problems more easily and clearly. The numerous practical projects and exercise sketches are once again realized on the Arduino Nano MCCAB Training Board, which you may already be familiar with from the course book ‘Microcontrollers Hands-on Course for Arduino Starters’, and which contains all the hardware peripherals and operating elements we need for the input/output operations of our sketches. Readers who do not yet own the Arduino Nano MCCAB Training Board can purchase the required hardware separately, or alternatively, build it on a breadboard.
€ 49,95
Members: € 44,96
-
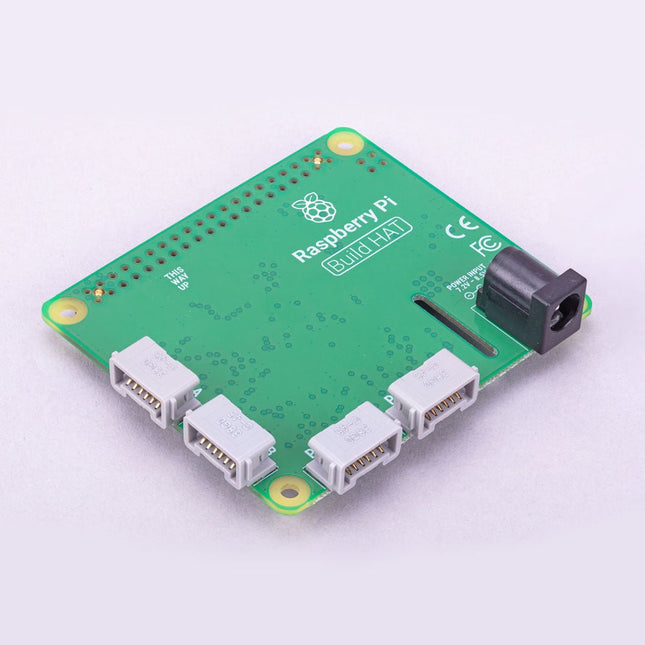
Raspberry Pi Foundation Raspberry Pi Build HAT
Build robust, intelligent machines that combine Raspberry Pi computing power with LEGO components. The Raspberry Pi Build HAT provides four connectors for LEGO Technic motors and sensors from the SPIKE Portfolio. The available sensors include a distance sensor, a color sensor, and a versatile force sensor. The angular motors come in a range of sizes and include integrated encoders that can be queried to find their position. The Build HAT fits all Raspberry Pi computers with a 40-pin GPIO header, including – with the addition of a ribbon cable or other extension device — Raspberry Pi 400. Connected LEGO Technic devices can easily be controlled in Python, alongside standard Raspberry Pi accessories such as a camera module. Features Controls up to 4 motors and sensors Powers the Raspberry Pi (when used with a suitable external PSU) Easy to use from Python on the Raspberry Pi
-
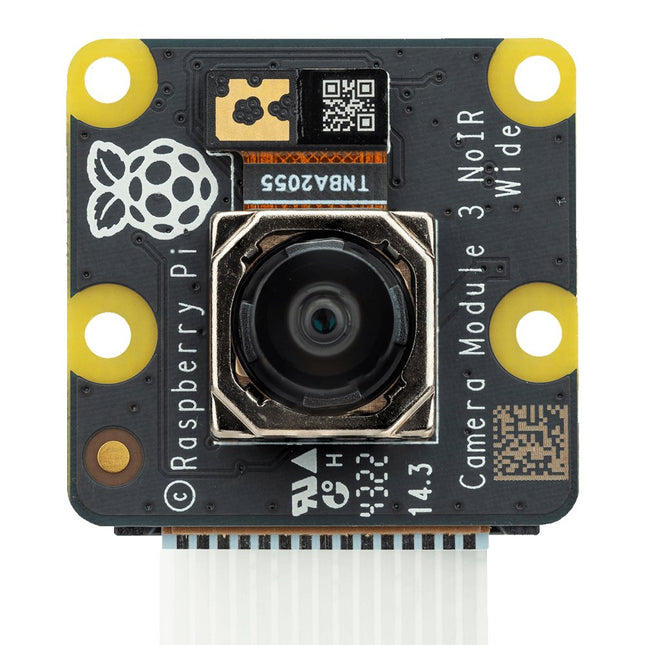
Raspberry Pi Foundation Raspberry Pi Camera Module 3 Wide NoIR
Raspberry Pi Camera Module 3 is a compact camera from Raspberry Pi. It offers an IMX708 12-megapixel sensor with HDR, and features phase detection autofocus. Camera Module 3 is available in standard and wide-angle variants, both of which are available with or without an infrared cut filter. Camera Module 3 can be used to take full HD video as well as stills photographs, and features an HDR mode up to 3 megapixels. Its operation is fully supported by the libcamera library, including Camera Module 3’s rapid autofocus feature: this makes it easy for beginners to use, while offering plenty for advanced users. Camera Module 3 is compatible with all Raspberry Pi computers. All variants of Raspberry Pi Camera Module 3 feature: Back-illuminated and stacked CMOS 12-megapixel image sensor (Sony IMX708) High signal-to-noise ratio (SNR) Built-in 2D Dynamic Defect Pixel Correction (DPC) Phase Detection Autofocus (PDAF) for rapid autofocus QBC Re-mosaic function HDR mode (up to 3 megapixel output) CSI-2 serial data output 2-wire serial communication (supports I²C fast mode and fast-mode plus) 2-wire serial control of focus mechanism Specifications Sensor Sony IMX708 Resolution 11.9 MP Sensor size 7.4 mm sensor diagonal Pixel size 1.4 x 1.4 µm Horizontal/vertical 4608 x 2592 pixels Common video modes 1080p50, 720p100, 480p120 Output RAW10 IR cut filter Integrated in standard variants; not present in NoIR variants Autofocus system Phase Detection Autofocus Ribbon cable length 200 mm Cable connector 15 x 1 mm FPC Dimensions 25 x 24 x 11.5 mm (12.4 mm height for Wide variants) Variants of Raspberry Pi Camera Module 3 Camera Module 3 Camera Module 3 NoIR Camera Module 3 Wide Camera Module 3 Wide NoIR Focus range 10 cm - ∞ 10 cm - ∞ 5 cm - ∞ 5 cm - ∞ Focal length 4.74 mm 4.74 mm 2.75 mm 2.75 mm Diagonal field of view 75 degrees 75 degrees 120 degrees 120 degrees Horizontal field of view 66 degrees 66 degrees 102 degrees 102 degrees Vertical field of view 41 degrees 41 degrees 67 degrees 67 degrees Focal ratio (F-stop) F1.8 F1.8 F2.2 F2.2 Infrared-sensitive No Yes No Yes Downloads GitHub Documentation
-

Elektor Publishing Apple Macintosh
20+ Macintosh Models, from 1984 to Today (History, Engineering, and Restoration) Apple is not like any other company. More than anyone else, it transformed technology into something people could desire, love, and even identify with—much like a luxury brand. Users were not only buying a tool; they were buying a vision, a way of life. At the center of this transformation stands the Macintosh. First introduced in 1984, it was radically different from everything before. With its graphical interface and mouse, it made computing approachable, even friendly. What now feels obvious—clicking on icons, dragging files, pointing instead of typing commands—was revolutionary at the time. The Macintosh not only changed the way people related to technology. The Macintosh forced the entire industry to rethink the way we use computers. This book tells that story through some of the most significant Macintosh models. Each one is presented not only in words but also in images, because these computers are more than technology—they are design icons, symbols of a unique vision. History, technical detail, and photography come together here, aiming to show each Macintosh as it truly deserves to be seen.
€ 79,95
Members: € 71,96
-
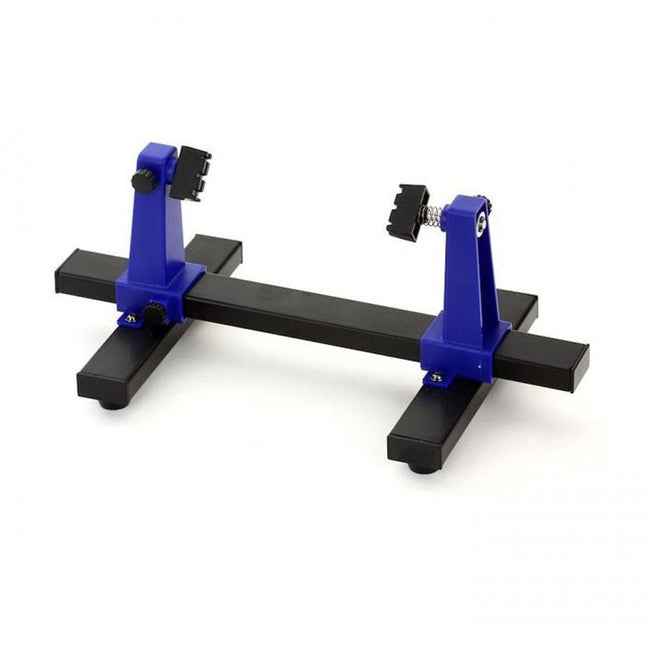
Zhongdi ZD-11E PCB Holder
This adjustable circuit board holder is ideal for clamping PCB for soldering, desoldering or rework. Features 2 adjustable grips on a retractable stand to accommodate various board sizes. The adjustable clamps allow the PCB to rotate 360 degrees and stay set in any position. The base of this rigid metal stand features four rubber feet to ensure stability. Specifications Product size 30 x 16.5 x 12.5 cm Max. holding size 20 x 14 cm Weight 450 g
€ 7,95
-

Elektor Publishing Getting Started With Java Using Eclipse
Mastering the Language and the Development Platform Many people would like to learn Java but getting started is not easy since programming with Java requires at least two things: mastering the programming language and the development environment. With the help of many examples, this book shows how the language is structured. In addition, it employs the Eclipse development environment as an example of a powerful tool to teach developing Java programs. In Basics, the first part of the book, you acquire your Java and Eclipse basic knowledge. This part lays the programming foundations, gives you an overview of Java technology, and shows you what is special about object-oriented programming. In the second part called Java Language, everything revolves around the subtleties of the Java language and this is where the first small Java applications are created, aided by a fine blend of the knowledge part and practical exercises. Java Technology is both the name and the focus of the third part which also introduces you to the rules to observe when programming, what class libraries are and what advantages they have. In addition, you will learn how to test programs, what algorithms are, and how to program them. The fourth part, Java Projects, enables you to apply all the previous elements in an application with a graphical user interface. The project shows how to develop a larger application piece by piece with the Eclipse development environment. The Appendix concludes with a section on frequent errors that can occur when working with Eclipse, and a Glossary.
€ 44,95
Members: € 40,46
-
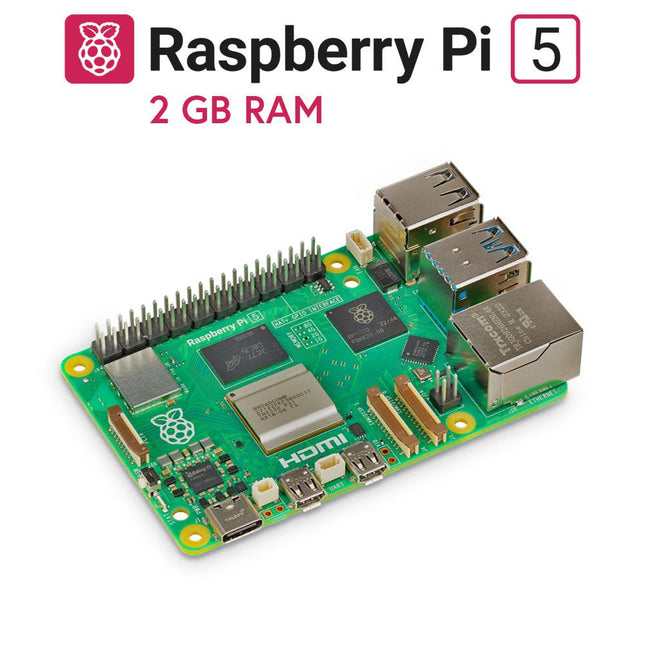
Raspberry Pi Foundation Raspberry Pi 5 (2 GB RAM)
The Raspberry Pi 5 delivers more performance than ever before. Thanks to the faster CPU, GPU and RAM, Raspberry Pi 5 is up to 3x faster than its already fast predecessor. In addition to the speed boost, the Raspberry Pi 5 (which features the new Raspberry Pi RP1 silicon for advanced I/O capabilities) also offers the following features for the first time ever: RTC, an on/off button and a PCIe interface. Features 64-bit quad-core ARM Cortex-A76 processor (2.4 GHz) VideoCore VII GPU (800 MHz) 2 GB of LPDDR4X RAM (4267 MHz) Raspberry Pi silicon RP1 I/O controller chip Real-time clock On/off button PCIe 2.0 UART connector Fan connector Specifications SoC Broadcom BCM2712 CPU ARM Cortex-A76 (ARM v8) 64-bit Clock speed 4x 2.4 GHz GPU VideoCore VII (800 MHz) RAM 2 GB LPDDR4X (4267 MHz) WiFi IEEE 802.11b/g/n/ac (2.4 GHz/5 GHz) Bluetooth Bluetooth 5.0, BLE Ethernet Gigabit Ethernet (with PoE+ support) USB 2x USB-A 3.0 (5 GBit/s)2x USB-A 2.0 PCI Express 1x PCIe 2.0 GPIO Standard 40-pin GPIO header Video 2x micro-HDMI ports (4K60)2x 4-lane MIPI (DSI/CSI) Multimedia H.265 (4K60 decode)OpenGL ES 3.1, Vulkan 1.2 SD card microSD Power 5 V/5 A (via USB-C)Power over Ethernet (PoE+) Raspberry Pi 4 vs Raspberry Pi 5 Raspberry Pi 4 Raspberry Pi 5 SoC Broadcom BCM2711 Broadcom BCM2712 CPU ARM Cortex-A72 (ARM v8) 64-bit ARM Cortex-A76 (ARM v8) 64-bit Clock speed 4x 1.5 GHz 4x 2.4 GHz L2 cache 1 MByte shared 4x 512 KByte L3 cache N/A 2 MByte shared GPU VideoCore VI (500 MHz) VideoCore VII (800 MHz) RAM 2 GB LPDDR4 (3200 MHz) 2 GB LPDDR4X (4267 MHz) WiFi IEEE 802.11b/g/n/ac (2.4 GHz/5 GHz) IEEE 802.11b/g/n/ac (2.4 GHz/5 GHz) Bluetooth Bluetooth 5.0, BLE Bluetooth 5.0, BLE Ethernet Gigabit Ethernet (with PoE support) Gigabit Ethernet (with PoE+ support) USB 2x USB-A 3.02x USB-A 2.0 2x USB-A 3.0 (5 GBit/s)2x USB-A 2.0 I/O controller chip N/A Raspberry Pi Silicon RP1 PCI Express N/A 1x PCIe 2.0 Real Time Clock (RTC) N/A RTC and RTC battery connector On/off button N/A Onboard power button Cooling N/A Fan connector GPIO Standard 40-pin GPIO header Standard 40-pin GPIO header UART via GPIO 1x UART connector SD card microSD slot (DDR50) microSD slot (SDR104) Video 2x micro-HDMI ports (4K60)1x 2-lane MIPI DSI port (display)1x 2-lane MIPI CSI port (camera) 2x micro-HDMI ports (4K60)2x 4-lane MIPI (DSI/CSI) Audio 4-pole 3.5 mm audio jack (stereo audio and composite video) N/A Multimedia H.265 (4K60 decode)H.264 (1080p60 decode, 1080p30 encode)OpenGL ES, 3.0 graphics H.265 (4K60 decode)OpenGL ES 3.1, Vulkan 1.2 Power 5 V/3 A (15 W)Power over Ethernet (PoE) 5 V/5 A (25 W), USB PDPower over Ethernet (PoE+) Raspberry Pi 5 4 GB RAM 8 GB RAM 16 GB RAM Downloads Datasheet Unboxing the Raspberry Pi 5 First Insights
-
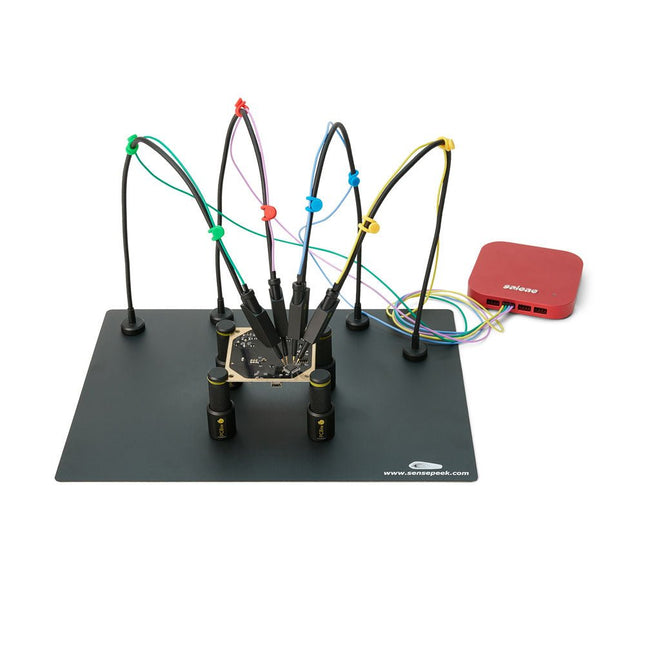
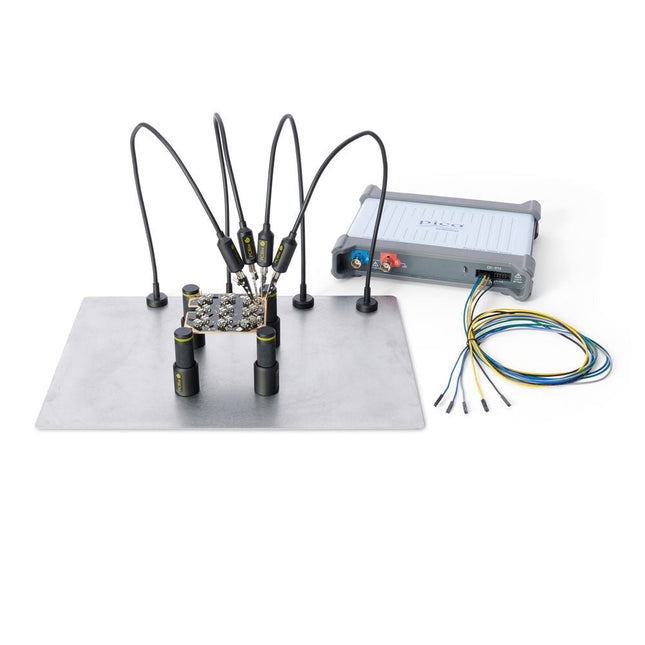
Sensepeek Sensepeek 6003 PCBite Kit incl. 4x SQ10 Probe and Test Wires
The SQ series of handsfree PCBite probes from Sensepeek are insulated, come with included color-coded cable holders and have a lower point of gravity making them even more stable compared with the original SP series of probes. All the loved features of handsfree measurement, exchangeable fine pitch spring tipped test needle and the minimalistic design is maintained to make traditional sized and handheld probes obsolete. Features All handsfree probes from Sensepeek makes instant measurements or long triggering sessions a breeze. No more soldering wires to connect your probe or complicated tools to setup, just positioning the probe needle on any test point or component in the signal path and release. Saves time and frustration during development, verification and repairs. The minimalist design and the spring-loaded test needle makes it possible to simultaneously measure on fine pitch components and nearby signals. Both length and weight of the SQ probes are perfectly balanced to be used with the included PCB holders and base plate which is a must for handsfree function. The probe holder comes with a powerful magnet in the base, as for all PCBite probes and holders which makes the probe easy to place and reposition. The SQ series of probes can be used handheld without the probe holder as they have an insulated grip but their full potential is used when measuring handsfree. One side of the included baseplate is matte and the other is mirror polished. The mirror polished surface makes it easy to see components on the circuit board underside. For added protection during measurement the included insulation cover can be mounted on one of the surfaces. Included 4x PCBite PCB holders 1x Set of yellow insulation washers for the PCB holders 1x Large Base plate (A4) 1x Insulation cover for the base plate (A4) 1x Micro fiber cloth 4x SQ10 probes and pin tipped test needles (black) 2x Banana to dupont test wires (red/black) 5x Dupont to dupont test wires 1x Set of cable holders (4 colors) 4x Extra test needles Downloads User guide (PCBite kit) User guide (SQ10 probes)
€ 180,29
-
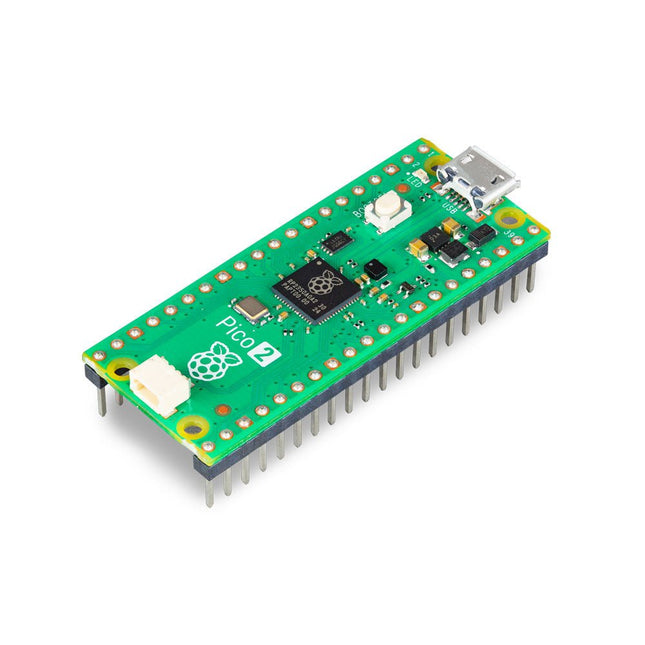
Raspberry Pi Foundation Raspberry Pi Pico 2 H
The Raspberry Pi Pico 2 H (with Headers) is a new microcontroller board from the Raspberry Pi Foundation, based on the RP2350. It features a higher core clock speed, double the on-chip SRAM, double the on-board flash memory, more powerful Arm cores, optional RISC-V cores, new security features, and upgraded interfacing capabilities. The Raspberry Pi Pico 2 H offers a significant boost in performance and features while maintaining hardware and software compatibility with earlier members of the Raspberry Pi Pico series. The RP2350 provides a comprehensive security architecture built around Arm TrustZone for Cortex-M. It incorporates signed boot, 8 KB of antifuse OTP for key storage, SHA-256 acceleration, a hardware TRNG, and fast glitch detectors. The unique dual-core, dual-architecture capability of the RP2350 allows users to choose between a pair of industry-standard Arm Cortex-M33 cores and a pair of open-hardware Hazard3 RISC-V cores. Programmable in C/C++ and Python, and supported by detailed documentation, the Raspberry Pi Pico 2 is the ideal microcontroller board for both enthusiasts and professional developers. Specifications CPU Dual Arm Cortex-M33 or dual RISC-V Hazard3 processors @ 150 MHz Memory 520 KB on-chip SRAM; 4 MB on-board QSPI flash Interfaces 26 multi-purpose GPIO pins, including 4 that can be used for AD Peripherals 2x UART 2x SPI controllers 2x I²C controllers 24x PWM channels 1x USB 1.1 controller and PHY, with host and device support 12x PIO state machines Input power 1.8-5.5 V DC Dimensions 21 x 51 mm Downloads Datasheet (Pico 2) Datasheet (RP2350)
-
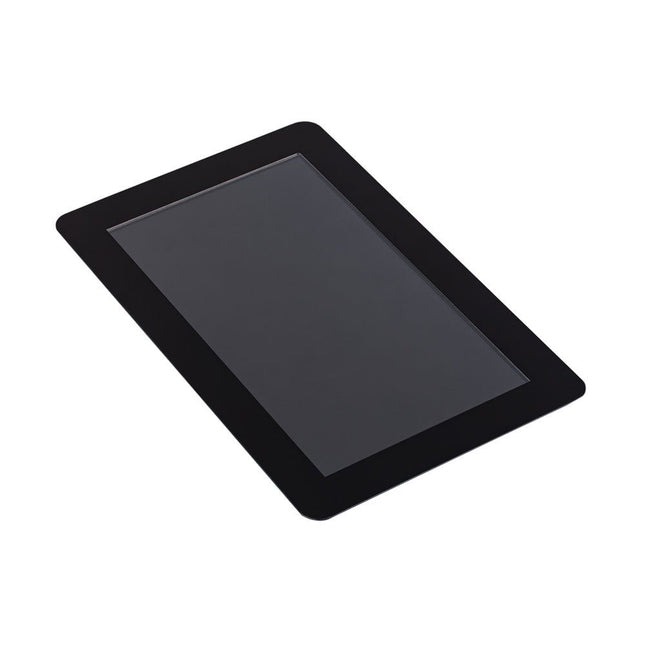
Raspberry Pi Foundation Raspberry Pi Touch Display 2
The Raspberry Pi Touch Display 2 is a 7-inch touchscreen designed for Raspberry Pi, perfect for interactive projects like tablets, entertainment systems, and information dashboards. Raspberry Pi OS includes touchscreen drivers that support five-finger touch and an on-screen keyboard, allowing complete functionality without a physical keyboard or mouse. Connecting the 720 x 1280 display to your Raspberry Pi requires just two connections: power from the GPIO port and a ribbon cable to the DSI port, compatible with all Raspberry Pi models except the Raspberry Pi Zero line. Specifications Display 7 inch TFT (720 x 1280 pixels) Active area 88 x 155 mm Touch panel True multi-touch capacitive touch panel, supporting five-finger touch Surface treatment Anti-glare Color configuration RGB-stripe Backlight type LED B/L Included 1x Raspberry Pi Touch Display 2 1x 22-way to 15-way FFC for Raspberry Pi 5 1x 15-way to 15-way FFC for Raspberry Pi 4 and older 1x GPIO connector cable 8x M2.5 screws Downloads Datasheet
-

Elektor Publishing How Humanity Turned Electricity into Electronics
From Rubbing Amber to Swiping Glass "The story of electricity, told one connection at a time."Why does rubbing amber attract dust? How did we go from that curious effect to a world where screens respond to a single touch? And how did we get from mysterious sparks to tiny chips packed with billions of transistors? For centuries, electricity puzzled and fascinated those who encountered its curious effects—long before it even had a name. From the earliest observations of static charge to the complex electronics that shape our lives today, this book traces the gradual, and often surprising, story of how humanity came to understand and harness this powerful force. This book offers an engaging and accessible account of the people, ideas, and inventions that transformed electricity from a scientific curiosity into the foundation of our digital age. Along the way, you’ll meet a host of inquisitive minds—some famous, others less so—whose persistence and creativity helped unravel the mysteries of the natural world and gave rise to the technologies we now take for granted. Covering everything from Leyden jars and batteries to transistors, microcontrollers and the internet, this book presents a clear and enjoyable overview of electronics and its relatively short, yet rich, history. Whether you have a technical background or simply a curiosity about how things work, From Rubbing Amber to Swiping Glass offers a thoughtful look at how far we’ve come—and a gentle nudge to wonder what might come next.
€ 39,95
Members: € 35,96
-
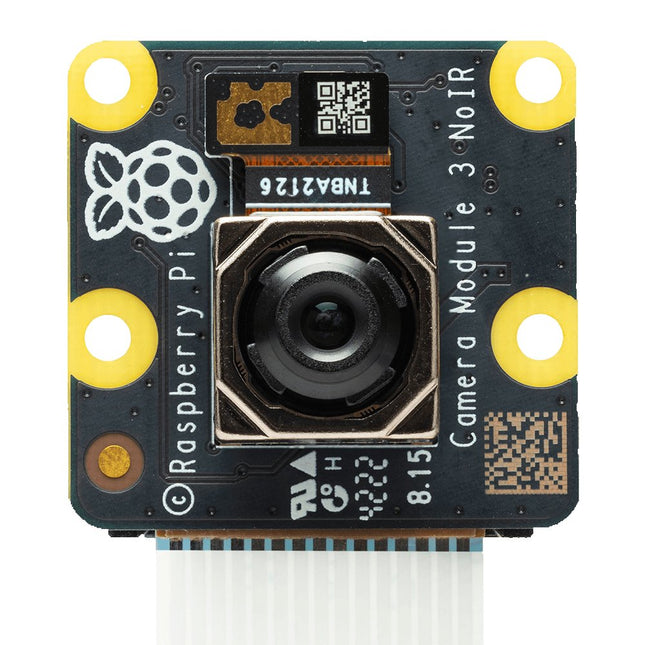
Raspberry Pi Foundation Raspberry Pi Camera Module 3 NoIR
Raspberry Pi Camera Module 3 is a compact camera from Raspberry Pi. It offers an IMX708 12-megapixel sensor with HDR, and features phase detection autofocus. Camera Module 3 is available in standard and wide-angle variants, both of which are available with or without an infrared cut filter. Camera Module 3 can be used to take full HD video as well as stills photographs, and features an HDR mode up to 3 megapixels. Its operation is fully supported by the libcamera library, including Camera Module 3’s rapid autofocus feature: this makes it easy for beginners to use, while offering plenty for advanced users. Camera Module 3 is compatible with all Raspberry Pi computers. All variants of Raspberry Pi Camera Module 3 feature: Back-illuminated and stacked CMOS 12-megapixel image sensor (Sony IMX708) High signal-to-noise ratio (SNR) Built-in 2D Dynamic Defect Pixel Correction (DPC) Phase Detection Autofocus (PDAF) for rapid autofocus QBC Re-mosaic function HDR mode (up to 3 megapixel output) CSI-2 serial data output 2-wire serial communication (supports I²C fast mode and fast-mode plus) 2-wire serial control of focus mechanism Specifications Sensor Sony IMX708 Resolution 11.9 MP Sensor size 7.4 mm sensor diagonal Pixel size 1.4 x 1.4 µm Horizontal/vertical 4608 x 2592 pixels Common video modes 1080p50, 720p100, 480p120 Output RAW10 IR cut filter Integrated in standard variants; not present in NoIR variants Autofocus system Phase Detection Autofocus Ribbon cable length 200 mm Cable connector 15 x 1 mm FPC Dimensions 25 x 24 x 11.5 mm (12.4 mm height for Wide variants) Variants of Raspberry Pi Camera Module 3 Camera Module 3 Camera Module 3 NoIR Camera Module 3 Wide Camera Module 3 Wide NoIR Focus range 10 cm - ∞ 10 cm - ∞ 5 cm - ∞ 5 cm - ∞ Focal length 4.74 mm 4.74 mm 2.75 mm 2.75 mm Diagonal field of view 75 degrees 75 degrees 120 degrees 120 degrees Horizontal field of view 66 degrees 66 degrees 102 degrees 102 degrees Vertical field of view 41 degrees 41 degrees 67 degrees 67 degrees Focal ratio (F-stop) F1.8 F1.8 F2.2 F2.2 Infrared-sensitive No Yes No Yes Downloads GitHub Documentation
-
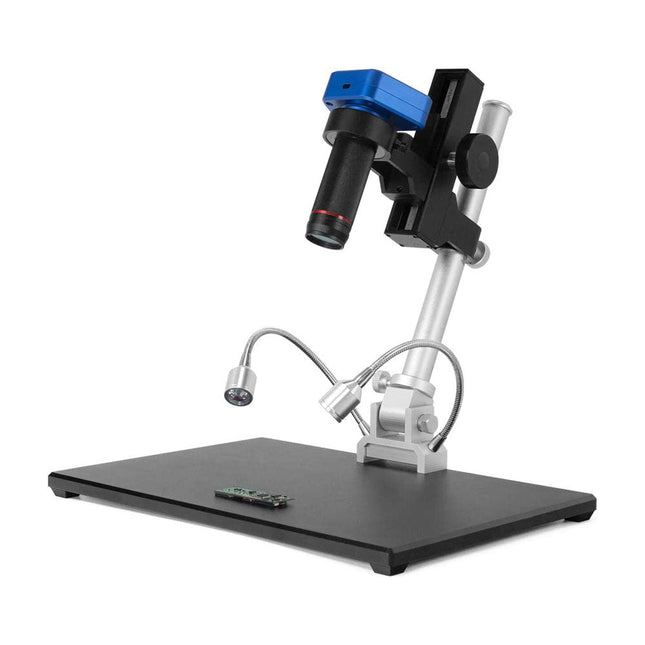
Andonstar Andonstar AD1605 4K HDMI Digital Microscope
The Andonstar AD1605 4K Digital Microscope features a 14 megapixels HD sensor, an oversized metal base and an adjustable bracket. With 4k ultra HD image sensor, you can capture high-quality pictures and record ultra-clear videos. This 4K digital microscope possesses a magnification up to 150X. With a stand size of 37.5 x 25 x 47 cm, it can offer a large working space that is ideal for assembly, inspection, training, real-time viewing, image capture and video documentation. With it, you can check the solder joint of a circuit board, or the minute structure of coin, jewelry, textile, skin, insect, etc. Features 14 MP HD sensor providing clear images of high quality Deep depth of field making images sharp and clear Oversized metal base providing large working space Wide focus range from 5 to 29 cm Adjustable metal bracket for easy adjustment of magnification and object distance Image capture & video record function for convenient documentation of work UV Filter to protect the lens from the oil, heat, dirt or dust during soldering or repair IR remote control for easy operation and avoid the shake of the microscope with the button playing Memory card with up to 32 GB storage (not included in the package) Applications Phone repair PCB checking Plants & insects Arts & crafts/miniature Printings/textile Assembling line Antique authentication Jewelry appraisal Watch repair DIY Specifications Image sensor 14 MP Video output 3840x2160 (30fps)2560x1440 (24fps)1920x1080 (60fps/30fps) Video format MP4 Magnification Up to 150 times (29 inch HDMI monitor) Photo resolution Max. 12 MP (4032x3024) Photo format JPG Focus range 5-29 cm Frame Rate Max. 60fps Video interface HDMI Storage microSD card (up to 32 GB) PC support No Power source 5 V DC Light source 2 LEDs with the stand Stand size 37.5 x 25 x 47 cm Weight 5.5 kg Included 1x Andonstar AD1605 Digital Microscope 1x Metal stand 1x UV filter 1x IR remote 1x Switch cable 1x Power adapter 1x User manual
€ 349,00
-
Sensepeek Sensepeek 4003 PCBite Kit incl. 4x SP10 Probe and Test Wires
The minimalist design and the spring loaded test needle makes it possible to simultaneously measure on fine pitch components and nearby signals. The probe is steady but yet flexible made for instant measurements or total hands-free operations together with your multimeter, logic analyzer or preferred tool. The dual pin header connector fits directly on a 2.54 mm (0.100”) connector. The SP10 comes with a powerful magnet in the base, as for all PCBite probes and holders which makes the probe easy to place and reposition. Included 4x PCBite holder 1x Large base plate (A4) 4x PCBite probe with pin tipped test needle 4x Extra crown tipped test needle 1x Set of yellow insulation washers 5x Dupont to dupont test wire 2x Banana to dupont test wire 1x Microfiber cloth Downloads User Guide
€ 152,46
-

Elektor Publishing Digital Electronics
The Basics, New Ideas & Applications Build digital electronics from the ground up—and take it all the way to practical circuits you can use. This book guides you through the core principles of digital technology with a strongly hands-on approach. You’ll begin with the essentials: signals, devices for working with them, and what "logic 0" and "logic 1" mean in real hardware. Simple demonstration setups made from easy-to-find parts (LEDs, diodes, resistors, switches) help you see how logic behaves, making the theory click before you move on. From there, you’ll explore a wide range of logic elements and how they’re implemented, including classic logic families such as TTL and CMOS. The fundamentals section covers the building blocks of digital systems: flip-flops, Schmitt triggers, registers, counters and dividers, encoders/ decoders, multiplexers/demultiplexers, plus A/D and D/A conversion and timing circuits. Next, the book invites you into "new ideas" in digital electronics—universal logic elements, unconventional approaches (including thyristor-based and fractional logic), and creative logic functions that can inspire original designs. Finally, a large, well-organized collection of application circuits turns knowledge into projects: electronic switches and selectors, pulse generators, PWM regulators, frequency multipliers/dividers, phase shifters, and digital filters. Study it deeply, and you’ll gain not only understanding—but the ability to design and debug digital circuits independently.
€ 39,95
Members: € 35,96
-

Elektor Academy Pro ESP32 with Arduino C/C++ (Programming Course)
This complete ESP32 microcontroller programming course features a textbook, a component kit, hands-on projects, and a comprehensive online course with simulations. It is ideal for step-by-step learning of embedded systems programming with Arduino using a practical, hands-on approach. A Practical Introduction to Embedded Systems with the ESP32 This course is designed for people who are new to embedded systems and looking for a structured, example-driven way to get started. A kit of parts comprising LEDs and resistors, switches, sensors and actuators, displays, a breadboard and wires, and more is included. These are used in the course to illustrate example applications. No prior experience with Arduino or embedded development is required. Each section features hands-on examples and mini projects designed to reinforce key concepts and inspire deeper exploration. By the end of the course, you’ll be able not only to reproduce the examples but also to build on them with your own ideas and applications. What Will You Learn? Microcontroller programming with the ESP32 using the Arduino IDE Working with Digital I/O, read buttons and encoders, control LEDs and relays Read analog inputs, voltages, and analog sensors Generating analog output signals and PWM Use serial communication like UART, I²C and SPI to control displays and read digital sensors and SD cards Managing time Working with interrupts Real-time sensor input and control via buttons, LEDs, and displays Control actuators like relays and servo motors Who Is It For? Students and self-learners exploring embedded systems Makers and IoT enthusiasts looking to improve their hardware skills Educators and trainers seeking ready-to-teach material What's Inside the Box? Access to the full course on the Elektor Academy Pro Learning Platform ESP32 microcontroller board + USB cable Book: Programming Microcontrollers in C/C++ Using Arduino Downloadable project files for every module Component Box: 2× LED, red, 5 mm LED, green, 5 mm 3× Resistor, 470 Ω, 0.25 W LDR Potentiometer, 10 kΩ, linear Pushbutton Rotary encoder module Relay module DHT22 Humidity & Temperature Sensor TM1637-compatible 4-digit 7-segment display MPU-6050 IMU with headers SSD1306-compatible I²C OLED display Micro SD card adapter with header Buzzer SG90 Micro Servo ILI9341-compatible SPI 240×320 TFT display 20× Jumper wires Breadboard All Programming Courses (and differences in content) Course Arduino Raspberry Pi Pico with Arduino C/C++ ESP32 with Arduino C/C++ Raspberry Pi Pico with MicroPython ESP32 with MicroPython Online Course Access to Arduino Course Access to Pico with Arduino C/C++ Course Access to ESP32 with Arduino C/C++ Course Access to Pico with MicroPython Course Access to ESP32 with MicroPython Course Board Uno R3 Raspberry Pi Pico ESP32 Raspberry Pi Pico ESP32 Book Programming Microcontrollers in C/C++ Using Arduino Programming Microcontrollers in C/C++ Using Arduino Programming Microcontrollers in C/C++ Using Arduino Programming Microcontrollers in MicroPython Programming Microcontrollers in MicroPython Kit 40-piece Component Box 40-piece Component Box 40-piece Component Box 40-piece Component Box 40-piece Component Box
€ 69,95
Members: € 62,96
-

Raspberry Pi Foundation Raspberry Pi SSD Kit for Raspberry Pi 5 (512 GB)
The Raspberry Pi SSD Kit bundles a Raspberry Pi M.2 HAT+ with a Raspberry Pi NVMe SSD. It unlocks outstanding performance for I/O intensive applications on Raspberry Pi 5, including super-fast startup when booting from SSD. The Raspberry Pi SSD Kit is also available with 256 GB capacity. Features 50k IOPS (4 kB random reads) 90k IOPS (4 kB random writes) Conforms to the Raspberry Pi HAT+ specification Included 512 GB NVMe SSD M.2 HAT+ for Raspberry Pi 5 16 mm GPIO stacking header Mounting hardware kit (spacers, screws) Downloads Datasheet
-
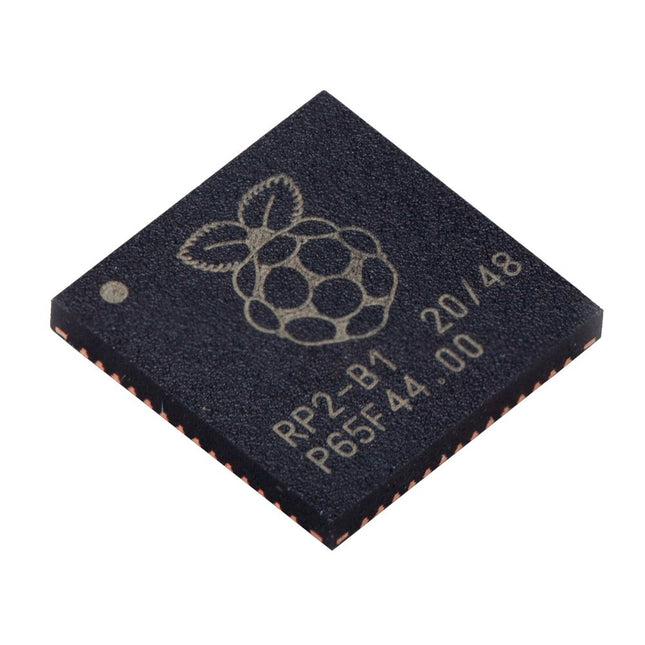
Raspberry Pi Foundation Raspberry Pi RP2040 Microcontroller (10 pcs)
Specifications Dual ARM Cortex-M0+ @ 133 MHz 264 kB on-chip SRAM in six independent banks Support for up to 16 MB of off-chip Flash memory via dedicated QSPI bus DMA controller Fully-connected AHB crossbar Interpolator and integer divider peripherals On-chip programmable LDO to generate core voltage 2x on-chip PLLs to generate USB and core clocks 30x GPIO pins, 4 of which can be used as analogue inputs Peripherals 2x UARTs 2x SPI controllers 2x I²C controllers 16x PWM channels USB 1.1 controller and PHY, with host and device support 8x PIO state machines What you'll get 10x bare RP2040 chips
€ 7,95€ 3,18
Best Price
-

Makerfabs Arduino Uno Experimenting Kit
With this kit you can built all the projects described in the book 'Mastering the Arduino Uno R4'. The kit comes with several LEDs, sensors, actuators, and other components. The purpose of the kit is to make a flying start with hardware and software aspects of projects designed around the Arduino Uno microcontroller system. Included 1x RFID reader module 1x DS1302 clock module 1x 5 V stepper motor 1x '2003' stepper motor drive board 5x Green LED 5x Yellow LED 5x Red LED 2x Rocker switch 1x Flame sensor 1x LM35 sensor module 1x Infrared receiver 3x Light-dependent resistors (LDRs) 1x IR remote controller 1x Breadboard 4x Pushbutton (with four caps) 1x Buzzer 1x Piezo sounder 1x Adjustable resistor (potentiometer) 1x 74HC595 shift register 1x 7-segment display 1x 4-digit 7-segment display 1x 8x8 Dot-matrix display 1x 1602 / I²C LCD module 1x DHT11 Temperature and humidity module 1x Relay module 1x Sound module Set of Dupont cables Set of Breadboard cables 1x Water sensor 1x PS2 Joystick 5x 1 k-ohm resistor 5x 10 k-ohm resistor 5x 220-ohm resistor 1x 4x4 keypad module 1x 9g Servo (25 cm) 1x RFID card 1x RGB module 1x 9 V battery DC jack Not included Mastering the Arduino Uno R4 (Book) Arduino Uno R3/R4 (Board)
-

iFixit iFixit Pro Tech Toolkit
The Pro Tech Toolkit is the one thing every DIYer, fixer, hacker, hobbyist, and professional needs to tackle any job. Every tool in the Pro Tech Toolkit has been re-engineered to be better. From the 64 Bit Driver Kit to the iFixit Opening Picks, every tool is specially designed and selected to maximize your repair capabilities. At the core of this kit is the iFixit 64 Bit Driver Kit, designed with extensive research into what fastener types are currently used in the consumer electronics industry and which legacy fasteners are still in demand by consumers. From the Apple Watch with its new tiny Tri-Point screws to vintage Nintendo game consoles with gamebit fasteners, the 64 bit kit covers them all with the highest quality CNC machined bits. Even the sturdy case was carefully engineered, having no hinges or latches to break, and features a sorting tray inside the magnetically attached lid. High-Performance Toolkit for DIY Repairs The perfect toolkit for pros to average joes. Contains all the poking, prying, gripping, lifting, ESD safety, and screw driving tools needed to service consumer electronics. Completely re-engineered to provide all the tools that you need, and none that you don't. Included Anti-Static Wrist Strap – protection for circuits against static electricity Small Suction Handle – suction handle for holding onto things lacking handles 3x iFixit Opening Tool – soft plastic prying tools 6x iFixit Opening Picks – thin prying tool for opening electronic devices Nylon Tipped Reverse Tweezers – to elevate and hold your work Angled ESD Tweezers – ESD-safe, feature teeth for tougher grip Blunt ESD Tweezers – ESD-safe, feature teeth for tougher grip Standard Spudger – tough antistatic tool for a variety of purposes Halberd Spudger – features a hook for scooping, scraping, pulling, and guiding.ESD-safe. Metal Spudger – for more powerful prying, scraping, probing, and poking action Jimmy – handy tool for 'Jimmy'ing open electronics. Magnetic Pad – Holds tiny screws and parts during repairs Tool Roll – Durable and compact Mako Precision Bit Set – all the bits needed for repairs on small electronics Mako Precision Bit Set Includes 64 Bit Driver 150 mm Flex Extension 4 mm Screwdriver Bits Phillips – 000, 00, 0, 1, 2 Flathead – 1, 1.5, 2, 2.5, 3, 4 mm Torx – T2, T3, T4, T5 Torx Security – TR6, TR7, TR8, TR9, TR10, TR15, TR20, TR25 Pentalobe – P2, P5, P6 JIS – J000, J00, J0, J1 Hex – 0.7, 0.9, 1.3, 1.5, 2, 2.5, 3, 3.5, 4, 4.5, 5 mm Tri-point – Y000, Y00, Y0, Y1 Nut Driver – 2.5, 3, 3.5, 4, 4.5, 5, 5.5 mm Square – 1, 2 Gamebit – 3.8, 4.5 mm Spanner – 6, 8 Triangle – 2, 3 mm Standoff Bit for iPhone Oval Bit Magnetic Pickup Bit SIM Eject Bit 1/4" to 4 mm Driver Adapter
€ 69,95
-

Raspberry Pi Foundation Raspberry Pi 500 (US)
The Raspberry Pi 500 (based on the Raspberry Pi 5) features a quad-core 64-bit Arm processor, RP1 I/O controller, 8 GB RAM, wireless networking, dual-display output, 4K video playback, and a 40-pin GPIO header. It's a powerful, compact all-in-one computer built into a portable keyboard. The built-in aluminum heatsink provides improved thermal performance, allowing the Raspberry Pi 500 to run quickly and smoothly even under heavy load. Specifications SoC Broadcom BCM2712 CPU ARM Cortex-A76 (ARM v8) 64-bit Clock rate 4x 2.4 GHz GPU VideoCore VII (800 MHz) RAM 8 GB LPDDR4X (4267 MHz) WiFi IEEE 802.11b/g/n/ac (2.4 GHz/5 GHz) Bluetooth Bluetooth 5.0, BLE Ethernet Gigabit Ethernet (with PoE+ support) USB 2x USB-A 3.0 (5 GBit/s)1x USB-A 2.01x USB-C (for power supply) PCI Express 1x PCIe 2.0 GPIO Standard 40-pin GPIO header Video 2x micro-HDMI ports (4K60) Multimedia H.265 (4K60 decode)OpenGL ES 3.1, Vulkan 1.2 SD card microSD Power supply 5 V DC (via USB-C) Keyboard layout US (QWERTY) Dimensions 286 x 122 x 23 mm Downloads Datasheet


