Arduino

110 products

  • Controller Area Network Projects with ARM and Arduino - Elektor

    Elektor Publishing Controller Area Network Projects with ARM and Arduino

    This book details the use of the ARM Cortex-M family of processors and the Arduino Uno in practical CAN bus based projects. Inside, it gives a detailed introduction to the architecture of the Cortex-M family whilst providing examples of popular hardware and software development kits. Using these kits helps to simplify the embedded design cycle considerably and makes it easier to develop, debug, and test a CAN bus based project. The architecture of the highly popular ARM Cortex-M processor STM32F407VGT6 is described at a high level by considering its various modules. In addition, the use of the mikroC Pro for ARM and Arduino Uno CAN bus library of functions are described in detail. This book is written for students, for practising engineers, for hobbyists, and for everyone else who may need to learn more about the CAN bus and its applications. The book assumes that the reader has some knowledge of basic electronics. Knowledge of the C programming language will be useful in later chapters of the book, and familiarity with at least one microcontroller will be an advantage, especially if the reader intends to develop microcontroller based projects using CAN bus. The book should be useful source of reference to anyone interested in finding an answer to one or more of the following questions: What bus systems are available for the automotive industry? What are the principles of the CAN bus? What types of frames (or data packets) are available in a CAN bus system? How can errors be detected in a CAN bus system and how reliable is a CAN bus system? What types of CAN bus controllers are there? What are the advantages of the ARM Cortex-M microcontrollers? How can one create a CAN bus project using an ARM microcontroller? How can one create a CAN bus project using an Arduino microcontroller? How can one monitor data on the CAN bus?

    € 44,95

    Members € 40,46

  •  -33%Last Stock! Cytron 10Amp 7 - 30 V DC Motor Driver Shield for Arduino (2 Channels) - Elektor

    Cytron Cytron 10Amp 7-30 V DC Motor Driver Shield for Arduino (2 Channels)

    1 in stock

    You can control the motor driver with PWM and DIR inputs. The Arduino pins for these inputs are configurable via jumpers. If the specified pins on Arduino are already used up by other application/shield, you can select another pin easily with the jumper. There is also a possibility to quickly and conveniently test the functionality of the motor driver with the onboard test buttons and output LEDs. Buck regulator which produces 5 V output is also available to power the Arduino mainboard, which eliminates the need of extra power supply for the Arduino mainboard. The board also offers various protection features. Overcurrent protection prevents the motor driver from damage when the motor stalls or an oversized motor is hooked up. When the motor is trying to draw current more than what the motor driver can support, the motor current will be limited at the maximum threshold. Assisted by temperature protection, the maximum current limiting threshold is determined by the board temperature. The higher the board temperature, the lower the current limiting threshold. As a result, the motor driver delivers its full potential depending on the current conditions without damaging any MOSFETs. Features Shield for Arduino form factor Bidirectional control for two brushed DC motors Control one unipolar/bipolar stepper motor Operating Voltage: DC 7 V to 30 V Maximum Motor Current: 10 A continuous, 30 A peak Buck regulator to produce 5 V output (500 mA max) Buttons for quick testing LEDs for motor output state Selectable Arduino pins for PWM/DIR inputs. PWM/DIR inputs compatible with 1.8 V, 3.3 V and 5 V logic PWM frequency up to 20 kHz (Output frequency is same as input frequency). Overcurrent protection with active current limiting Temperature protection Undervoltage shutdown Possible applications Mobile Robot Automated Guided Vehicle (AGV) Solar Tracker Game Simulator Automation Machine Downloads Datasheet Sample Code 3D CAD Files Packing List 1x 10Amps 7V-30V DC Motor Driver Shield for Arduino (2 Channels) MDD010

    1 in stock

    € 29,95€ 19,95

    Members identical

  •  -22% Arduino Giga R1 WiFi - Elektor

    Arduino Arduino Giga R1 WiFi

    The Arduino Giga R1 WiFi brings the power of the STM32H7 to the same form factor as the popular Mega and Due, being the first Mega board to include onboard Wi-Fi and Bluetooth connectivity. The board provides 76 digital inputs/outputs (12 with PWM capability), 14 analog inputs and 2 analog outputs (DAC) all easily accessible via pin headers. The STM32 microprocessor with dual-core Cortex-M7 and Cortex-M4, together with onboard memory and audio jack enables you to perform machine learning and signal processing on the edge. Microcontroller (STM32H747XI) This dual core 32-bits microcontroller allows you have two brain talking to each other (a Cortex-M7 at 480 MHz and a Cortex-M4 at 240 MHz) you can even run micropython in one and Arduino in the other. Wireless communication (Murata 1DX) Whether you prefer Wi-Fi or Bluetooth, the Giga R1 WiFi got you covered. You can even quickly connect to the Arduino IoT Cloud and keep track of your project remotely. And if you are concerned about the security of the communication, the ATECC608A keeps everything under control. Hardware ports and communication Following the legacy of the Arduino Mega and the Arduino Due, the Giga R1 WiFi has 4x UARTs (hardware serial ports), 3x I²C ports (1 more than its predecessors), 2x SPI ports (1 more than its predecessors), 1x FDCAN. GPIOs and extra pins By keeping the same form factor of the Mega and the Due, you can easily adapt your custom made shields to the Giga R1 WiFi (remember this board works at 3.3 V though!). Also, additional headers have been added so that the total number of GPIO pins is now 76, and two new pins have been added: a VRTC so you can connect a battery to keep the RTC running while the board is off and an OFF pin so you can shut down the board. Connectors The Giga R1 WiFi has extra connectors on board which will facilitate the creation of your project without any extra hardware. This board has: USB-A connector suitable for hosting USB sticks, other mass storage devices and HID devices such as keyboard or mouse. 3.5 mm input-output jack connected to DAC0, DAC1 and A7. USB-C to power and program the board, as well as simulate an HID device such as mouse or keyboard. Jtag connector, 2x5 1.27 mm. 20-pin Arducam camera connector. Higher voltage support: In comparison with its predecessors that support up to 12 V, the Giga R1 WiFi can handle a range of 6 to 24 V. Specifications Microcontroller STM32H747XI dual Cortex-M7+M4 32-bit low power ARM MCU (datasheet) Radio Module Murata 1DX dual WiFi 802.11b/g/n 65 Mbps and Bluetooth (datasheet) Secure Element ATECC608A-MAHDA-T (datasheet) USB USB-C Programming Port / HID USB-A Host (enable with PA_15) Pins Digital I/O pins 76 Analog input pins 12 DAC 2 (DAC0/DAC1) PWM pins 12 Misc VRT & OFF pin Communication UART 4x I²C 3x SPI 2x CAN Yes (requires an external transceiver) Connectors Camera I²C + D54-D67 Display D1N, D0N, D1P, D0P, CKN, CKP + D68-D75 Audio Jack DAC0, DAC1, A7 Power Circuit operating voltage 3.3 V Input voltage (VIN) 6-24 V DC Current per I/O Pin 8 mA Clock Speed Cortex-M7 480 MHz Cortex-M4 240 MHz Memory STM32H747XI 2 MB Flash, 1 MB RAM Dimensions 53 x 101 mm Downloads Datasheet Schematics Pinout

    € 89,95€ 69,95

    Members identical

  • Arduino Nano - Elektor

    Arduino Arduino Nano

    The Arduino Nano is a small, complete, and breadboard-friendly board based on the ATmega328 (Arduino Nano 3.x). It has more or less the same functionality of the Arduino Duemilanove but in a different package. It lacks only a DC power jack and works with a Mini-B USB cable instead of a standard one. Specifications Microcontroller ATmega328 Operating Voltage (logic level) 5 V Input Voltage (recommended) 7-12 V Input Voltage (limits) 6-20 V Digital I/O Pins 14 (of which 6 provide PWM output) Analog Input Pins 8 DC Current per I/O Pin 40 mA Flash Memory 16 KB (ATmega168) or 32 KB (ATmega328) of which 2 KB used by bootloader SRAM 1 KB (ATmega168) or 2 KB (ATmega328) EEPROM 512 bytes (ATmega168) or 1 KB (ATmega328) Clock Speed 16 MHz Dimensions 0.73 x 1.70' (18 x 45 mm) Power The Arduino Nano can be powered via the Mini-B USB connection, 6-20 V unregulated external power supply (pin 30), or 5 V regulated external power supply (pin 27). The power source is automatically selected to the highest voltage source. Memory The ATmega168 has 16 KB of flash memory for storing code (of which 2 KB is used for the bootloader), 1 KB of SRAM and 512 bytes of EEPROM The ATmega328 has 32 KB of flash memory for storing code, (also with 2 KB used for the bootloader), 2 KB of SRAM and 1 KB of EEPROM. Input and Output Each of the 14 digital pins on the Nano can be used as an input or output, using pinMode(), digitalWrite(), and digitalRead() functions. They operate at 5 V. Each pin can provide or receive a maximum of 40 mA and has an internal pull-up resistor (disconnected by default) of 20-50 kOhms. Communication The Arduino Nano has a number of facilities for communicating with a computer, another Arduino, or other microcontrollers. The ATmega168 and ATmega328 provide UART TTL (5V) serial communication, which is available on digital pins 0 (RX) and 1 (TX). An FTDI FT232RL on the board channels this serial communication over USB and the FTDI drivers (included with the Arduino software) provide a virtual com port to software on the computer. The Arduino software includes a serial monitor which allows simple textual data to be sent to and from the Arduino board. The RX and TX LEDs on the board will flash when data is being transmitted via the FTDI chip and USB connection to the computer (but not for serial communication on pins 0 and 1). A SoftwareSerial library allows for serial communication on any of the Nano's digital pins. Programming The Arduino Nano can be programmed with the Arduino software (download). The ATmega168 or ATmega328 on the Arduino Nano comes with a bootloader that allows you to upload new code to it without the use of an external hardware programmer. It communicates using the original STK500 protocol (reference, C header files). You can also bypass the bootloader and program the microcontroller through the ICSP (In-Circuit Serial Programming) header using Arduino ISP or similar; see these instructions for details. Automatic (Software) Reset Rather than requiring a physical press of the reset button before an upload, the Arduino Nano is designed in a way that allows it to be reset by software running on a connected computer. One of the hardware flow control lines (DTR) of theFT232RL is connected to the reset line of the ATmega168 or ATmega328 via a 100 nF capacitor. When this line is asserted (taken low), the reset line drops long enough to reset the chip. The Arduino software uses this capability to allow you to upload code by simply pressing the upload button in the Arduino environment. This means that the bootloader can have a shorter timeout, as the lowering of DTR can be well-coordinated with the start of the upload.

    € 22,95

    Members € 20,66

  • Cytron 25Amp 7 - 58 V High Voltage DC Motor Driver - Elektor

    Cytron Cytron 25Amp 7-58 V High Voltage DC Motor Driver

    It is possible to control Cytron 25Amp 7-58 V High Voltage DC Motor Driver with PWM and DIR inputs. The input logic voltage ranges from 1.8 V to 30 V and the board is compatible with variety of host controllers (such as Arduino, Raspberry Pi, PLC). If you don't want to deal with programming to control the motor, there is an option to control the motor driver from a potentiometer (speed) and a switch (direction). You can also test the motor quickly and conveniently using the onboard test buttons and motor output LEDs without the need to hook up the host controller. It is possible to power the host controller with the buck regulator which produces 5 V output. This is especially useful for high voltage applications where no additional power source nor high voltage buck regulator is needed. This motor driver also incorporates various protection features. If the motor stalls or you've hooked up an oversized motor, the overcurrent protection will take care of the board and protect it from damage. If the motor is trying to draw current more than what the motor driver can support, the motor current will be limited at the maximum threshold. Assisted by temperature protection, the maximum current limiting threshold depends on the board temperature. The higher the board temperature, the lower the current limiting threshold. Note: Power input does not have reverse-voltage protection. Connecting the battery in reverse polarity will damage the motor driver instantaneously. Features Bidirectional control for one brushed DC motor Operating Voltage: DC 7 V to 58 V Maximum Motor Current: 25 A continuous, 60 A peak 5 V output for the host controller (250 mA max) Buttons for quick testing LEDs for motor output state Dual Input Mode: PWM/DIR or Potentiometer/Switch Input PWM/DIR Inputs compatible with 1.8 V, 3.3 V, 5 V, 12 V and 24 V logic (Arduino, Raspberry Pi, PLC, etc) PWM frequency up to 40 kHz (Output frequency is fixed at 16 kHz) Overcurrent protection with active current limiting Temperature protection Undervoltage shutdown Scope of delivery 1 × MD25HV (motor driver board) 1 × Potentiometer with connector 1 × Rocker switch with connector 4 × Nylon PCB Standoffs/Spacers Documents Datasheet Sample Code

    € 62,95

    Members € 56,66

  • Pixy2 CMUcam5 - Smart Vision Sensor - Elektor

    Charmed Labs Pixy2 CMUcam5 – Smart Vision Sensor

    Pixy2 can be taught to detect objects by the press of a button. It is equipped with a new line detection algorithm to use on line-following robots. It can learn to recognize intersection and follow road signs. Pixy2 comes with various cables so that you can connect it with an Arduino or a Raspberry Pi out of the box. Furthermore, the I/O port offers several interfaces (SOI, I²C, UART, USB) to plug your Pixy2 in most boards. Downloads Documentation Projects Software

    € 94,95

    Members € 85,46

  •  -36% Whadda WSPXL103 Poly Reindeer XL Soldering & Programming Kit (incl. Arduino Nano Every) - Elektor

    Velleman Whadda WSPXL103 Poly Reindeer XL Soldering & Programming Kit (incl. Arduino Nano Every)

    Looking for a fun DIY Christmas project? Assemble and program this extra-large Poly Reindeer figurine and make its LEDs shine all the colors of the rainbow! Ideal for both beginners and advanced makers! This educational and fun kit combines soldering and programming skills in one XL-sized project. First, you will need to solder some simple components onto the copper plated circuit board. The components include fancy RGB LEDs that have a special diffused effect. Once the soldering work is finished, you will be able to program the colors and light effects of the different LEDs thanks to the onboard Arduino Nano Every. The Arduino will be pre-programmed with some basic LED effects, so your kit will work once you power it with the included adaptor. Or you can choose to write your own code based on the available example code. Programmable add-ons The printed circuit board of this project is designed especially so you can add different add-ons. For example, add an OLED screen to display messages or program it to countdown the days until Christmas! Or add an IoT Tuya chip so your project can communicate with your smartphone. You can even add a sound microphone, motion sensor or light sensor. Features XL-sized & copper plated circuit board (PCB) in the shape of a polymetric reindeer 22 addressable (programmable) RGB LEDs 14 x 5 mm RGB LEDs 10 x 8 mm RGB LEDs Arduino Nano Every Onboard push button USB A to USB micro cable for programming USB A to USB B cable for power supply Wooden holder Complete manual and video available in 5 languages Example code for Arduino available Educational & fun for all ages and skill levels Expandable with lots of add-ons: an OLED screen a smart IoT sensor to connect with your smartphone a microphone sensor and more! Not included: soldering iron, soldering tin, pliers and an soldering mat Specifications Dimensions: 168 x 270 mm Power supply: 5 V/2.1 A max. (cable included)

    € 54,95€ 34,95

    Members identical

  •  -31% Arduino - controlled Drawing Robot - Elektor

    Generic Arduino-controlled Drawing Robot

    This versatile plotter robot arm DIY kit for Arduino is equipped with MG90S metal gear servo motors to ensure precise and stable drawing movements. Features Fully compatible with Arduino IDE, includes complete source code for easy development and customization. Equipped with robust MG90S metal gear servo motors for accuracy and durability. Includes a Bluetooth module enabling wireless operation via a dedicated app. Specially designed robotic arm tip securely holds pens or markers with a diameter of 8-10 mm, ideal for sketches and detailed drawings. Included Arduino-compatible Nano motherboard Nano expansion board Bluetooth module MG90S all-metal gear servo motors Aluminum structural frame Thickened stable base plate Screw and fastening accessories Connecting wires USB data cable

    € 64,95€ 44,95

    Members identical

  •  -25% Arduino Nano ESP32 - Elektor

    Arduino Arduino Nano ESP32

    The Arduino Nano ESP32 (with and without headers) is a Nano form factor board based on the ESP32-S3 (embedded in the NORA-W106-10B from u-blox). This is the first Arduino board to be based fully on an ESP32, and features Wi-Fi, Bluetooth LE, debugging via native USB in the Arduino IDE as well as low power. The Nano ESP32 is compatible with the Arduino IoT Cloud, and has support for MicroPython. It is an ideal board for getting started with IoT development. Features Tiny footprint: Designed with the well-known Nano form factor in mind, this board's compact size makes it perfect for embedding in standalone projects. Wi-Fi and Bluetooth: Harness the power of the ESP32-S3 microcontroller, well-known in the IoT realm, with full Arduino support for wireless and Bluetooth connectivity. Arduino and MicroPython support: Seamlessly switch between Arduino and MicroPython programming with a few simple steps. Arduino IoT Cloud compatible: Quickly and easily create IoT projects with just a few lines of code. The setup takes care of security, allowing you to monitor and control your project from anywhere using the Arduino IoT Cloud app. HID support: Simulate human interface devices, such as keyboards or mice, over USB, opening up new possibilities for interacting with your computer. Specifications Microcontroller u-blox NORA-W106 (ESP32-S3) USB connector USB-C Pins Built-in LED pins 13 Built-in RGB LED pins 14-16 Digital I/O pins 14 Analog input pins 8 PWM pins 5 External interrupts All digital pins Connectivity Wi-Fi u-blox NORA-W106 (ESP32-S3) Bluetooth u-blox NORA-W106 (ESP32-S3) Communication UART 2x I²C 1x, A4 (SDA), A5 (SCL) SPI D11 (COPI), D12 (CIPO), D13 (SCK). Use any GPIO for Chip Select (CS) Power I/O Voltage 3.3 V Input voltage (nominal) 6-21 V Source Current per I/O pin 40 mA Sink Current per I/O pin 28 mA Clock speed Processor Up to 240 MHz Memory ROM 384 kB SRAM 512 kB External Flash 128 Mbit (16 MB) Dimensions 18 x 45 mm Downloads Datasheet Schematics

    € 23,95€ 17,95

    Members identical

  • Arduino Uno Experimenting Kit - Elektor

    Makerfabs Arduino Uno Experimenting Kit

    With this kit you can built all the projects described in the book 'Mastering the Arduino Uno R4'. The kit comes with several LEDs, sensors, actuators, and other components. The purpose of the kit is to make a flying start with hardware and software aspects of projects designed around the Arduino Uno microcontroller system. Included 1x RFID reader module 1x DS1302 clock module 1x 5 V stepper motor 1x '2003' stepper motor drive board 5x Green LED 5x Yellow LED 5x Red LED 2x Rocker switch 1x Flame sensor 1x LM35 sensor module 1x Infrared receiver 3x Light-dependent resistors (LDRs) 1x IR remote controller 1x Breadboard 4x Pushbutton (with four caps) 1x Buzzer 1x Piezo sounder 1x Adjustable resistor (potentiometer) 1x 74HC595 shift register 1x 7-segment display 1x 4-digit 7-segment display 1x 8x8 Dot-matrix display 1x 1602 / I²C LCD module 1x DHT11 Temperature and humidity module 1x Relay module 1x Sound module Set of Dupont cables Set of Breadboard cables 1x Water sensor 1x PS2 Joystick 5x 1 k-ohm resistor 5x 10 k-ohm resistor 5x 220-ohm resistor 1x 4x4 keypad module 1x 9g Servo (25 cm) 1x RFID card 1x RGB module 1x 9 V battery DC jack Not included Mastering the Arduino Uno R4 (Book) Arduino Uno R3/R4 (Board)

    € 39,95

    Members € 35,96

  • Seeed Studio CANBed - Arduino CAN - BUS Development Kit (ATmega32U4 with MCP2515 and MCP2551) - Elektor

    Seeed Studio Seeed Studio CANBed - Arduino CAN-BUS Development Kit (ATmega32U4 with MCP2515 and MCP2551)

    Features ATmega32U4 with Arduino Leonardo bootloader on the board MCP2515 CAN Bus controller and MCP2551 CAN Bus transceiver OBD-II and CAN standard pinout selectable at the sub-D connector Compatible with Arduino IDE Parameter Value MCU ATmega32U4(with Arduino Leonardo bootloader) Clock Speed 16 MHz Flash Memory 32 KB SRAM 2.5 KB EEPROM 1 KB Operate Voltage(CAN-BUS) 9 V - 28 V Operate Voltage (MicroUSB) 5 V Input Interface sub-D Included CANBed PCBA sub-D connector 4PIN Terminal 2 x 4PIN 2.0 Connector 1 x 9x2 2.54 Header 1 x 3x2 2.54 Header

    € 32,95

    Members € 29,66

  • IIC/I²C Serial Interface Adapter Module - Elektor

    Kuongshun IIC/I²C Serial Interface Adapter Module

    This is another great IIC/I²C/TWI/SPI Serial Interface. As the pin resources of controller is limited, your project may be not able to use normal LCD shield after connected with a certain quantity of sensors or SD card. However, with this I²C interface module, you will be able to realize data display via only 2 wires. If you already has I²C devices in your project, this LCD module actually cost no more resources at all. It is fantastic for based project. I²C Address: 0X20~0X27 (the original address is 0X20,you can change it yourself) The backlight and contrast is adjusted by potentiometer Comes with 2 IIC interface, which can be connected by Dupont Line or IIC dedicated cable I²C Address: 0x27 (I²C Address: 0X20~0X27 (the original address is 0X27,you can change it yourself) Specifications Compatible for 1602 LCD Supply voltage: 5 V Weight: 5 g Size: 5.5 x 2.3 x 1.4 cm

    € 4,95

    Members € 4,46

  • ESP - 01 Adapter Module 3.3 - 5 V (Arduino compatible) - Elektor

    Kuongshun ESP-01 Adapter 3.3-5 V for Arduino

    The ESP-01 Adapter 3.3-5 V is the ideal solution for connecting an ESP-01 ESP8266 module to a 5 V system such as Arduino Uno. Features Adapter module for ESP-01 Wi-Fi module 3.3 V voltage regulator circuit & onboard level conversion for easy use of 5 V microcontroller with ESP-01 Wi-Fi module Compatible with Uno R3 4.5~5.5 V (on-board 3.3 V LDO Regulator) Interface logic voltage: 3.3-5 V compatible (on-board level shift) Current: 0-240 mA

    € 5,95

    Members € 5,36

  • miniSD Card Module - Elektor

    Kuongshun miniSD Card Module

    miniSD Card Module

    € 3,95

    Members € 3,56

  •  -20% Keyestudio Solar Tracking DIY Kit for Arduino - Elektor

    Keyestudio Keyestudio Solar Tracking DIY Kit for Arduino

    The solar tracking kit is based on Arduino. It consists of 4 ambient light sensors, 2 DOF servos, a solar panel and so on, aiming at converting light energy into electronic energy and charging power devices. It also boasts a charging module, a temperature and humidity sensor, a BH1750 light sensor, a buzzer, an LCD1602 display, a push button module, an LED module and others, highly enriching the tutorial and making projects more interesting. This kit can not only help kids have a better learning about programming but obtain knowledge about electronics, machinery, controlling logic and computer science. Features Multiple functions: Track light automatically, read temperature, humidity and light intensity, button control, LCD1602 display and charge by solar energy. Easy to build: Insert into Lego jack to install and no need to fix with screws and nuts or solder circuit; also easy to dismantle. Novel style: Adopt acrylic boards and copper pillars; sensors or modules connected to acrylic boards via Lego jacks; LCD1602 modules and solar panels add technologies to it. High extension: Preserve I²C, UART, SPI ports and Lego jacks, and extend other sensors and modules. Basic programming: Program in C language with Arduino IDE. Specifications Working voltage 5 V Input voltage 3.7 V Max. output current 1.5 A Max. power dissipation 7.5 W Downloads Wiki

    € 74,95€ 59,95

    Members identical

  • Cytron Maker Uno - Elektor

    Cytron Cytron Maker Uno

    Features Piezo Buzzer: Acts as a simple audio output Micro USB Port Programmable Button 12 x LED: Provides visual output on board Specifications Microcontroller ATmega328P Programming IDE Arduino IDE Operating Voltage 5 V Digital I/O 20 PWM 6 Analog Input 6 (10-bit) UART 1 SPI 1 I2C 1 External Interrupt 2 Flash Memory 32 KB SRAM 2 KB EEPROM / Data Flash 1 KB Clock Speed 16 MHz DC Current I/O Pin 20 mA Power Supply USB only DC Current for 5 V USB Source DC Current for 3.3 V 500 mA USB to Serial Chip CH340G Programmable LED 12 at digital Pin 2 to 13 Programmable Push Button 1 at digital Pin 2 Piezo Buzzer 1 at digital Pin 8 Arduino vs Maker Uno

    € 14,95

    Members € 13,46

  •  -25% Arduino Student Kit - Elektor

    Arduino Arduino Student Kit

    The Arduino Student Kit is a hands-on, step-by-step remote learning tool for ages 11+: get started with the basics of electronics, programming, and coding at home. No prior knowledge or experience is necessary as the kit guides you through step by step. Educators can teach their class remotely using the kits, and parents can use the kit as a homeschool tool for their child to learn at their own pace. Everyone will gain confidence in programming and electronics with guided lessons and open experimentation. Learn the basics of programming, coding and electronics including current, voltage, and digital logic. No prior knowledge or experience is necessary as the kit guides you through step by step. You’ll get all the hardware and software you need for one person, making it ideal to use for remote teaching, homeschooling, and for self-learning. There are step-by-step lessons, exercises, and for a complete and in-depth experience, there’s also extra content including invention spotlights, concepts, and interesting facts about electronics, technology, and programming. Lessons and projects can be paced according to individual abilities, allowing them to learn from home at their own level. The kit can also be integrated into different subjects such as physics, chemistry, and even history. In fact, there’s enough content for an entire semester. How educators can use the kit for remote teaching The online platform contains all the content you need to teach remotely: exclusive learning guidance content, tips for remote learning, nine 90-minute lessons, and two open-ended projects. Each lesson builds off the previous one, providing a further opportunity to apply the skills and concepts students have already learned. They also get a logbook to complete as they work through the lessons. The beginning of each lesson provides an overview, estimated completion times, and learning objectives. Throughout each lesson, there are tips and information that will help to make the learning experience easier. Key answers and extension ideas are also provided. How the kit helps parents homeschool their children This is your hands-on, step-by-step remote learning tool that will help your child learn the basics of programming, coding, and electronics at home. As a parent, you don’t need any prior knowledge or experience as you are guided through step-by-step. The kit is linked directly into the curriculum so you can be confident that your children are learning what they should be, and it provides the opportunity for them to become confident in programming and electronics. You’ll also be helping them learn vital skills such as critical thinking and problem-solving. Self-learning with the Arduino Student Kit Students can use this kit to teach themselves the basics of electronics, programming, and coding. As all the lessons follow step-by-step instructions, it’s easy for them to work their way through and learn on their own. They can work at their own pace, have fun with all the real-world projects, and increase their confidence as they go. They don’t need any previous knowledge as everything is clearly explained, coding is pre-written, and there’s a vocabulary of concepts to refer to. The Arduino Student Kit comes with several parts and components that will be used to build circuits while completing the lessons and projects throughout the course. Included in the kit Access code to exclusive online content including learning guidance notes, step-by-step lessons and extra materials such as resources, invention spotlights and a digital logbook with solutions. 1x Arduino Uno 1x USB cable 1x Board mounting base 1x Multimeter 1x 9 V battery snap 1x 9 V battery 20x LEDs (5x red, 5x green, 5x yellow & 5x blue ) 5x Resistors 560 Ω 5x Resistors 220 Ω 1x Breadboard 400 points 1x Resistor 1 kΩ 1x Resistor 10 kΩ 1x Small Servo motor 2x Potentiometers 10 kΩ 2x Knob potentiometers 2x Capacitors 100 uF Solid core jumper wires 5x Pushbuttons 1x Phototransistor 2x Resistors 4.7 kΩ 1x Jumper wire black 1x Jumper wire red 1x Temperature sensor 1x Piezo 1x Jumper wire female to male red 1x Jumper wire female to male black 3x Nuts and Bolts

    € 79,95€ 59,95

    Members identical

  • Arduino 8 - bit Sound Generation (E - book) - Elektor

    Elektor Digital Arduino 8-bit Sound Generation (E-book)

    Arduinonext is an initiative powered by an electronics and microcontrollers specialist team aiming to help all those who are entering in the technology world, using the well-known Arduino platform to take the next step in electronics. We strive to bring you the necessary knowledge and experience for developing your own electronics applications; interacting with environment; measuring physical parameters; processing them and performing the necessary control actions. This is the first title in the 'Hands-On' series in which Arduino platform co-founder, David Cuartielles, introduces board programming, and demonstrates the making of an 8-bit Sound Generator.

    € 7,95

    Members € 6,36

  • Arduino Nano Every with Headers - Elektor

    Arduino Arduino Nano Every with Headers

    The Arduino Nano Every is an evolution of the traditional Arduino Nano board but features a lot more powerful processor, the ATMega4809. This will allow you to make larger programs than with the Arduino Uno (it has 50% more program memory), and with a lot more variables (the RAM is 200% bigger). An Improved Arduino Nano If you used Arduino Nano in your projects in the past, the Nano Every is a pin-equivalent substitute. The main differences are a better processor and a micro-USB connector. The board comes in two options: with or without headers, allowing you to embed the Nano Every inside any kind of invention, including wearables. The board comes with tessellated connectors and no components on the B-side. These features allow you to solder the board directly onto your own design, minimizing the height of your whole prototype. Oh, and did we mention the improved price? Thanks to a revised manufacturing process, the Arduino Nano Every costs a fraction of the original Nano … what are you waiting for? Upgrade now! Microcontroller ATMega4809 Operating Voltage 5 V Input Voltage 7 V - 21 V Analog Input Pins 8 Analog Output Pins Only through PWM External Interrupts all digital pins DC Current per I/O Pin 20 mA DC Current for 3.3 V Pin 50 mA Flash Memory 48 KB SRAM 6 KB EEPROM 256 Byte Clock Speed 20 MHz LED_Builtin 13 UART 1 SPI 1 I2C 1 PWM Pins 5 USB Uses the ATSAMD11D14A Length 45 mm Width 18 mm Weight 5 g

    € 19,95

    Members € 17,96

  • SparkFun RedBoard Artemis - Elektor

    SparkFun SparkFun RedBoard Artemis

    The RedBoard Artemis has the improved power conditioning and USB to serial that we've refined over the years on our RedBoard line of products. A modern USB-C connector makes programming easy. A Qwiic connector makes I²C easy. The RedBoard Artemis is fully compatible with SparkFun's Arduino core and can be programmed easily under the Arduino IDE. We've exposed the JTAG connector for more advanced users who prefer to use professional tools' power and speed. We've added a digital MEMS microphone for folks wanting to experiment with always-on voice commands with TensorFlow and machine learning. We've even added a convenient jumper to measure current consumption for low power testing. With 1MB flash and 384k RAM, you'll have plenty of room for your sketches. The on-board Artemis module runs at 48MHz with a 96MHz turbo mode available and with Bluetooth to boot! Features Arduino Uno R3 Footprint 1M Flash / 384k RAM 48MHz / 96MHz turbo available 24 GPIO - all interrupt capable 21 PWM channels Built-in BLE radio 10 ADC channels with 14-bit precision 2 UARTs 6 I²C buses 4 SPI buses PDM Interface I²S Interface Qwiic Connector

    € 21,95

    Members € 19,76

  • Last Stock! Arduino Uno Rev3 SMD - Elektor

    Arduino Arduino Uno Rev3 SMD

    2 in stock

    The Uno differs from all preceding boards in that it does not use the FTDI USB-to-serial driver chip. Additional features coming with the R3 version are: ATmega16U2 instead of 8U2 as a USB-to-Serial converter. 1.0 pinout: added SDA and SCL pins for TWI communication placed near to the AREF pin and two other new pins placed near to the RESET pin, the IOREF that allow the shields to adapt to the voltage provided from the board and the second one is a not connected pin, that is reserved for future purposes. stronger RESET circuit. Microcontroller ATmega328P Operating Voltage 5 V Input Voltage 7 V - 12 V Digital I/O Pins 14 PWM Pins 6 Analog Input Pins 8 DC Current per I/O Pin 20 mA DC Current for 3.3 V Pin 50 mA Flash Memory 32 KB (ATmega328P) of which 0.5 KB used by bootloader SRAM 2 KB EEPROM 1 KB Clock Speed 16 MHz LED_Builtin 13 Length 68.6 mm Width 53.4 mm Weight 25 g

    2 in stock

    € 22,95

    Members identical

  •  -25% JOY - iT 64x64 RGB - LED Matrix Module - Elektor

    JOY-iT JOY-iT 64x64 RGB-LED Matrix Module

    The RGB matrix module is equipped with 4096 LEDs and is characterized by a particularly small grid size of only 3mm. This makes it ideal for pictorial representations. Video sequences can also be displayed. The module is supplied with the necessary cables. It is perfectly suited in combinations with single board computers like the Raspberry Pi, Arduino, BBC Microbit and many more. Specifications Display RGB-LED Resolution 64 x 64 Amount of LED 4096 LEDs LED Size 3 mm Pitch Supply Voltage 5 V Max. Power Input 40 W Control 1/32 Scan Operating Temperature -20~55°C Viewing Angle 140° Pixel Density 111111 Pixel/m² Dimensions 192 x 192 x 14 mm Weight 246 g Items Shipped LED-Matrix, Kabel Downloads Datasheet Manual

    € 59,95€ 44,95

    Members identical

  •  -25% Pixy2 CMUcam Pan/Tilt Kit - Elektor

    Charmed Labs Pixy2 CMUcam Pan/Tilt Kit

    This is a kit for a pan-tilt mechanism explicitly designed for Pixy2. After assembling the kit and connecting it to Pixy2, you'll be able to follow colored objects using the Pan/Tilt demo. It includes two laser-cut plastic pieces for the base, two different servos for the pan and tilt axes, and all the mounting hardware and cable ties you will need to assemble. Features The pan-tilt mechanism for Pixy2 is redesigned, making it smaller and faster than the pan-tilt for the original Pixy. All necessary hardware is included. The pan-tilt base is attached directly to an Arduino with Arduino-compatible hole-pattern and includes stand-offs and fasteners. Several pan-tilt demos are provided that can run using either Arduino, Raspberry Pi or stand-alone (no controller). Downloads Manual

    € 39,95€ 29,95

    Members identical

  • Seeed Studio Grove LCD RGB Backlight (16x2 full - color Display for Arduino) - Elektor

    Seeed Studio Seeed Studio Grove LCD RGB Backlight (16x2 full-color Display for Arduino)

    With the help of the Grove I²C connector, only 2 signal pins and 2 power pins are needed. You don't even need to care about how to connect these pins. Just plug it into the I²C interface on Seeeduino or Arduino/Raspberry Pi+baseshield via the Grove cable. No complicated wiring, no soldering, no need to worry about burning the LCD caused by the wrong current limiting resistor. Easy peasy. Specifications Battery: Exclude Input Voltage: 5 V Dimensions: 83 x 44 x 13 mm Weight: 42 g

    € 17,95

    Members € 16,16

Buy an Arduino

What is Arduino? Why do you need an Arduino board? What are the benefits?

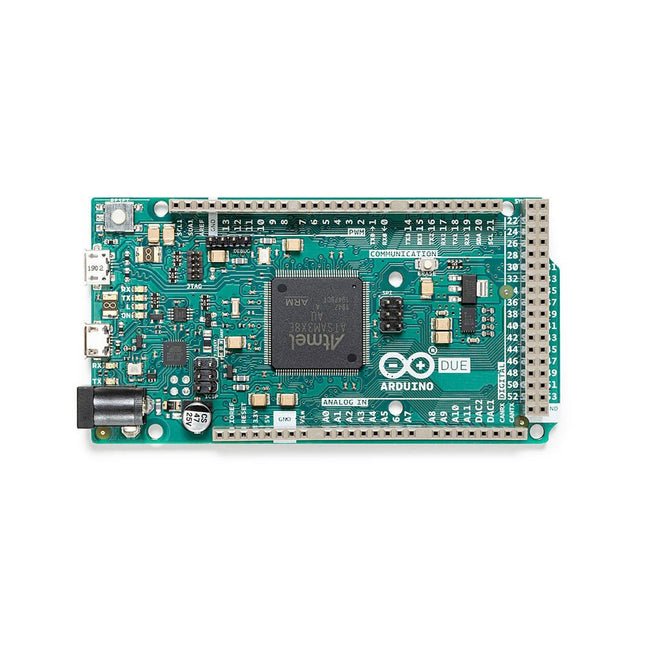
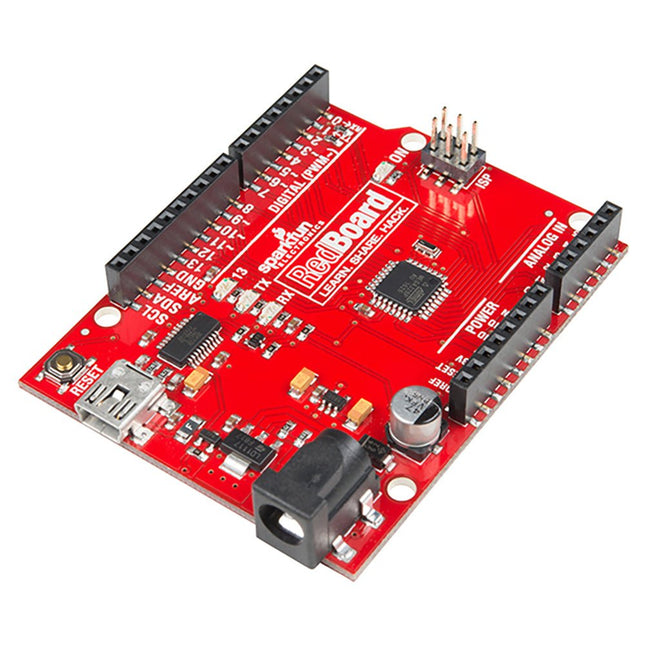
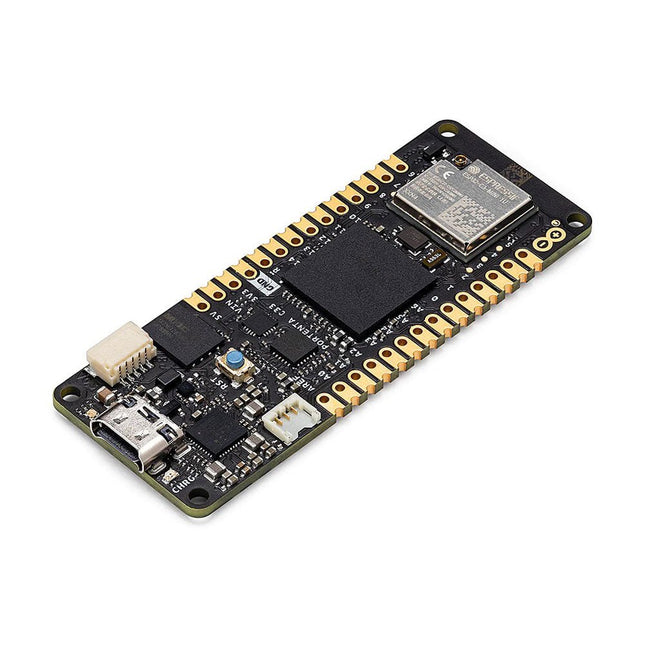
Arduino boards are equipped with a microcontroller, which is easy to program. The pins of this microcontroller (for example, digital inputs and outputs, and analog inputs) are connected to headers, to which you can connect other electronics without soldering. Connect buttons, potentiometers, LEDs, sensors, motors, displays and many other components and modules to quickly and easily create a prototype of the project you have in mind!

The software for the microcontroller can be developed with a program on your PC, the so-called IDE (integrated development environment). Even for beginners, the IDE is easy to understand, and so are the commands you can use to control your inputs and outputs. For many sensors and other accessories, there are powerful software libraries and samples you can use. Just connect your Arduino board to the PC via USB, write your commands, compile and send your software to the board with one click of the mouse, and see what happens. In short, it has never been easier to create a microcontroller project that includes hardware and software!

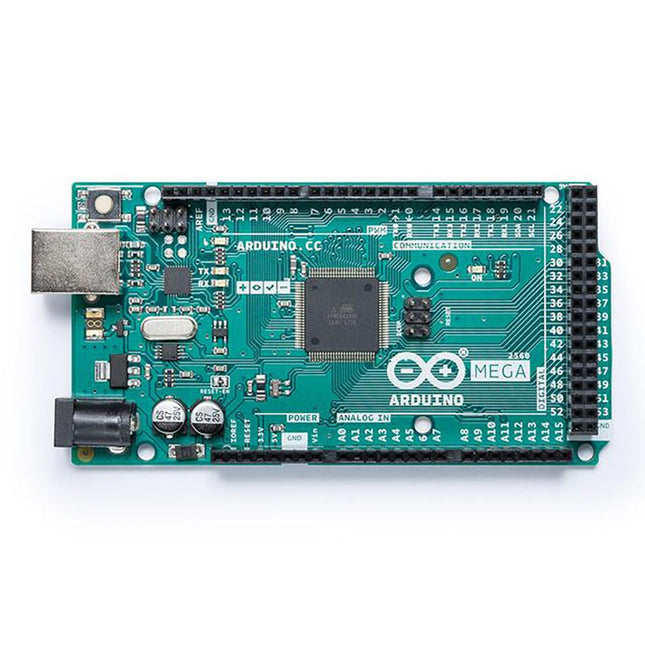
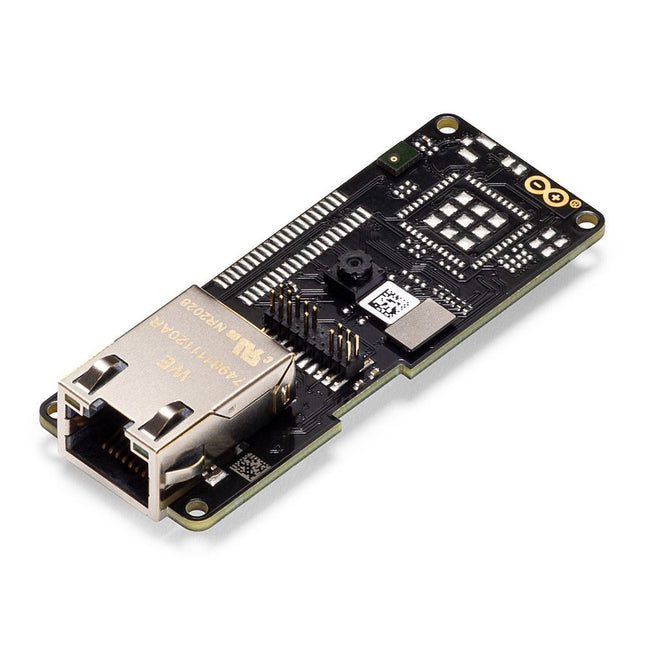
The first Arduino boards were developed around 2005 by a group of programming enthusiasts who needed cheap and simple boards for educational purposes. Because programming it was so easy, Arduino became very popular among artists and makers. In the years that followed, more and more boards were developed, some with fairly cheap 8-bit microcontrollers, others with more powerful models, and with different functions on the board such as WiFi or an Ethernet interface. In addition, a very large number of add-on boards, called shields, were developed to expand the functionality.

Arduino boards and the Arduino IDE are often used by Elektor Lab and external authors of Elektor articles and books, for a microcontroller project, or for educational purposes.

What do we offer (our range)?

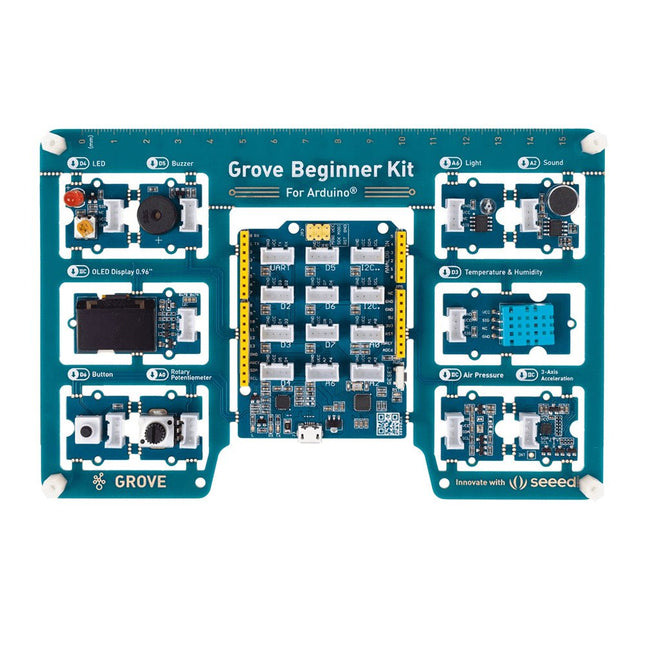
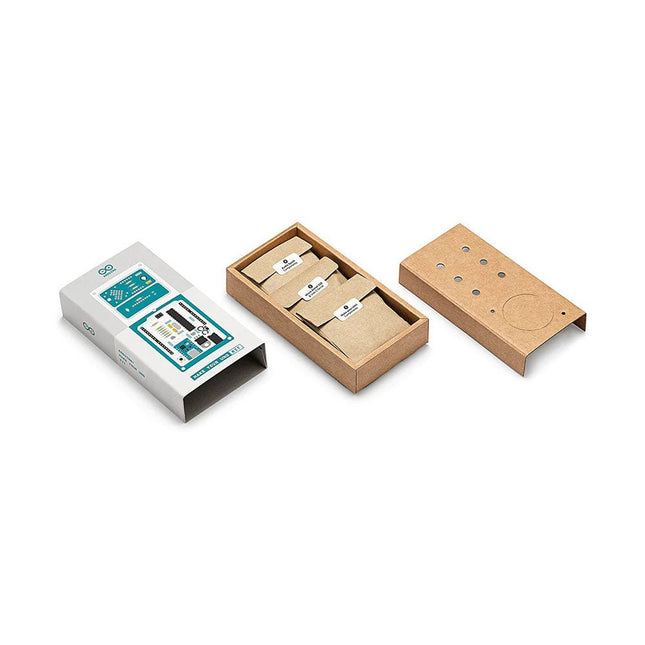
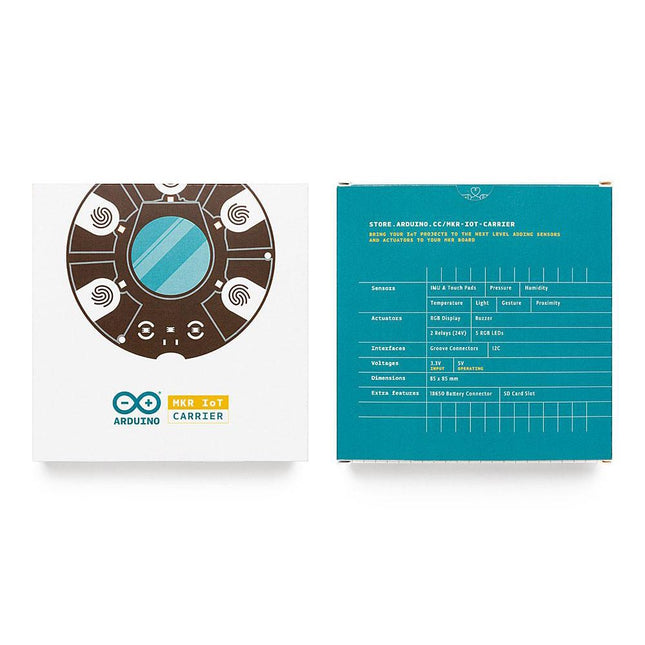
In addition to many of the currently available Arduino boards Elektor offers official Arduino accessories and a selection of special and tested products from third parties, such as shields (add-on boards) and accessories. We also sell kits and bundles, for example Arduino boards in combination with a book.

Buying an Arduino board: what can you do with it?

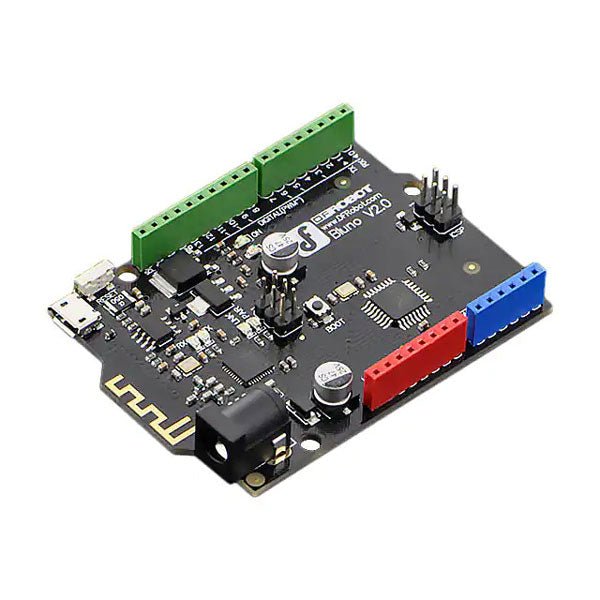
What makes Arduino boards so special? These boards are cheap, compact and energy-saving, there are even robust variants for industrial purposes. The boards are very versatile, and there are a huge amount of shields (add-on boards) and modules to expand the functions. All connections can be made without soldering. Programming the Arduino program (called sketch) is very simple, there are many libraries and examples and quite good documentation. Projects such as weather stations, CO2 sensors, simple robots, audio players and much more are easy to implement.

Which accessories are available? What are they used for? What can you do with it?

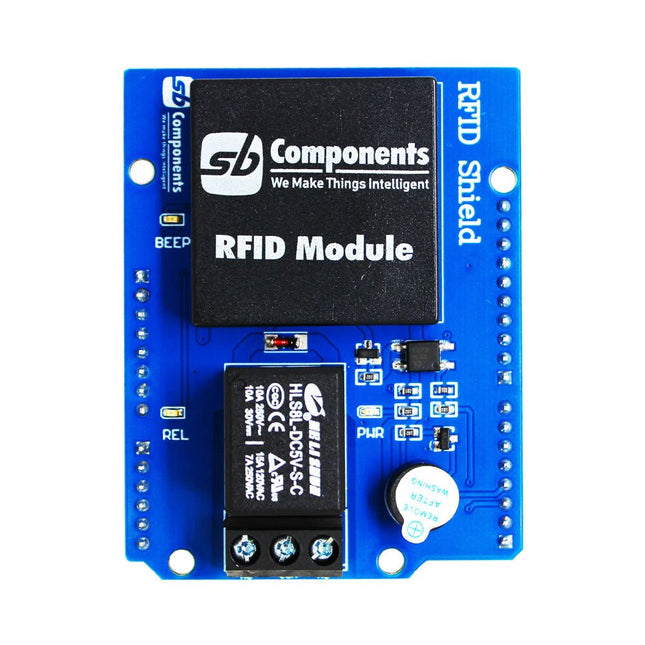
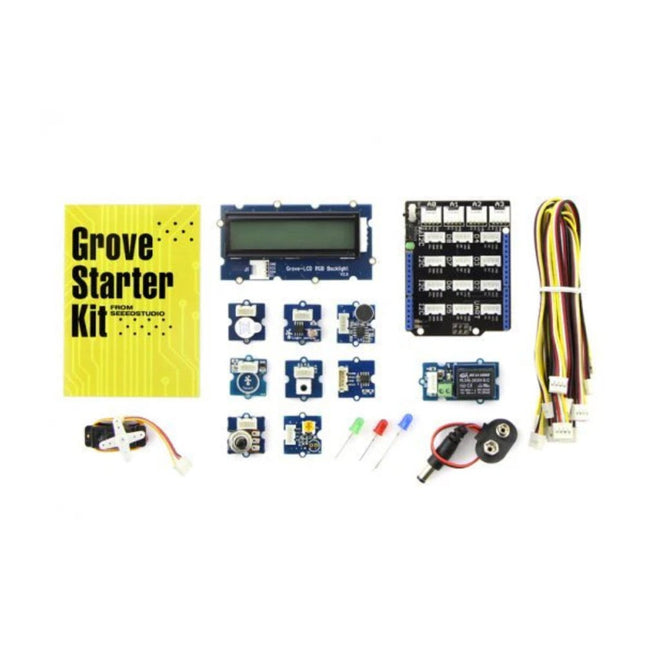
Buying an Arduino board is just the first step. There are many shields (add-on boards, for example for motor control and lighting) and expansion modules (for example sensors) to expand the functions. Displays, power supplies, housings, cables, ... a wide variety of user-friendly accessories are available. In addition, there are many books about Arduino.

Why should you buy an Arduino from Elektor?

Elektor is an authorized distributor of Arduino. We purchase Arduino directly from the manufacturer in Italy and not through distribution channels.

More information about Arduino

Login

Forgot password?

Don't have an account yet?
Create account