Products
-
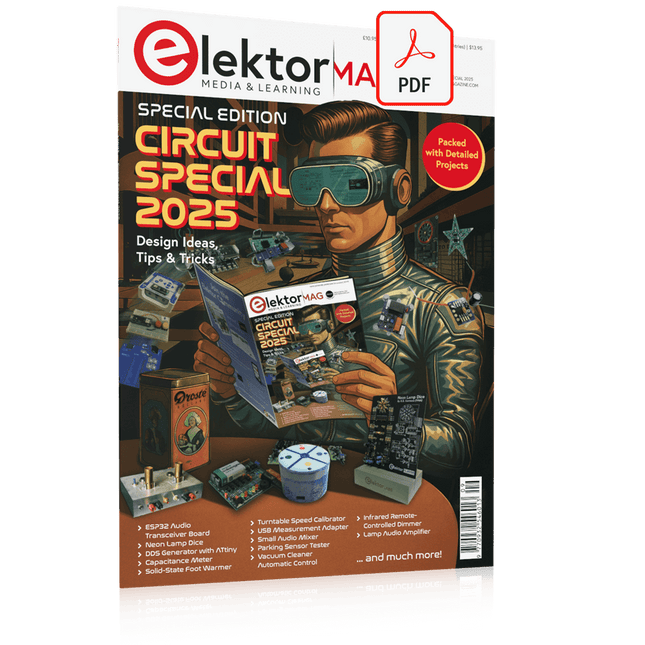
Elektor Digital Elektor Circuit Special 2025 (PDF) EN
Elektor GREEN and GOLD members can download their digital edition here. Not a member yet? Click here. USB Measurement AdapterTesting Current and Signal Quality of USB Ports 4...20 mA Current Output for Arduino UnoA Reliable, EMI-Insensitive Current Loop Interface Vacuum Cleaner Automatic ControlKeep Your Tools’ Work Area Clean DDS Generator with ATtiny Opamp-Tester V2New PCB – Now Also Suitable for SMDs 550-mW “Lamp” Audio AmplifierGet the Warm Sound of Vacuum Tubes With Ease Fuse GuardMonitoring a Fuse with a Flashing LED HQ RIAA PreamplifierGet the Most Out of Your Vinyl Records! Turntable Speed CalibratorAn Arduino-Based 100–120 Hz Strobe Light Generator Elektor Classics: video buffer/repeater Infrared Remote-Controlled DimmerControl Your Halogen or LED Floor Lamp Effortlessly and With Style How to Use switch…case on Strings in C++/Arduino IDE Magnet FinderWith a Simple Hall-Effect Sensor Raspberry Pi Smart Power ButtonA Solution for Raspberry Pi Up to Model 4 Essential Maker TipsProfessional Insights for Everyday Making Practical Projects with the 555 TimerDC Motor Control and Fast Reaction Challenges Basic AC-Load-On MonitorSave Energy with a Simple Device Power Banks in ParallelA Three-Day Continuous Power Solution VFO Up to 15 MHzAn Implementation With Raspberry Pi Pico Violin Tuner with ATtiny202 Elektor Classics: video amplifier for B/W television sets Capacitance Meter20 pF to 600 nF Quasi-Analog Clockwork Mk IITwo LED Rings for Hours and Minutes You Can Do Anything You Want(with the Arduino Ecosystem at Your Side) Neon Lamp Dice Elektor Classics: RTTY calibrator indicator Inspiring Hardware Designs for Your ESPs Elektor Classics: variable 3 A power supply RGB LEDs with Integrated Control CircuitLight with Precision: ICLEDs Set Standards Experiment: Towards a Mixed-Signal Theremin?Blending Modern Time-of-Flight Sensors With the Timeless XR2206 Analog Generator ESP32 Audio Transceiver Board (Part 1)SD Card WAV File Player Demo Infographics: Circuits and Circuit Design 2025 Small Audio MixerA Simple and Versatile Scalable Design Smart Staircase Light TimerSave More Money on the Energy Bill! Smarten Up Your ShuttersControlling Velux Hardware With an ESP32 and MQTT Solid-State Foot WarmerEnergy-Efficient Comfort Is the M5Stamp Fly Quadcopter the Next Tello? Boosting Wi-Fi Range of the ESP32-C3 SuperMiniA Simple and Effective Antenna Mod ZD-8968 Hot-Air Soldering StationA Budget-Friendly Workhorse or Just Hot Air? Parking Sensor TesterFinding Defects in the PDC System of a Car
€ 9,50
-

Elektor Labs Elektor Dual DC LISN (150 kHz – 200 MHz)
Measuring conducted emission is the simplest and most affordable method of getting some indication of whether a design can meet EMI/EMC requirements. A Line Impedance Stabilization Network (LISN) is an indispensable part of an EMC pre-compliance test setup. In cooperation with Würth Elektronik, Elektor has developed a 5 µH, 50 Ω Dual DC LISN that supports voltages up to 60 V and currents up to 10 A. The instrument measures RF interferences on both channels (the power supply) by means of 5-μH blocking inductances. The internal 10-dB attenuation network – one in each channel – contains a 3rd-order high-pass filter with a cutoff frequency of 9 kHz to protect the input of instruments like a spectrum analyzer from potentially harmful DC voltages or low frequencies coming from the EUT (Equipment Under Test). Specifications RF path Channels 2 (with clamping diodes) Bandwidth 150 kHz – 200 MHz Inductance 5 μH || 50 Ω Internal attenuation 10 dB Connectors SMA DC path Max. current < 10 ADC Max. voltage < 60 VDC DC resistance < 2 x 70 mΩ PCB size 94.2 x 57.4 mm Connectors 4-mm banana Hammond enclosure Type 1590N Dimensions 121 x 66 x 40 mm Included 1x 4-layer PCB with all SMT parts fitted 1x pre-drilled enclosure with ready-printed front panel layout 5x gold-plated, insulated, 4-mm banana sockets, rated for 24 A, 1 kV 1x Hammond enclosure 1590N1, Aluminum (Die-Cast Alloy) More Info Project on Elektor Labs: Dual DC LISN for EMC pre-compliance testing Elektor 9-10/2021: EMC Pre-Compliance Test for Your DC-Powered Project (Part 1) Elektor 11-12/2021: EMC Pre-Compliance Test for Your DC-Powered Project (Part 2)
-

Elektor Edge Impulse Guest Edition 2025 (EN)
Elektor GREEN and GOLD members can download their digital edition here. Not a member yet? Click here. What to expect This Elektor edition guest-edited by Edge Impulse explores the edge AI workflow, from data collection and model training to deployment and optimization: End-to-End Edge AIA hands-on object detection series that walks through the complete machine learning pipeline on embedded hardware. High-Resolution, High-Speed Object Counting (Nvidia Jetson Nano, TensorRT)Pushing inference speed and precision for visual counting applications. PCB Defect Detection with Computer Vision (Raspberry Pi)Smarter manufacturing through embedded vision. Smart Building Ventilation with Sensor FusionAI-powered environmental optimization for energy efficiency. Analog Meter Reading (Arduino Nicla Vision)A TinyML approach to automating analog infrastructure. Smart Appliance Control Using Voice Commands (Nordic Thingy:53)Speech recognition at the edge. Liquid Classification with TinyML (Seeed Wio Terminal + TDS Sensor)Combining IoT sensing and embedded ML for fluid analysis. Surgery Inventory Object DetectionApplying real-time vision to healthcare logistics. Plus, the magazine includes exclusive interviews with: Edge Impulse co-founders Zach Shelby and Jan Jongboom; Qualcomm Technologies VP of product management Manny Singh; and EDGE AI FOUNDATION CEO Pete Bernard. Also included are a Tech the Future essay titled "AI at the Edge: Powering the Next Generation of Devices," an Industry Case Study on GlobalSense, and more. Contents What the Heck Is Edge AI Anyway?Bringing Intelligence to the Device Meet Edge Impulse StudioEasily Build and Deploy Edge AI Models Keyword Spotting with Edge ImpulseCollect, Train, and Deploy Smart Appliance Control Using Voice Commands with the Nordic Thingy:53 Key Terms for Understanding Edge AI and Machine Learning Crash Course: Getting Started with Edge ImpulseLearn to Collect, Train, and Deploy an ML Model with the Arduino Nano 33 BLE Sense A New Chapter for ArduinoFrom Hobby Board to Edge Computing Powerhouse Getting Started with Object Detection on Edge Devices PCB Defect DetectionComputer Vision with Raspberry Pi Scaling AI to the Smallest Devices Optimizing Power Efficiency in Battery-Driven Edge AI Devices AI ToasterWhen Edge AI Meets Breakfast Thundercomm Rubik Pi 3Raspberry Pi Familiarity Meets Edge AI Leadership, Embedded ML, and the Edge Revolution Vision Language Models for the EdgeCascading Models for Better Reliability Get to Know Edge ImpulseQuestions from the Elektor Community Project Update #5: ESP32-Based Energy MeterUsing Edge AI to Recognize Household Loads Motion Recognition with Anomaly DetectionAn End-to-End Tutorial Smart Ventilation System: Fusing Sound and Environmental DataA Dual-MCU Machine Learning Approach for Automated Window and Louver Control Bringing Voice Control to Earbuds and Headsets AI at the Edge: Powering the Next Generation of Devices
€ 14,90
-

Elektor Digital Elektor Edge Impulse Guest Edition 2025 (PDF) EN
Elektor GREEN and GOLD members can download their digital edition here. Not a member yet? Click here. What to expect This Elektor edition guest-edited by Edge Impulse explores the edge AI workflow, from data collection and model training to deployment and optimization: End-to-End Edge AIA hands-on object detection series that walks through the complete machine learning pipeline on embedded hardware. High-Resolution, High-Speed Object Counting (Nvidia Jetson Nano, TensorRT)Pushing inference speed and precision for visual counting applications. PCB Defect Detection with Computer Vision (Raspberry Pi)Smarter manufacturing through embedded vision. Smart Building Ventilation with Sensor FusionAI-powered environmental optimization for energy efficiency. Analog Meter Reading (Arduino Nicla Vision)A TinyML approach to automating analog infrastructure. Smart Appliance Control Using Voice Commands (Nordic Thingy:53)Speech recognition at the edge. Liquid Classification with TinyML (Seeed Wio Terminal + TDS Sensor)Combining IoT sensing and embedded ML for fluid analysis. Surgery Inventory Object DetectionApplying real-time vision to healthcare logistics. Plus, the magazine includes exclusive interviews with: Edge Impulse co-founders Zach Shelby and Jan Jongboom; Qualcomm Technologies VP of product management Manny Singh; and EDGE AI FOUNDATION CEO Pete Bernard. Also included are a Tech the Future essay titled "AI at the Edge: Powering the Next Generation of Devices," an Industry Case Study on GlobalSense, and more. Contents What the Heck Is Edge AI Anyway?Bringing Intelligence to the Device Meet Edge Impulse StudioEasily Build and Deploy Edge AI Models Keyword Spotting with Edge ImpulseCollect, Train, and Deploy Smart Appliance Control Using Voice Commands with the Nordic Thingy:53 Key Terms for Understanding Edge AI and Machine Learning Crash Course: Getting Started with Edge ImpulseLearn to Collect, Train, and Deploy an ML Model with the Arduino Nano 33 BLE Sense A New Chapter for ArduinoFrom Hobby Board to Edge Computing Powerhouse Getting Started with Object Detection on Edge Devices PCB Defect DetectionComputer Vision with Raspberry Pi Scaling AI to the Smallest Devices Optimizing Power Efficiency in Battery-Driven Edge AI Devices AI ToasterWhen Edge AI Meets Breakfast Thundercomm Rubik Pi 3Raspberry Pi Familiarity Meets Edge AI Leadership, Embedded ML, and the Edge Revolution Vision Language Models for the EdgeCascading Models for Better Reliability Get to Know Edge ImpulseQuestions from the Elektor Community Project Update #5: ESP32-Based Energy MeterUsing Edge AI to Recognize Household Loads Motion Recognition with Anomaly DetectionAn End-to-End Tutorial Smart Ventilation System: Fusing Sound and Environmental DataA Dual-MCU Machine Learning Approach for Automated Window and Louver Control Bringing Voice Control to Earbuds and Headsets AI at the Edge: Powering the Next Generation of Devices
€ 9,50
-
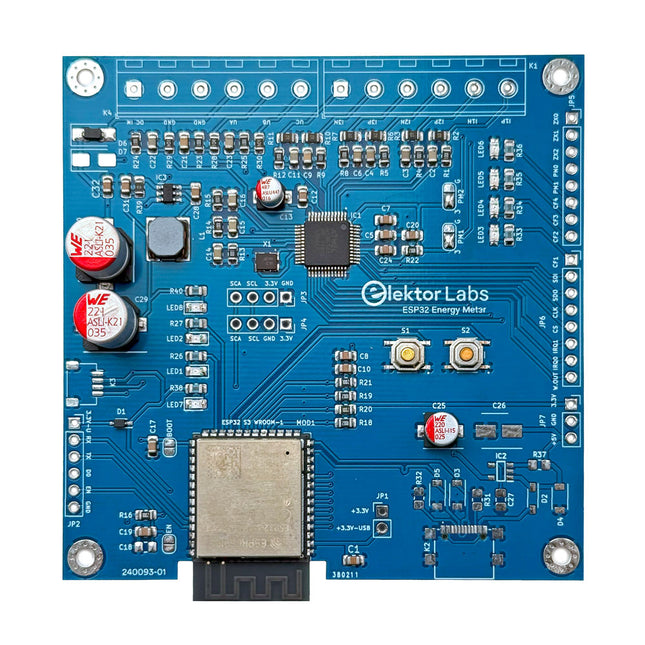
Elektor Labs Elektor ESP32 Energy Meter
The Elektor ESP32 Energy Meter is a device designed for real-time energy monitoring and smart home integration. Powered by the ESP32-S3 microcontroller, it offers robust performance with modular and scalable features. The device uses a 110/230 VAC to 12 VAC step-down transformer for voltage sampling, ensuring galvanic isolation and safety. Its compact PCB layout includes screw-type terminal blocks for secure connections, a Qwiic connector for additional sensors, and a programming header for direct ESP32-S3 configuration. The energy meter is compatible with single-phase and three-phase systems, making it adaptable for various applications. The energy meter is simple to set up and integrates with Home Assistant, offering real-time monitoring, historical analytics, and automation capabilities. It provides accurate measurements of voltage, current, and power, making it a valuable tool for energy management in homes and businesses. Features Comprehensive Energy Monitoring: Get detailed insights into your energy usage for smarter management and cost savings. Customizable Software: Tailor functionality to your needs by programming and integrating custom sensors. Smart Home Ready: Compatible with ESPHome, Home Assistant, and MQTT for full Smart Home integration. Safe & Flexible Design: Operates with a 110/230 VAC to 12 VAC step-down transformer and features a pre-assembled SMD board. Quick Start: Includes one Current Transformer (CT) sensor and access to free setup resources. Specifications Microcontroller ESP32-S3-WROOM-1-N8R2 Energy Metering IC ATM90E32AS Status Indicators 4x LEDs for power consumption indication2x Programmable LEDs for custom status notifications User Input 2x Push buttons for user control Display Output I²C OLED display for real-time power consumption visualization Input Voltage 12~16 VAC (via a step-down transformer 110/230 VAC to 12 VAC) Clamp Current Sensor YHDC SCT013-000 (100 A/50 mA) included Smart Home Integration ESPHome, Home Assistant, and MQTT for seamless connectivity Connectivity Header for programming, Qwiic for sensor expansion Applications Supports single-phase and three-phase energy monitoring systems Dimensions 79.5 x 79.5 mm Included 1x Partly assembled board (SMDs are pre-mounted) 2x Screw terminal block connectors (not mounted) 1x YHDC SCT013-000 current transformer Required Power transformer not included Downloads Datasheet (ESP32-S3-WROOM-1) Datasheet (ATM90E32AS) Datasheet (SCT013-000) Frequently Asked Questions (FAQ) From Prototype to Finished Product What started as an innovative project to create a reliable and user-friendly energy meter using the ESP32-S3 microcontroller has evolved into a robust product. Initially developed as an open-source project, the ESP32 Energy Meter aimed to provide precise energy monitoring, smart home integration and more. Through meticulous hardware and firmware development, the energy meter now stands as a compact, versatile solution for energy management.
€ 79,95€ 64,95
Best Price
-
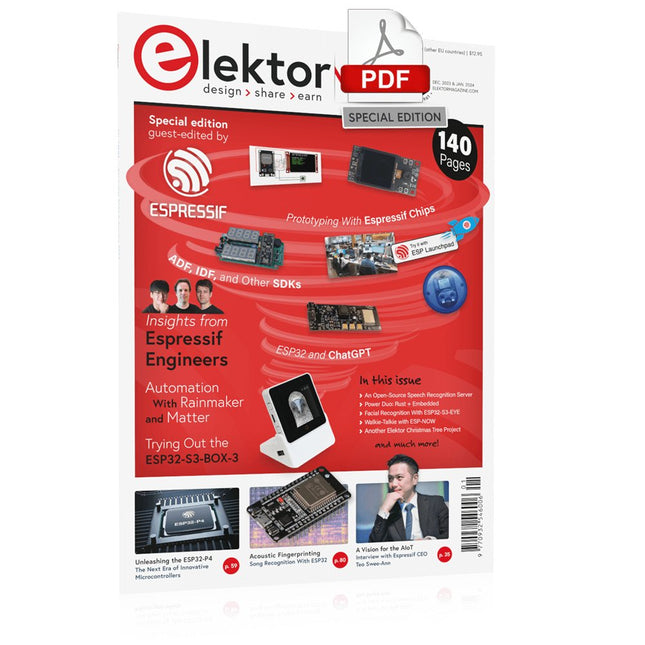
Elektor Digital Elektor Espressif Guest Edition (PDF)
Elektor GREEN and GOLD members can download their digital edition here. Not a member yet? Click here. Accelerating IoT Innovation A Color E-Ink Wi-Fi Picture Frame ESP-Launchpad TutorialFrom Zero to Flashing in Minutes ESP32 and ChatGPTOn the Way to a Self-Programming System… Walkie-Talkie with ESP-NOWNot Quite Wi-Fi, Not Quite Bluetooth! From Idea to Circuit with the ESP32-S3A Guide to Prototyping with Espressif Chips AIoT Chip InnovationAn Interview With Espressif CEO Teo Swee-Ann Simulate ESP32 with WokwiYour Project’s Virtual Twin Trying Out the ESP32-S3-BOX-3A Comprehensive AIoT Development Platform Electronics Workspace EssentialsInsights and Tips From Espressif Engineers The ESP RainMaker StoryHow We Built “Your” IoT Cloud Assembling the Elektor Cloc 2.0 KitAn Elektor Product Unboxed by Espressif Unleashing the ESP32-P4The Next Era of Microcontrollers Rust + EmbeddedA Development Power Duo Who Are the Rust-Dacious Embedded Developers?How Espressif is Cultivating Embedded Rust for the ESP32 Espressif’s Series of SoCs Building a PLC with Espressif SolutionsWith the Capabilities and Functionality of the ISOBUS Protocol The ESP32-S3 VGA BoardBitluni’s Exciting Journey Into Product Design Acoustic Fingerprinting on ESP32Song Recognition With Open-Source Project Olaf Circular Christmas Tree 2023A High-Tech Way to Celebrate the Holiday Season A Simpler and More Convenient LifeAn Amateur Project Based on the Espressif ESP8266 Module How to Build IoT Apps without Software ExpertiseWith Blynk IoT Platform and Espressif Hardware Building a Smart User Interface on ESP32 Quick & Easy IoT Development with M5Stack Prototyping an ESP32-Based Energy Meter A Value-Added Distributor for IoT and More In-Depth Insights: Interview With Arduino on the Nano ESP32Alessandro Ranellucci and Martino Facchin Discuss Espressif Collaboration Your AIoT Solution ProviderInsights From Espressif Streamlining MCU Development With ESP-IDF Privilege Separation An Open-Source Speech Recognition Server……and the ESP BOX The Thinking EyeFacial Recognition and More Using the ESP32-S3-EYE ESP32-C2-Based Coin Cell SwitchDesign and Performance Evaluation The Smart Home Leaps Forward with MatterUnlocking Smart Home IoT Potential Tech the Future: Where Is Smart Home IoT Headed?
€ 7,50
-

Elektor Digital Elektor Green Membership
Learn, Build, and Understand Electronics – with Elektor Projects, expert knowledge, archive access, and exclusive discounts – all in one membership. Would you like to learn electronics, develop your own circuits, and gain a better understanding of modern technologies? Elektor Magazine has been one of the leading sources of information for electronics engineers, developers, start-ups, and companies for 65 years. With an Elektor Green Membership, you get: ✅ The international electronics magazine Elektor (in digital format) ✅ Access to the Elektor archive with 65 years of electronics know-how ✅ DIY projects, tested circuits, in-depth reviews and tutorials ✅ Exclusive member discounts at Elektor.com Why Elektor? For 65 years, Elektor has stood for in-depth electronics knowledge, practical projects, and innovative technologies. From microcontrollers and embedded systems to Raspberry Pi, Arduino, and ESP32, as well as IoT, AI, measurement technology, audio, RF, and robotics, Elektor covers the key platforms and application areas of modern electronics. Whether you are a beginner, maker, or professional – Elektor helps you take your skills to the next level. Who is this membership for? Beginners – Start your journey into electronics with clear fundamentals and first projects Makers – Discover new projects, ideas, and inspiration for your own developments Professionals & Engineers – Stay up to date with modern technologies and deepen your expertise Your benefits at a glance Magazine (Digital) – Receive every issue digitally, delivered straight to your inbox 65 years of electronics knowledge – Access the extensive Elektor archive anytime (since 1974) Hands-on projects – Turn your ideas into reality with guides, circuits, and tutorials Exclusive discounts – Save on every purchase at Elektor.com Unlock all Elektor benefits today! Free Membership Green Membership ❌ 8x Elektor Magazine (Digital Edition) as PDF ✅ 8x Elektor Magazine (Digital Edition) as PDF ❌ 12 Months of Access to the Full Elektor Archive ✅ 12 Months of Access to the Full Elektor Archive ❌ Access to Over 5,000 Gerber Files ✅ Access to Over 5,000 Gerber Files ❌ 10% Member Discount at Elektor.com ✅ 10% Member Discount at Elektor.com ✅ Read Elektor weekly every Friday ✅ Read Elektor weekly every Friday ℹ️ Do you prefer reading Elektor Magazine in print? Find out everything about the Elektor Gold Membership (Print) here.
€ 99,95 - € 169,95
-
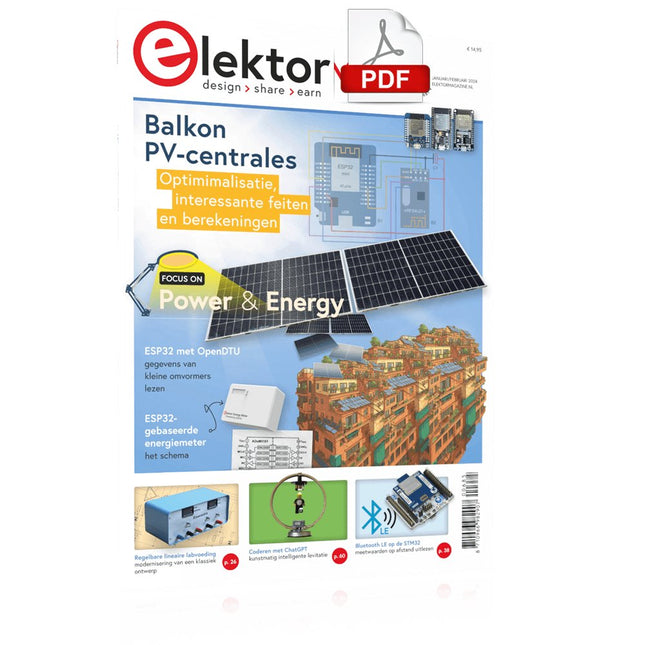
Elektor Digital Elektor Januari/Februari 2024 (PDF)
Elektor GREEN en GOLD leden kunnen deze uitgave hier downloaden. Nog geen lid? Klik hier om een lidmaatschap af te sluiten. Project-update: ESP32-gebaseerde energiemeterwe gaan verder met het prototype Optimalisatie van balkon PV-centralesoverwegingen, interessante feiten en berekeningen ESP32 met OpenDTU voor balkoncentralesgegevens van kleine omvormers via MCU’s uitlezen Regelbare lineaire labvoeding0...50 V / 0...2 A + dubbele symmetrische voeding Energieopslag – vandaag en morgeneen vraaggesprek met Simon Engelke 2024: een AI-odysseehet houdt nog lang niet op Bluetooth LE op de STM32meetwaarden op afstand uitlezen Mensvriendelijk slim keuken-voorraadsysteem MAUI: programmeren voor PC, tablet en smartphonehet nieuwe framework in theorie en praktijk ChatMagLevkunstmatig intelligente levitatie Eenvoudige PV-regelaarbouw je eerste, volledig functionele PV-energiebeheersysteem Koude-kathode-buizenvreemde onderdelen Uit het leven gegrepennostalgie Alle begin......bekijkt de FET CAN-bus voor de Arduino UNO R4: een tutorialtwee UNO R4’s nemen de bus! Elektor infographicvoeding en energie Vergelijking van vermogensdichtheid en vermogensefficiëntie Aluminium elektrolytische condensatorenstoringspotentieel in audiotechnologie USB testen en metenmet de Fnirsi FNB58 De Pixel Pump pick&place-tooleenvoudiger handmatige assemblage van SMT-printen Oost West Lab Bestnog niet zo lang geleden, in een land heel ver van hier... “In de wereld van ethiek in elektronica kunnen zelfs kleine stappen een aanzienlijke invloed hebben.” Ethiek in elektronicade OECD Guidelines en het Lieferkettensorgfaltspflichtengesetz Chadèche: slimme NiMH-(ont)laderlezersproject in het kort Project 2.0correcties, updates en brieven van lezers
€ 9,95
-
Elektor Digital Elektor January/February 2020 (PDF)
Elektor Magazine EN January/February 2020 (PDF)
€ 7,50
-
Elektor Digital Elektor January/February 2021 (PDF)
Elektor Magazine EN January/February 2021 (PDF)
€ 7,50
-

Elektor Digital Elektor January/February 2022 (PDF)
DRIVING MOTORS WITH H-BRIDGESAn Introduction to DC, Stepper, and Brushless Motors THE ELEKTOR LAB TEAMOur Approach, Preferred Tools, and More RASPBERRY PI AS A KVM REMOTE CONTROLPi-KVM Software Test IQAUDIO CODEC ZEROA Sound Card for the Raspberry Pi Family THE PIKVM PROJECT AND LESSONS LEARNEDInterview with Maxim Devaev (Developer, PiKVM) AUTONOMOUS VEHICLE WITH 2D LIDARESP32 Pico Interprets Data from the Lidar Module THE RASPBERRY PI ZERO 2 W GOES QUAD-CORE NOTES FROM THE 2021 WORLD ETHICAL ELECTRONICS FORUM MOTOR CONTROLHow the Complexity of Motor Control Is Simplified LARGE ELECTRIC MOTORSBasic Principles and Useful Information GETTING STARTED WITH THE ESP32-C3 RISC-V MCU PROTECT YOURSELF AND OTHERS!DIY Master Power Switch for the Lab Bench CREATE GUIS WITH PYTHON (PART 2)Spy name chooser PRODUCTRONICA FAST FORWARD 2021 WINNERSExciting Technologies and Creative Engineering Solutions VERSATILE SERVO TESTERCheck Behavior When There’s No Datasheet MODBUS OVER WLAN (PART 2)Software for the Modbus TCP WLAN Module UNDERSTANDING THE NEURONS IN NEURAL NETWORKS (PART 3)Practical Neurons INSIDE AN OPEN-SOURCE PROCESSORSample Chapter: Lattice and Xilinx FPGA Results STARTING OUT IN ELECTRONICSWe Are Not Yet Done with the Coil ERR-LECTRONICSCorrections, Updates and Readers’ Letters COLOR TO SOUNDHow to Read Out a Color Sensor via I2C BATTLAB-ONEMeasure and Optimize the Battery Life of IoT Devices SIMPLE EARTH-LEAKAGE TRACERTesting Isolation of Mains Supply POVERTY AND ELECTRONICSSustainable Development Goal 1 HEXADOKUThe Original Elektorized Sudoku
€ 7,50
-
Elektor Digital Elektor January/February 2023 (PDF)
Elektor GREEN and GOLD members can download their digital edition here. Not a member yet? Click here. For Eyes and Ears Video Output with Microcontrollers (1)Composite Video electronica 2022News from the world’s leading electronics trade show ESP32 CameraSo Simple, It Doesn’t Even Have to Use Wi-Fi ATX Power Supply for Raspberry Pi 32 Ω Headphone AmplifierSimple But High-Quality 3-Chip Solution SDR Radio-Controlled clocksFive Time Signals, Six Displays Starting Out in ElectronicsSpecial Diodes From Life's ExperienceMusings on the Quality of Things Reverse-Engineering a Bluetooth Low Energy LED BadgeHow to Control a BLE Device with a Python Script MakePython ESP32 Development KitEverything in a Box THD Measurement with an Oscilloscope and FFTEasily Calculate the Distortion Factor All-Seeing MachinesThe Technology Behind Today’s Industrial Vision Systems Infographics The Evolution of Voice and Audio Control for Electronic Devices WEEF 2022 in Review FFWD electronica 2022 in ReviewInnovators Did Not Fail to Impress The TubeAn Unusual Tube Amplifier Biomaterial in Electronics: Ready or Not Opera Cake Antenna Switch for HackRF OneConnect Up To Eight Antennas To Your SDR Engineering with Arduino and MoreAn Interview with Author Ashwin Pajankar LiDAR Precision GaugeMeasure up to 12 Meters Audio Signals and the ESP32The ESP-ADF Environment in Practice Elektor Fortissimo-100 Power Amplifier Kit Using Light for Sound EffectsLDR-Based Voltage-Controlled 24 dB/oct Synthesizer Filter Elektor High-Power AF AmplifierThe Loudest of Them All! HomeLab ToursA Volumetric Display Made in Canada Err-lectronicsCorrections, Updates and Readers’ Letters Hexadoku
€ 7,50
-

Elektor Digital Elektor January/February 2024 (PDF)
Elektor GREEN and GOLD members can download their digital edition here. Not a member yet? Click here. Project Update: ESP32-Based Energy MeterNext Steps in Prototyping Optimizing Balcony Power PlantsConsiderations, Interesting Facts, and Calculations ESP32 With OpenDTU for Balcony Power PlantsRead Data from Small Inverters Via MCUs Variable Linear Power Supply Ensemble0…50 V / 0…2 A + Dual Symmetrical Supply Energy Storage Today and TomorrowAn Interview With Simon Engelke 2024: An AI OdysseyIt’s Not Letting Up Bluetooth LE on the STM32A Way to Read Measurements Remotely Human-Centric Smart Kitchen Grocery Container MAUI: Programming for PC, Tablet, and SmartphoneThe New Framework in Theory and Practice ChatMagLevThe AI Way of Levitation Simple PV Power RegulatorBuild Your First, Fully Functional PV Energy Management System Cold-Cathode DevicesPeculiar Parts, the Series From Life’s ExperienceNostalgia Starting Out in Electronics……Looking at FETs CAN Bus Tutorial for the Arduino UNO R4Two UNO R4s Hop on the Bus! Infographics: Power & Energy Comprehensive Design and Development SupportArrow Engineering Services Comparing Power Density and Power Efficiency Aluminium Electrolytic CapacitorsInterference Potential in Audio Technology USB Test and MeasurementThe Fnirsi FNB58 The Pixel Pump Pick-and-Place ToolSimplifying Manual SMT Board Assembly HomeLab ToursNot So Long Ago, in a Far-Away Country... “In the world of ethics in electronics, even small steps can make a significant impact.” Ethics in ElectronicsThe OECD Guidelines and Germany’s Supply Chain Due Diligence Act Chadèche: Smart Ni-MH Charger/DischargerA Reader’s Project in Brief Err-lectronicsCorrections, Updates and Readers’ Letters
€ 7,50
-
Elektor Digital Elektor January/February 2025 (PDF)
Elektor GREEN and GOLD members can download their digital edition here. Not a member yet? Click here. DIY Solar Energy StorageBuild Your Own Energy Store for a PV Solar Array Solar Module SimulatorA Solution for Testing and Optimizing MPP Trackers and Inverters The STM32 Edge AI ContestExplore the new STM32N6 and Compete for a Share of €5,000 in Prizes! Widening the BandgapWhy There Is So Much Interest in SiC and GaN Notebook Power BankExtend the Life of Your Aged Laptop Medical RobotsOvercoming Technical and Regulatory Hurdles Frost Guard for Fruit Plants With Temperature Data Logger The Analog ThingThe Arduino of Analog Computing? Energy Saving Relay DriverSaves 90% of Relay Drive Power Improving the ET5410A+ DC loadKeep Cool and Be Quiet, Please electronica 2024 in Review Electromagnetic CompatibilityEMC in a Nutshell! Starting Out in Electronics……Filters Actively Reducing Power Dissipation With Dropping CapacitorsA Clever Use of Capacitive Reactance The Affordable MCP4725 12-Bit Digital-to-Analog ConverterAn EEPROM Feature Enables Safe Switch-On Behavior Fnirsi LCR-ST1 Smart LCR SMD Tweezers Raspberry Pi-Based Private Test & Measurement LabFirst Things First: The ADC Electronic Load ResistorAn Out-of-the-Box Project 2025: An AI OdysseySome Projects to See in the New Year AmpVolt v2.0 Project Update100 Amps and Beyond! Err-lectronicsCorrections, Updates, and Readers’ Letters Unveiling Ethical TransparencyInsights from Ethics in Electronics’s 2024 Survey Elektor Audio DSP FX Processor Board (2)Creating Applications
€ 7,50
-

Elektor January/February 2026 (EN)
Elektor GREEN and GOLD members can download their digital edition here. Not a member yet? Click here. Low-Noise Lab Power Supply (1)A Quiet Source for Sensitive Circuits STM32 Edge AI Contest 2025: The Winners Batteries TodayTechnology and Differences in Lithium Batteries Adjustable Electronic LoadStatic + Dynamic DC Load Step-Down Converter from 48 V to 5 VThe Story of Circuit Development Autonomous Sensor Node v2.0Part 2: Hardware Validation and Power Optimizations VaristorsPeculiar Parts, the Series Graphical Grid Frequency MeterMonitor Grid Quality Starting Out in Electronics……Brings Its Own End Peak Current Load SMD FerritesMore Resilient Against Current Peaks Elektor Live! Expert Day 2025 Energy Harvesting Set to Accelerate IoT and IIoT Use CasesHow Energy Harvesting Frees IoT from the Grid Fnirsi DPS-150Compact and Portable Power Supply and Converter Adjustable USB-C Power SourceTurn Your USB-C Charger Into an Adjustable Power Supply Simple Charger and Capacity TesterWith Two Cheap “Off-the-Shelf” Modules Smart Color Detector with AI Voice and Playback PbMonitor v2.0Introduction to the Updated Battery Monitoring System A Fan for the Mini Reflow PlateSmart Modifications That Improve Results From Life’s ExperienceThe Tsunami of Indulgence Err-lectronicsCorrections, Updates, and Readers’ Letters 2026: An AI OdysseyWhen Models Start Dictating the Hardware Precision Picoammeter (2)Assembling, Calibration, and Test Wireless Device Poweringwith Inductive Technology AI-Based Autonomous DrivingThe RDW’s Self Driving Challenge 2024 Sound Card as Signal GeneratorPC as DCF77 Test Transmitter
€ 14,90
-

Elektor Digital Elektor January/February 2026 (PDF) EN
Elektor GREEN and GOLD members can download their digital edition here. Not a member yet? Click here. Low-Noise Lab Power Supply (1)A Quiet Source for Sensitive Circuits STM32 Edge AI Contest 2025: The Winners Batteries TodayTechnology and Differences in Lithium Batteries Adjustable Electronic LoadStatic + Dynamic DC Load Step-Down Converter from 48 V to 5 VThe Story of Circuit Development Autonomous Sensor Node v2.0Part 2: Hardware Validation and Power Optimizations VaristorsPeculiar Parts, the Series Graphical Grid Frequency MeterMonitor Grid Quality Starting Out in Electronics……Brings Its Own End Peak Current Load SMD FerritesMore Resilient Against Current Peaks Elektor Live! Expert Day 2025 Energy Harvesting Set to Accelerate IoT and IIoT Use CasesHow Energy Harvesting Frees IoT from the Grid Fnirsi DPS-150Compact and Portable Power Supply and Converter Adjustable USB-C Power SourceTurn Your USB-C Charger Into an Adjustable Power Supply Simple Charger and Capacity TesterWith Two Cheap “Off-the-Shelf” Modules Smart Color Detector with AI Voice and Playback PbMonitor v2.0Introduction to the Updated Battery Monitoring System A Fan for the Mini Reflow PlateSmart Modifications That Improve Results From Life’s ExperienceThe Tsunami of Indulgence Err-lectronicsCorrections, Updates, and Readers’ Letters 2026: An AI OdysseyWhen Models Start Dictating the Hardware Precision Picoammeter (2)Assembling, Calibration, and Test Wireless Device Poweringwith Inductive Technology AI-Based Autonomous DrivingThe RDW’s Self Driving Challenge 2024 Sound Card as Signal GeneratorPC as DCF77 Test Transmitter
€ 9,50
-
Elektor Digital Elektor July/August 2020 (PDF)
Elektor Magazine EN July/August 2020 (PDF)
€ 7,50
-
Elektor Digital Elektor July/August 2021 (PDF)
Elektor Magazine EN July/August 2021 (PDF)
€ 7,50
-
Elektor Digital Elektor July/August 2022 (PDF)
Measuring Does Not Have to be Expensive Low-Cost Audio TesterUsing PC-Based Software and a USB Audio Interface AC Grid Frequency MeterMonitor Mains Frequency and Voltage A Modest Inductance MeterAn Affordable Solution for Your Workbench Acoustic Wave HoveringA Look at the Makerfabs Acoustic Levitation Kit Starting Out in ElectronicsRectifiers E-FFWD: Looking Ahead Again! Get Started With Your OscilloscopeFind Your Way Through the Knobs and Buttons Raspberry Pi Pico Makes an MSF-SDRDecode a Time Signal with a Pi Pico SDR Moisture Sensors for Watering SystemsAutomatic Watering Disruption in Test and Measurement EquipmentInnovation from the Smaller Players Infographics 7-8/2022 Inspiration, That’s What It’s All AboutInterview with Entrepreneur Walter Arkesteijn, InnoFaith Beauty Sciences Minimizing EMC Interference from Storage Chokes GUIs with Python (Part 5)Tic-Tac-Toe Reed RelaysPeculiar Parts, the series Simple Analog ESR Meter With Moving-Coil Meter Precision Sigfox CO2 Traffic LightNo Wi-Fi Network Needed! Women in Tech“It's All About Merit Until Merit Has Tits” Low-Budget Tablet Oscilloscope ADS1013DGood Value for Money? Smart Plug TeardownWhich Ones Are Hacker-Friendly? Skin Impedance and Skin CapacitanceSmall Experiments From Life’s ExperienceNo Local Business Pokit Meter ReviewA Swiss army knife of test gear HexadokuThe Original Elektorized Sudoku
€ 7,50
-
Elektor Digital Elektor July/August 2023 (PDF)
Elektor GREEN and GOLD members can download their digital edition here. Not a member yet? Click here. Rotary Dial Phone as Remote ControlTo Switch On the Lights, Dial 1; For the Coffee Maker, Dial 2 GPS-Based Speed MonitorNo More Speeding Tickets RGB Stroboscope with ArduinoA Colorful Adaptation of a Useful Instrument Wireless Emergency Push ButtonEnhanced Safety with LoRa Starting Out in ElectronicsFollow the Emitter Arbitrary, Independent Hysteresis Levels for Comparatorswith Simulations, Spreadsheets and Algebra ESP32-Based Impedance AnalyzerSimple, Low-Part-Count, and Inexpensive! HomeLab ToursEncouraging DIY The MCCAB Arduino Nano Training BoardAll-in-One Hardware for the “Microcontrollers Hands-On Course” From Life’s ExperienceModern Luddism Sensor 101: The DS18B20 Temperature SensorConnection to the 1-Wire Bus Is Matter the Thread to Save the Smart Home?New Standards to Simplify the Smart Home A Matter of CollaborationDeveloping with the Thing Plus Matter Board and Simplicity Studio Infographics: IoT and Sensors Matter, ExpressLink, Rainmaker — What Is This All About?Q&A with Amey Inamdar, Technical Marketing Director at Espressif Selecting Microcontroller Dev Kits for IoT and IIoT ApplicationsAn Introductory Guide Capacitors Do Not Always Behave Capacitively! An NTP Clock with CircuitPythonWhy Should You Use This Programming Language? Build a Cool IoT DisplayWith the Phambili Newt The HB100 Doppler Motion SensorTheory and Practice A Bare-Metal Programming Guide (Part 1)For STM32 and Other Controllers Siglent SDM3045X Multimeter Microprocessors for Embedded SystemsPeculiar Parts, the Series Microcontroller Documentation Explained (Part 3)Block Diagrams and More Low-Power LoRa Weather StationBuild a long-range weather station by yourself Transverter for the 70 cm Band Climate Calling EngineersMove Fast and Fix Things Hexadoku
€ 7,50
-

Elektor Digital Elektor July/August 2024 (PDF)
Elektor GREEN and GOLD members can download their digital edition here. Not a member yet? Click here. Small Thermal Imaging CameraAn Arduino UNO-Based DIY Solution Project Update #3: ESP32-Based Energy MeterIntegration and Testing with Home Assistant 2024: An AI OdysseyEnhancing Object Detection: Integrating Refined Techniques Raspberry Pi Goes AINew Kit Incorporates M.2 HAT+ With AI Accelerator Weather Station SensorsWhich One Should You Choose? AI-Based Water Meter Reading (1)Get Your Old Meter Onto the IoT! A GSM AlarmHarnessing GSM Technology for Remote Garage Safety Low-Power Thread Devices Optimized and ScrutinizedLow Power … Low Effort? From Life’s ExperienceThe Gender Gap DIY Cloud ChamberMaking Invisible Radiation Visible SparkFun Thing Plus MatterA Versatile Matter-Based IoT Development Board IoT RetrofittingMaking RS-232 Devices Fit for Industry 4.0 Enabling IoT with 8-Bit MCUs Technology Drives SustainabilityAdvances Lead to More Efficient Use of Energy in Many Applications AWS for Arduino and Co. (1)Using AWS IoT ExpressLink in Real Life Airflow Detector Using Arduino OnlyNo External Sensors Needed! Water Leak DetectorConnected to Arduino Cloud CrystalsPeculiar Parts, the Series Universal Garden LoggerA Step Towards AI Gardening Analog 1 kHz GeneratorSine Waves with Low Distortion Miletus: Using Web Apps OfflineSystem and Device Access Included! From 4G to 5GIs It Such an Easy Step? Starting Out in Electronics……Balances Out
€ 7,50
-
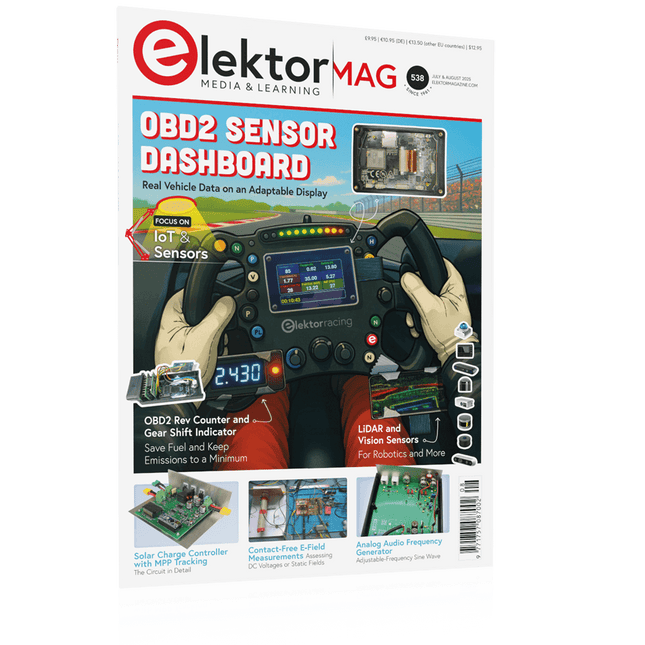
Elektor July/August 2025 (EN)
Elektor GREEN and GOLD members can download their digital edition here. Not a member yet? Click here. OBD2 Sensor DashboardOld Dials Sparked a Quest for Real Data OBD2: Add a Rev Counter and Gear Shift Indicator to Your CarRetro, but Super Useful LiDAR and Vision Sensors for Robotics Sensor+Test 2025 and PCIM 2025 Contact-Free E-Field Measurements (1)A Vibrating Membrane for Assessing DC Voltages or Static Electric Fields Wireless Mailbox NotifierFrom Optical Sensors to Radar, Exploring a Few Options Elektor Mini-WheelieA Self-Balancing Robot Solar CellsPeculiar Parts, the Series Getting Started With a Modern Radar SensorIs an Accurate Measurement on Your Radar? From Life’s ExperiencePaper Factory CybersecurityTough Times for Hackers Siglent Presents Next-Gen Multi-Channel OscilloscopesHigh-Performance Solutions for Modern Power and Embedded Systems Bluetooth 6.0 Brings Enhanced Distance-Ranging ApplicationsNew Version Offers Improved Device Positioning and Location Services Exploring Wireless Communication with BeagleY-AI Err-lectronicsCorrections, Updates, and Readers’ Letters Starting Out in Electronics……Concludes the Topic on Opamps A Powerful AI Code AssistantSpeed Up Your Development with Continue and Visual Studio Code Solar Charge Controller with MPPT (2)The Circuit Ultrasonic Obstacle DetectorA Simple Project to Help Those with Impaired Vision 2025: An AI OdysseyMid-Year Review Raspberry Pi Standalone MIDI Synthesizer (3)Making It Smarter and Adding a User Interface Meshtastic: A Demo ProjectAn Intelligent Mesh of LoRa Radios Analog Audio Frequency GeneratorHigh-Quality Adjustable Frequency Sine Wave Generator
€ 10,95
-
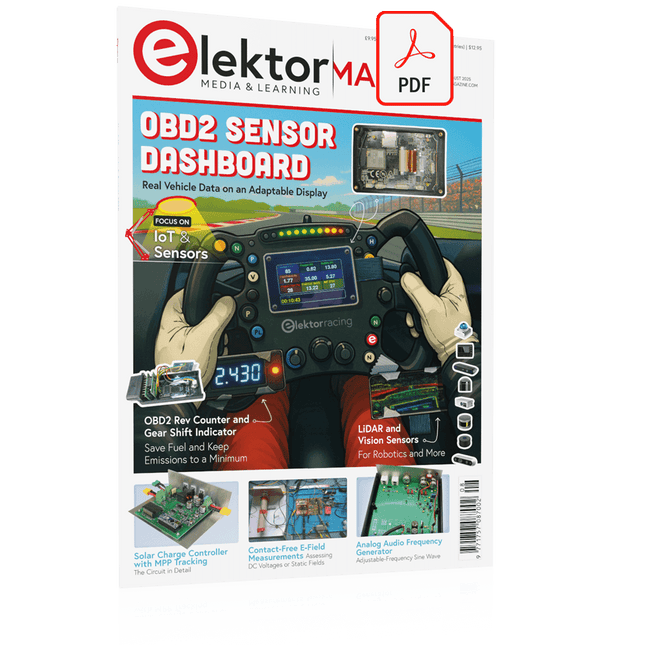
Elektor Digital Elektor July/August 2025 (PDF) EN
Elektor GREEN and GOLD members can download their digital edition here. Not a member yet? Click here. OBD2 Sensor DashboardOld Dials Sparked a Quest for Real Data OBD2: Add a Rev Counter and Gear Shift Indicator to Your CarRetro, but Super Useful LiDAR and Vision Sensors for Robotics Sensor+Test 2025 and PCIM 2025 Contact-Free E-Field Measurements (1)A Vibrating Membrane for Assessing DC Voltages or Static Electric Fields Wireless Mailbox NotifierFrom Optical Sensors to Radar, Exploring a Few Options Elektor Mini-WheelieA Self-Balancing Robot Solar CellsPeculiar Parts, the Series Getting Started With a Modern Radar SensorIs an Accurate Measurement on Your Radar? From Life’s ExperiencePaper Factory CybersecurityTough Times for Hackers Siglent Presents Next-Gen Multi-Channel OscilloscopesHigh-Performance Solutions for Modern Power and Embedded Systems Bluetooth 6.0 Brings Enhanced Distance-Ranging ApplicationsNew Version Offers Improved Device Positioning and Location Services Exploring Wireless Communication with BeagleY-AI Err-lectronicsCorrections, Updates, and Readers’ Letters Starting Out in Electronics……Concludes the Topic on Opamps A Powerful AI Code AssistantSpeed Up Your Development with Continue and Visual Studio Code Solar Charge Controller with MPPT (2)The Circuit Ultrasonic Obstacle DetectorA Simple Project to Help Those with Impaired Vision 2025: An AI OdysseyMid-Year Review Raspberry Pi Standalone MIDI Synthesizer (3)Making It Smarter and Adding a User Interface Meshtastic: A Demo ProjectAn Intelligent Mesh of LoRa Radios Analog Audio Frequency GeneratorHigh-Quality Adjustable Frequency Sine Wave Generator
€ 7,50
-
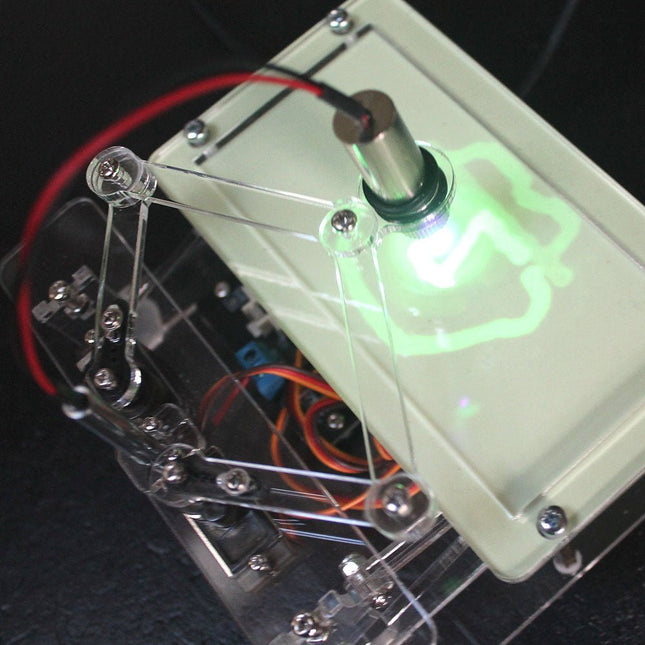
Elektor Labs Elektor Laser Head Upgrade for Sand Clock
The Elektor Laser Head transforms the Elektor Sand Clock into a clock that writes the time on glow-in-the-dark film instead of sand. In addition to displaying the time, it can also be used to create ephemeral drawings. The 5 mW laser pointer, with a wavelength of 405 nm, produces bright green drawings on the glow-in-the-dark film. For best results, use the kit in a dimly lit room. Warning: Never look directly into the laser beam! The kit includes all the necessary components, but soldering three wires is required. Note: This kit is also compatible with the original Arduino-based Sand Clock from 2017. For more details, see Elektor Magazine 1-2/2017 and Elektor Magazine 1-2/2018.
€ 34,95€ 24,95
Best Price


