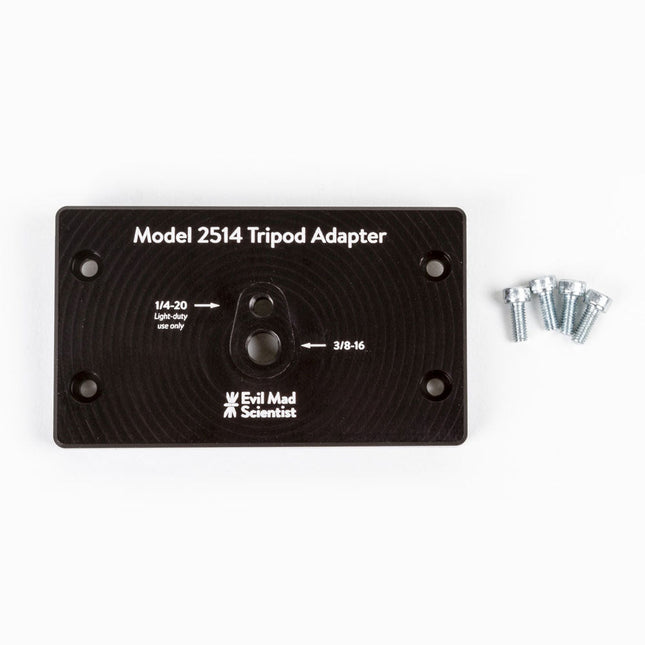
The tripod adapter is custom machined from a solid block of aluminum, and provides two standard tripod mounting points with 3/8-16 and light-duty 1/4-20 thread respectively. This allows you to mount the AxiDraw to a tripod, should you have reason to do so.
We would highly recommend using a sturdy tripod with a 3/8-16 connection point and appropriate counterweight (sand bag, lifting weights, etc) to balance the weight of the AxiDraw while in use.
Installation is straightforward, and does not require any tools other than those included with AxiDraw: Remove the existing foot pads from the AxiDraw (either standard or outrigger feet, depending on model) and attach this plate to the captured nuts in the bottom surface of the AxiDraw. For AxiDraw SE/A3 (April 2019 and newer), the tripod adapter attaches directly to tapped holes in the base of the machine.
This heavy-duty tripod adapter is compatible with AxiDraw V3, AxiDraw V3/A3 and AxiDraw V3 XLX. It is also compatible with AxiDraw SE/A3 manufactured in April 2019 and newer.
Specifications
Material: Anodized 6061-T6 aluminum
Size: 3.90 x 2.36 x 0.35 inches (99.1 x 60 x 8.3 mm)
Weight: Approximately 144 g
Mounting hardware: included (four M4x10 high-strength steel mounting screws)
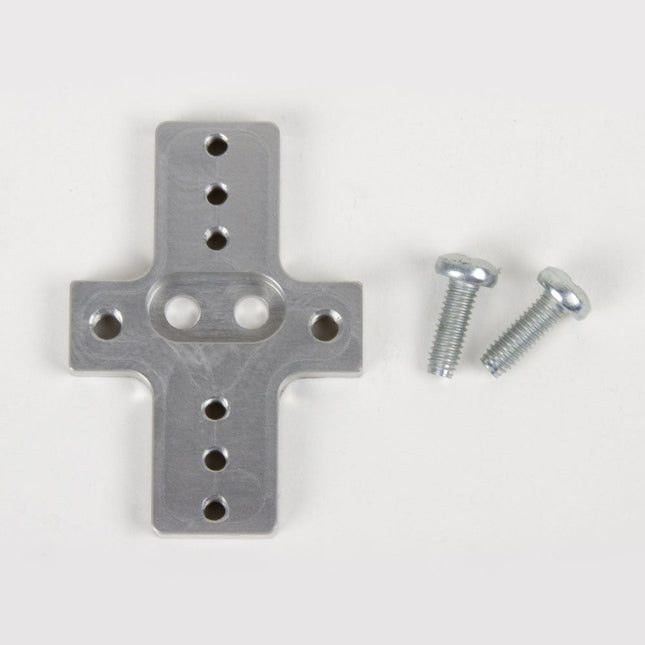
This rigid end effector plate is designed to be in place of the standard AxiDraw pen-lift Z stage, and provides an alternative mounting scheme for mounting various things to the end of the AxiDraw's arm, for applications where greater rigidity is important but the lifting ability of the standard Z stage is not required.
The rigid end effector is custom machined from aluminum, and provides six M3 tapped holes and two M4 tapped holes for mounting what ever it is that you would like to mount to the end of the AxiDraw, to use it as a 2D robot arm. The hole pattern is compatible with the AxiDraw pen clip, so you can, if you like, mount the AxiDraw's pen clip to this end effector.
Installation is straightforward, but requires a Pozidrive PZ2 screwdriver, not included*. Remove the AxiDraw's pen clip, and then remove the pen-lift Z stage by removing two screws with the PZ2 screwdriver. Install the rigid end effector plate in its place, using the two included mounting screws and the PZ2 screwdriver. You may wish to also tie back or fully remove the AxiDraw's cable guides, which normally extend to power the pen-lift stage.
Specifications
Material: Anodized 6061-T6 aluminum
Size: 1.97 x 1.38 x 0.19 inches (50 x 35 x 4.8 mm)
Weight: Approximately 11 g
Mounting hardware: included (Two M4x12 pozidrive-head self-tapping screws)
Compatibility
All AxiDraw V3 family pen plotters
AxiDraw V3/A3
AxiDraw SE/A3
AxiDraw MiniKit models
Extra easel boards for AxiDraw V3/A3 can be used as replacements, or for staging additional workpieces for quickly swapping to the next plot. This set consists of one 11.75 x 17 inch (29.85 x 43.18 cm) hardboard platen with rubber feet attached, plus eight micro binder clips.
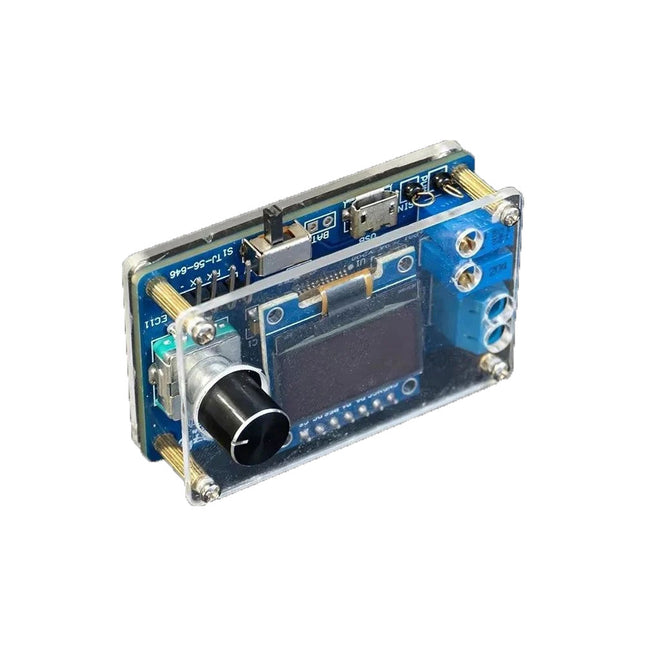
The DIY Mini Digital Oscilloscope Kit (with shell) is an easy-to-build kit for a tiny digital oscilloscope. Besides the power switch, it has only one other control, a rotary encoder with a built-in pushbutton. The kit's microcontroller comes preprogrammed. The 0.96" OLED display has a resolution of 128 x 64 pixels. The oscilloscope features one channel that can measure signals up to 100 kHz. The maximum input voltage is 30 V, the minimum voltage is 0 V.
The kit consists of through-hole components (THT) are surface-mount devices (SMD). Therefore, assembling the kit means soldering SMD parts, which requires some soldering experience.
Specifications
Vertical range: 0 to 30 V
Horizontal range: 100 µs to 500 ms
Trigger type: auto, normal and single
Trigger edge: rising and falling
Trigger level: 0 to 30 V
Run/Stop mode
Automatic frequency measurement
Power: 5 V micro-USB
10 Hz, 5 V sinewave output
9 kHz, 0 to 4.8 V square wave output
Display: 0.96-inch OLED screen
Dimensions: 57 x 38 x 26 mm
Downloads
Documentation
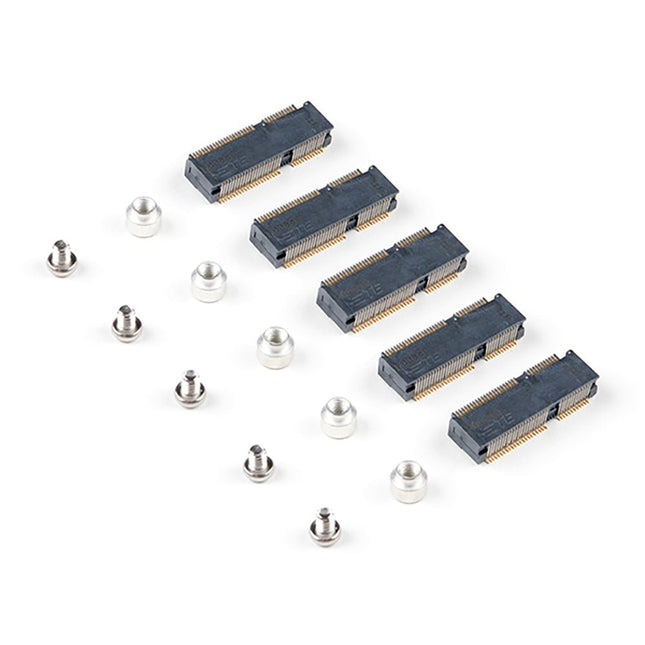
The MicroMod DIY Carrier Kit includes five M.2 connectors (4.2mm height), screws, and standoffs so that you can get all the special parts you may need to make your own carrier board.
MicroMod uses the standard M.2 connector. This is the same connector found on modern motherboards and laptops. There are various locations for the plastic ‘key’ on the M.2 connector to prevent a user from inserting an incompatible device. The MicroMod standard uses the ‘E’ key and further modifies the M.2 standard by moving the mounting screw 4mm to the side. The ‘E’ key is fairly common so a user could insert an M.2 compatible Wifi module. Still, because the screw mount doesn’t align, the user would not secure an incompatible device into a MicroMod carrier board.
Features
5x Machine Screws
Phillips Head #0 (but #00 to #1 works)
Thread: M2.5
Length: 3 mm
5x SMD Reflow Compatible Standoffs
Thread: M2.5 x 0.4
Height: 2.5 mm
5x M.2 MicroMod Connectors
Key: E
Height: 4.2 mm
Pin count: 67
Pitch: 0.5 mm
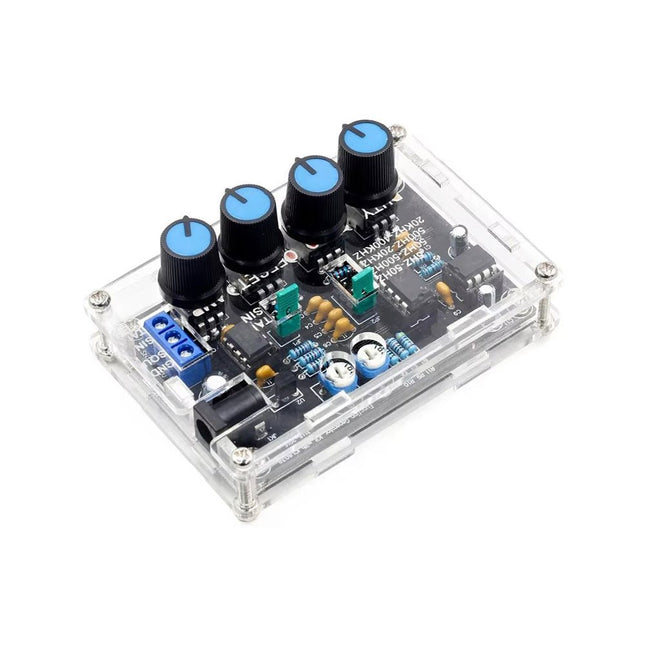
The ICL8038 signal generator delivers versatile waveforms, including sine, triangle, square, and forward/reverse sawtooth, making it suitable for a wide range of applications. Powered by the ICL8038 chip and high-speed operational amplifiers, it ensures exceptional precision and signal stability.
With a frequency range of 5 Hz to 400 kHz, it supports applications from audio to radio frequencies. Its adjustable duty cycle, ranging from 2% to 95%, allows for precise waveform customization to meet various needs.
The DIY kit is beginner-friendly, featuring through-hole components for easy assembly. It includes all necessary parts, an acrylic shell, and a detailed manual, providing everything required to build and use the signal generator efficiently.
Specifications
Frequency range
5 Hz~400 KHz (adjustable)
Power supply voltage
12 V~15 V
Duty cycle range
2~95% (adjustable)
Low distortion sine wave
1%
Low temperature drift
50 ppm/°C
Output triangular wave linearity
0.1%
DC bias range
−7.5 V~7.5 V
Output amplitude range
0.1 V~11 VPP (working voltage 12 V)
Dimensions
89 x 60 x 35 mm
Weight
81 g
Included
PCB incl. all necessary components
Acrylic shell
Manual
,
by Lobna Belarbi
Affordable Robot Kits to Kickstart Your Robotics Journey
Robotics is an exciting and rewarding field, but getting started can be intimidating—especially when it comes to choosing the right kit. Fortunately, Elektor offers a...
,
by Clemens Valens
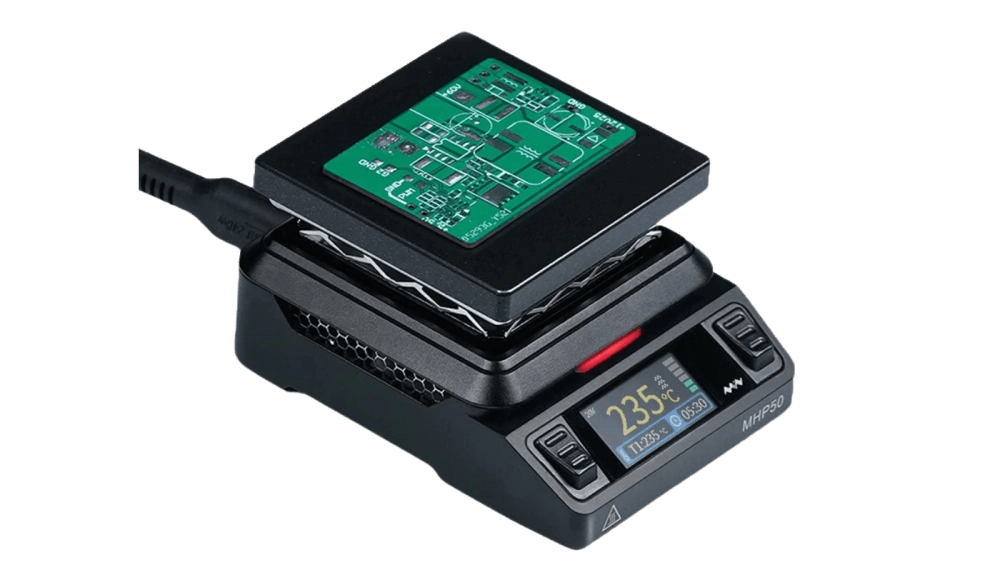
Unleashing the Power of the Miniware MHP50: A Compact Hot Plate for Preheating and Reflow Soldering
The Miniware MHP50 isn't just another hot plate for preheating circuit boards—it's a versatile tool that's perfect for reflow soldering on smaller boards. Let’s dive into...
,
by Clemens Valens
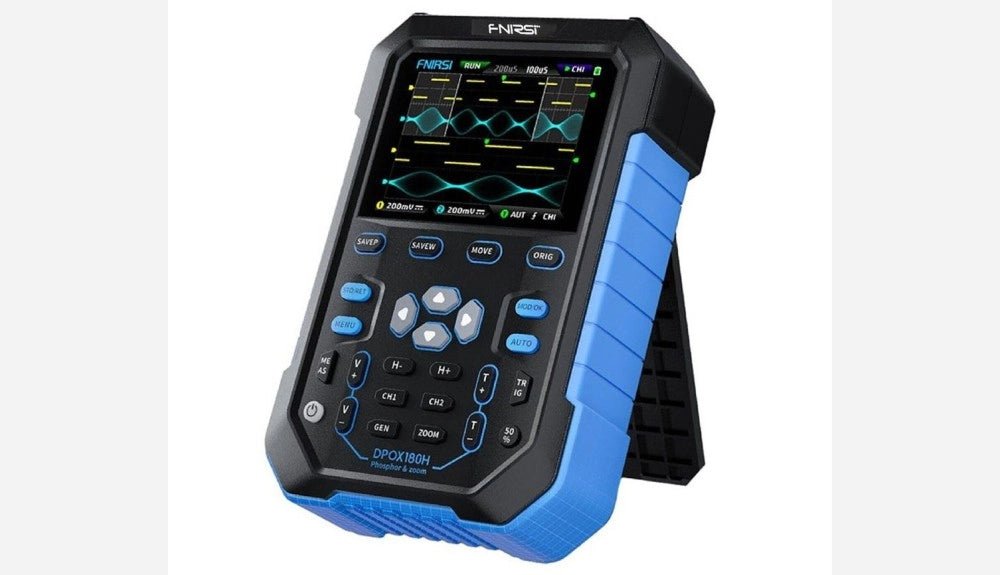
FNIRSI DPOX180H 2-in-1 Digital Phosphor Oscilloscope (Review)
Oscilloscopes sure have made a lot of progress over the past two decades. Twenty years ago, I still used my single-beam analog 20 MHz CRT oscilloscope...