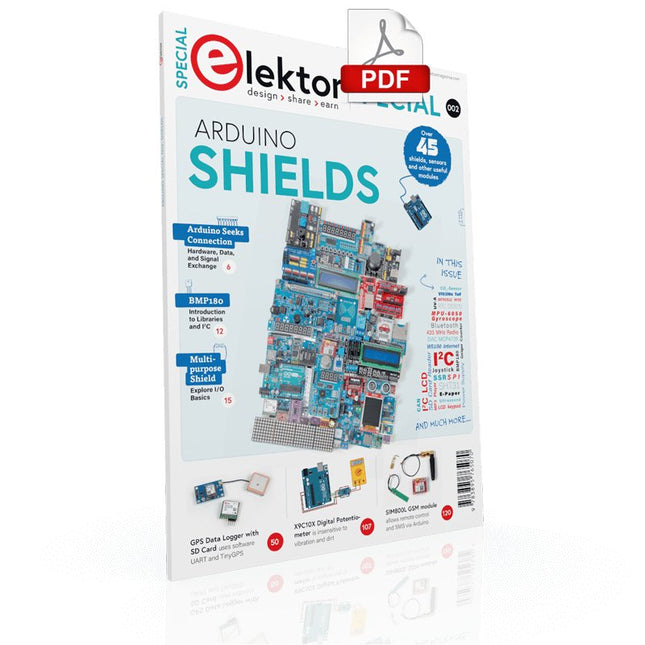
Make your project dreams come true: an odometer for the hamster wheel, a fully automatic control of your ant farm with web interface, or the Sandwich-O-Mat – a machine that toasts and grills sandwiches of your choice.
With the Arduino and the DIY or Maker movement, not only did entry into microcontroller programming become child's play, but a second development also took place: Resourceful developers brought small boards – so-called shields or modules – to the market, which greatly simplified the use of additional hardware. The small modules contain all the important electronic parts to be connected to the microcontroller with a few plug-in cables, eliminating the need for a fiddly and time-consuming assembly on the plug-in board. In addition, it is also possible to handle tiny components that do not have any connecting legs (so-called SMDs).
Projects Discussed
Arduino seeks connection
BMP and introduction to libraries, I²C
Learn I/O basics with the multi-purpose shield
I²C LCD adapter and DOT matrix displays
LCD keypad shield
Level converter
W5100: Internet connection
I/O expansion shield
Relays and solid-state relays
The multi-function shield: A universal control unit
Connecting an SD card reader via SPI
Keys and 7-segment displays
16-bit ADC
MCP4725 DAC
16-way PWM servo driver
MP3 player
GPS data logger using an SD card
Touch sensor
Joystick
SHT31: Temperature and humidity
VEML6070 UV-A sensor
VL53L0X time-of-flight
Ultrasonic distance meter
MAX7219-based LED DOT matrix display
DS3231 RTC
Port expander MCP23017
433 MHz radio
MPU-650 gyroscope
ADXL345 accelerometer
WS2812 RGB LEDs
Power supply
MQ-xx gas sensors
CO2 gas sensor
ACS712 current sensor
INA219 current sensor
L298 motor driver
MFRC522 RFID
28BYJ-48 stepper motor
TMC2209 silent step stick
X9C10x digital potentiometer
ST7735 in a color TFT display
e-Paper display
Bluetooth
Geiger counter
SIM800L GSM module
I²C multiplexer
Controller Area Network
Elektor GREEN and GOLD members can download their digital edition here.
Not a member yet? Click here.
Arduino Portenta Machine Control and Arduino Portenta H7A CAN-to-MQTT Gateway Demo Project
Unboxing the Elektor LCR Meter with David Cuartielles
MicroPython Enters the World of Arduino
Connected Projects, SimplifiedDive Into the Arduino Cloud
Introduction to TinyMLBig Is Not Always Better
Arduino K-Way
Writing Arduino Sketches Just Got Better
Get to Know Arduino
Getting Started with the Portenta X8Manage Software Securely with Containers
Build, Deploy, and Maintain Scalable, Secure ApplicationsWith Arduino Portenta X8 Featuring NXP’s i.MX 8M Mini Applications Processor and EdgeLock SE050 Secure Element
How I Automated My HomeArduino CEO Fabio Violante Shares Solutions
Altair 8800 SimulatorHardware Simulation of a Vintage Computer
MS-DOS on the Portenta H7Run Old-School Software on Contemporary Hardware
Grow It YourselfA Digitally Controlled, Single-Box Solution for Indoor Farming
Save the Planet With Home Automation?MQTT on the Arduino Nano RP2040 Connect
Go Professional with Arduino Pro
Smart Ovens Take a Leap Into the Future
Tagvance Builds Safer Construction Sites with Arduino
Santagostino Breathes Easywith Remote Monitoring that Leverages AI for Predictive Maintenance
Security Flies High with RIoT Secure’s MKR-Based Solution
Open-Source Brings a New Generation of Water Management to the World
SensoDetect Deforestation with Sound Analysis
The Mozzi Arduino Library for Sound SynthesisInsights from Tim Barrass
The New Portenta X8 (with Linux!) and Max Carrier Redefine What’s Possible
How Using Arduino Helps Students Build Future Skills
Must-Haves for Your Electronics Workspace
The Importance of Robotics in Education
Dependable IoT Based Upon LoRa
Unboxing the Portenta Machine Control
8-Bit Gaming with Arduboy
Reducing Water Usage at Horseback Riding TracksAn IoT to Constantly Monitor Soil Humidity and Temperature Levels
The Panettone ProjectA sourdough starter management and maintenance system
Supporting Arduino Resellers
Space Invaders with Arduino
Art with ArduinoInspiring Insights from Artists and Designers
Arduino Product Catalogue
The Future of Arduino
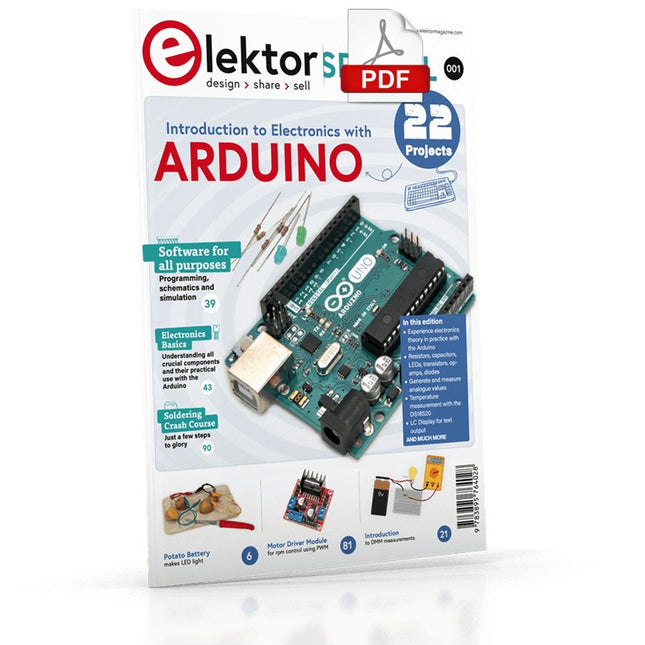
Although the Arduino isn’t a novelty any longer, there are still many beginners who want to try programming and development with a microcontroller, and to them, it is all new. All beginnings can be difficult, though they should be light and enjoyable.
You do not need much or expensive equipment for the examples. The circuits are built on a small breadboard, and, if necessary, connected to an Arduino Uno, which you can program on a Windows PC. You will find clear examples of how to build all circuits, ensuring easy and error-free reproduction.
Projects Discussed
Current & Voltage – How it all began
Arduino Hardware
Arduino Programming
The Electrical Circuit
Measuring with the Multimeter
Circuit Diagrams and Breadboards
Creating Circuit Diagrams
Breadboard Views with Fritzing
Online Circuit Simulation
Indispensable: Resistors (Part 1)
Hands-on with Resistors (Part 2)
Variable Resistors
Diodes: One-way Street for Current
The Transistor Switch
Electromagnetism
Relays and Motors
op-amps: Operational Amplifiers
Capacitors
The NE555 Timer
PWM and Analogue Values with Arduino
7-Segment Temperature Display
Introduction to Soldering and LCDs
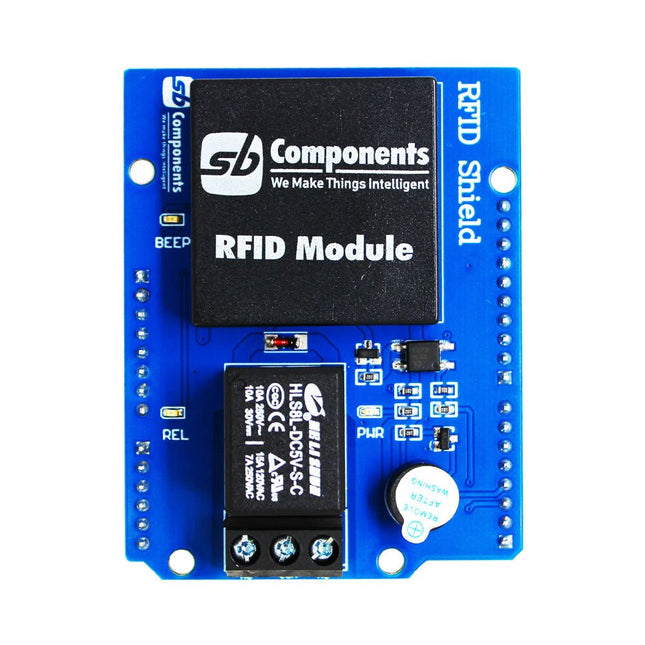
Designed with convenience and security in mind, the Ardi RFID Shield is based on the EM-18 module, operating at a frequency of 125 KHz. This shield allows you to easily integrate RFID (Radio Frequency Identification) technology into your projects, enabling seamless identification and access control systems.
Equipped with a powerful 1-channel optoisolated relay, the Ardi RFID Shield offers a reliable switching solution with a maximum DC rating of 30 V and 10 A, as well as an AC rating of 250 V and 7 A. Whether you need to control lights, motors, or other high-power devices, this shield provides the necessary functionality.
Additionally, the Ardi RFID Shield features an onboard buzzer that can be utilized for audio feedback, allowing for enhanced user interaction and system feedback. With the onboard 2-indication LEDs, you can easily monitor the status of RFID card detection, power supply, and relay activation, providing clear visual cues for your project's operation.
Compatibility is key, and the Ardi RFID Shield ensures seamless integration with the Arduino Uno platform. Paired with a read-only RFID module, this shield opens up a world of possibilities for applications such as access control systems, attendance tracking, inventory management, and more.
Features
Onboard 125 kHz EM18 RFID small, compact module
Onboard High-quality relays Relay with Screw terminal and NO/NC interfaces
Shield compatible with both 3.3 V and 5 V MCU
Onboard 3 LEDs power, relay ON/OFF State and RFID Scan status
Multi-tone Buzzer onboard for Audio alerts
Mounts directly onto ArdiPi, Ardi32 or other Arduino compatible boards
Specifications
RFID operating Frequency: 125 kHz
Reading distance: 10 cm, depending on TAG
Integrated Antenna
Relay Max Switching Voltage: 250 V AC/30 V DC
Relay Max Switching Current: 7 A/10 A
Input Voltage: 12 - 36 V Max. Phase Current: 2 A per phase Removable motor drivers Reset-button Screw terminals for power supply Dimensions: 53 mm x 68 mm x 18 mm Weight: 46 g
The Arduino Pro Portenta Vision Shield brings industry-rated features to your Portenta. This hardware add-on will let you run embedded computer vision applications, connect wirelessly or via Ethernet to the Arduino Cloud or your own infrastructure, and activate your system upon the detection of sound events.
Features
324x324 pixels camera sensor: use one of the cores in Portenta to run image recognition algorithms using the OpenMV for Arduino editor
100 Mbps Ethernet connector: get your Portenta H7 connected to the wired Internet
2 onboard microphones for directional sound detection: capture and analyse sound in real-time
JTAG connector: perform low-level debugging of your Portenta board or special firmware updates using an external programmer
SD-Card connector: store your captured data in the card, or read configuration files
The Vision Shield has been designed to fit on top of the Arduino Portenta family. The Portenta boards feature multicore 32-bit ARM Cortex processors running at hundreds of megahertz, with megabytes of program memory and RAM. Portenta boards come with WiFi and Bluetooth.
Embedded Computer Vision Made Easy
Arduino has teamed up with OpenMV to offer you a free license to the OpenMV IDE, an easy way into computer vision using MicroPython as a programming paradigm. Download the OpenMV for Arduino Editor from our professional tutorials site and browse through the examples we have prepared for you inside the OpenMV IDE. Companies across the whole world are already building their commercial products based on this simple-yet-powerful approach to detect, filter, and classify images, QR codes, and others.
Debugging With Professional Tools
Connect your Portenta H7 to a professional debugger through the JTAG connector. Use professional software tools like the ones from Lauterbach or Segger on top of your board to debug your code step by step. The Vision Shield exposes the required pins for you to plug in your external JTAG.
Camera
Himax HM-01B0 camera module
Resolution
320 x 320 active pixel resolution with support for QVGA
Image sensor
High sensitivity 3.6μ BrightSense pixel technology
Microphone
2 x MP34DT05
Length
66 mm
Width
25 mm
Weight
11 gr
For more information, check out the tutorials provided by Arduino here.
Elektor GREEN and GOLD members can download their digital edition here.
Not a member yet? Click here.
Accelerating IoT Innovation
A Color E-Ink Wi-Fi Picture Frame
ESP-Launchpad TutorialFrom Zero to Flashing in Minutes
ESP32 and ChatGPTOn the Way to a Self-Programming System…
Walkie-Talkie with ESP-NOWNot Quite Wi-Fi, Not Quite Bluetooth!
From Idea to Circuit with the ESP32-S3A Guide to Prototyping with Espressif Chips
AIoT Chip InnovationAn Interview With Espressif CEO Teo Swee-Ann
Simulate ESP32 with WokwiYour Project’s Virtual Twin
Trying Out the ESP32-S3-BOX-3A Comprehensive AIoT Development Platform
Electronics Workspace EssentialsInsights and Tips From Espressif Engineers
The ESP RainMaker StoryHow We Built “Your” IoT Cloud
Assembling the Elektor Cloc 2.0 KitAn Elektor Product Unboxed by Espressif
Unleashing the ESP32-P4The Next Era of Microcontrollers
Rust + EmbeddedA Development Power Duo
Who Are the Rust-Dacious Embedded Developers?How Espressif is Cultivating Embedded Rust for the ESP32
Espressif’s Series of SoCs
Building a PLC with Espressif SolutionsWith the Capabilities and Functionality of the ISOBUS Protocol
The ESP32-S3 VGA BoardBitluni’s Exciting Journey Into Product Design
Acoustic Fingerprinting on ESP32Song Recognition With Open-Source Project Olaf
Circular Christmas Tree 2023A High-Tech Way to Celebrate the Holiday Season
A Simpler and More Convenient LifeAn Amateur Project Based on the Espressif ESP8266 Module
How to Build IoT Apps without Software ExpertiseWith Blynk IoT Platform and Espressif Hardware
Building a Smart User Interface on ESP32
Quick & Easy IoT Development with M5Stack
Prototyping an ESP32-Based Energy Meter
A Value-Added Distributor for IoT and More
In-Depth Insights: Interview With Arduino on the Nano ESP32Alessandro Ranellucci and Martino Facchin Discuss Espressif Collaboration
Your AIoT Solution ProviderInsights From Espressif
Streamlining MCU Development With ESP-IDF Privilege Separation
An Open-Source Speech Recognition Server……and the ESP BOX
The Thinking EyeFacial Recognition and More Using the ESP32-S3-EYE
ESP32-C2-Based Coin Cell SwitchDesign and Performance Evaluation
The Smart Home Leaps Forward with MatterUnlocking Smart Home IoT Potential
Tech the Future: Where Is Smart Home IoT Headed?
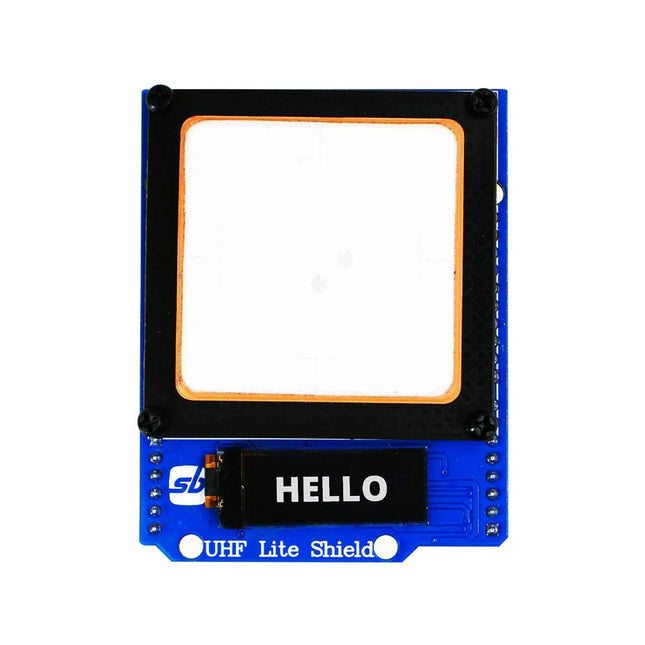
Designed with cutting-edge technology, this shield brings the power of Ultra High Frequency (UHF) RFID to your fingertips.
With the Ardi UHF Shield, you can effortlessly read up to an impressive 50 tags per second, allowing for fast and efficient data collection. The shield features an onboard UHF antenna, ensuring reliable and accurate tag detection even in challenging environments.
Equipped with a high-performance 0.91" OLED display, the Ardi UHF Shield provides clear and concise visual feedback, making it easy to monitor and interact with the RFID readings. Whether you're tracking inventory, managing access control, or implementing a smart attendance system, this shield has you covered.
With a remarkable 1-meter reading distance, the Ardi UHF Shield offers an extended range for capturing RFID data. Say goodbye to the limitations of proximity-based RFID systems and embrace the flexibility and convenience of a wider reading range.
The shield provides read-write capabilities, allowing you to not only retrieve information from RFID tags but also update or modify data as needed. This versatility opens up a world of possibilities for advanced applications and custom solutions.
Features
Onboard High-performance UHF RFID reader module
24 hours x 365 days’ work normally
0.91” OLED display for visual interaction with shield
Multi-tone Buzzer onboard for Audio alerts
Shield compatible with both 3.3 V and 5 V MCU
Mounts directly onto ArdiPi, Ardi32 or other Arduino compatible boards
Specifications
OLED resolution 128x32 pixels
I²C Interface for OLED
UHF Frequency Range (EU/UK): 865.1-867.9 MHz
UHF Module Type: Read/Write
Protocols Supported: EPCglobal UHF Class 1 Gen 2 / ISO 18000-6C
Reading Distance: 1 meters
Can identify over 50 tags simultaneously
Communication interface: TTL UART Interface for UHF
Communication baud rate: 115200 bps (default and recommend) – 38400 bps
Operation current: 180 mA @ 3.5 V (26 dBm Output, 25°C), 110 mA @ 3.5 V (18 dBm Output, 25°C)
Working humidity <95% (+25°C)
Heat-dissipating method Air cooling(no need out install cooling fin)
Tags storage capacity: 200 pcs tags @ 96 bit EPC
Output power: 18-26 dBm
Output power accuracy: +/-1 dB
Tags RSSI support
The Arduino Pro Portenta Vision Shield LoRa brings industry-rated features to your Portenta. This hardware add-on will let you run embedded computer vision applications, connect wirelessly via LoRa to the Arduino Cloud or your own infrastructure, and activate your system upon the detection of sound events.
The shield comes with:
a 320x320 pixels camera sensor: use one of the cores in Portenta to run image recognition algorithms using the OpenMV for Arduino editor
long range 868/915 MHz LoRa wireless connectivity: get your Portenta H7 connected to the Internet of Things with low power consumption
two on-board microphones for directional sound detection: capture and analyse sound in real-time
JTAG connector: perform low-level debugging of your Portenta board or special firmware updates using an external programmer
SD-Card connector: store your captured data in the card, or read configuration files
The Vision Shield LoRa has been designed to work with the Arduino Portenta H7. The Portenta boards feature multicore 32-bit ARM Cortex processors running at hundreds of megahertz, with megabytes of program memory and RAM. Portenta boards come with WiFi and Bluetooth.
Specifications
Camera
Himax HM-01B0 camera module (manufacturer site)
Resolution
320 x 320 active pixel resolution with support for QVGA
Image sensor
High sensitivity 3.6μ BrightSense pixel technology
Microphone
2x MP34DT05 (datasheet)
Connectivity
868/915MHz ABZ-093 LoRa Module with ARM Cortex-M0+ (datasheet)
Dimensions
66 x 25 mm
Weight
8 g
Downloads
Datasheet
Schematics
Elektor GREEN en GOLD leden kunnen deze uitgave hier downloaden.Nog geen lid? Klik hier om een lidmaatschap af te sluiten.
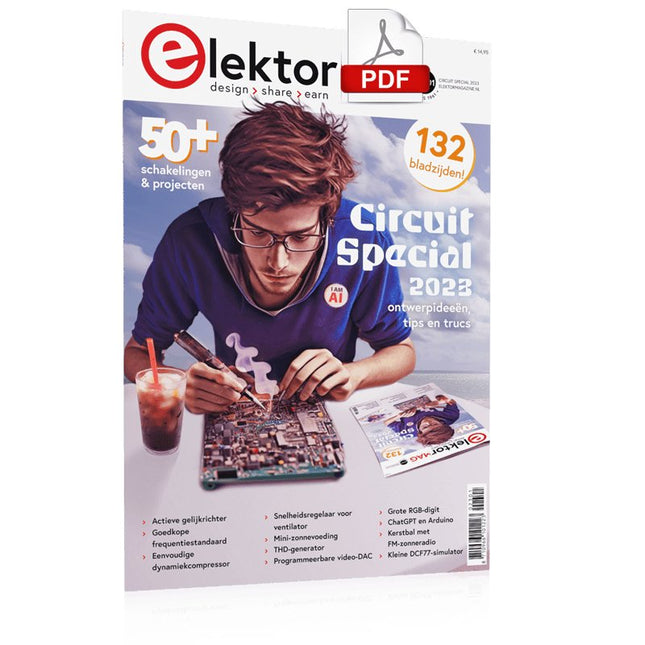
Mini-zonnevoedingzon in, 3,3 V uit
Solid-state stereo-audioschakelaarklikvrij en zonder bewegende onderdelen
Grote RGB-digitmet through-hole WS2812 LED’s
Microfoon-voorversterker met 48V-fantoomvoedingvoor podcasting en pro-audio
Blokgolfgeneratoren met regelbare duty cycle en frequentiesimpele schakelingen met CMOS- en TTL-IC’s
Eenvoudige dynamiekcompressorsofte aansturing, warm geluid
Simpel elektronisch slot
Actieve gelijkrichtervoor 2...40 V bij maximaal 3 A met tegenstroomonderdrukking
Actieve boxen in- en uitschakelen
Ongebalanceerd/gebalanceerd-convertermet RF-filter en DC-bescherming
2023: een AI-odysseewaar komt het vandaan en waar gaat het naar toe?
Snelheidsregelaar voor ventilatormet handmatige en thermostaatmodus
Laatste nieuwtjes van Arduino Project Hubnieuwe projecten uit de community
Overbelastingsmonitorbewaakt netsnoeren
Transistorloos knipperlicht in het donkeroscillator met alleen tweedraads onderdelen
Morsecode-generatorvoor gebruik als baken of leermiddel!
Programmeerbare video-DACvoor elk formaat tot RGB888
Kleintje klavierzonder bewegende onderdelen
Dubbel-dobbel zonder microprocessordubbele dobbelsteen op een enkele print – plus enkele ontwerptrucs
Elektronische vogelverschrikker
Amusante, inspirerende en verbazingwekkende schakelingen
LC/LP/HA-thermometernauwkeurige metingen en een binair display
THD-generatorvervorming, maar dan opzettelijk
Overtemperatuur-indicator met thyristorelektronische onderdelen ongebruikelijk gebruikt
Een PTC-flipflop
Sociale vogeleen tsjilpende Elektor Klassieker
Neonlamp plus microcontroller
Temperatuurgestabiliseerde IC-stroombronneutraliseer de temperatuurdrift van deze driebeners
Regelbare tweede-orde hogetonen-boostergehoorsteuntje voor ouderen
Edwin komt naar huisherinneringen na 53 jaar
Eénarmige bandieteen eenvoudige, leuke, nostalgische en leerzame Elektor-klassieker!
Eenvoudige digitaal gestuurde variabele weerstand
Lekdetectorbeveiligt en alarmeert bij lekkages
Eco-timer met automatische uitschakelingverbruikt niets in uitgeschakelde toestand!
ChatGPT en Arduino
Zenermetermeet de Z-spanning van Z-diodes ≤ 100 V
Servotester
ESP32 Windows-controller met gratis software
Analoge en mixed-signal IC’s van Microchipzuinige signaalverwerking
Interfacenormenfilter en overspanningsbeveiliging voor de I²C-bus
Li-Ion accumonitorrestlading-indicator geeft visuele feedback
PS/2-muis als draai-encoder (en meer...)
Simpele schemerschakelaarvoor bestaande lampen of installaties
Controller voor waterpompbereid je voor op hoogwater
Kerstbal met FM-zonneradiomeer heb je voor de kerst niet nodig
Trillingssensor met relaistik of schud om in te schakelen
Doorgangstestergevoelig en niet storend
In- en uitschakelen met een drukknop
Regeling voor mini-boor (2023)een ontwerp uit 1980 herzien
Digitale trillingssensorzet trillingen om in nauwkeurig getimede pulsen
Ompoolbeveiliging met kleine spanningsval
Goedkope frequentiestandaard
Kleine DCF77-simulatornauwkeurige fake-tijdstandaard
De Lilygo T-PicoC3combineert RP2040 en ESP32-C3 met een full-color TFT-display
Hexadoku
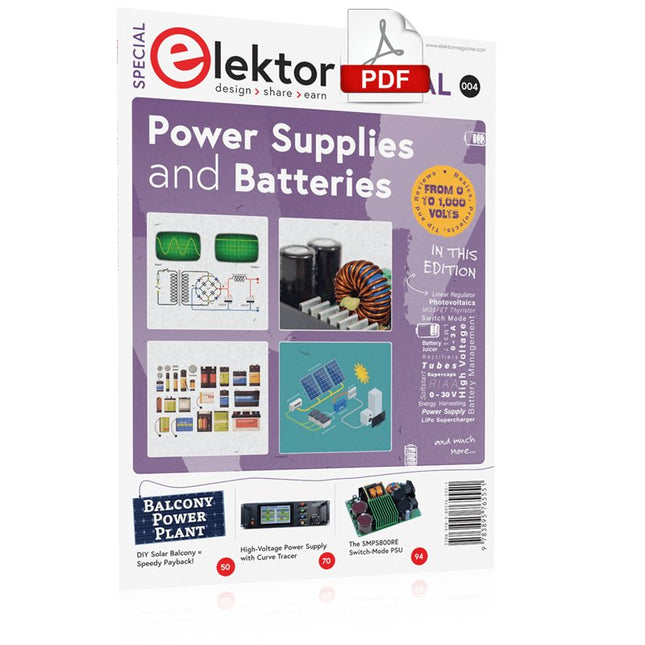
Whatever the methods or even then financial means you have to make your circuits work, the power supply should rank high if not Number One in your considerations. The design block simply called “power supply” is hugely underrated both in electronics creation and repair. Yet, the “PSU” has enormous diversity and comes in wildly differing guises like AC/DC, generator, battery (rechargeable or not), PV panel, benchtop, linear or switch-mode, to mention but a few. The output ranges are also staggering like nano-amps to kiloamps and the same for voltages.This special covers the features and design aspects of power supplies.ContentsBasics
Battery ManagementWhat to be aware of when using (Lithium) batteries.
Fixed-Voltage Power Supply using Linear RegulatorsThe best result right after batteries.
Light Energy HarvestingA small solar panel is used in an energy harvesting project to manage and charge four AAA cells.
Mains Powered Adapter DesignBasic circuits and tips for transformers, rectification, filtering and stabilization.
LM317 Soft StartThe high inrush current pulse should be avoided.
Controllable RectifiersSome suggestions to keep the power loss in the linear regulator as low as possible.
Components
Worksheet: The LM117 / LM217 / LM317 Voltage Regulators
SupercapsLow voltage but lots of current… or not?
Reviews
JOY-iT RD6006 Benchtop Power Supply Kit
Siglent SDL1020X Programmable DC Electronic Load
Projects
Balcony Power PlantDIY solar balcony = speedy payback!
DIY LiPo Supercharger KitFrom handcrafted to mass market
Dual-Anode MOSFET ThyristorFaster and less wasteful than the old SCR
Battery JuicerDo not throw away, squeeze!
High-Voltage Power Supply with Curve TracerGenerate voltages up to 400 V and trace characteristics curves for valves and transistors
High Voltage Supply for RIAAFor RIAA tube preamps and other applications.
MicroSupplyA lab power supply for connected devices
Phantom Power Supply using Switched CapacitorsVoltage tripler using three ICs
The SMPS800RE Switch-Mode Supply for the Elektor Fortissimo-100Reliable, light and affordable
Soft Start for PSUBe nice to your power supply – and its load
UniLab 20-30 V, 3 A compact switch-mode lab power supply
Tips
Soft Start for Step-Down Switching Regulators
Low Loss Current Limit
Powerbank Surprise
A Virtual Ground
Battery Maintainer
Battery Pack Discharger
Connecting Voltage Regulators in Parallel
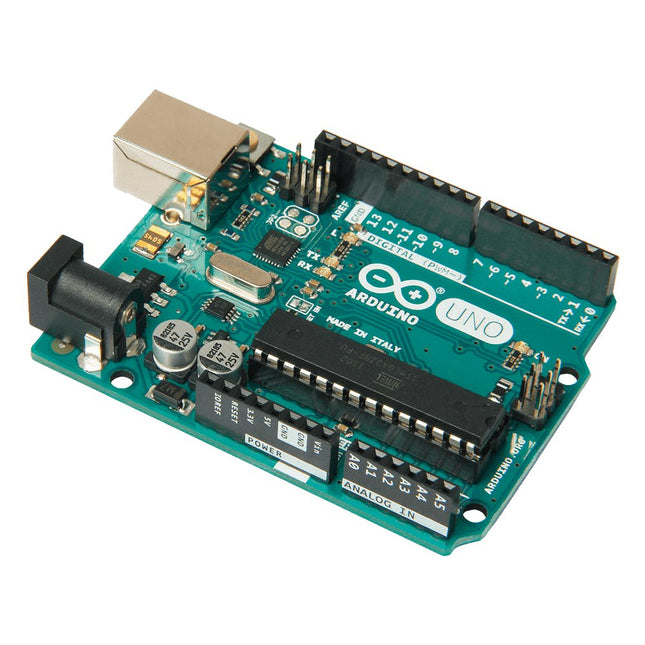
Arduino Uno is an open-source microcontroller board based on the ATmega328P. It has 14 digital input/output pins (of which 6 can be used as PWM outputs), 6 analog inputs, a 16 MHz ceramic resonator (CSTCE16M0V53-R0), a USB connection, a power jack, an ICSP header and a reset button. It contains everything needed to support the microcontroller; simply connect it to a computer with a USB cable or power it with a AC-to-DC adapter or battery to get started. You can tinker with your Uno without worring too much about doing something wrong, worst case scenario you can replace the chip for a few dollars and start over again.
'Uno' means one in Italian and was chosen to mark the release of Arduino Software (IDE) 1.0. The Uno board and version 1.0 of Arduino Software (IDE) were the reference versions of Arduino, now evolved to newer releases. The Uno board is the first in a series of USB Arduino boards, and the reference model for the Arduino platform; for an extensive list of current, past or outdated boards see the Arduino index of boards.
Specifications
Microcontroller
ATmega328P
Operating Voltage
5 V
Input Voltage (recommended)
7-12 V
Input Voltage (limit)
6-20 V
Digital I/O Pins
14 (of which 6 provide PWM output)
PWM Digital I/O Pins
6
Analog Input Pins
6
DC Current per I/O Pin
20 mA
DC Current for 3.3 V Pin
50 mA
Flash Memory
32 KB (ATmega328P) of which 0.5 KB used by bootloader
SRAM
2 KB (ATmega328P)
EEPROM
1 KB (ATmega328P)
Clock Speed
16 MHz
LED_BUILTIN
13
Dimensions
68.6 x 53.4 mm
Weight
25 g