
Search results for "epaper OR 2 OR 0 OR display OR 160097 OR 71"
-
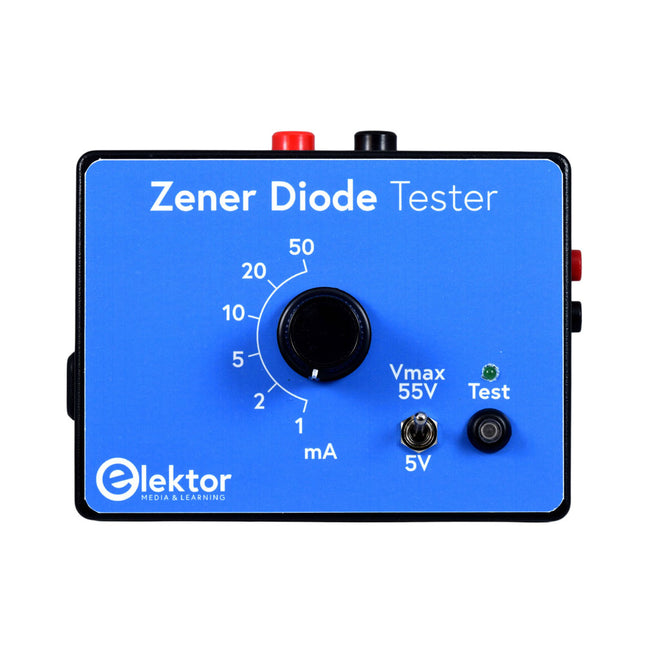
Elektor Zener Diode Tester
The Elektor Zener Diode Tester is essentially a constant-current source that can be switched in steps from 1 to 50 mA. It can be used to test Z-diodes up to a maximum of 54 V. Thanks to a 60-V step-up converter, the device can be powered by the usual 5 to 12 V. The principle of this tester is straightforward. A Z-diode or other DUT (device under test, such as an LED) is biased by an adjustable current source. The voltage across the DUT can be measured with a multimeter. The voltage of most (small) Z-diodes is specified at a current of 5 mA. Depending on the application, the voltage at other currents can also be of interest. That is why six current settings are available: 1, 2, 5, 10, 20, and 50 mA. LEDs are often specified at a current of 20 mA. What can be tested is: Whether a Z-diode is defective (short circuit or high impedance). Whether a Z-diode exhibits the correct Z-voltage. How a Z-voltage changes with different currents. What exact voltage is present at an integrated voltage reference. Whether LEDs in a series chain differ in brightness (hence the 20 mA current). What the current gain is for different base currents in (power) transistors. The kit contains all parts listed in the bill of materials including PCB and enclosure. Specifications Supply voltage 5…12 V/2 A (USB-C) Supply current (Itest = 50 mA) 1.1 A @ 5 V / 412 mA @ 12 V Selectable currents 1, 2, 5, 10, 20, and 50 mA Max. test voltage >54 V @ Itest ≥1 mA Max. output voltage 60 V @ Itest = 0 mA Voltage limit at 5 V 4.5 V @ Itest = 1 mA / 5.18 V @ Itest = 50 mA Enclosure dimensions 110 x 82 x 44 mm PCB size 105.4 x 67.3 mm Connections 4 mm banana sockets for multimeter 2 mm banana sockets for test clips USB-C socket for power supply Included Resistors R1 = 3.3 kΩ, 600 mW, 1% R2 = 0.15 Ω, 1 W, 5%, LS 12.7 mm, ø 3.5 mm R3, R8 = 180 Ω, 600 mW, 1% R4, R6, R16 = 1 kΩ, 600 mW, 1% R5, R19 = 47 kΩ, 600 mW, 1% R7 = 3.9 kΩ, 1 W, 5%, LS 12.7 mm, ø 3.5 mm R9, R10, R12 = 10 kΩ, 600 mW, 1% R11, R13 = 100 Ω, 600 mW 1% R14 = 249 Ω, 600 mW, 1% R15 = 499 Ω, 600 mW, 1% R17 = 2.49 kΩ, 250 mW, 1% R18 = 4.99 kΩ, 250 mW, 1% Capacitors C1 = 470 uF / 35 V, 20%, Ir = 1.86 A, ø 12.5 mm, LS 5 mm, ESR = 0.038 Ω (Panasonic EEUTP1V471) C2 = 1 uF / 100 V, 10%, X7R, LS 5 mm C3 = 2.2 nF / 50 V, 10%, X7R, LS 5 mm C4, C7 = 100 nF / 100 V, 10%, X7R, LS 5 mm C5 = 100 uF / 100 V, 20%, ø 14 mm max., LS 5 mm C6 = 1 nF / 100 V, 10%, X7R, LS 5 mm Inductor L1 = 100 uH, Irms = 2.4 A, Isat = 3.5 A, 0.09 Ω, radial, pitch 2.5/5/10 mm, ø 14 mm max. (Kemet SBC8-101-242) Semiconductors D1 = MUR120G, DO-41 D2, D4 = STPS3150RL, DO-201AD D3 = Z-diode, 18 V, 1.3 W (BZX85C18) D5 = Z-diode, 5.1 V, 0.5 W (1N5231B) LED1 = LED in pushbutton S1 LED2 = LED, green, 3 mm IC1 = MC34063, DIP-8 IC2 = LM4040BIZ-5.0/NOPB, TO-92 (TO-226AA-3) IC3 = TL051CP, DIP-8 T1 = BC327.25, TO-92 T2 = STP40NF10L, TO-220 T3 = IRF9510PBF, TO-220 T4 = 2N7000, TO-92 Others K1, K2, S1, S3 = 2-way screw terminal block, LS 3.5 mm, max. 1.5 mm² connected to K1 = USB-C socket, 30 V/3 A, chassis mounted, wired, 9 x 16 mm connected to K2 = Banana Connector, 2 mm, Socket, 60 VDC, Panel Mount, red (Multicomp 24.102.1) connected to K2 = Banana Connector, 2 mm, Socket, 60 VDC, Panel Mount, black (Multicomp 24.102.2) Test clip, red, 30 VAC/60 VDC (Hirschmann 931467101) Test clip, black, 30 VAC/60 VDC (Hirschmann 931467100) S1 = Pushbutton, panel mount, SPST-NO, 30 DC/100 mA, with red LED S2 = Rotary Switch, 6 position, 2 pole, 30°, 250 V/150 mA S3 = Toggle switch, panel mount, SPDT, solder lugs, 28 VDC T2, T3 = Heat sink, 15°C/W, FK 214 SA-CB Enclosure Hammond 1591XXSSBK, ABS, 110 x 82 x 44 mm Knob for S2, round shaft 6 mm, ø 21 mm, with indicator line (Multicomp CP-LB21-6-6D) 4 x Self-tapping screw #4-1/4", carbon steel, pan head Banana plug, red, 2 mm, 60 VDC (Multicomp 25.205.1) Banana plug, black, 2 mm, 60 VDC (Multicomp 25.205.2) Banana socket, black 4 mm, panel mount Banana socket, red 4 mm, panel mount for LED1, LED2 = Pin header, 1 x 2, vertical, pitch 2.54 mm for LED1, LED2 = Pin socket, 1 x 2, vertical, pitch 2.54 mm for T2, T3 = M3 screw, 10 mm, steel, pan head 2 x M3 washer, plain, steel 4 x M3 nut for IC1, IC3 = DIP-8 socket Wire, black, 0.25 mm² (24 AWG), stranded 14 x 0.15 mm, 1 m Wire, red, 0.25 mm² (24 AWG), stranded 14 x 0.15 mm, 1 m PCB 250772-1 v1.1 Links Article Elektor Labs
€ 79,95
Best Price
-

FNIRSI FNIRSI HT-P1B Pro Mini Hot Plate (150 W)
The FNIRSI HT-P1B Pro is a compact mini hot plate designed for PCB soldering, desoldering, and SMD rework. With up to 150 W of heating power, precise PID temperature control, and an adjustable temperature range of 100°C to 350°C, it delivers fast and stable heating for electronics projects. The 50 x 50 mm heating surface is ideal for small PCBs and electronic components. Two operating modes – constant temperature heating and simulated reflow soldering – provide flexibility for different applications. A 1.44-inch color display, three temperature presets, and built-in safety features ensure convenient operation. With DC and USB-C PD 3.1 support, a compact design, and an included 100 W USB-C charger, the HT-P1B Pro is a practical tool for makers, electronics enthusiasts, and repair professionals. Features Up to 150 W Heating Power: Fast heating with adjustable power settings from 30 W to 150 W. Precise PID Temperature Control: Adjustable range from 100°C to 350°C with ±3°C temperature stability. Dual Operating Modes: Constant temperature heating and simulated reflow soldering. 50 × 50 mm Heating Surface: Ideal for small PCBs, SMD soldering, and component rework. Flexible Power Input: DC 12-28 V (up to 150 W) and USB-C PD 3.1 (up to 140 W). Three Temperature Presets: Quick access to frequently used temperature settings. 1.44-inch Color Display: Shows temperature, voltage, power, heating time, and operating status. Built-in Safety Features: Over-temperature, low-voltage, prolonged-heating, and tilt protection. Specifications Power Input DC 12-28 V / USB-C PD Power Range 30-150 W Standby Power 1.6 W Temperature Range 100-350°C (212-662°F) Temperature Stability ±3°C Heating Area 50 x 50 mm Display 1.44" Color Screen Tilt Detection 20°-50° Protocol PD 3.1 Dimensions 68.8 x 81.8 x 44.5 mm Weight 157 g Included 1x FNIRSI HT-P1B Preheating Station 1x FNIRSI 100 W PD GaN Charger (EU) 1x FNIRSI 100 W USB-C Fast-charging Cable 1x Heat-Resistant Silicone Cover 1x Storage Case 1x Manual Downloads Manual
€ 84,95
Best Price
-
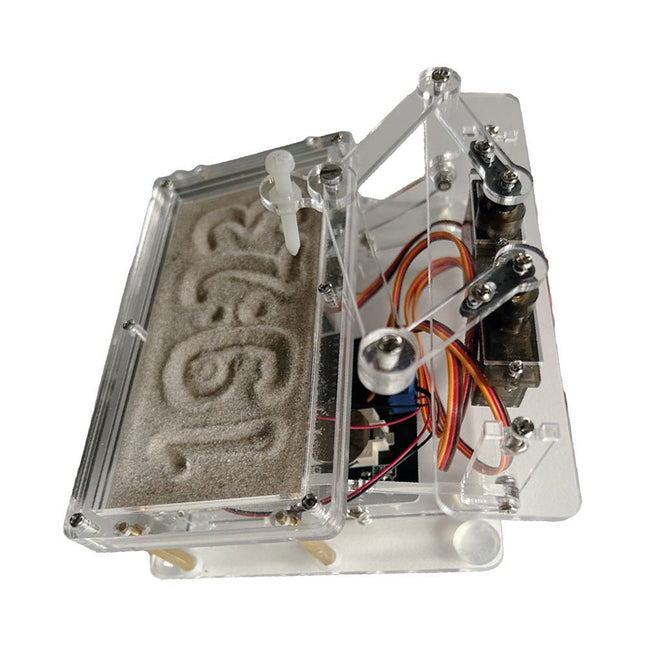
Elektor Labs Elektor Sand Clock for Raspberry Pi Pico
Raspberry Pi-based Eye Catcher A standard sand clock just shows how time passes. In contrast, this Raspberry Pi Pico-controlled sand clock shows the exact time by “engraving” the four digits for hour and minute into the layer of sand. After an adjustable time the sand is flattened out by two vibration motors and everything begins all over again. At the heart of the sand clock are two servo motors driving a writing pen through a pantograph mechanism. A third servo motor lifts the pen up and down. The sand container is equipped with two vibration motors to flatten the sand. The electronic part of the sand clock consists of a Raspberry Pi Pico and an RTC/driver board with a real-time clock, plus driver circuits for the servo motors. A detailed construction manual is available for downloading. Features Dimensions: 135 x 110 x 80 mm Build time: approx. 1.5 to 2 hours Included 3x Precut acrylic sheets with all mechanical parts 3x Mini servo motors 2x Vibration motors 1x Raspberry Pi Pico 1x RTC/driver board with assembled parts Nuts, bolts, spacers, and wires for the assembly Fine-grained white sand
€ 49,95
Members: € 44,96
-

Elektor Digital Elektronik & Modellbahn 2 (PDF)
Elektronik & Modellbahn 2 (PDF)
€ 24,90
Members: € 22,41
-

Elektor Digital Elektor 01-02/2024 (PDF)
Diese Ausgabe steht allen GOLD- und GREEN-Mitgliedern auf der ElektorMagazine-Website zum Download bereit! Sie sind noch kein Mitglied? Hier klicken! Projekt-Update: Energiemessgerät mit ESP32Nächste Schritte beim Prototyping Balkonkraftwerke optimierenÜberlegungen, Wissenswertes und Kalkulationen Für Balkonkraftwerke: ESP32 mit OpenDTUDaten kleiner Wechselrichter per µC auslesen Variables lineares Stromversorgungs-Ensemble0...50 V / 0...2 A + Doppelsymmetrische Versorgung Energiespeicherung heute und morgenEin Interview mit Simon Engelke 2024: Eine Odyssee in die KIWeiter, immer weiter... Bluetooth LE auf dem STM32Auf dem Weg zum fernabgelesenen Messgerät Intelligentes KücheninventarsystemMehr als eine Küchenwaage MAUI: Programmieren für PC, Tablet und SmartphoneDas neue Framework in Theorie und Praxis ChatMagLevDer KI-Weg der Levitation Einfacher PV-Energieregler für InselanlagenBauen Sie ein voll funktionsfähiges PV-Energiemanagement-System KaltkathodenröhrenBemerkenswerte Bauteile Aus dem Leben gegriffenNostalgie Aller Anfang ...... muss nicht schwer sein: Vom FET zum Opamp CAN-Bus-Tutorial für den Arduino UNO R4Zwei UNO R4 nehmen den Bus! Infografik: Strom und Energie Umfangreiche Unterstützung bei Design und EntwicklungArrow Engineering Services Leistungsdichte vs. Wirkungsgrad Aluminium-ElektrolytkondensatorenStörpotential in der Audiotechnik? USB-Tester FNB58 von Fnirsi Pixel Pump Das Pick-and-Place ToolVereinfachung der manuellen SMD-Bestückung HomeLab-ToursVor nicht allzu langer Zeit in einem weit entfernten Land... „In der Welt der Ethik in der Elektronik können auch kleine Schritte eine große Wirkung haben.“ Ethik in der ElektronikDie OECD-Leitsätze und das deutsche Lieferkettengesetz Intelligentes Ni-MH-Ladegerät/EntladegerätDas Leserprojekt „Chadèche“ in Kürze Projekt 2.0Korrekturen, Updates und Leserbriefe
€ 11,90
-
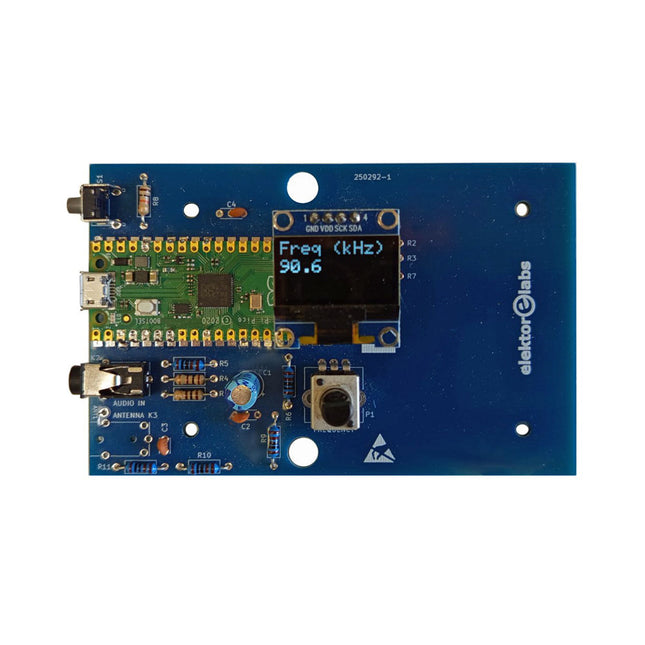
Elektor Labs Elektor AM Transmitter Kit
Build Your Own Vintage Radio Broadcaster The Elektor AM Transmitter Kit allows streaming audio to vintage AM radio receivers. Based on a Raspberry Pi Pico microcontroller module, the AM Transmitter can transmit on 32 frequencies in the AM band, from 500 kHz up to 1.6 MHz in 32 steps of approx. 35 kHz. The frequency is selected with a potentiometer and shown on a 0.96" OLED display. A pushbutton allows toggles the transmitting mode between On and Off. The range of the transmitter depends on the antenna. The onboard antenna provides a range of a few centimeters, requiring the AM Transmitter to be placed close to or inside the radio. An external loop antenna (not included) can be connected to increase the range. The Elektor AM Transmitter Kit comes as a kit of parts that you must solder to the board yourself. Features The board is compatible with a Hammond 1593N enclosure (not included).A 5 VDC power supply with micro-USB connector (e.g., an old phone charger) is needed to power the kit (not included). Current consumption is 100 mA. The Arduino software (requiring Earle Philhower’s RP2040 Boards Package) for the Elektor AM Transmitter Kit plus more information is available at the Elektor Labs page of this project. Component List Resistors R1, R4 = 100 Ω R2, R3, R8 = 10 kΩ R5, R6, R9, R10, R11 = 1 kΩ R7 = optional (not included) P1 = potentiometer 100 kΩ, linear Capacitors C1 = 22 µF 16V C2, C4 = 10 nF C3 = 150 pF Miscellaneous K1 = 4×1 pin socket K2, K3 = 3.5 mm socket Raspberry Pi Pico pushbutton, angle mount 0.96" monochrome I²C OLED display PCB 150292-1
€ 29,95
Best Price
-
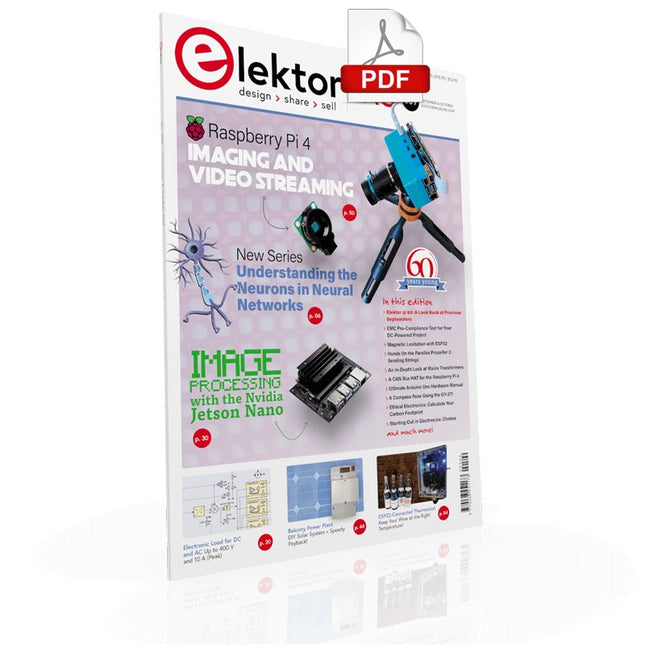
Elektor Digital Elektor September/October 2021 (PDF)
UNDERSTANDING THE NEURONS IN NEURAL NETWORKS (PART 1)Artificial Neurons EMC PRE-COMPLIANCE TEST FOR YOUR DC-POWERED PROJECT (PART 1)Dual DC LISN ELECTRONIC LOAD FOR DC AND ACUp to 400 V and 10 A (Peak) STARTING OUT IN ELECTRONICSEasier Than Imagined! ...Taking on the Choke! IMAGE PROCESSING WITH THE NVIDIA JETSON NANO (PART 1)The Hardware and Software AN IN-DEPTH LOOK AT MAINS TRANSFORMERSHow Do They Behave When They Are Switched On and Off? YES WE CAN WITH PICAN 3A CAN Bus HAT for the Raspberry Pi 4 BALCONY POWER PLANTDIY Solar Balcony = Speedy Payback! IMAGING AND VIDEO-STREAMING WITH A RASPBERRY PI 4The Raspberry Pi High-Quality Camera in Practice USING DISPLAYS IN RASPBERRY PI PROJECTSSample Chapter: Organic Light Emitting Diode Displays (OLED) HANDS ON THE PARALLAX PROPELLER 2 (PART 4)Sending Strings ELEKTOR @ 60A Look Back at Previous Septembers HOMELAB TOURSIn the Friesian Countryside, Where the Tubes Bloom ... HYBRIDSPeculiar Parts, the series A COMPASS ROSE USING THE GY-271Or Why We Move in Figures of Eight to Calibrate a Sensor FINDING YOUR FOOTPRINTCalculate the Carbon Footprint of Your Electronics ESP32-CONNECTED THERMOSTATKeep Your Wine at the Right Temperature! MAGNETIC LEVITATION THE DIGITAL WAYESP32 Pico Replaces the Analog Comparator ULTIMATE ARDUINO UNO HARDWARE MANUALSample Chapter: Main Microcontroller Bootloader MICROPYTHON FOR THE ESP32 AND FRIENDS (PART 2)Control Matrix Displays Easily MADMACHINE SWIFTIO BOARDModern Language Meets Modern Hardware FROM LIFE’S EXPERIENCEOn-Again, Off-Again Relationship HEXADOKUThe Original Elektorized Sudoku
€ 7,50
-

Elektor Digital ESP32 programmeren voor beginners (E-book)
In ESP32 programmeren voor beginners bekijken we de ESP32 en zijn voorganger, de ESP8266. Deze kleine, maar zeer krachtige Chinese chips bestaan uit een processor, geheugen, input- en outputaansluitingen en hebben draadloze netwerktoegang via WiFi. Met dit boek tonen we hoe de programmeeromgeving Arduino werkt en hoe die kan gebruikt worden met ESP-hardware. Aan de hand van voorbeelden en projecten verduidelijken we hoe de ESP-hardware kan worden toegepast. In vogelvlucht: We beschrijven de opbouw van ESP-experimenten. We tonen hoe displays worden aangesloten. Eeprom_24c16 demonstreert hoe een externe geheugenchip wordt gebruikt om getallen en tekst op te slaan en weer uit te lezen. Project Klok is de eenvoudige implementatie van een digitale klok. We geven een handleiding voor het gebruik van temperatuur- en luchtvochtigheidsensoren. Webclient laat zien hoe de ESP32 gegevens van het internet kan halen. Met Webserver kunnen we op afstand met een pc of smartphone gegevens halen uit een ESP32, sensoren uitlezen en toestellen aan- en uitschakelen. Een NTP-klok haalt tijdinformatie van Tijdserver. Die geeft zowel de tijd als het aantal seconden sinds 1 januari 1900. Het boek beschrijft hoe hieruit de tijd kan worden berekend. In het laatste hoofdstuk gebruiken we het internet om nauwkeurige weerinformatie en voorspellingen op te vragen.
€ 24,95
Members: € 22,46
-
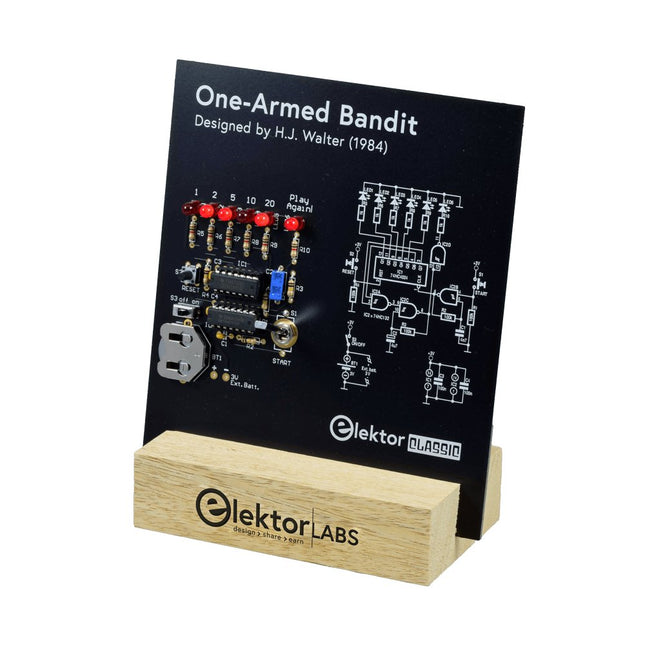
Elektor Labs Elektor One-armed Bandit
Pull Down Lever For Highest Score! This Elektor Circuit Classic from 1984 shows a playful application of CMOS 400x series logic ICs in combination with LEDs, a highly popular combination at the time. The project imitates a spinning-digit type slot machine. The Game To play the game, first agree on the number of rounds. Player 1 actuates the switch lever as long as desired and releases it. The LEDs then show the score which is the sum of the 50-20-10-5 digits lit up. If the Play Again! LED lights, Player 1 has another, “free” round. If not, it’s Player 2’s turn. The players keep tab of their scores, and the highest score wins. Features LEDs Indicate Score Multi-Player and Play Again! Elektor Heritage Circuit Symbols Tried & Tested by Elektor Labs Educational & Geeky Project Through-Hole Parts Only Included Printed Circuit Board All Components Wooden Stand Bill of Materials Resistors (5%, 250 mW) R1,R2,R3,R4 = 100kΩ R5,R6,R7,R8,R9,R10 = 1kΩ Capacitors C1 = 4.7nF, 10%, 50V, 5mm C2 = 4.7μF, 10%, 63V, axial C3,C4 = 100nF, 10 %, 50V, ceramic X7R, 5mm Semiconductors LED1-LED6 = red, 5mm (T1 3/4) IC1 = 74HC4024 IC2 = 74HC132 Miscellaneous S1 = switch, toggle, 21mm lever, SPDT, momentary S2 = switch, tactile, 24V, 50mA, 6x6mm S3 = switch, slide, SPDT IC1,IC2 = IC socket, DIP14 BT1 = PCB-mount CR2032 battery retainer clip Desktop Stand PCB 230098-1 Not included: BT1 = CR2032 coin cell battery
€ 39,95€ 24,95Best Price
-
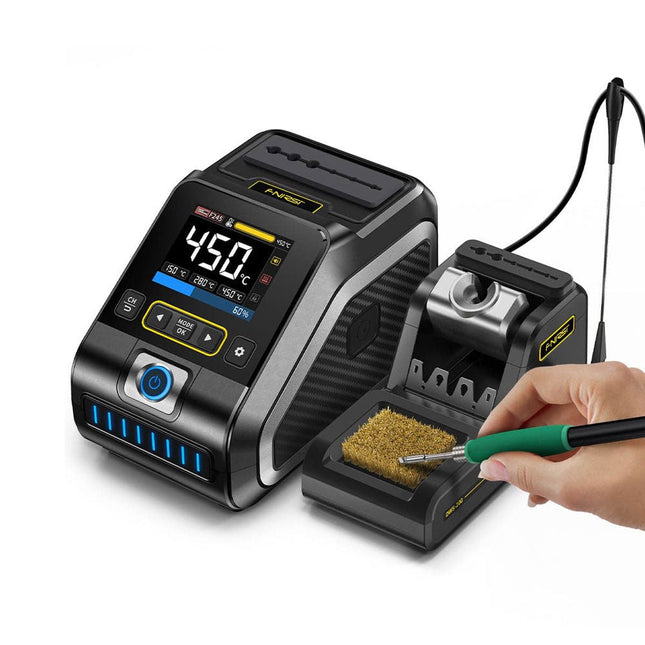
FNIRSI FNIRSI DWS-200 Smart Soldering Station (with F245 Handle + 6 Soldering Tips)
The FNIRSI DWS-200 is a powerful 200 W smart soldering station, ideal for electronic soldering applications. Powered by a switch-mode power supply, it operates smoothly with a wide voltage input range of 100-240 V. The station provides an adjustable temperature range from 100°C to 450°C (212°F to 842°F) and allows for easy switching between °C and °F. To enhance efficiency, it supports up to three preset temperature values and can connect to a soldering iron stand for standby mode activation. The station also features a dynamic temperature curve mode for real-time data monitoring, ensuring precise and consistent performance in demanding soldering tasks. Features Maximum power output of 200 W, allowing for fast heating Wide adaptive voltage input of 100-240 V 2.8" HD color TFT display with intelligent control Multiple preset groups to switch between different settings quickly Supports F245 and F210 soldering handle types, offering flexibility for different soldering applications Real-time sleep mode to extend the life of the soldering tip Multi-mode real-time monitoring for power and temperature status, enhancing safety and precision Specifications Peak Power 200 W (max) Temperature Range 100°C~450°C (212°F~842°F) Display 2.8" TFT HD Color Screen Heating Time 1 sec Melting Time 3 sec Input Voltage 100-240 V (AC) Input Fuse 3 A Soldering Handle Type F245 Dimensions (Station) 156 x 96 x 103 mm Weight (Station) 475 g Included 1x FNIRSI DWS-200 Soldering Station 1x Soldering Handle F245 6x Soldering Tips (B, KU, K, C2, I, JS) 1x Connecting Cable 2x Helping Hands 1x Power Cable (EU) Downloads Manual Firmware V1.3
€ 179,00
-

Elektor Digital Elektor Janvier/Février 2024 (PDF)
Le téléchargement intégral de ce numéro est disponible pour nos membres GOLD et GREEN sur le site Elektor Magazine ! Pas encore membre ? Cliquez ici. mise à jour du projet : compteur d'énergie basé sur l'ESP32Prochaines étapes du prototypage optimisation des centrales solaires sur balconConsidérations, faits intéressants et calculs ESP32 avec OpenDTU pour les centrales sur balconRelever les données des petits onduleurs avec des microcontrôleurs alimentation linéaire variable EnsembleAlimentation 0-50 V / 0-2 A + alim symétrique double le stockage d?énergie aujourd?hui et dans le futurinterview de Simon Engelke 2024 : l'Odyssée de l'IAsans répit Bluetooth LE sur le STM32Un moyen de lire les mesures à distance boîte de conservation intelligente centrée sur l'être humain MAUI : programmation pour PC, tablettes et smartphonesle nouveau framework en théorie et en pratique ChatMagLevlévitation magnétique ? version IA régulateur de puissance PV simpleRéalisez votre premier système de gestion de l'énergie photovoltaïque entièrement fonctionnel les composants à cathode froide sur le vifnostalgie démarrer en électronique?Les FET tutoriel bus CAN pour l'Arduino UNO R4deux UNO R4 connectés au bus infographie assistance complète à la conception et au développementles services d?ingénierie d?Arrow comparatif entre densité de puissance et rendement énergétique condensateurs électrolytiques en aluminiumsources potentielles de distorsions en technologie audio test et mesure USBle Fnirsi FNB58 l'outil Pick-and-Place manuel Pixel Pumpsimplifier l'assemblage manuel des cartes CMS visite à domicilenaguère, dans un pays lointain? « Dans le monde de l'éthique en électronique, même les petits pas peuvent avoir un impact significatif. » éthique en électroniqueles lignes directrices de l'OCDE et la loi allemande sur le devoir de diligence dans la chaîne d'approvisionnement Chadèche : chargeur/déchargeur intelligent pour accus NiMhrésumé d?un projet de lecteur projet 2.0Corrections, mises à jour et courriers des lecteurs
€ 10,95
-
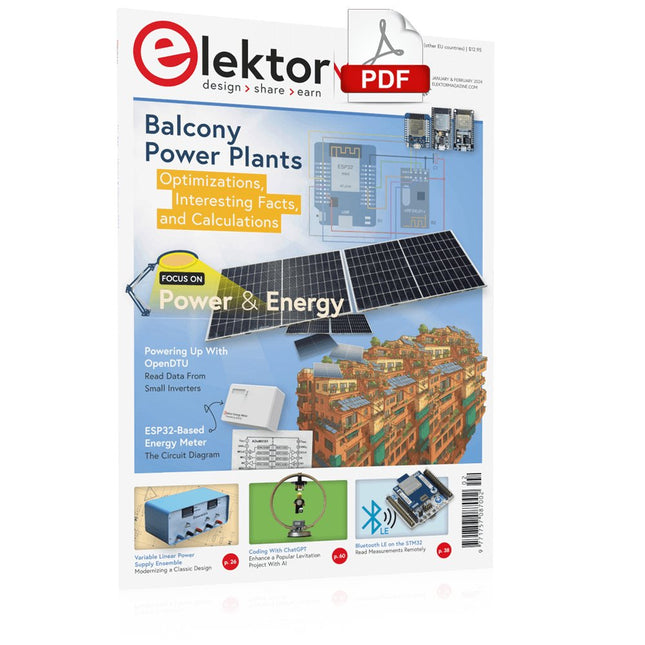
Elektor Digital Elektor January/February 2024 (PDF)
Elektor GREEN and GOLD members can download their digital edition here. Not a member yet? Click here. Project Update: ESP32-Based Energy MeterNext Steps in Prototyping Optimizing Balcony Power PlantsConsiderations, Interesting Facts, and Calculations ESP32 With OpenDTU for Balcony Power PlantsRead Data from Small Inverters Via MCUs Variable Linear Power Supply Ensemble0…50 V / 0…2 A + Dual Symmetrical Supply Energy Storage Today and TomorrowAn Interview With Simon Engelke 2024: An AI OdysseyIt’s Not Letting Up Bluetooth LE on the STM32A Way to Read Measurements Remotely Human-Centric Smart Kitchen Grocery Container MAUI: Programming for PC, Tablet, and SmartphoneThe New Framework in Theory and Practice ChatMagLevThe AI Way of Levitation Simple PV Power RegulatorBuild Your First, Fully Functional PV Energy Management System Cold-Cathode DevicesPeculiar Parts, the Series From Life’s ExperienceNostalgia Starting Out in Electronics……Looking at FETs CAN Bus Tutorial for the Arduino UNO R4Two UNO R4s Hop on the Bus! Infographics: Power & Energy Comprehensive Design and Development SupportArrow Engineering Services Comparing Power Density and Power Efficiency Aluminium Electrolytic CapacitorsInterference Potential in Audio Technology USB Test and MeasurementThe Fnirsi FNB58 The Pixel Pump Pick-and-Place ToolSimplifying Manual SMT Board Assembly HomeLab ToursNot So Long Ago, in a Far-Away Country... “In the world of ethics in electronics, even small steps can make a significant impact.” Ethics in ElectronicsThe OECD Guidelines and Germany’s Supply Chain Due Diligence Act Chadèche: Smart Ni-MH Charger/DischargerA Reader’s Project in Brief Err-lectronicsCorrections, Updates and Readers’ Letters
€ 7,50


