The SEQURE HT140 is a highly versatile 2-in-1 soldering tool that combines the functionality of hot tweezers and a soldering iron. It is specifically engineered for precise SMD soldering and desoldering tasks.
With independent control for single-sided heating, it operates as a traditional soldering iron when fitted with a standard tip. When configured for dual-sided heating, it transforms into hot tweezers – perfect for the efficient and accurate removal of SMD components.
Features
Working Temperature: 50-500°C (122-932°F)
Supports multiple power inputs: PD 3.1/3.0/2.0, QC 3.0/2.0, (5-28 V DC), LiPo batteries, and power adapters.
The HT140 combines hot tweezers and a soldering iron, with independent single- or dual-sided heating. Use it as a soldering iron with a tip, or as hot tweezers for easy SMD desoldering.
Voltage and current can be adjusted based on the power source.
Features dual temperature control, presets, quick temperature increase, and fine-tuning.
128 x 32 OLED screen with adjustable brightness, and orientation. Switchable °C/°F.
High-precision heating element with ±1% accuracy. Melts solder in just 2 seconds.
Smart standby, sleep, and wake-up functions extend tip lifespan and boost efficiency.
Supports temperature calibration and compensation for precise work.
Includes a 1.5 m heat-resistant PD 150 W silicone cable and a sturdy all-metal HT Station.
Swappable tips and adjustable angles for various SMD soldering tasks.
Specifications
Working Voltage
5-28 V DC
Maximum Power
140 W
Working Temperature
50-500°C (122-932°F)
Tin Melting Time
2s
Interface Type
USB-C, DC5525
Power Supply
PD 3.1/3.0/2.0, QC 3.0/2.0, 28 V DC max
Display
128 x 32 OLED
Firmware Upgrade
Yes
Menu Languages
English, Russian, Chinese
Dimensions
160 x 27 x 17.5 mm
Weight
50 g
Included
1x SEQURE HT140 Host
2x HT140-IS Tapered Curved Desoldering Tips
1x HT Station
1x Accessory Package
1x Storage Bag
1x 65 W PD Power Supply (EU, UK & US)
1x 24 W PD Silicone Wire (1.5 m)
1x GND Wire Accessory Kit (1.8 m)
Downloads
Manual
Firmware V1.04
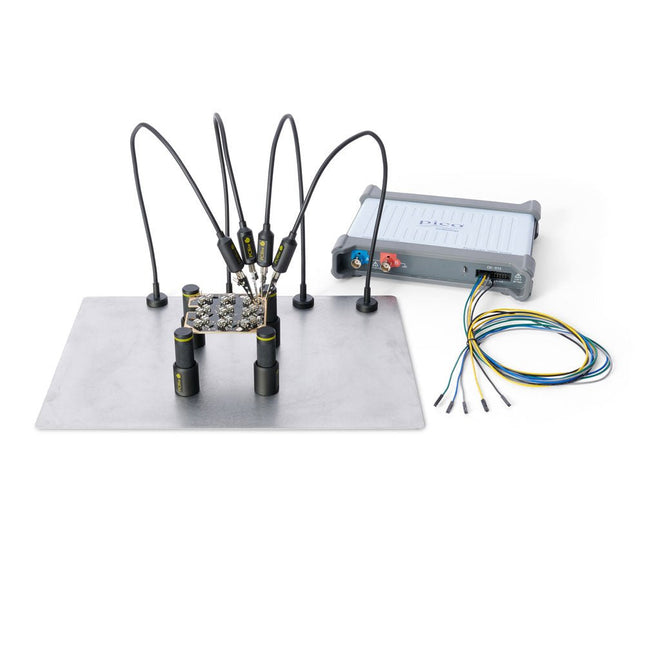
The minimalist design and the spring loaded test needle makes it possible to simultaneously measure on fine pitch components and nearby signals.
The probe is steady but yet flexible made for instant measurements or total hands-free operations together with your multimeter, logic analyzer or preferred tool.
The dual pin header connector fits directly on a 2.54 mm (0.100”) connector.
The SP10 comes with a powerful magnet in the base, as for all PCBite probes and holders which makes the probe easy to place and reposition.
Included
4x PCBite holder
1x Large base plate (A4)
4x PCBite probe with pin tipped test needle
4x Extra crown tipped test needle
1x Set of yellow insulation washers
5x Dupont to dupont test wire
2x Banana to dupont test wire
1x Microfiber cloth
Downloads
User Guide
Practical Projects in Analog, Audio and Beyond
Discover a remarkable collection of more than 450 electronics projects published in Elektor Magazine and carefully selected by renowned Elektor Lab engineer Ton Giesberts.
The USB drive brings together a wide variety of circuits, designs, and practical project ideas created by numerous Elektor authors and engineers over the years. Covering a broad range of electronics topics, this extensive archive is a valuable source of knowledge and inspiration for engineers, makers, students, and electronics enthusiasts.
More than 450 selected Elektor projects
Carefully compiled by Elektor engineer Ton Giesberts
Ideal for building, experimenting, and discovering new ideas
Explore decades of Elektor expertise in one comprehensive project collection.
Highlights
Q-Watt Audio Power
Fortissimo-100 High-End Amplifier
Buffer Board for the Raspberry Pi 400
USB-to-Multi-Protocol Serial Converter
DDS Function Generator
AC/DC Power Meter
Charge-a-Phone
Specifications
Storage
8 GB
Connectors
1x USB-A1x USB-C
System requirements
PC with Adobe Reader 7.0 or higher
Web browser
This complete STM32 microcontroller programming course features a textbook, a component kit, hands-on projects, and a comprehensive online course. It is ideal for step-by-step learning of embedded systems programming with Arduino using a practical, hands-on approach.
A Practical Introduction to Embedded Systems with the STM32
This course is designed for people who are new to embedded systems and looking for a structured, example-driven way to get started. A kit of parts comprising LEDs and resistors, switches, sensors and actuators, displays, a breadboard and wires, and more is included. These are used in the course to illustrate example applications.
No prior experience with Arduino or embedded development is required. Each section features hands-on examples and mini projects designed to reinforce key concepts and inspire deeper exploration. By the end of the course, you’ll be able not only to reproduce the examples but also to build on them with your own ideas and applications.
What Will You Learn?
Microcontroller programming in C/C++ with the STM32 using the Arduino IDE
Working with Digital I/O, read buttons and encoders, control LEDs and relays
Read analog inputs, voltages, and analog sensors
Generating analog output signals and PWM
Use serial communication like UART, I²C and SPI to control displays and read digital sensors and SD cards
Managing time
Working with interrupts
Real-time sensor input and control via buttons, LEDs, and displays
Control actuators like relays and servo motors
Debug programs using breakpoints and stepping through code
Who Is It For?
Students and self-learners exploring embedded systems
Makers and IoT enthusiasts looking to improve their hardware skills
Educators and trainers seeking ready-to-teach material
What's Inside the Box?
Access to the full course on the Elektor Academy Pro Learning Platform
STM32 NUCLEO-F411RE microcontroller board
Book: Arduino for STM32
Downloadable project files for every module
Component Box:
2× LED, red, 5 mm
LED, green, 5 mm
3× Resistor, 470 Ω, 0.25 W
LDR
Potentiometer, 10 kΩ, linear
Pushbutton
Rotary encoder module
Relay module
DHT22 Humidity & Temperature Sensor
TM1637-compatible 4-digit 7-segment display
MPU-6050 IMU with headers
SSD1306-compatible I²C OLED display
Micro SD card adapter with header
Buzzer
SG90 Micro Servo
ILI9341-compatible SPI 240×320 TFT display
20× Jumper wires
Breadboard
Vom Messwert zur stabilen Entscheidung
Wie wird aus einem einfachen Mikrocontroller ein intelligentes System, das Sensorwerte erfasst, verarbeitet und sinnvoll darauf reagiert? Dieses Buch zeigt es Ihnen Schritt für Schritt – verständlich, praxisnah und ohne unnötige Vorkenntnisse.
Sie beginnen mit den Grundlagen der digitalen und analogen Ein- und Ausgänge. Anschließend lernen Sie, wie Sensorwerte gelesen, geglättet und zuverlässig bewertet werden. Anschauliche Beispiele erklären, warum einzelne Messwerte oft täuschen können und wie Mittelwertbildung, Hysterese und einfache Entscheidungsregeln für stabile Ergebnisse sorgen. Nach und nach erweitern Sie Ihre Projekte um Displays, I²C-Kommunikation und mehrere vernetzte Mikrocontroller. So entstehen verteilte Systeme, in denen Raspberry Pi Pico und ATtiny-Controller Daten austauschen und gemeinsam Aufgaben übernehmen.
Im fortgeschrittenen Teil erhalten Sie einen leicht verständlichen Einstieg in Merkmalsbildung, Datenvorverarbeitung, hybride Entscheidungsmodelle und TinyML-nahe Anwendungen. Dabei verbinden Sie klassische Regelungstechnik mit modernen datenbasierten Methoden.
Alle Projekte werden von ausführlich kommentierten Programmen in C und MicroPython begleitet. Das Buch richtet sich an Einsteiger, Maker, Studierende und alle, die Embedded-Systeme von Grund auf verstehen möchten.
Am Ende können Sie eigene Systeme entwickeln, die nicht nur messen, sondern Informationen auswerten, zuverlässige Entscheidungen treffen und gezielt reagieren.
Projekte mit Arduino Uno und Raspberry Pi
In diesem Buch werden Anwendungen von Arduino Uno und Raspberry Pi 4 in praxisnahen Projekten auf Basis von CAN-Bus detailliert beschrieben. Durch den Einsatz von entweder Arduino Uno oder Raspberry Pi in Verbindung mit handelsüblichen CAN-Bus-Schnittstellenmodulen werden die Entwicklung, Fehlersuche und Fehlerbeseitigung sowie die Überprüfung von Projekten auf CAN-Bus-Basis erheblich erleichtert.
Dieses Buch richtet sich an jeden, der mehr über den CAN-Bus lernen möchte und mit den Grundlagen der Elektronik vertraut ist. Hilfreich ist auch Erfahrung mit den Programmiersprachen C und Python sowie mit der Programmierung von Arduino Uno unter Verwendung seiner IDE und von Raspberry Pi zu haben.
Das Buch ist eine nützliche Informationsquelle und ein Nachschlagewerk für jeden, der Antworten auf eine oder mehrere der folgenden Fragen sucht:
Welche Bussysteme stehen für die Automobilindustrie zur Verfügung?
Was sind die Grundprinzipien des CAN-Bus?
Welche Arten von Frames (oder Datenpaketen) stehen in einem CAN-Bussystem zur Verfügung?
Wie können Fehler in einem CAN-Bussystem erkannt werden, und wie zuverlässig ist ein CAN-Bussystem?
Welche Arten von CAN-Bus-Controllern gibt es?
Welches sind die Funktionsprinzipien des MCP2515 CAN-Bus-Controllers?
Wie kann ich ein CAN-Bus-Projekt mit Arduino Uno realisieren?
Wie kann ich Arduino oder Raspberry Pi CAN-Bus-Projekte mit 2 und 3 Knoten erstellen?
Wie kann ich die Daten auf dem CAN-Bus analysieren?
Wie kann ich ein CAN-Bus-Projekt mit Raspberry Pi ausführen?
From Simple Ciphers to Secure Systems
Understanding how to apply cryptography on modern microcontrollers is essential for building secure, reliable, and trustworthy systems. This book explains cryptography in the context of embedded hardware, from classical ciphers that illustrate core principles to modern techniques such as AES for practical high-security applications.
By combining mathematical theory with real-world microcontroller implementations, readers learn not only how cryptography works, but also how to implement it effectively on systems with limited processing power and memory. The book is intended for students starting out in cryptography, hobbyists securing personal projects, and engineers looking for a structured guide to embedded security.
The book covers these key topics in applied cryptography:
Classical ciphers on Arduino Uno and Raspberry Pi Pico, with full programs: Spartan Scytale, Hebrew Atbash, Caesar, ROT13, Alberti Disk, Vigenère, Affine, Polybius, Playfair, Beaufort, Ottoman Codebook, and One-Time Pad.
Hacking classical ciphers using microcontrollers, with examples.
Pseudo-random (PRNG) and true random number generation (TRNG) on microcontrollers.
Symmetric-key cryptography with full programs: DES and AES-128/256.
Memory and speed constraints of cryptography on microcontrollers.
Asymmetric cryptography: public/private keys, digital signatures, key distribution and derivation (KDF), RSA, and SHA-256 implementations.
A complete secure communication program using RSA and AES-256.
A glossary of commonly used cryptography terms.
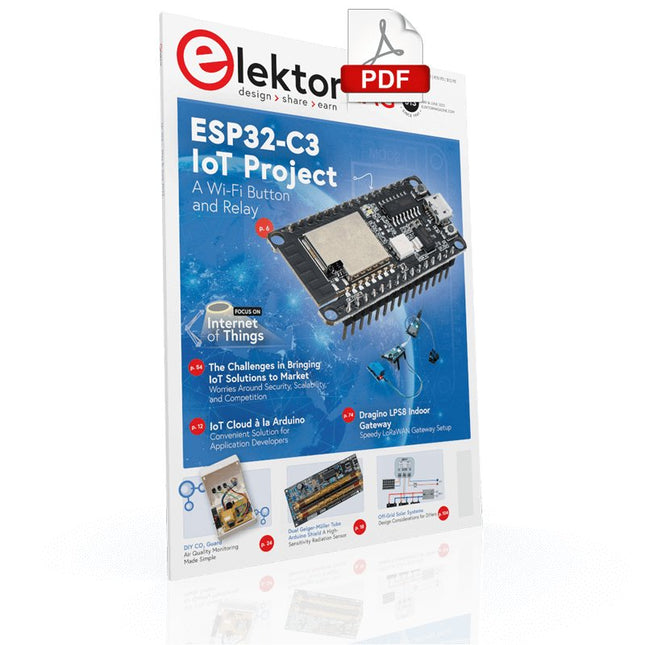
Your First Steps with an ESP32-C3 and the IoTA Wi-Fi Button and Relay IoT Cloud a la Arduino
Dual Geiger-Müller Tube Arduino ShieldA High Sensitivity, Very Low-Power Radiation Sensor
CO2 GuardA DIY Approach to Monitoring Air Quality
MonkMakes Air Quality Kit for Raspberry PiMeasures Temperature and eCO2
Starting Out in ElectronicsWelcome to the Diode
Tips & Tricks for Testing ComponentsNo Expensive Equipment Required
Reducing the Power Consumption of Your Mole RepellerAn ATtiny13 Replaces a 555
Light Switch DeLuxA Solution for High-Precision Light-Controlled Switching
The Challenges in Bringing IoT Solutions to MarketWorries Around Security, Scalability, and Competition Infographics 5-6/2022
Preferably Wired After AllTips for Developing a 1 Gbit/s Interface in an Industrial Environment Bringing Real-Time Object Detection to MCUs with Edge Impulse FOMO
Traveling-Wave TubesPeculiar Parts, the Series
Narrowband Internet of ThingsStandards, Coverage, Agreements, and Modules
Dragino LPS8 Indoor GatewaySpeedy LoRaWAN Gateway Setup
Explore ATtiny Microcontrollers Using C and Assembly LanguageSample Chapter: ATtiny I/O Ports
Err-lectronicsCorrections, Updates and Readers’ Letters
LoRa GPS Tracker UpdateReceive and Show Location Using a Raspberry Pi
Circuit Simulation with TINA Design Suite & TINACloudSample Chapter: Sinusoidal Oscillators
From Life’s ExperienceAssembly Line Work
The WinUI Graphics Framework for Windows AppsA Small Demo Application
GUIs with PythonWorst GUI of the world
Off-Grid Solar SystemsElectrical Energy Independent of the Mains Grid
The 10-Year SmartphoneRenew Your Expectations
HexadokuThe Original Elektorized Sudoku
STmicroelectronics’ wireless IoT & wearable sensor development kit
‘SensorTile.box’ is a portable multi-sensor circuit board housed in a plastic box and developed by STMicroelectronics. It is equipped with a high-performance 32-bit ARM Cortex-M4 processor with DSP and FPU, and various sensor modules, such as accelerometer, gyroscope, temperature sensor, humidity sensor, atmospheric pressure sensor, microphone, and so on. SensorTile.box is ready to use with wireless IoT and Bluetooth connectivity that can easily be used with an iOS or Android compatible smartphone, regardless of the level of expertise of the users. SensorTile.box is shipped with a long-life battery and all the user has to do is connect the battery to the circuit to start using the box.
The SensorTile.box can be operated in three modes: Basic mode, Expert mode, and Pro mode. Basic mode is the easiest way of using the box since it is pre-loaded with demo apps and all the user has to do is choose the required apps and display or plot the measured data on a smartphone using an app called STE BLE Sensor. In Expert mode users can develop simple apps using a graphical wizard provided with the STE BLE Sensor. Pro mode is the most complex mode allowing users to develop programs and upload them to the SensorTile.box.
This book is an introduction to the SensorTile.box and includes the following:
Brief specifications of the SensorTile.box; description of how to install the STE BLE Sensor app on an iOS or Android compatible smartphone required to communicate with the box.
Operation of the SensorTile.box in Basic mode is described in detail by going through all of the pre-loaded demo apps, explaining how to run these apps through a smartphone.
An introduction to the Expert mode with many example apps developed and explained in detail enabling users to develop their own apps in this mode. Again, the STE BLE Sensor app is used on the smartphone to communicate with the SensorTile.box and to run the developed apps.
The book then describes in detail how to upload the sensor data to the cloud. This is an important topic since it allows the sensor measurements to be accessed from anywhere with an Internet connection, at any time.
Finally, Pro mode is described in detail where more experienced people can use the SensorTile.box to develop, debug, and test their own apps using the STM32 open development environment (STM32 ODE). The Chapter explains how to upload the developed firmware to the SensorTile.box using several methods. Additionally, the installation and use of the Unicleo-GUI package is described with reference to the SensorTile.box. This PC software package enables all of the SensorTile.box sensor measurements to be displayed or plotted in real time on the PC.
Dieses Buch ist eine Einführung in das hochaktuelle Gebiet der Robotik. Dabei stehen praktische Anwendungsbeispiele im Vordergrund. Neben den technischen und mechanischen Grundlagen werden die elektronischen Komponenten und Module erläutert. Eine zentrale Rolle spielt dabei der Mikrocontroller.
Für Robotik-Anwendungen haben sich zwei Controller-Boards etabliert: der Arduino und der Raspberry Pi. Dem trägt dieses Buch Rechnung und beschreibt praktische Nachbauprojekte mit diesen beiden populären Boards.
Getreu der Philosophie des „Learning by Doing“ können sich auch ambitionierte, nichtprofessionelle Anwender mit dem Lernmaterial des Buches einen Überblick über den neuesten Stand der Robotertechnik und KI verschaffen. Für praktische Anwendungen können sowohl komplette Bausätze als auch einzelne Komponenten verwendet werden. Dabei wurde stets darauf geachtet, dass die Hardware möglichst universell einsetzbar ist.
Open-Source-Code mit Arduino IDE und PlatformIO
Autonomes Fahren: GPS, Accelerometer, Gyroskop
PS3-Controller
Mikrocontroller wie der Arduino und Einplatinenrechner wie der Raspberry Pi haben sich zu beliebten Komponenten entwickelt. Dritter im Bunde ist der ESP32 der Firma Espressif. Mikrocontroller dieser Baureihe zeichnen sich durch eine Vielzahl implementierter Funktionen aus, die bei einem Arduino konventioneller Prägung mit einem Atmel-AVR-Mikrocontroller erst mit weiterer Hardware möglich sind. Prominentes Beispiel sind hier die WiFi- und Bluetooth-Funktionalitäten. Gegenüber einem Raspberry Pi zeichnen sie sich durch einen deutlich geringeren Preis aus.
Allgemeine Informationen für die Realisierung eines Roboterauto-Projekts mit dem ESP32 sind leicht zu finden. Dabei handelt es sich aber oft nur um Ausführungen zu einem Teilaspekt, ohne inhaltliche oder funktionale Abstimmung. So ist nicht nur die Beschaffung der benötigten Informationen mühselig und zeitaufwändig, sie kann auch außerordentlich fehlerträchtig sein.
Ansatzpunkt dieses Buches ist, diese Lücke zu schließen. Es geht auf verschiedene Möglichkeiten eines Chassis ein, vermittelt nötige Kenntnisse und führt schrittweise von einer einfachen Motorsteuerung zu einem komplexen sensor- und sprachgesteuerten Roboterauto. Hacks rund um GPS und eine PlayStation 3 runden die Sache ab.
Inhalt
Bei der Reihenfolge der Kapitel wurde versucht – beginnend bei der Darstellung von grundlegenden Informationen – über die Lösung einfacher Aufgaben zu etwas anspruchsvolleren Techniken zu führen.
Der Mikrocontroller ESP32
Die Software erstellen
Die Stromversorgung
Rund um die Hardware
Das Chassis
Der Gleichstrommotor
Kabellose Steuerung über WiFi
Mit Sensoren Hindernisse erkennen
Eine eigene Roboterauto-App
Servo und Lichtsensor
GPS
Accelerometer / Gyroskop
PS3-Controller
Roboterauto-App
Hinweis zur Software
Die Dateien haben das Suffix (.cpp). Grund ist die Entwicklung mit PlatformIO. Mit Copy & Paste sollten sie auch in der Arduino-IDE verwendet werden können.