
Search results for "nanosound or dac or 2 or pro or for or rpi or with or 1 or 5 or colour or oled"
-

Elektor Classics The Elektor Audio Collection 2026 (USB Stick)
More than 475 Audio Circuits from 30 Years of Elektor This USB Stick contains over 475 different audio circuits from the volumes 1995-2025 of Elektor. The article search feature allows you to search full-text content. The results are always displayed as pre-formatted PDF documents. Highlights Surround-sound decoder Compact amp Sampling rate converter Battery powered preamplifier Titan 2000 amplifier Crescendo Millennium amplifier Audio-DAC/ADC IR-S/PDFI receiver and transmitter High-End Power Amp Hi-fi Wireless Headset Paraphase Tone Control and more… On the Stick you will also find a folder with additional material such as PCB layouts, Gerber files and software. Specifications Storage 16 GB Interfaces 1x USB-A1x USB-C System requirements PC with Adobe Reader 7.0 or higher Web browser
€ 49,95€ 39,95Best Price
-
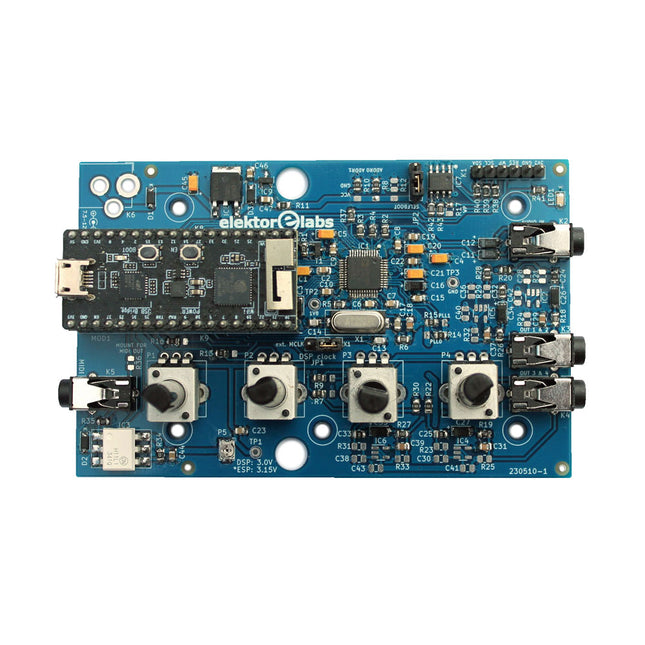
Elektor Labs Elektor Audio DSP FX Processor (New Revision)
The Elektor Audio DSP FX Processor combines an ESP32 microcontroller and an ADAU1701 Audio DSP from Analog Devices. Besides a user-programmable DSP core, the ADAU1701 has high-quality analog-to-digital and digital-to-analog converters built-in and features an I²S port. This makes it suitable as a high-quality audio interface for the ESP32. Programs for the ESP32 can be created with Arduino, Platform IO, CMake or by using the Espressif IDF in another way. Programs for the ADAU7101 audio DSPs are created with the free visual programming tool SigmaStudio by dragging and dropping pre-defined algorithm blocks on a canvas. Applications Bluetooth/Wi-Fi audio sink (e.g. loudspeaker) & source Guitar effect pedal (stomp box) Music synthesizer Sound/function generator Programmable cross-over filter for loudspeakers Advanced audio effects processor (reverb, chorus, pitch shifting, etc.) Internet-connected audio device DSP experimentation platform Wireless MIDI MIDI to CV converter and many more... Specifications ADAU1701 28-/56-bit, 50-MIPS digital audio processor supporting sampling rates of up to 192 kHz ESP32 32-bit dual-core microcontroller with Wi-Fi 802.11b/g/n and Bluetooth 4.2 BR/EDR and BLE 2x 24-bit audio inputs (2 V RMS, 20 kΩ) 4x 24-bit audio outputs (0.9 V RMS, 600 Ω) 4x Control potentiometer MIDI in- and output I²C expansion port Multi-mode operation Power supply: 5 V DC USB or 7.5-12 V DC (barrel jack, center pin is GND) Current consumption (average): 200 mA Included 1x ESP32 Audio DSP FX Processor board (assembled) 1x ESP32-PICO-KIT 2x Jumpers 2x 18-pin headers (female) 4x 10 KB potentiometers Downloads Documentation GitHub
€ 99,95€ 84,95Best Price
-
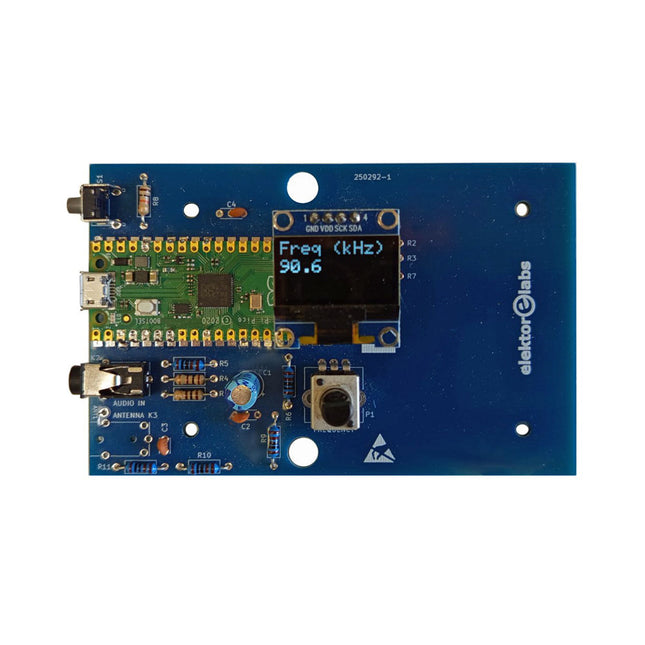
Elektor Labs Elektor AM Transmitter Kit
Build Your Own Vintage Radio Broadcaster The Elektor AM Transmitter Kit allows streaming audio to vintage AM radio receivers. Based on a Raspberry Pi Pico microcontroller module, the AM Transmitter can transmit on 32 frequencies in the AM band, from 500 kHz up to 1.6 MHz in 32 steps of approx. 35 kHz. The frequency is selected with a potentiometer and shown on a 0.96" OLED display. A pushbutton allows toggles the transmitting mode between On and Off. The range of the transmitter depends on the antenna. The onboard antenna provides a range of a few centimeters, requiring the AM Transmitter to be placed close to or inside the radio. An external loop antenna (not included) can be connected to increase the range. The Elektor AM Transmitter Kit comes as a kit of parts that you must solder to the board yourself. Features The board is compatible with a Hammond 1593N enclosure (not included).A 5 VDC power supply with micro-USB connector (e.g., an old phone charger) is needed to power the kit (not included). Current consumption is 100 mA. The Arduino software (requiring Earle Philhower’s RP2040 Boards Package) for the Elektor AM Transmitter Kit plus more information is available at the Elektor Labs page of this project. Component List Resistors R1, R4 = 100 Ω R2, R3, R8 = 10 kΩ R5, R6, R9, R10, R11 = 1 kΩ R7 = optional (not included) P1 = potentiometer 100 kΩ, linear Capacitors C1 = 22 µF 16V C2, C4 = 10 nF C3 = 150 pF Miscellaneous K1 = 4×1 pin socket K2, K3 = 3.5 mm socket Raspberry Pi Pico pushbutton, angle mount 0.96" monochrome I²C OLED display PCB 150292-1
€ 34,95€ 29,95Best Price
-

Elektor Bundles Logic Analyzer im Einsatz (Bundle)
Buch: Logic Analyzer im Einsatz Schritt-für-Schritt-Anleitungen führen Sie in die Analyse moderner Protokolle von I²C, SPI, UART, RS-232, NeoPixel, WS28xx, HD44780 und 1-Wire ein. Anhand von zahlreichen Experimentierschaltungen mit dem Raspberry Pi Pico, Arduino Uno und dem Bus Pirate üben Sie die praxisnahe Anwendung gängiger USB-Logikanalysatoren ein. Alle in diesem Buch vorgestellten Experimentierschaltungen wurden vollständig getestet und sind funktionsfähig. Die notwendigen Programmlistings sind enthalten, es sind keine besonderen Programmier- oder Elektronikkenntnisse für diese Schaltungen notwendig. Es werden die Programmiersprachen MicroPython und C mit den Entwicklungsumgebungen Thonny und Arduino IDE eingesetzt. Dieses Buch verwendet mehrere Modelle flexibler und weit verbreiteter USB-Logikanalysatoren und zeigt die Stärken und Schwächen jeder Preisklasse. Sie werden kennenlernen, welche Kriterien für Ihre Arbeit wichtig sind und in der Lage sein, das für Sie passende Gerät zu finden. Egal ob Arduino, Raspberry Pi oder Raspberry Pi Pico: Die abgebildeten Beispielschaltungen ermöglichen einen schnellen Start in die Protokollanalyse und können auch als Grundlage für eigene weitere Experimente dienen. Sie werden alle wichtigen Begriffe und Zusammenhänge kennenlernen, eigene Experimente durchführen, selbstständig Protokolle analysieren und nach der Lektüre dieses Buches – im Bereich der digitalen Signale und Protokolle – ein umfassendes Wissen aufgebaut haben. USB Logic Analyzer (8 Kanäle, 24 MHz) Dieser USB Logic Analyzer ist ein 8-Kanal-Logikanalysator, bei dem jeder Eingang doppelt für die analoge Datenaufzeichnung dient. Es eignet sich perfekt zum Debuggen und Analysieren von Signalen wie I²C, UART, SPI, CAN und 1-Wire. Dabei wird ein digitaler Eingang, der mit einem zu testenden Gerät (DUT) verbunden ist, mit einer hohen Abtastrate abgetastet. Die Verbindung zum PC erfolgt via USB. Technische Daten Kanäle 8 digitale Kanäle Maximale Abtastrate 24 MHz Maximale Eingangsspannung 0 V ~ 5 V Betriebstemperatur 0°C ~ 70°C Eingangsimpedanz 1 MΩ || 10 pF Unterstützte Protokolle I²C, SPI, UART, CAN, 1-Wire etc. PC-Verbindung USB Abmessungen 55 x 28 x 14 mm Downloads Software Dieses Bundle enthält: Buch: Logic Analyzer im Einsatz (Einzelpreis: 40 €) USB Logic Analyzer (8 Kanäle, 24 MHz) (Einzelpreis: 20 €) USB-Kabel Jumper Wire Ribbon Kabel
€ 59,95€ 49,95Best Price
-

Elektor Digital Heimautomation und Elektronik für Anfänger (PDF)
Projekte mit Arduino, ESPHome, Home Assistant und Raspberry Pi & Co Dieses E-Book enthält verschiedene Projektbeispiele und beginnt mit einer Einführung in die Elektronik. Es erklärt unter anderem, wie man Home Assistant auf einem Raspberry Pi installiert, wie man Raumklimasensoren für Temperatur und Luftfeuchtigkeit nutzt, das MQTT-Protokoll sowie weitere Schnittstellen einsetzt und ESPHome verwendet, um Sensoren und Aktoren in Home Assistant zu integrieren. Zahlreiche Video-Tutorials ergänzen das Buch. Grundlagen der Elektrotechnik Das Buch beginnt mit einer Einführung in die Elektrotechnik. Ihr lernt die Grundlagen von Spannung, Strom, Widerständen, Dioden und Transistoren. Arduino und Mikrocontroller Ein kompletter Abschnitt widmet sich dem Arduino Uno. Ihr lernt den Aufbau kennen, schreibt erste Programme und erarbeitet praktische Beispiele. Home Assistant und Automatisierung Ihr erfahrt, wie Home Assistant auf einem Raspberry Pi eingerichtet wird, und lernt den Umgang mit Automatisierungen, Szenen und Geräten. Zusätzlich wird auf Zigbee, MQTT und ESP-NOW eingegangen – wichtige Technologien für die Heimautomation. ESP8266, ESP32 und ESP32-CAM Die beliebten ESP-Mikrocontroller werden ausführlich behandelt. Nach einer theoretischen Einführung folgen praktische Projekte, die euch zeigen, wie ihr das Beste aus diesen Geräten herausholen könnt. Sensoren und Aktoren Das Buch erklärt die Funktionsweise und Anwendung zahlreicher Sensoren wie Temperatur- und Luftfeuchtigkeitssensoren, Bewegungsmelder und RFID-Reader. Bei den Aktoren werden Schrittmotoren, e-ink Displays, Servo-Motoren und vieles mehr beleuchtet. Zu allen Geräten gibt es praxisnahe Anwendungsbeispiele. ESPHome Dieses Kapitel zeigt euch, wie ihr Sensoren und Aktoren ohne Programmieraufwand in Home Assistant integriert. Ihr werdet Schritt für Schritt durch die Einrichtung mit ESPHome geführt. LEDs und Lichttechnik In diesem Kapitel lernt ihr verschiedene LED-Typen und deren Einsatzmöglichkeiten kennen. Grundlagen der Lichttechnik werden ebenfalls erklärt. Node-RED Ein eigenes Kapitel ist Node-RED gewidmet. Ihr erlernt die Grundlagen dieses leistungsstarken Tools und werdet Schritt für Schritt durch die Einrichtung und Nutzung geführt. Integrierte Schaltkreise (ICs) In der Elektronik gibt es zahlreiche ICs, die uns das Leben erleichtern. Ihr lernt die wichtigsten kennen und wendet das Wissen in praktischen Projekten an. Programmieren für Profis Fortgeschrittene Themen wie die korrekte Verwendung von Tastern, der Einsatz von Interrupts und die Nutzung eines NTP-Servers für Zeit-Synchronisation werden in diesem Kapitel detailliert behandelt. Downloads GitHub
€ 59,95
Best Price
-

Elektor Digital Home Automation and Electronics for Starters (E-book)
Projects with Arduino, ESPHome, Home Assistant, and Raspberry Pi & Co. This e-book contains various example projects, beginning with an introduction to electronics. It also explains how to install Home Assistant on a Raspberry Pi, how to use indoor climate sensors for temperature and humidity, how to implement the MQTT protocol and other interfaces, and how to use ESPHome to integrate sensors and actuators into Home Assistant. Numerous video tutorials complement the book. Fundamentals of electrical engineering The book begins with an introduction to electrical engineering. You will learn the basics of voltage, current, resistors, diodes and transistors. Arduino and microcontrollers A complete section is dedicated to the Arduino Uno. You will get to know the structure, write your first programs and work on practical examples. Home Assistant and automation You will learn how to set up Home Assistant on a Raspberry Pi and how to use automations, scenes and devices. In addition, Zigbee, MQTT and ESP-NOW – important technologies for home automation – will be discussed. ESP8266, ESP32 and ESP32-CAM The popular ESP microcontrollers are covered in detail. A theoretical introduction is followed by practical projects that show you how to get the most out of these devices. Sensors and actuators The book explains the functionality and application of numerous sensors such as temperature and humidity sensors, motion detectors and RFID readers. For actuators, stepper motors, e-ink displays, servo motors and much more are covered. There are practical application examples for all devices. ESPHome This chapter shows you how to integrate sensors and actuators into Home Assistant without any programming effort. You will be guided step by step through the setup with ESPHome. LEDs and lighting technology In this chapter, you will learn about different types of LEDs and how they can be used. The basics of lighting technology are also explained. Node-RED A whole chapter is dedicated to Node-RED. You will learn the basics of this powerful tool and be guided step by step through its setup and use. Integrated Circuits (ICs) In electronics, there are numerous ICs that make our lives easier. You will get to know the most important ones and apply your knowledge in practical projects. Professional programming Advanced topics such as the correct use of buttons, the use of interrupts and the use of an NTP server for time synchronisation are covered in detail in this chapter. Downloads GitHub
€ 59,95
Best Price


