Analoge schakelingen, sensors en microcontrollers
Elektronica is spannend. Het is een hobby die zowel leuk als leerzaam is. Het stelt je in staat om thuis of op het werk nieuwe en nuttige vaardigheden te leren. Een ervaren elektronicus ontwerpt zijn eigen schakelingen, en brengt zijn projecten tot leven. Maar voordat je zover bent, moet je eerst de basis onder de knie krijgen. Daarom brengt dit boek een groot aantal inleidende artikelen samen die in het elektronicatijdschrift Elektor zijn gepubliceerd. Het is je metgezel bij het leerproces in de wereld van de elektronica.
Het begint allemaal met analoge elektronica. Je zult de eenvoudigste componenten en circuits ontdekken om te begrijpen hoe ze werken, hoe ze op elkaar inwerken en de mogelijke problemen. De beste manier om vooruitgang te boeken is door echte experimenten uit te voeren, want theorie is niet genoeg. Dit boek begeleid je in een groot aantal praktische projecten voor beginners. Door ze te maken, doe je veel ervaring en kennis op.
Het tweede deel van het boek neemt je mee in de wereld van de digitale elektronica. De auteur bespreekt het gebruik van microcontrollers. Taken die voorheen werden uitgevoerd door discrete componenten of conventionele geïntegreerde schakelingen worden nu uitgevoerd door microcontrollers. De programmeertaal BASCOM, maar ook platforms als Arduino, BBC micro:bit en andere, maken dit leerproces veel gemakkelijker. Dit boek beschrijft in detail vele toepassingen van microcontrollers, die betaalbaar zijn voor de beginner. Hier gaan programmeren en solderen hand in hand!
Open-Source-Code mit Arduino IDE und PlatformIO
Autonomes Fahren: GPS, Accelerometer, Gyroskop
PS3-Controller
Mikrocontroller wie der Arduino und Einplatinenrechner wie der Raspberry Pi haben sich zu beliebten Komponenten entwickelt. Dritter im Bunde ist der ESP32 der Firma Espressif. Mikrocontroller dieser Baureihe zeichnen sich durch eine Vielzahl implementierter Funktionen aus, die bei einem Arduino konventioneller Prägung mit einem Atmel-AVR-Mikrocontroller erst mit weiterer Hardware möglich sind. Prominentes Beispiel sind hier die WiFi- und Bluetooth-Funktionalitäten. Gegenüber einem Raspberry Pi zeichnen sie sich durch einen deutlich geringeren Preis aus.
Allgemeine Informationen für die Realisierung eines Roboterauto-Projekts mit dem ESP32 sind leicht zu finden. Dabei handelt es sich aber oft nur um Ausführungen zu einem Teilaspekt, ohne inhaltliche oder funktionale Abstimmung. So ist nicht nur die Beschaffung der benötigten Informationen mühselig und zeitaufwändig, sie kann auch außerordentlich fehlerträchtig sein.
Ansatzpunkt dieses Buches ist, diese Lücke zu schließen. Es geht auf verschiedene Möglichkeiten eines Chassis ein, vermittelt nötige Kenntnisse und führt schrittweise von einer einfachen Motorsteuerung zu einem komplexen sensor- und sprachgesteuerten Roboterauto. Hacks rund um GPS und eine PlayStation 3 runden die Sache ab.
Inhalt
Bei der Reihenfolge der Kapitel wurde versucht – beginnend bei der Darstellung von grundlegenden Informationen – über die Lösung einfacher Aufgaben zu etwas anspruchsvolleren Techniken zu führen.
Der Mikrocontroller ESP32
Die Software erstellen
Die Stromversorgung
Rund um die Hardware
Das Chassis
Der Gleichstrommotor
Kabellose Steuerung über WiFi
Mit Sensoren Hindernisse erkennen
Eine eigene Roboterauto-App
Servo und Lichtsensor
GPS
Accelerometer / Gyroskop
PS3-Controller
Roboterauto-App
Hinweis zur Software
Die Dateien haben das Suffix (.cpp). Grund ist die Entwicklung mit PlatformIO. Mit Copy & Paste sollten sie auch in der Arduino-IDE verwendet werden können.
KI in der Praxis
Tauchen Sie ein in die faszinierende Welt der Robotik und Automatisierung!
Dieses Elektor Special zeigt, wie Sie mit Kreativität, etwas Know-how und günstiger Technik eigene Roboter bauen können. Vom ersten DIY-Projekt mit Arduino oder Raspberry Pi bis hin zu intelligenten Systemen mit KI – dieses Heft macht moderne Robotik verständlich und greifbar.
Entdecken Sie praxisnahe Anleitungen, inspirierende Projekte und spannende Einblicke in die Maker-Szene. Lernen Sie, wie aus Experimentierfreude, Gemeinschaft und Offenheit echte Innovation entsteht – und warum Robotik weit mehr ist als nur ein technisches Hobby.
Inhalt
Phantasie wird Realität
Arduino-controlled Drawing Robot
GalaxyRVR Mars Rover Kit for Arduino
YDLIDAR X4Pro Lidar
xHuskyLens AI Camera
DOF Robot Arm mit Raspberry Pi Pico
Fertigungsroboter mit Fischertechnik
Pneumatischer Industrieroboter
Warum bauen wir immer wieder Roboterhunde?
Elektor Mini-Wheelie
Roboterfahrzeuge und autonomes Fahren
Using the RFID Starter Kit
An Arduino board has now become ‘the’ basic component in the maker community. No longer is an introduction to the world of microcontrollers the preserve of the expert. When it comes to expanding the capabilities of the basic Arduino board however, the developer is still largely on his own. If you really want to build some innovative projects it’s often necessary to get down to component level. This can present many beginners with major problems. That is exactly where this book begins.
This book explains how a wide variety of practical projects can be built using items supplied in a single kit together with the Arduino board. This kit, called the 'RFID Starter Kit for Arduino' (SKU 17240) is not just limited to RFID applications but contains more than 30 components, devices and modules covering all areas of modern electronics.
In addition to more simple components such as LEDs and resistors there are also complex and sophisticated modules that employ the latest technology such as:
A humidity sensor
A multicolor LED
A large LED matrix with 64 points of light
A 4-character 7-segment LED display
An infra red remote-controller unit
A complete LC-display module
A servo
A stepper motor and controller module
A complete RFID reader module and security tag
On top of that you will get to build precise digital thermometers, hygrometers, exposure meters and various alarm systems. There are also practical devices and applications such as a fully automatic rain sensor, a sound-controlled remote control system, a multifunctional weather station and so much more.
All of the projects described can be built using the components supplied in the Elektor kit.
This bundle contains the popular Elektor Sand Clock for Raspberry Pi Pico and the new Elektor Laser Head Upgrade, offering even more options for displaying the time. Not only can you "engrave" the current time in sand, you can now alternatively write it on a glow-in-the-dark foil or create green drawings.
Contents of the bundle
Elektor Sand Clock for Raspberry Pi Pico (normal price: €50)
Elektor Laser Head Upgrade for Sand Clock (normal price: €35)
Elektor Sand Clock for Raspberry Pi (Raspberry Pi-based Eye Catcher)
A standard sand clock just shows how time passes. In contrast, this Raspberry Pi Pico-controlled sand clock shows the exact time by "engraving" the four digits for hour and minute into the layer of sand. After an adjustable time the sand is flattened out by two vibration motors and everything begins all over again.
At the heart of the sand clock are two servo motors driving a writing pen through a pantograph mechanism. A third servo motor lifts the pen up and down. The sand container is equipped with two vibration motors to flatten the sand. The electronic part of the sand clock consists of a Raspberry Pi Pico and an RTC/driver board with a real-time clock, plus driver circuits for the servo motors.
A detailed construction manual is available for downloading.
Features
Dimensions: 135 x 110 x 80 mm
Build time: approx. 1.5 to 2 hours
Included
3x Precut acrylic sheets with all mechanical parts
3x Mini servo motors
2x Vibration motors
1x Raspberry Pi Pico
1x RTC/driver board with assembled parts
Nuts, bolts, spacers, and wires for the assembly
Fine-grained white sand
Elektor Laser Head Upgrade for Sand Clock
The new Elektor Laser Head transforms the Sand Clock into a clock that writes the time on glow-in-the-dark film instead of sand. In addition to displaying the time, it can also be used to create ephemeral drawings. The 5 mW laser pointer, with a wavelength of 405 nm, produces bright green drawings on the glow-in-the-dark film. For best results, use the kit in a dimly lit room. Warning: Never look directly into the laser beam!
The kit includes all the necessary components, but soldering three wires is required.
Note: This kit is also compatible with the original Arduino-based Sand Clock from 2017. For more details, see Elektor Magazine 1-2/2017 and Elektor Magazine 1-2/2018.
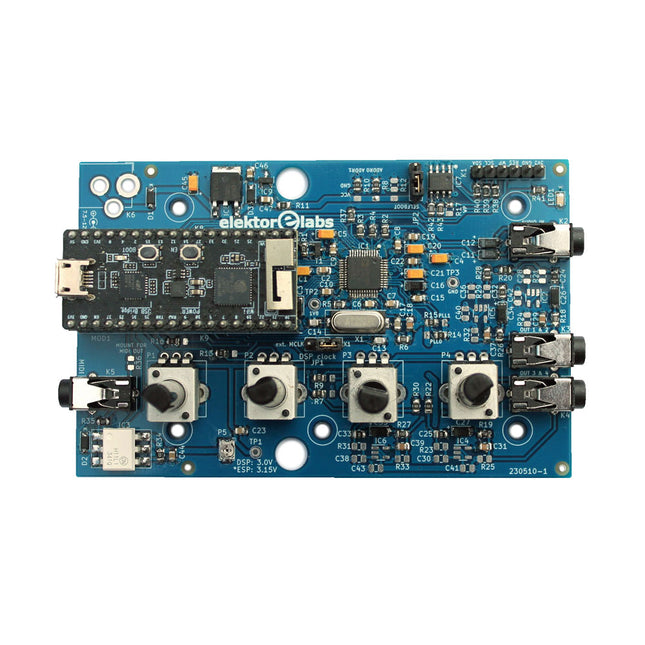
The Elektor Audio DSP FX Processor combines an ESP32 microcontroller and an ADAU1701 Audio DSP from Analog Devices. Besides a user-programmable DSP core, the ADAU1701 has high-quality analog-to-digital and digital-to-analog converters built-in and features an I²S port. This makes it suitable as a high-quality audio interface for the ESP32.
Programs for the ESP32 can be created with Arduino, Platform IO, CMake or by using the Espressif IDF in another way. Programs for the ADAU7101 audio DSPs are created with the free visual programming tool SigmaStudio by dragging and dropping pre-defined algorithm blocks on a canvas.
Applications
Bluetooth/Wi-Fi audio sink (e.g. loudspeaker) & source
Guitar effect pedal (stomp box)
Music synthesizer
Sound/function generator
Programmable cross-over filter for loudspeakers
Advanced audio effects processor (reverb, chorus, pitch shifting, etc.)
Internet-connected audio device
DSP experimentation platform
Wireless MIDI
MIDI to CV converter
and many more...
Specifications
ADAU1701 28-/56-bit, 50-MIPS digital audio processor supporting sampling rates of up to 192 kHz
ESP32 32-bit dual-core microcontroller with Wi-Fi 802.11b/g/n and Bluetooth 4.2 BR/EDR and BLE
2x 24-bit audio inputs (2 V RMS, 20 kΩ)
4x 24-bit audio outputs (0.9 V RMS, 600 Ω)
4x Control potentiometer
MIDI in- and output
I²C expansion port
Multi-mode operation
Power supply: 5 V DC USB or 7.5-12 V DC (barrel jack, center pin is GND)
Current consumption (average): 200 mA
Included
1x ESP32 Audio DSP FX Processor board (assembled)
1x ESP32-PICO-KIT
2x Jumpers
2x 18-pin headers (female)
4x 10 KB potentiometers
Downloads
Documentation
GitHub
Multilingual DIY Kit (incl. 27 RGB LEDs + Raspberry Pi Pico)
Bring some engineering magic to your festive season with the Wordy LED Christmas Tree, a unique DIY electronics kit designed by Elektor. This beautifully engineered 3D Christmas tree combines eleven PCBs, a Raspberry Pi Pico, and 27 addressable RGB LEDs to illuminate Christmas greetings in seven languages: Danish, Dutch, English, French, German, Italian, and Spanish.
Unlike ordinary LED trees, each word inside the tree has its own light chamber, creating a refined, softly glowing display without sound or flicker. The LEDs are fully WS2812-compatible and driven via the popular Adafruit NeoPixel library, making custom animations and color effects easy to create.
Perfect for makers, tinkerers, and festive electronics fans, this kit offers both an enjoyable build and a striking, conversation-worthy decoration. The Wordy Christmas Tree is your perfect holiday maker project!
Features
Multilingual greetings (7 languages) milled into the front panel
3D construction from 11 interlocking PCBs
Powered by Raspberry Pi Pico
27 individually addressable RGB LEDs (pre-mounted)
Smooth fade-in and fade-out animations
Fully programmable using the Arduino IDE
A 5-V power supply (with micro-USB connector) capable of ≥1 A is recommended for maximum brightness (not included)
Dimensions (H x W x D): 130 x 115 x 75 mm
Included
All required PCBs with LEDs and other SMD parts mounted
Raspberry Pi Pico (to be soldered & programmed by the user)
3-way pin header (to be soldered by the user)
3-way pin socket (to be soldered by the user)
4x Self-adhesive dome bumpers
Project Page
Elektor Labs
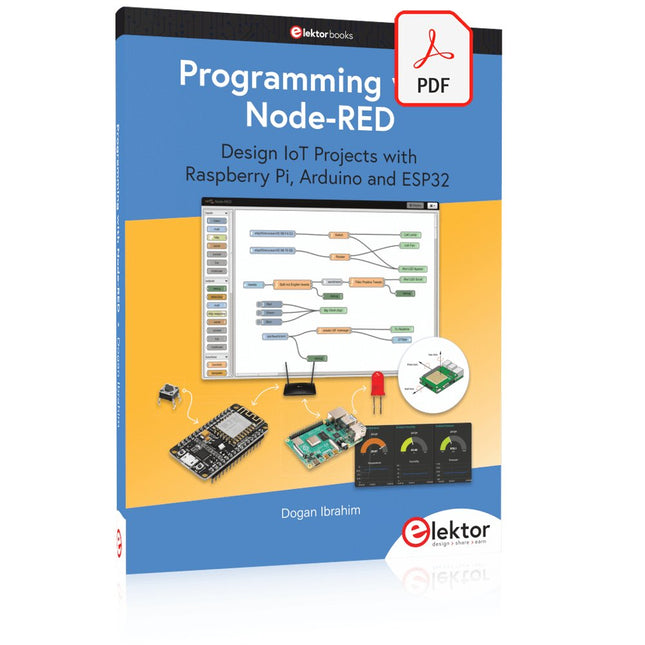
Design IoT Projects with Raspberry Pi, Arduino and ESP32 The Internet of Things (IoT) is becoming a major application area for embedded systems. As a result, more and more people are becoming interested in learning about embedded design and programming. Technical colleges and universities are moving away from legacy 8 and 16-bit microcontrollers and are introducing 32-bit embedded microcontrollers to their curriculums. Many IoT applications demand precision, high processing power, and low power consumption. Produced by IBM, Node-RED is an open-source visual editor for wiring the Internet of Things. Node-RED comes with a large number of nodes to handle a multitude of tasks. The required nodes are selected and joined together to perform a particular task. Node-RED is based on flow type programming where nodes are configured and joined together to form an application program. There are nodes for performing complex tasks, including web access, Twitter, E-mail, HTTP, Bluetooth, MQTT, controlling GPIO ports, etc. One particularly nice aspect of Node-RED is that the programmer does not need to learn how to write complex programs. For example, an email can be sent by simply joining nodes together and writing only a few lines of code. The aim of this book is to teach how Node-RED can be used in projects. The main hardware platform used with most of the projects in this book is Raspberry Pi 4. Chapters are included to show how Node-RED can be also be used with Arduino Uno, ESP32 DevKitC, and the ESP8266 NodeMCU microcontroller development boards.
Dit boek gaat over de Raspberry Pi, en over het programmeren in C. De programmeertaal C en het besturingssysteem Linux (Raspbian) passen uitstekend bij elkaar. Alles wat we nodig hebben om in C te programmeren wordt meegeleverd met het besturingssysteem van de Raspberry Pi.
In dit boek leert u hoe C gebruikt wordt met de Raspberry Pi, en krijgt u een overzicht van de taal.
WiringPi is een softwarebibliotheek voor de Raspberry Pi waarmee C hardware-uitbreidingen kan benaderen. Die bibliotheek wordt gebruikt om sensoren uit te lezen en om extra hardware aan te sturen. U gaat experimenteren met LED’s en schakelaars, met motoren, met geluid en met sensoren voor temperatuur, luchtdruk, en luchtvochtigheid.
Met een Linux-systeem kunt u een webserver maken, inclusief interactieve websites met PHP en WiringPi. Daarom is ook een beknopt overzicht van HTML en PHP in het boek opgenomen. In de voorbeelden worden sensoren via het web uitgelezen en worden apparaten bestuurd. In het laatste voorbeeld wordt een temperatuurlogger gemaakt. Die meet elk kwartier de temperatuur. Een tabel met de meetwaarden kan via het web worden uitgelezen.
Alle voorbeeldprogramma’s kunnen worden gedownload van de website van Elektor.
Practical Multitasking Fundamentals
Programming embedded systems is difficult because of resource constraints and limited debugging facilities. Why develop your own Real-Time Operating System (RTOS) as well as your application when the proven FreeRTOS software is freely available? Why not start with a validated foundation?
Every software developer knows that you must divide a difficult problem into smaller ones to conquer it. Using separate preemptive tasks and FreeRTOS communication mechanisms, a clean separation of functions is achieved within the entire application. This results in safe and maintainable designs.
Practicing engineers and students alike can use this book and the ESP32 Arduino environment to wade into FreeRTOS concepts at a comfortable pace. The well-organized text enables you to master each concept before starting the next chapter. Practical breadboard experiments and schematics are included to bring the lessons home. Experience is the best teacher.
Each chapter includes exercises to test your knowledge. The coverage of the FreeRTOS Application Programming Interface (API) is complete for the ESP32 Arduino environment. You can apply what you learn to other FreeRTOS environments, including Espressif’s ESP-IDF. The source code is available from GitHub. All of these resources put you in the driver’s seat when it is time to develop your next uber-cool ESP32 project.
What you will learn:
How preemptive scheduling works within FreeRTOS
The Arduino startup “loopTask”
Message queues
FreeRTOS timers and the IDLE task
The semaphore, mutex, and their differences
The mailbox and its application
Real-time task priorities and its effect
Interrupt interaction and use with FreeRTOS
Queue sets
Notifying tasks with events
Event groups
Critical sections
Task local storage
The gatekeeper task
AVR-microcontrollers zijn populair, eenvoudig in het gebruik en bijzonder veelzijdig. In het elektronicatijdschrift 'Elektor' is dan ook al een groot aantal speciale toepassingen en printen met een ATmega- of een ATtiny-controller gepubliceerd. Meestal ging het daarbij om afgeronde projecten. In dit boek staat echter de programmering van deze controllers centraal. BASCOM is hiervoor een ideaal gereedschap. Na een minimale voorbereiding kunt u al beginnen uw eigen ideeën te realiseren.
BASCOM en AVR-controllers, een onverslaanbaar team! Wat u ook wilt ontwikkelen, in de meeste gevallen heeft een ATmega alles aan boord wat u nodig hebt. Poorten, timers, A/D-omzetters, PWM-uitgangen en seriële interfaces, RAM, flash-ROM en EEPROM: alles is ruimschoots voorhanden. En met BASCOM is het gebruik daarvan kinderspel. Ook ingewikkelder periferie als LCD, RC5 en I²C kan met slechts een handjevol instructies worden gebruikt. Er is een brede hardware-basis beschikbaar. Of u nu de STK500 van Atmel gebruikt, de ATM18 of een eigen print, u kunt de voorbeelden uit dit boek meteen in praktijk brengen. Voor heel kleine taken worden controllers uit de ATtiny-reeks gebruikt. Op die manier kunt u uw eigen projecten snel en met weinig kosten realiseren.
Downloads
Software
Beginselen van het programmeren Eenvoudige projecten voor beginners Interface- en hardware-uitbreidingen Complexe projecten voor gevorderden Twee zaken hebben in belangrijke mate bijgedragen aan het grote succes van het Arduinoplatform. De eerste is de complete, gebruiksklare processorprint die de kennismaking met dehardware aanzienlijk vergemakkelijkt. En de tweede is de gratis verkrijgbare programmeerinterface, die zonder ingewikkelde installatieprocedures meteen gebruikt kan worden. Eenvoudige projecten voor beginners garanderen snelle resultaten. Het is niet nodig eerst ingewikkelde parameters (processortype of interface-instellingen) te selecteren -- de eerste voorbeeldprogramma's kunnen al na enkele minuten in de Arduino worden geladen en uitgeprobeerd. De Arduino-gebruiker wordt geholpen door een groot aantal software-bibliotheken -- maar deze nog dagelijks groeiende schat aan libraries vormt juist voor de beginner een luxe-probleem: na de eerste eenvoudige voorbeelden is het niet altijd even duidelijk hoe het nu verder moet. Bij de in het internet circulerende projecten ontbreekt het in veel gevallen aan gedetailleerd commentaar en uitleg. Er is geen duidelijk herkenbare leidraad, en eigenlijk is dat ook niet zo vreemd omdat de toepassingen door verschillende mensen voor verschillende doeleinden zijn ontwikkeld. Dat is waar dit boek te hulp komt. Projecten worden op een systematische manier gepresenteerd, waarbij elk project een ander onderwerp belicht. De aanpak is praktijkgericht, maar de noodzakelijke theoretische achtergrond wordt daarbij niet uit het oog verloren. Belangrijke onderwerpen zoals A/D-omzetting, timers en interrupts worden steeds in praktische projecten 'ingebed'. In het boek komen zaken als looplicht-effecten, praktisch bruikbare voltmeters, nauwkeurige digitale thermometers, allerlei soorten klokken, reactietesters en zelfs een muisgestuurde robotkraan aan de orde. En al lezende en doende krijgt de lezer een gedegen inzicht in de achterliggende controllertechnieken.