
Search results for "elektor or magazine or nl or maart or april or 2019 or pdf"
-

Elektor Digital Raspberry Pi für Funkamateure (PDF)
Mit RPi-basierten Tools und Messgeräten Amateurfunkstationen bauen und programmieren Obwohl viele Funkamateure immer noch mit klassischer HF- und Mobilfunkausrüstung arbeiten, ist der Einsatz von Computern und digitalen Techniken inzwischen sehr beliebt. Heutzutage kann jeder für ca. 40 € einen Raspberry Pi-Computer kaufen und fast jede Amateurfunk-Software auf dem 'RPi' ausführen. Die RTL-SDR-Geräte sind bei Funkamateuren sehr beliebt, weil sie sehr preiswert sind und viele Funktionen bieten. Ein Basissystem kann aus einem USB-basierten RTL-SDR-Dongle mit einer geeigneten Antenne, einem RPi-Computer, einem USB-basierten externen Audio-Eingangs-/ Ausgangsadapter und einer auf dem RPi installierten Software bestehen. Mit einer solch einfachen Einrichtung ist es möglich, Signale von etwa 24 MHz bis über 1,7 GHz zu empfangen. Dieses Buch richtet sich an Funkamateure, die lernen wollen, wie man mit dem Raspberry Pi elektronische Projekte baut. Das Buch eignet sich für die gesamte Bandbreite von Anfängern bis hin zu alten Hasen im Amateurfunk. Die schrittweise Installation des Betriebssystems wird mit vielen Details zu den gängigsten Linux-Befehlen beschrieben. Einige Kenntnisse der Programmiersprache Python sind erforderlich, um die im Buch beschriebenen Projekte zu verstehen und zu bearbeiten. Zu den im Buch entwickelten Beispielprojekten gehören eine Stationsuhr, ein Signalgenerator, der Entwurf eines Transistorverstärkers, der Entwurf eines aktiven Filters, ein Morsezeichen-Übungsgerät, ein Frequenzzähler, ein HF-Meter und vieles mehr. Für jedes Projekt werden das Blockdiagramm, der Schaltplan und der vollständige Python-Quellcode angegeben, einschließlich der vollständigen Beschreibung der Projekte. Neben der umfassenden Behandlung von RTL-SDR für Amateurfunk fasst das Buch auch die Installations- und Gebrauchsanweisungen der folgenden Amateurfunkprogramme zusammen, die Sie auf ihrem Raspberry Pi ausführen können: TWCLOCK, Klog, Gpredict, FLDIGI, DIRE WOLF, xcwcp, QSSTV, LinPsk, Ham Clock, CHIRP, xastir und CQRLOG.
€ 34,80
Members: € 31,32
-

FNIRSI FNIRSI TDM-120P Thermal Imaging Multimeter
The FNIRSI TDM-120P is a thermal imaging multimeter that combines thermal imaging technology with traditional multimeter functions, delivering more comprehensive and intuitive test results for electrical testing and related applications. It is widely used in fields such as electrical engineering, industrial manufacturing, construction, and security monitoring. The TDM-120P provides reliable technical support for equipment testing, fault diagnosis, and maintenance management, helping to improve production efficiency, product quality, and overall safety. Features 2-in-1: Thermal Imager + True RMS Multimeter (19,999 Counts) 120 x 90 HD Imaging | <60 mK High Thermal Sensitivity -20°C to 400°C (-4°F to 752°F) Temperature Range | 0.01–1.00 Adjustable Emissivity 2.8" LCD Touch Screen | 7 Color Palettes | One-Click Save & USB Export Full Multimeter Functions: AC/DC Voltage, Resistance, and Capacitance Wide Application: HVAC, Leak Detection, Electrical & Automotive Repair Specifications 7 Color Palettes Arctic / Hot Iron / Iron Red / Rainbow / Lava / Black Hot / White Hot Detector Type Vanadium oxide Field of View 50° Screen 2.8-inch LCD touchscreen Frame Rate ≤25 Hz Infrared Resolution 120 x 90 Temperature Measurement Display Center point, automatic high/low temperature tracking Temperature Range -20°C ~ 400°C (-4°F ~ 752°F) Temperature Unit °C / °F Accuracy ±2°C or ±2% (maximum value measured) High/Low Temperature Alarm Yes Emissivity 0.01-1 adjustable Languages English, Chinese Multimeter DC Voltage Range: 1.9999V / 19.999V / 199.99V / 1000V Accuracy: ±(0.5% +3) AC Voltage Range: 1.9999V / 19.999V / 199.99V / 750.0V Accuracy: ±(1% +3) Resistance Range: 19.999MΩ / 1.9999MΩ / 199.99KΩ / 19.999KΩ Accuracy: ±(0.5% +3) Range: 1.9999KΩ / 199.99Ω Accuracy: ±(2.0% +3) Capacitance Range: 999.9μF / 99.99μF / 9.999μF / 999.9nF / 99.99nF / 9.999nF Accuracy: ±(2.0% +5) Range: 9.999mF / 99.99mF Accuracy: ±(5.0% +20) Diode Yes Continuity Yes Included 1x FNIRSI TDM-120P Thermal Imaging Multimeter 2x Multimeter Test Leads 1x Storage bag 1x USB cable 1x Manual Downloads Manual Firmware v1.2.6
€ 199,95€ 179,95Best Price
-

Elektor Digital ESP32 steuert Roboterauto (PDF)
Open-Source-Code mit Arduino IDE und PlatformIO Autonomes Fahren: GPS, Accelerometer, Gyroskop PS3-Controller Mikrocontroller wie der Arduino und Einplatinenrechner wie der Raspberry Pi haben sich zu beliebten Komponenten entwickelt. Dritter im Bunde ist der ESP32 der Firma Espressif. Mikrocontroller dieser Baureihe zeichnen sich durch eine Vielzahl implementierter Funktionen aus, die bei einem Arduino konventioneller Prägung mit einem Atmel-AVR-Mikrocontroller erst mit weiterer Hardware möglich sind. Prominentes Beispiel sind hier die WiFi- und Bluetooth-Funktionalitäten. Gegenüber einem Raspberry Pi zeichnen sie sich durch einen deutlich geringeren Preis aus. Allgemeine Informationen für die Realisierung eines Roboterauto-Projekts mit dem ESP32 sind leicht zu finden. Dabei handelt es sich aber oft nur um Ausführungen zu einem Teilaspekt, ohne inhaltliche oder funktionale Abstimmung. So ist nicht nur die Beschaffung der benötigten Informationen mühselig und zeitaufwändig, sie kann auch außerordentlich fehlerträchtig sein. Ansatzpunkt dieses Buches ist, diese Lücke zu schließen. Es geht auf verschiedene Möglichkeiten eines Chassis ein, vermittelt nötige Kenntnisse und führt schrittweise von einer einfachen Motorsteuerung zu einem komplexen sensor- und sprachgesteuerten Roboterauto. Hacks rund um GPS und eine PlayStation 3 runden die Sache ab. Inhalt Bei der Reihenfolge der Kapitel wurde versucht – beginnend bei der Darstellung von grundlegenden Informationen – über die Lösung einfacher Aufgaben zu etwas anspruchsvolleren Techniken zu führen. Der Mikrocontroller ESP32 Die Software erstellen Die Stromversorgung Rund um die Hardware Das Chassis Der Gleichstrommotor Kabellose Steuerung über WiFi Mit Sensoren Hindernisse erkennen Eine eigene Roboterauto-App Servo und Lichtsensor GPS Accelerometer / Gyroskop PS3-Controller Roboterauto-App Hinweis zur Software Die Dateien haben das Suffix (.cpp). Grund ist die Entwicklung mit PlatformIO. Mit Copy & Paste sollten sie auch in der Arduino-IDE verwendet werden können.
€ 32,80
Members: € 29,52
-
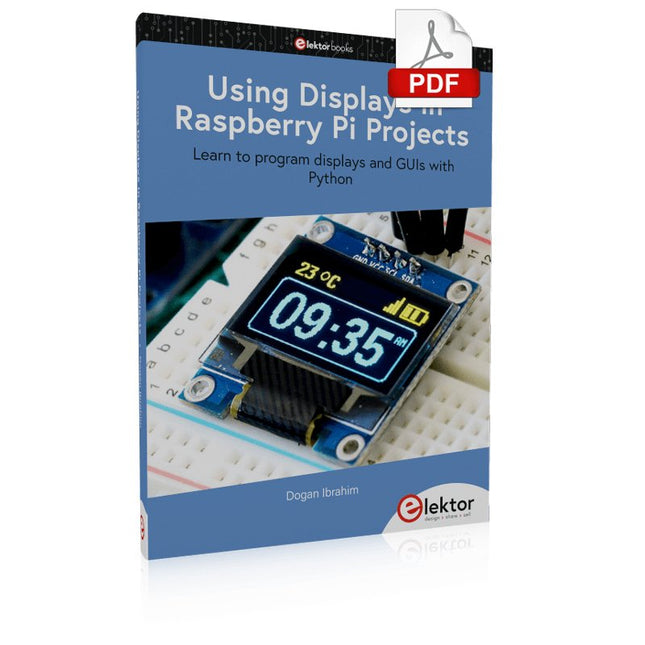
Elektor Digital Using Displays in Raspberry Pi Projects (E-book)
Learn to program displays and GUIs with Python This book is about Raspberry Pi 4 display projects. The book starts by explaining how to install the latest Raspbian operating system on an SD card, and how to configure and use the GPIO ports. The core of the book explains the following topics in simple terms with fully tested and working example projects: Simple LED projects Bar graph LED projects Matrix LED projects Bitmap LED projects LED strips LCDs OLED displays E-paper displays TFT displays 7-inch touch screen GUI Programming with Tkinder One unique feature of this book is that it covers almost all types of display that readers will need to use in their Raspberry Pi based projects. The operation of each project is fully given, including block diagrams, circuit diagrams, and commented full program listings. It is therefore an easy task to convert the given projects to run on other popular platforms, such as Arduino or PIC microcontrollers. Python program listings of all Raspberry Pi projects developed in this book are available for download at Elektor.com. Readers can use these programs in their projects. Alternatively, they can modify the programs to suit their applications.
€ 32,95
Members: € 29,66
-

FNIRSI FNIRSI 2D15P (3-in-1) 2-ch Oscilloscope (100 MHz) + Multimeter + Signal Generator
The FNIRSI 2D15P is a compact 3-in-1 test tool combining a 2-channel digital oscilloscope, True RMS multimeter, and waveform generator in one device. With a 4.3" capacitive touchscreen, 100 MHz bandwidth, 500 MSa/s sampling rate, and up to 1,200 fps capture speed, it’s ideal for fast troubleshooting, signal analysis, and electronics testing. Features Dual-Channel Input (100 MHz single-channel, 50 MHz dual-channel operation) Selectable Memory Depths 20 MHz Bandwidth Limit Grayscale & Color Temperature Visualization Math Operations (Add, Subtract, Multiply, Divide, etc.) XY Mode & Infinite Persistence Cursor Function & 13 Auto Measurements Auto / Normal / Single Trigger Modes True RMS Multimeter (19,999 Counts) 10 MHz DDS Signal Generator Specifications General Display 4.3" IPS Capacitive Touchscreen Operation Touch + Knob + Physical Buttons Charging USB-C (12 V/1 A fast charging) Battery 5000 mAh Lithium battery Dimensions 19.6 x 12.9 x 5.7 cm Weight 1.1 kg Oscilloscope Channels 2 Analog Bandwidth 100 MHz Sample Rate 500 MSa/s Memory Depth 10K, 100K, 1M Input Impedance 1 MΩ Timebase Range 5ns - 50s Vertical Sensitivity 10 mV - 10 V/div Max Input Voltage 800 V (x10 Probe) Trigger Mode Auto, Normal, Single Trigger Type Rising, Falling, Both Edges Coupling AC/DC Persistence min / 2s / 5s / 10s / 20s / 50s / ∞ Math Operations Yes Waveform Capture Yes Waveform Export Yes Cursor Measurement Yes Multimeter DC Voltage 1.9999V / 19.999V / 199.99V / 1000V AC Voltage 1.9999V / 19.999V / 199.99V / 750.0V DC Current 19.999mA / 199.99mA / 1.9999A / 9.999A AC Current 19.999mA / 199.99mA / 1.9999A / 9.999A Resistance 19.999MΩ / 1.9999MΩ / 199.99KΩ / 19.999KΩ / 1.9999KΩ / 199.99Ω Capacitance 999.9uF / 99.99uF / 9.999uF / 999.9nF / 99.99nF / 9.999nF / 9.999mF / 99.99mF Diode Yes Continuity Yes Signal Generator Channels 1 Frequency 0–10 MHz Amplitude 0.1–3.0 Vpp Duty Cycle 0–100% Included 1x FNIRSI 2D15P Oscilloscope 2x P6100 Oscilloscope Probes 1x Multimeter Probe 1x Alligator Clip Probe 1x USB Data Cable 1x Manual Downloads Manual Firmware V2.7.0.7
€ 209,00€ 179,95Best Price
-

Raspberry Pi Foundation Das offizielle Raspberry Pi-Handbuch für Einsteiger (5. Auflage)
Vollständig aktualisiert für Raspberry Pi 5 Raspberry Pi ist ein kleiner, cleverer, in Großbritannien hergestellter Computer, der voller Potenzial steckt. Der Raspberry Pi basiert auf einem energieeffizienten Prozessor der Desktop-Klasse und soll Ihnen dabei helfen, das Programmieren zu erlernen, herauszufinden, wie Computer funktionieren, und Ihre eigenen erstaunlichen Dinge zu bauen. Dieses Buch wurde geschrieben, um Ihnen zu zeigen, wie einfach der Einstieg ist. Lernen Sie, wie Sie: Richten Sie Ihren Raspberry Pi ein, installieren Sie sein Betriebssystem und beginnen Sie mit der Nutzung dieses voll funktionsfähigen Computers. Starten Sie Codierungsprojekte mit Schritt-für-Schritt-Anleitungen für die Programmiersprachen Scratch 3, Python und MicroPython. Experimentieren Sie mit der Verbindung elektronischer Komponenten und haben Sie Spaß beim Erstellen erstaunlicher Projekte. Neu in der 5. Auflage: Aktualisiert für die neuesten Raspberry Pi-Computer: Raspberry Pi 5 und Raspberry Pi Zero 2 W. Deckt das neueste Raspberry Pi OS ab. Enthält ein neues Kapitel über den Raspberry Pi Pico. Downloads GitHub
€ 24,95€ 9,98Best Price
-
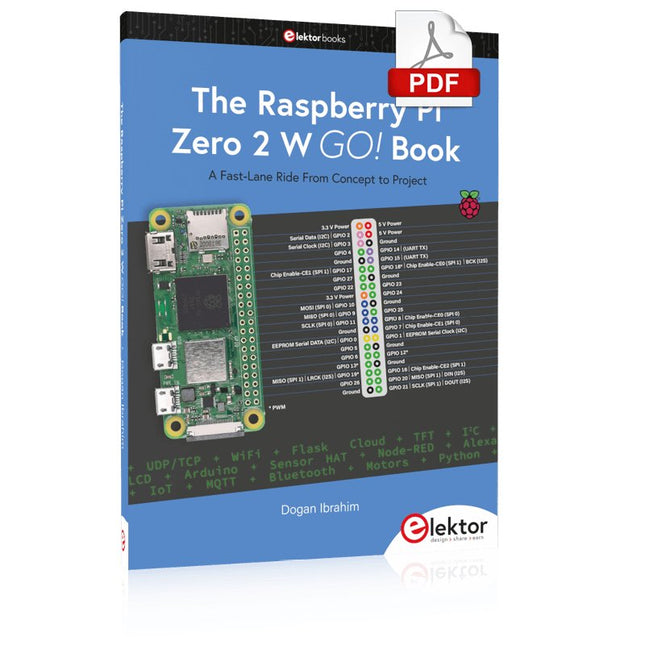
Elektor Digital The Raspberry Pi Zero 2 W GO! Book (PDF)
A Fast-Lane Ride From Concept to Project The core of the book explains the use of the Raspberry Pi Zero 2 W running the Python programming language, always in simple terms and backed by many tested and working example projects. On part of the reader, familiarity with the Python programming language and some experience with one of the Raspberry Pi computers will prove helpful. Although previous electronics experience is not required, some knowledge of basic electronics is beneficial, especially when venturing out to modify the projects for your own applications. Over 30 tested and working hardware-based projects are given in the book, covering the use of Wi-Fi, communication with smartphones and with a Raspberry Pi Pico W computer. Additionally, there are Bluetooth projects including elementary communication with smartphones and with the popular Arduino Uno. Both Wi-Fi and Bluetooth are key features of the Raspberry Pi Zero 2 W. Some of the topics covered in the book are: Raspberry Pi OS installation on an SD card Python program creation and execution on the Raspberry Pi Zero 2 W Software-only examples of Python running on the Raspberry Pi Zero 2 W Hardware-based projects including LCD and Sense HAT interfacing UDP and TCP Wi-Fi based projects for smartphone communication UDP-based project for Raspberry Pi Pico W communication Flask-based webserver project Cloud storage of captured temperature, humidity, and pressure data TFT projects Node-RED projects Interfacing to Alexa MQTT projects Bluetooth-based projects for smartphone and Arduino Uno communications
€ 32,95
Members: € 29,66
-

Elektor Digital Getting Started with ESPHome (E-book)
Develop your own custom home automation devices Espressif's ESP8266 and ESP32 microcontrollers have brought DIY home automation to the masses. However, not everyone is fluent in programming these microcontrollers with Espressif's C/C++ SDK, the Arduino core, or MicroPython. This is where ESPHome comes into its own: with this project, you don’t program your microcontroller but configure it. This book demonstrates how to create your own home automation devices with ESPHome on an ESP32 microcontroller board. You’ll learn how to combine all kinds of electronic components and automate complex behaviours. Your devices can work completely autonomously, and connect over Wi-Fi to your home automation gateways such as Home Assistant or MQTT broker. By the end of this book, you will be able to create your own custom home automation devices the way you want. Thanks to ESPHome and the ESP32, this is within everyone’s grasp. Set up an ESPHome development environment and create maintainable configurations Use buttons and LEDs Sound a buzzer and play melodies Read measurements from various types of sensors Communicate over a short distance with NFC, infrared light, and Bluetooth Low Energy Show information on various types of displays Downloads Software
€ 29,95
Members: € 26,96
-

Elektor Digital The BeagleY-AI Handbook (E-book)
A Practical Guide to AI, Python, and Hardware Projects Welcome to your BeagleY-AI journey! This compact, powerful, and affordable single-board computer is perfect for developers and hobbyists. With its dedicated 4 TOPS AI co-processor and a 1.4 GHz Quad-core Cortex-A53 CPU, the BeagleY-AI is equipped to handle both AI applications and real-time I/O tasks. Powered by the Texas Instruments AM67A processor, it offers DSPs, a 3D graphics unit, and video accelerators. Inside this handbook, you‘ll find over 50 hands-on projects that cover a wide range of topics—from basic circuits with LEDs and sensors to an AI-driven project. Each project is written in Python 3 and includes detailed explanations and full program listings to guide you. Whether you‘re a beginner or more advanced, you can follow these projects as they are or modify them to fit your own creative ideas. Here’s a glimpse of some exciting projects included in this handbook: Morse Code Exerciser with LED or BuzzerType a message and watch it come to life as an LED or buzzer translates your text into Morse code. Ultrasonic Distance MeasurementUse an ultrasonic sensor to measure distances and display the result in real time. Environmental Data Display & VisualizationCollect temperature, pressure, and humidity readings from the BME280 sensor, and display or plot them on a graphical interface. SPI – Voltmeter with ADCLearn how to measure voltage using an external ADC and display the results on your BeagleY-AI. GPS Coordinates DisplayTrack your location with a GPS module and view geographic coordinates on your screen. BeagleY-AI and Raspberry Pi 4 CommunicationDiscover how to make your BeagleY-AI and Raspberry Pi communicate over a serial link and exchange data. AI-Driven Object Detection with TensorFlow LiteSet up and run an object detection model using TensorFlow Lite on the BeagleY-AI platform, with complete hardware and software details provided.
€ 34,95
Members: € 31,46
-
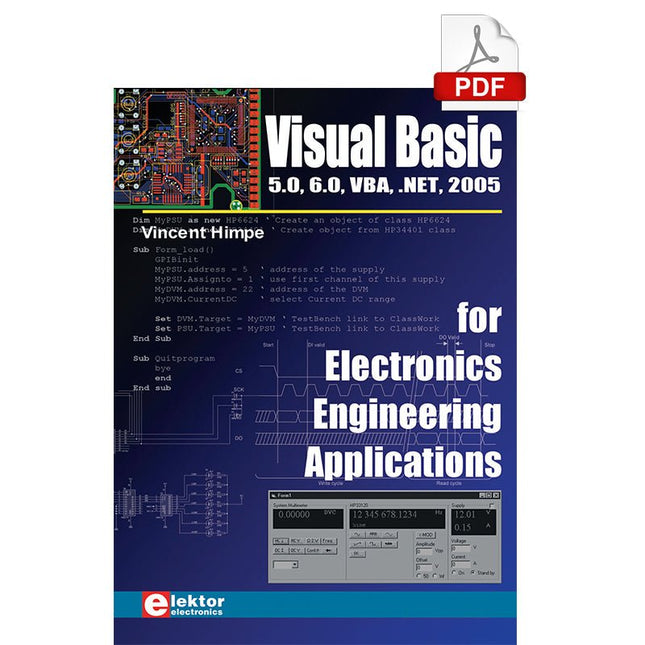
Elektor Digital Visual Basic for Electronics Engineering Applications (E-book)
The PC has long-time outgrown its function as a pure computer and has become an all-purpose machine. This book is targeted towards those people that want to control existing or self-built hardware from their computer. Using Visual Basic as Rapid Application Development tool we will take you on a journey to unlock the world beyond the connectors of the PC. After familiarising yourself with Visual Basic, its development environment and the toolset it offers, items such as serial communications, printer ports, bit-banging, protocol emulation, ISA, USB and Ethernet interfacing and the remote control of test-equipment over the GPIB bus, are covered in extent. Each topic is accompanied by clear, ready to run code, and where necessary, schematics are provided that will get your projects up to speed in no time. This book will show you advanced things like: using tools like Debug to find hardware addresses, setting up remote communication using TCP/IP and UDP sockets and even writing your own internet servers. Or how about connecting your own block of hardware over USB or Ethernet and controlling it from Visual Basic. Other things like internet-program communication, DDE and the new graphics interface of Windows XP are covered as well. All examples are ready to compile using Visual Basic 5.0, 6.0, NET or 2005. Extensive coverage is given on the differences between what could be called Visual Basic Classic and Visual basic .NET / 2005.
€ 39,95
Members: € 35,96
-

Elektor Digital ARM Microcontrollers 2 (NL) | E-book
Dit is een ideaal boek voor hobbyisten, studenten en ingenieurs die op een leuke manier C en het gebruik van een mbed ARM microcontroller willen leren, rechtstreeks op internet zonder ingewikkelde software-installatie. De projecten in dit boek zijn bedoeld voor gevorderden op het gebied van ARM microcontrollers of de programmeertaal C. Dat wil zeggen dat de kennis uit deel 1 van deze serie bekend verondersteld wordt. Cloud technologie De in dit boek gebruikte mbed NXP LPC1768 maakt gebruik van cloud-technologie, een revolutionair concept voor software-ontwikkeling. Dit houdt in dat u geen software hoeft te installeren om de mbed te kunnen programmeren! Het enige dat u nodig heeft, is een internet-browser zoals Microsoft Internet Explorer, en een USB-poort op uw PC. U kunt vanaf elke willekeurige PC waar dan ook ter wereld toegang krijgen tot uw project en er aan verder werken. Wanneer u klaar bent, kunt u met een paar eenvoudige klikjes met uw muis het programma overzetten naar uw mbed-hardware. Uiteraard kunt u de projecten ook downloaden en op uw eigen PC opslaan wanneer u dat liever heeft. In een deel van de projecten wordt Visual Basic gebruikt; dit gratis pakket is nog niet in de cloud beschikbaar en moet wel op uw PC geïnstalleerd worden. Onderwerpen die aan de orde komen Leer het programmeren van een ARM microcontroller via cloud-technologie. Geen ARM ontwikkelsoftware-installatie op uw eigen PC. Leer hoe u een ARM microcontroller met internet kunt verbinden, hoe u via internet uw ARM kunt bedienen en hoe u vanaf de ARM microcontroller tweets kunt versturen. Leer hoe u een CMUcam camera kunt aansturen en toepassen in uw applicaties, bijvoorbeeld als alarm. Leer hoe u met behulp van de gratis PC programmeertaal Visual Basic met uw ARM microcontroller kunt communiceren met gebruik van multi-threading. Voorbeelden van projecten in dit boek: internet-server, automatisch twitteren, digitaal naar analoog conversie, USB HID, automatisch metingen in een spreadsheet plaatsen, met een camera bewegingen waarnemen, seriële communicatie met een zelfgeschreven PC-programma, gebruik van een LCD en SPI en I²C communicatie.
€ 29,95
Members: € 26,96
-
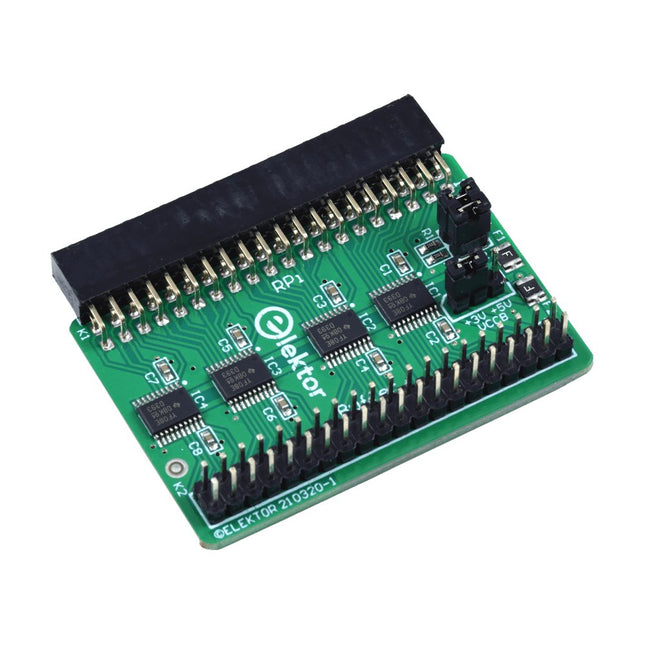
Elektor Labs Elektor Raspberry Pi Buffer Board
When you experiment with the Raspberry Pi on a regular basis and you connect a variety of external hardware to the GPIO port via the header you may well have caused some damage in the past. The Elektor Raspberry Pi Buffer Board is there to prevent this! The board is compatible with Raspberry Pi Zero, Zero 2 (W), 3, 4, 5, 400 and 500. All 26 GPIOs are buffered with bi-directional voltage translators to protect the Raspberry Pi when experimenting with new circuits. The PCB is intended to be inserted in the back of Raspberry Pi 400/500. The connector to connect to the Raspberry Pi is a right angled 40-way receptacle (2x20). The PCB is only a fraction wider. A 40-way flat cable with appropriate 2x20 headers can be connected to the buffer output header to experiment for instance with a circuit on a breadboard or PCB. The circuit uses 4x TXS0108E ICs by Texas Instruments. The PCB can also be put upright on a Raspberry Pi. Downloads Schematics Layout
€ 34,95
Members: € 31,46


