The SEQURE HT140 is a highly versatile 2-in-1 soldering tool that combines the functionality of hot tweezers and a soldering iron. It is specifically engineered for precise SMD soldering and desoldering tasks.
With independent control for single-sided heating, it operates as a traditional soldering iron when fitted with a standard tip. When configured for dual-sided heating, it transforms into hot tweezers – perfect for the efficient and accurate removal of SMD components.
Features
Working Temperature: 50-500°C (122-932°F)
Supports multiple power inputs: PD 3.1/3.0/2.0, QC 3.0/2.0, (5-28 V DC), LiPo batteries, and power adapters.
The HT140 combines hot tweezers and a soldering iron, with independent single- or dual-sided heating. Use it as a soldering iron with a tip, or as hot tweezers for easy SMD desoldering.
Voltage and current can be adjusted based on the power source.
Features dual temperature control, presets, quick temperature increase, and fine-tuning.
128 x 32 OLED screen with adjustable brightness, and orientation. Switchable °C/°F.
High-precision heating element with ±1% accuracy. Melts solder in just 2 seconds.
Smart standby, sleep, and wake-up functions extend tip lifespan and boost efficiency.
Supports temperature calibration and compensation for precise work.
Includes a 1.5 m heat-resistant PD 150 W silicone cable and a sturdy all-metal HT Station.
Swappable tips and adjustable angles for various SMD soldering tasks.
Specifications
Working Voltage
5-28 V DC
Maximum Power
140 W
Working Temperature
50-500°C (122-932°F)
Tin Melting Time
2s
Interface Type
USB-C, DC5525
Power Supply
PD 3.1/3.0/2.0, QC 3.0/2.0, 28 V DC max
Display
128 x 32 OLED
Firmware Upgrade
Yes
Menu Languages
English, Russian, Chinese
Dimensions
160 x 27 x 17.5 mm
Weight
50 g
Included
1x SEQURE HT140 Host
2x HT140-IS Tapered Curved Desoldering Tips
1x HT Station
1x Accessory Package
1x Storage Bag
1x 65 W PD Power Supply (EU, UK & US)
1x 24 W PD Silicone Wire (1.5 m)
1x GND Wire Accessory Kit (1.8 m)
Downloads
Manual
Firmware V1.04
Highlights
Output Frequency (Sine): 100 MHz
Output Frequency (Square): 25 MHz
Channels: 2
Arbitrary Waveform Length: 16 Mpts
Features
Unique SiFi II (Signal Fidelity II) technology: generate the arbitrary waveforms point by point; recover the signal without distortion; sample rate accurate and adjustable; jitter of all the output waveforms (including Sine, Pulse, etc.) as low as 200 ps
16 Mpts memory depth per channel for arbitrary waveforms
Standard dual-channel with the same performance, equivalent to two independent signal sources
High frequency stability: ±1 ppm; low phase noise: -105 dBc/Hz
Built-in high-order harmonic generator (at most 8-order harmonics)
Built-in 7 digits/s, 240 MHz bandwidth full featured frequency counter
Up to 160 built-in arbitrary waveforms, covering the common signals in engineering application, medical electronics, auto electronics, math processing, and other various fields
Sample rate up to 250 MSa/s, vertical resolution 16 bits
Arbitrary waveform sequence editing function available; arbitrary waveforms also can be generated through the PC software
Various analog and digital modulation functions: AM, FM, PM, ASK, FSK, PSK, and PWM.
Standard waveform combine function, capable of outputting specified waveforms combined with the basic waveforms
Standard channel tracking function, when enabled, all the parameters of both channels are updated based on users' configurations
Standard interface: USB Host&Device and LAN (LXI Core 2011 Device); USB-GPIB function supported
4.3'' TFT
Included
1x Rigol DG2102 Function/Arbitrary Waveform Generator
1x Power cord
1x USB cable
Diese Ausgabe steht allen GOLD- und GREEN-Mitgliedern auf der ElektorMagazine-Website zum Download bereit!
Sie sind noch kein Mitglied? Hier klicken!
Cloc 2.0Der Wecker, den Sie sich schon immer gewünscht haben
Raspberry Pi Pico: PIO in der PraxisExperimente mit der Programmable I/O des RP2040
ChipTweaker des armen MannesBillige Wege, sie zum Sprechen zu bringen
Echter Zufallszahlen-Generator mit USBZwei PICs zum Preis von einem AVR
Pimp my mike...Pegelanhebung selbst gebaut
FFT mit MaixduinoFrequenzspektren erfassen
Aus dem Leben gegriffenEntwurfslogik (oder Un-Logik)
Schrittmotor-Treiber UCN5804Bemerkenswerte Bauteile
Schaltungssimulation mit Micro-CapErste Schritte in eine komplizierte Welt
Der PAUL Award 2022Junge Techniktalente und ihre kreativen Lösungen
Mein erstes Software-definiertes RadioGebaut in weniger als 15 Minuten
Mikrocontroller-Dokumentation verstehenTeil 1: Aufbau einer Dokumentation
KI und eingebettete Systeme - Was kommt als Nächstes?Werkzeuge, Plattformen und das Ende der Textarbeiter
Digitalisierung der vertikalen Landwirtschaft
Infografik: Embedded und KI, heute und morgen
Einführung in TinyML
Casestudy KwickPOS
High-Performance in jeder KlasseComputer-on-Module-Standards
Aller Anfang...muss nicht schwer sein: Werden wir aktiv!
I²C-Kommunikation mit Node.js und einem Raspberry PiSehen Sie Ihre Sensordaten in einem Browser
Videoausgabe mit MikrocontrollernTeil 2: VGA- und DVI-Ausgabe
Das Echtzeit-Betriebssystem MetronomEin RTOS für AVR-Prozessoren
DVI auf dem RP2040Ein Interview mit Luke Wren, Chip-Entwickler bei Raspberry Pi
Display HAT MiniZeigt die Wettervorhersage auf dem Raspberry Pi
WEEF 2022 Awards: Feiern Sie das Gute!
Hexadoku
Die Hochfrequenztechnik ist eines der Gebiete, auf denen man auch heute noch eigene Ideen in die Tat umsetzen kann. Unzählige Schaltungsvarianten mit besonderen Zielsetzungen geben Raum für sinnvolle Experimente und Projekte. Vieles kann man nicht einfach kaufen. Detektorradios ohne eigene Energiequelle, einfache Röhrenempfänger mit einem Hauch von Nostalgie, die ersten Empfangsversuche mit dem Software Defined Radio oder Spezialempfänger für den Amateurfunk, all dies lässt sich mit wenig Aufwand realisieren.
Lange Zeit war das Radiobasteln der Einstieg in die Elektronik. Inzwischen gibt es auch andere Wege, vor allem über Computer, Mikrocontroller und die Digitaltechnik. Allerdings kommen die analogen Wurzeln der Elektronik oft zu kurz. Die Radiotechnik eignet sich besonders gut als Lernfeld der Elektronik, weil man hier mit den einfachsten Grundlagen beginnen kann. Aber auch die Verbindung zur modernen Digitaltechnik liegt auf der Hand, wenn es z. B. um moderne Abstimmverfahren wie PLL und DDS oder um moderne DSP-Radios geht.
Dieses Buch gibt einen Überblick und stellt eine Sammlung einfacher Projekte vor. Der Autor möchte Sie dabei unterstützen, eigene Ideen zu entwickeln, eigene Empfänger zu entwerfen und sie zu erproben.
This complete ESP32 microcontroller programming course features a textbook, a component kit, hands-on projects, and a comprehensive online course with simulations. It is ideal for step-by-step learning of embedded systems programming with Arduino using a practical, hands-on approach.
A Practical Introduction to Embedded Systems with the ESP32
This course is designed for people who are new to embedded systems and looking for a structured, example-driven way to get started.
A kit of parts comprising LEDs and resistors, switches, sensors and actuators, displays, a breadboard and wires, and more is included. These are used in the course to illustrate example applications.
No prior experience with Arduino or embedded development is required. Each section features hands-on examples and mini projects designed to reinforce key concepts and inspire deeper exploration. By the end of the course, you’ll be able not only to reproduce the examples but also to build on them with your own ideas and applications.
What Will You Learn?
Microcontroller programming with the ESP32 using the Arduino IDE
Working with Digital I/O, read buttons and encoders, control LEDs and relays
Read analog inputs, voltages, and analog sensors
Generating analog output signals and PWM
Use serial communication like UART, I²C and SPI to control displays and read digital sensors and SD cards
Managing time
Working with interrupts
Real-time sensor input and control via buttons, LEDs, and displays
Control actuators like relays and servo motors
Who Is It For?
Students and self-learners exploring embedded systems
Makers and IoT enthusiasts looking to improve their hardware skills
Educators and trainers seeking ready-to-teach material
What's Inside the Box?
Access to the full course on the Elektor Academy Pro Learning Platform
ESP32 microcontroller board + USB cable
Book: Programming Microcontrollers in C/C++ Using Arduino
Downloadable project files for every module
Component Box:
2× LED, red, 5 mm
LED, green, 5 mm
3× Resistor, 470 Ω, 0.25 W
LDR
Potentiometer, 10 kΩ, linear
Pushbutton
Rotary encoder module
Relay module
DHT22 Humidity & Temperature Sensor
TM1637-compatible 4-digit 7-segment display
MPU-6050 IMU with headers
SSD1306-compatible I²C OLED display
Micro SD card adapter with header
Buzzer
SG90 Micro Servo
ILI9341-compatible SPI 240×320 TFT display
20× Jumper wires
Breadboard
All Programming Courses (and differences in content)
Course
Arduino
Raspberry Pi Pico with Arduino C/C++
ESP32 with Arduino C/C++
Raspberry Pi Pico with MicroPython
ESP32 with MicroPython
Online Course
Access to Arduino Course
Access to Pico with Arduino C/C++ Course
Access to ESP32 with Arduino C/C++ Course
Access to Pico with MicroPython Course
Access to ESP32 with MicroPython Course
Board
Uno R3
Raspberry Pi Pico
ESP32
Raspberry Pi Pico
ESP32
Book
Programming Microcontrollers in C/C++ Using Arduino
Programming Microcontrollers in C/C++ Using Arduino
Programming Microcontrollers in C/C++ Using Arduino
Programming Microcontrollers in MicroPython
Programming Microcontrollers in MicroPython
Kit
40-piece Component Box
40-piece Component Box
40-piece Component Box
40-piece Component Box
40-piece Component Box
Elektor GREEN en GOLD leden kunnen deze uitgave hier downloaden.Nog geen lid? Klik hier om een lidmaatschap af te sluiten.
Cloc 2.0de wekker die je altijd al wilde hebben
PIO in de praktijkexperimenten met de programmeerbare I/O van de RP2040
Armeluis chiptweakerwe krijgen je wel (goedkoop) aan de praat...
Echte USB-toevalsgeneratortwee PIC’s voor de prijs van één AVR
Pimp my mike...opvoeren doe je zelf
FFT met Maixduinofrequentiespectra vastleggen
Uit het leven gegrepenontwerp(on)logica
UCN5804 stappenmotordrivervreemde onderdelen
Simuleren met Micro-Capeerste stappen in een complexe wereld
PAUL Award 2022jonge technische talenten en hun creatieve ontwerpen
Mijn eerste Software Defined Radioin minder dan 15 minuten klaar
Microcontroller-documentatie verklaarddeel 1: de opzet van een datasheet
Hoe verder met AI en embedded systems?tools, platforms – en worden schrijvers obsoleet?
Digitalisering van verticale landbouw
Elektor Infographicsembedded en AI vandaag – en morgen
Een introductie tot TinyML
Casestudy KwickPOS
High-performance in elke klassecomputer-on-module standaarden
Alle begin......wordt eindelijk actief!
I²C-communicatie met Node.js en een Raspberry Pibekijk sensordata in een browser
Video-output met microcontrollers (2)VGA en DVI
Het Metronom real-time besturingssysteemeen RTOS voor AVR-processoren
DVI op de RP2040vraaggesprek met Luke Wren, chipontwikkelaar bij Raspberry Pi
Display-HAT Minitoont het weer op de Raspberry Pi
De WEEF 2022 Awardshet goede vieren
Hexadoku
The OWON SDS1102 is an affordable benchtop digital oscilloscope that combines solid performance with essential measurement features. This 2-channel oscilloscope offers a 100 MHz bandwidth, a 1 GS/s sampling rate, a 7-inch LCD display, and a 10 kpts memory depth, making it a practical choice for everyday electronics testing, troubleshooting, and education.
The SDS1102 features a simplified trigger system with level and edge triggering, making it easy to capture and analyze common signals. It is designed for applications that do not require deep memory or advanced trigger functions, offering a straightforward and cost-effective solution for basic signal analysis.
Features
Bandwidth: 100 MHz
2 channels
Sample rate: 1 GS/s
Ultra-thin body
7-inch high-res LCD
SCPI and LabVIEW supported
Specifications
Bandwidth
100 MHz
Horizontal Scale (s/div)
5 ns/div – 1000 s/div
Channel
2
Vertical Sensitivity
5 mV/div – 5 V/div (at input)
DC Gain Accuracy
3%
Vertical Resolution (A/D)
8 bits (2 channels simultaneously)
Input
Input Impedance
1 MΩ, 10 pF
Input Coupling
AC, DC, GND
Max Input Voltage
±400 V, CATI, CATII
Passive probes
х1; х10
Probe Attenuation Factor
х1; х10; х100; х1000
Trigger System
Trigger Mode
Auto, Normal, Single
Trigger Type
Edge, Video
Edge Trigger Source
CH1, CH2
Video Trigger
Sampling Type
Real-time
Sample Rate
1 GS/s
Equivalent Sample Rate
No
Wavelength
10K pts
Interpolation
sin(x)/x
Measurement and Mathematical Treatment System
Automatic Measurement
Vpp, Vavg, RMS, Frequency, Period, Vmax, Vmin, Vtop, Vbase, Width, Overshoot, Pre-shootRise time, Fall time, +Width, -Width, +Duty, -Duty, Delay A→B, Delay A→B, area, cycle area
Math Functions
Addition, Subtraction, Multiplication, Division, FFT
General Characteristics
Display type
7" color LCD
Display Resolution
800 x 480
Power
100-240 V, 45-440 Hz, <15 W
Dimensions
301 x 70 x 152 mm
Weight
1.1 kg
Included
1x OWON SDS1102 Oscilloscope
2x Oscilloscope probes
1x Probe adjust
1x Mains power cord
1x USB cable
1x CD-Rom
1x Quick guide
Downloads
Quick Guide
Manual
PC Software
SCPI Commands
The X500 V2 ARF Kit is an affordable, lightweight, and robust carbon fiber professional drone kit that is easy to assemble (less than 15 minutes). It comes with the X500 V2 Frame Kit and motors, ESCs, power distribution boards and propellers preinstalled. It is perfectly compatible with various flight controllers such as the Holybro Pixhawk series, Durandal, Pix32 V5, etc. There are numerous improvements compared the previous model.
Specifications
Wheelbase: 500 mm
Motor mount pattern: 16x16 mm
Frame body: 144x144 mm, 2 mm thick
Landing gear height: 215 mm
Space between top and bottom plates: 28 mm
Weight: 610 g
Flight time: ~18 minutes hover with no additional payload. Tested with 5000 mAh battery.
Payload: 1500 g (without battery, 70% throttle)
Battery recommendation: 4S 3000-5000 mAh 20C+ with XT60 Lipo battery (not Included)
Included
X500 V2 Frame Kit
With Preinstalled Items:
4x Motors: Holybro 2216 KV920 Motor (4 pcs) with XT30 Plug
4x ESCs (BLHeli S ESC 20A)
6x 1045 Propellers
Power Distribution Board – XT60 plug for battery & XT30 plug for ESCs & peripherals
Note: Depth camera mount is sold separately.
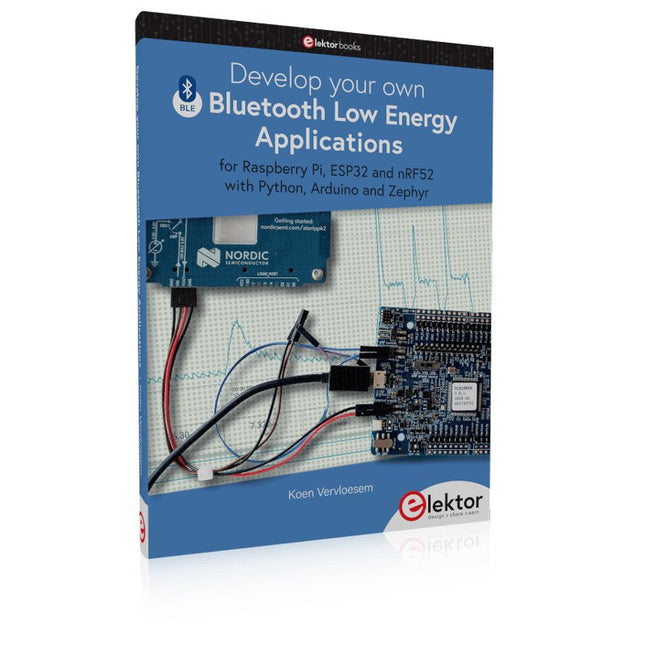
For Raspberry Pi, ESP32 and nRF52 with Python, Arduino and Zephyr
Bluetooth Low Energy (BLE) radio chips are ubiquitous from Raspberry Pi to light bulbs. BLE is an elaborate technology with a comprehensive specification, but the basics are quite accessible.
A progressive and systematic approach will lead you far in mastering this wireless communication technique, which is essential for working in low power scenarios.
In this book, you’ll learn how to:
Discover BLE devices in the neighborhood by listening to their advertisements.
Create your own BLE devices advertising data.
Connect to BLE devices such as heart rate monitors and proximity reporters.
Create secure connections to BLE devices with encryption and authentication.
Understand BLE service and profile specifications and implement them.
Reverse engineer a BLE device with a proprietary implementation and control it with your own software.
Make your BLE devices use as little power as possible.
This book shows you the ropes of BLE programming with Python and the Bleak library on a Raspberry Pi or PC, with C++ and NimBLE-Arduino on Espressif’s ESP32 development boards, and with C on one of the development boards supported by the Zephyr real-time operating system, such as Nordic Semiconductor's nRF52 boards.
Starting with a very little amount of theory, you’ll develop code right from the beginning. After you’ve completed this book, you’ll know enough to create your own BLE applications.
Le téléchargement intégral de ce numéro est disponible pour nos membres GOLD et GREEN sur le site Elektor Magazine !
Pas encore membre ? Cliquez ici.
Raspberry Pi Pico comme analyseur de spectredes FFT avec du matériel bon marché
régulateur de tension linéaire ±40 Vune alimentation de qualité pour l'amplificateur de puissance Fortissimo-100... et d'autres !
la communication sans fil des microcontrôleurs devient flexiblel'EEPROM ouvre des perspectives de mise en réseau pour les microcontrôleurs sans fil
5000 ? à gagner !participez au concours STM32 Wireless Innovation Design Contest
2023 : l'odyssée de l'IAdémarrer avec l'interpréteur de code de ChatGPT
LoRa, un couteau suisse (1)le protocole LoRa et ses avantages
puit de courant réglable avec générateur d'horloge intégrétestez vos alimentations, convertisseurs de tension et batteries
les nouvelles cartes Arduino UNO R4 Minima et WiFi
des potentiomètres logarithmiquesqui sont exponentiels !
Carte d'interface pour pilote de moteurUn BoB pour un pilote de moteur à courant continu de 5 A avec une taille de 3×3 mm
sur le vifdanger de l'électronique
une architecture cellulaire offre-t-elle la plus basse consommation pour l'Internet des objets (IdO) ?caractéristiques énergétiques des technologies LTE-M et NB-IoT pour le déploiement de réseaux étendus à basse consommation (LPWAN)
communication sans fil dans les systèmes IoT à l'aide de modules Arduino MKRnormes de communication des modules Arduino pour l'IoT
pertes en courant alternatif dans les composants magnétiquesévitez la surchauffe des inductances !
optimiser son déploiement cloud grâce aux appareils de mesure
implémentation de Matter : que faut-il pour déployer les appareils Matter ?
le YARD Stick Oneun outil de test sans fil pour les fréquences jusqu?à 1 GHz
relais à verrouillagedrôle de composant, la série
PIC O?Clock ? prendre le pouls du tempsconception d'un récepteur de signaux horaires SDR
Due Diligence DirectiveBusiness as Usual Will Not Do
démarrer en électronique?amplificateur de tension
enregistreur d'infrasons avec l'Arduino Pro Miniun projet extrait du livre 'Arduino & Co.' d'Elektor
compteur d'énergie basé sur le cloudavec un module ESP32 et un capteur de tension/courant PZEM-004T
guide de programmation Bare-Metal (2)timer précis, UART et débogage
Hexadoku
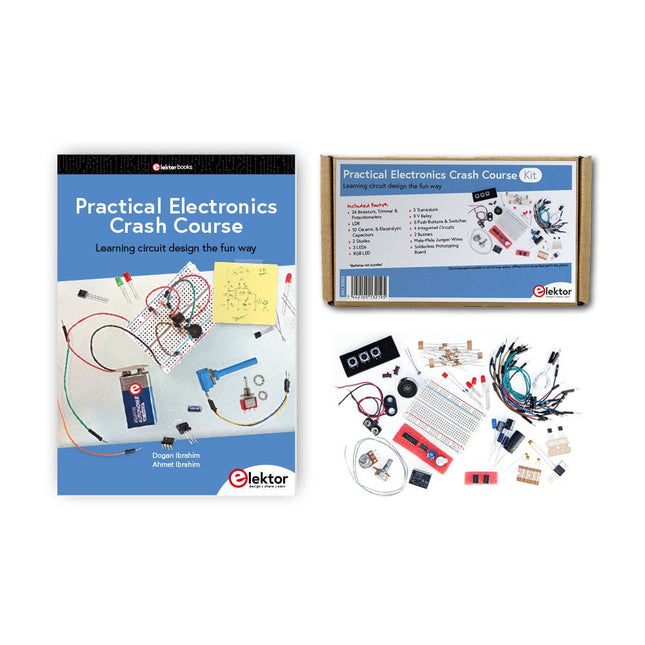
Getting started in electronics is not as difficult as you may think. With this bundle (book + kit of parts), you can explore and learn the most important electrical and electronics engineering concepts in a fun way by doing various experiments. You will learn electronics practically without getting into complex technical jargon and long calculations. As a result, you will be creating your own projects soon.
This kit contains the components required to build most of the detailed examples of the book on a breadboard and try them out for real.
The kit can, of course, also be used without the book for building other circuits and doing your own experiments.
Kit contents
1x 39 Ω, 1 W resistor
1x 47 Ω resistor
1x 180 Ω resistor
1x 330 Ω resistor
3x 1 kΩ resistor
1x 2.2 kΩ resistor
1x 3.9 kΩ resistor
1x 6.8 kΩ resistor
1x 10 kΩ resistor
1x 15 kΩ resistor
1x 22 kΩ resistor
1x 33 kΩ resistor
1x 47 kΩ resistor
1x 56 kΩ resistor
1x 82 kΩ resistor
1x 120 kΩ resistor
1x 680 kΩ resistor
2x 100 kΩ resistor
1x 10 kΩ trimmer
1x 10 kΩ linear potentiometer
1x 100 kΩ linear potentiometer
1x LDR
1x 1 nF ceramic capacitor
2x 10 nF ceramic capacitor
1x 100 nF ceramic capacitor
1x 1 µF, 25 V aluminium electrolytic capacitor
2x 10 µF, 25 V aluminium electrolytic capacitor
1x 100 µF, 25 V aluminium electrolytic capacitor
1x 470 µF, 25 V aluminium electrolytic capacitor
1x 1000 µF, 25 V aluminium electrolytic capacitor
1x RGB LED, Common-Cathode (CC)
1x 1N4148 small signal diode
1x 1N4733A 5.1 V, 1 W Zener diode
3x LED, red
2x BC337 NPN transistor
1x IRFZ44N N-channel MOSFET
2x NE555 timer
1x LM393 comparator
1x 74HCT08 quad AND gate
3x Tactile switch
2x SPDT switch
1x Relay, SPDT, 9 VDC
1x Active buzzer
1x Passive buzzer
50 cm Solid wire, 16 AWG, unjacketed
2x PP3 9 V battery clip
1x Breadboard
20x Jumper wire
This bundle contains:
Practical Electronics Crash Course Kit (valued at: €45)
Book: Practical Electronics Crash Course (normal price: €45)
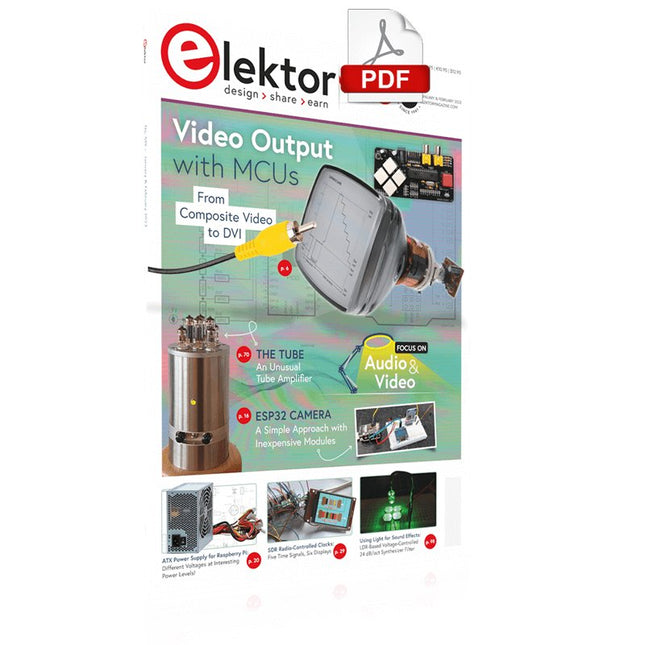
Elektor GREEN and GOLD members can download their digital edition here.
Not a member yet? Click here.
For Eyes and Ears
Video Output with Microcontrollers (1)Composite Video
electronica 2022News from the world’s leading electronics trade show
ESP32 CameraSo Simple, It Doesn’t Even Have to Use Wi-Fi
ATX Power Supply for Raspberry Pi
32 Ω Headphone AmplifierSimple But High-Quality 3-Chip Solution
SDR Radio-Controlled clocksFive Time Signals, Six Displays
Starting Out in ElectronicsSpecial Diodes
From Life's ExperienceMusings on the Quality of Things
Reverse-Engineering a Bluetooth Low Energy LED BadgeHow to Control a BLE Device with a Python Script
MakePython ESP32 Development KitEverything in a Box
THD Measurement with an Oscilloscope and FFTEasily Calculate the Distortion Factor
All-Seeing MachinesThe Technology Behind Today’s Industrial Vision Systems
Infographics
The Evolution of Voice and Audio Control for Electronic Devices
WEEF 2022 in Review
FFWD electronica 2022 in ReviewInnovators Did Not Fail to Impress
The TubeAn Unusual Tube Amplifier
Biomaterial in Electronics: Ready or Not
Opera Cake Antenna Switch for HackRF OneConnect Up To Eight Antennas To Your SDR
Engineering with Arduino and MoreAn Interview with Author Ashwin Pajankar
LiDAR Precision GaugeMeasure up to 12 Meters
Audio Signals and the ESP32The ESP-ADF Environment in Practice
Elektor Fortissimo-100 Power Amplifier Kit
Using Light for Sound EffectsLDR-Based Voltage-Controlled 24 dB/oct Synthesizer Filter
Elektor High-Power AF AmplifierThe Loudest of Them All!
HomeLab ToursA Volumetric Display Made in Canada
Err-lectronicsCorrections, Updates and Readers’ Letters
Hexadoku