Die Programmiersprache „Python“ hat in den letzten Jahren einen enormen Aufschwung erlebt. Nicht zuletzt haben verschiedene Einplatinensysteme wie der Raspberry Pi zu deren Bekanntheitsgrad beigetragen. Aber auch in anderen Gebieten, wie der Künstlichen Intelligenz oder dem Machine Learning, hat Python weite Verbreitung gefunden. Es ist daher naheliegend, Python bzw. die Variante „MicroPython“ auch für den Einsatz in SoCs (Systems on Chip) zu verwenden.
Leistungsfähige Controller wie der ESP32 der Firma Espressif Systems bieten eine hervorragende Performance sowie Wi-Fi- und Bluetooth-Funktionalität zu einem günstigen Preis. Mit diesen Eigenschaften wurde die Maker-Szene im Sturm erobert. Im Vergleich zu anderen Controllern weist der ESP32 einen deutlich größeren Flash und SRAM-Speicher, sowie eine wesentlich höhere CPU-Geschwindigkeit auf. Aufgrund dieser Leistungsmerkmale eignet sich der Chip nicht nur für klassische C-Anwendungen, sondern insbesondere auch für die Programmierung mit MicroPython.
Das vorliegende Buch führt in die Anwendung der modernen Ein-Chip-Systeme ein. Neben den technischen Hintergründen steht vor allem MicroPython selbst im Vordergrund. Nach der Einführung in die Sprache werden die erlernten Programmierkenntnisse umgehend in die Praxis umgesetzt. Die einzelnen Projekte sind sowohl für den Einsatz im Labor als auch für Alltagsanwendungen geeignet. Neben dem eigentlichen Lerneffekt steht also auch die Freude am Aufbau kompletter und nützlicher Geräte im Vordergrund. Durch die Verwendung von Laborsteckboards können Schaltungen aller Art mit geringem Aufwand realisiert werden, sodass das Austesten der selbstgebauten Geräte zum lehrreichen Vergnügen wird.
Durch die verschiedenen Anwendungen wie Wetterstationen, Digitalvoltmeter, Ultraschall-Entfernungsmesser, RFID-Kartenleser oder Funktionsgeneratoren sind die vorgestellten Projekte auch für Praktika oder Fach- und Studienarbeiten in den Naturwissenschaften bzw. im Natur- und Technikunterricht bestens geeignet.
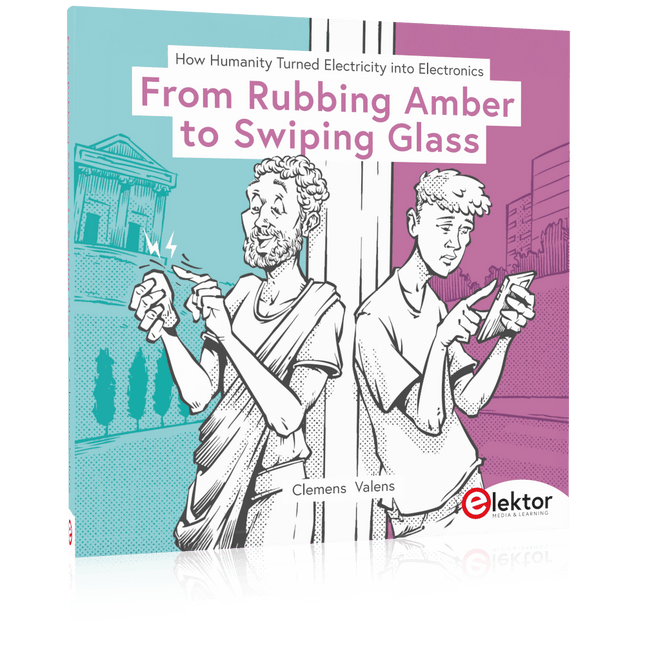
From Rubbing Amber to Swiping Glass
"The story of electricity, told one connection at a time."Why does rubbing amber attract dust? How did we go from that curious effect to a world where screens respond to a single touch? And how did we get from mysterious sparks to tiny chips packed with billions of transistors?
For centuries, electricity puzzled and fascinated those who encountered its curious effects—long before it even had a name. From the earliest observations of static charge to the complex electronics that shape our lives today, this book traces the gradual, and often surprising, story of how humanity came to understand and harness this powerful force.
This book offers an engaging and accessible account of the people, ideas, and inventions that transformed electricity from a scientific curiosity into the foundation of our digital age. Along the way, you’ll meet a host of inquisitive minds—some famous, others less so—whose persistence and creativity helped unravel the mysteries of the natural world and gave rise to the technologies we now take for granted.
Covering everything from Leyden jars and batteries to transistors, microcontrollers and the internet, this book presents a clear and enjoyable overview of electronics and its relatively short, yet rich, history.
Whether you have a technical background or simply a curiosity about how things work, From Rubbing Amber to Swiping Glass offers a thoughtful look at how far we’ve come—and a gentle nudge to wonder what might come next.
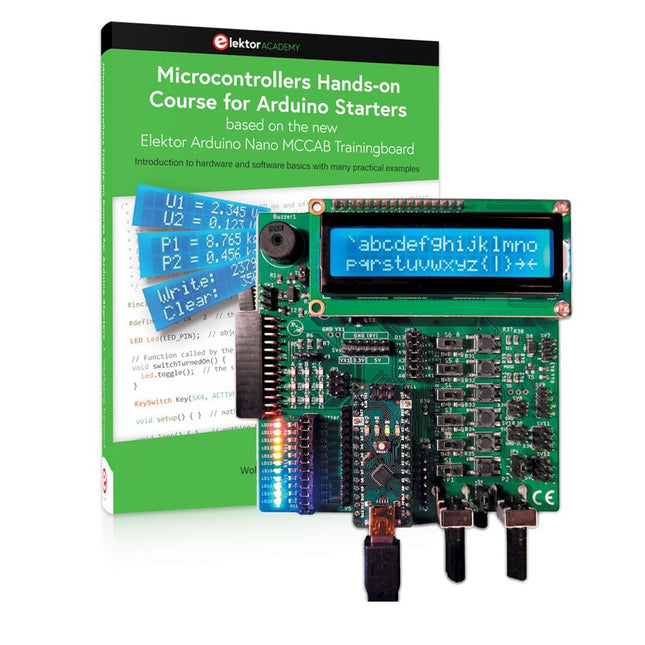
Realize your own projects with the Elektor Arduino Nano MCCAB Training Board
The microcontroller is probably the most fascinating subfield of electronics. Due to the multitude of functions, it combines on its chip, it is a universal multi-tool for developers to realize their projects. Practically every device of daily use today is controlled by a microcontroller. However, for an electronic layman, realizing his own ideas with a microcontroller has so far remained a pipe dream due to its complexity. The Arduino concept has largely simplified the use of microcontrollers, so that now even laymen can realize their own electronics ideas with a microcontroller.
Book & Hardware in the Bundle: 'Learning by Doing'
This book, which is included in the bundle, shows how you can realize your own projects with a microcontroller even without much experience in electronics and programming languages. It is a microcontrollers hands-on course for starters, because after an overview of the internals of the microcontroller and an introduction to the programming language C, the focus of the course is on the practical exercises. The reader acquires the necessary knowledge by 'learning by doing': in the extensive practical section with 12 projects and 46 exercises, what is learned in the front part of the book is underpinned with many examples. The exercises are structured in such a way that the user is given a task to solve using the knowledge built up in the theoretical part of the book. Each exercise is followed by a sample solution that is explained and commented on in detail, which helps the user to solve problems and compare it with his own solution.
Arduino IDE
The Arduino IDE is a software development environment that can be downloaded for free to your own PC and that contains the entire software package needed for your own microcontroller projects. You write your programs ('apps') with the IDE’s editor in the C programming language. You translate them into the bits and bytes that the microcontroller understands using the Arduino IDE's built-in compiler, and then load them into the microcontroller's memory on the Elektor Arduino MCCAB Nano Training Board via a USB cable.
Query or control external sensors, motors or assemblies
In addition to an Arduino Nano microcontroller module, the Elektor Arduino Nano MCCAB Training Board contains all the components required for the exercises, such as light-emitting diodes, switches, pushbuttons, acoustic signal transmitters, etc. External sensors, motors or assemblies can also be queried or controlled with this microcontroller training system.
Specifications (Arduino Nano MCCAB Training Board)
Power Supply
Via the USB connection of the connected PC or an external power supply unit (not included)
Operating Voltage
+5 Vcc
Input Voltage
All inputs
0 V to +5 V
VX1 and VX2
+8 V to +12 V (only when using an external power supply)
Hardware periphery
LCD
2x16 characters
Potentiometer P1 & P2
JP3: selection of operating voltage of P1 & P2
Distributor
SV4: Distributor for the operating voltagesSV5, SV6: Distributor for the inputs/outputs of the microcontroller
Switches and buttons
RESET button on the Arduino Nano module 6x pushbutton switches K1 ... K6 6x slide switches S1 ... S6 JP2: Connection of the switches with the inputs of the microcontroller
Buzzer
Piezo buzzer Buzzer1 with jumper on JP6
Indicator lights
11 x LED: Status indicator for the inputs/outputs LED L on the Arduino Nano module, connected to GPIO D13 JP6: Connection of LEDs LD10 ... LD20 with GPIOs D2 ... D12
Serial interfacesSPI & I²C
JP4: Selection of the signal at pin X of the SPI connector SV12 SV9 to SV12: SPI interface (3.3 V/5 V) or I²C interface
Switching output for external devices
SV1, SV7: Switching output (maximum +24 V/160 mA, externally supplied) SV2: 2x13 pins for connection of external modules
3x3 LED matrix(9 red LEDs)
SV3: Columns of the 3x3 LED matrix (outputs D6 ... D8) JP1: Connection of the rows with the GPIOs D3 ... D5
Software
Library MCCABLib
Control of hardware components (switches, buttons, LEDs, 3x3 LED matrix, buzzer) on the MCCAB Training Board
Operating Temperature
Up to +40 °C
Dimensions
100 x 100 x 20 mm
Specifications (Arduino Nano)
Microcontroller
ATmega328P
Architecture
AVR
Operating Voltage
5 V
Flash Memory
32 KB, of which 2 KB used by bootloader
SRAM
2 KB
Clock Speed
16 MHz
Analog IN Pins
8
EEPROM
1 KB
DC Current per I/O Pins
40 mA on one I/O pin, total maximum 200 mA on all pins together
Input Voltage
7-12 V
Digital I/O Pins
22 (6 of which are PWM)
PWM Output
6
Power Consumption
19 mA
Dimensions
18 x 45 mm
Weight
7 g
Included
Elektor Arduino Nano MCCAB Training Board
Arduino Nano
Book: Microcontrollers Hands-on Course for Arduino Starters
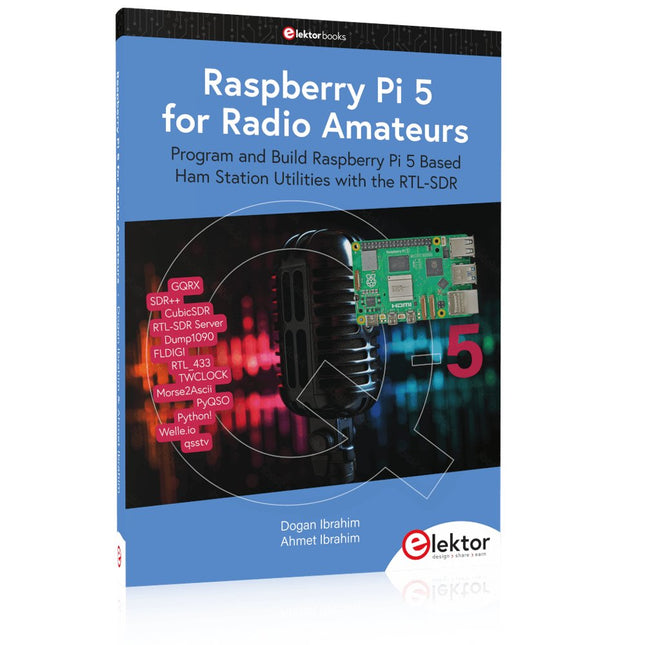
Program and Build Raspberry Pi 5 Based Ham Station Utilities with the RTL-SDR
The RTL-SDR devices (V3 and V4) have gained popularity among radio amateurs because of their very low cost and rich features. A basic system may consist of a USB based RTL-SDR device (dongle) with a suitable antenna, a Raspberry Pi 5 computer, a USB based external audio input-output adapter, and software installed on the Raspberry Pi 5 computer. With such a modest setup, it is possible to receive signals from around 24 MHz to over 1.7 GHz.
This book is aimed at amateur radio enthusiasts and electronic engineering students, as well as at anyone interested in learning to use the Raspberry Pi 5 to build electronic projects. The book is suitable for both beginners through experienced readers. Some knowledge of the Python programming language is required to understand and eventually modify the projects given in the book. A block diagram, a circuit diagram, and a complete Python program listing is given for each project, alongside a comprehensive description.
The following popular RTL-SDR programs are discussed in detail, aided by step-by-step installation guides for practical use on a Raspberry Pi 5:
SimpleFM
GQRX
SDR++
CubicSDR
RTL-SDR Server
Dump1090
FLDIGI
Quick
RTL_433
aldo
xcwcp
GPredict
TWCLOCK
CQRLOG
klog
Morse2Ascii
PyQSO
Welle.io
Ham Clock
CHIRP
xastir
qsstv
flrig
XyGrib
FreeDV
Qtel (EchoLink)
XDX (DX-Cluster)
WSJT-X
The application of the Python programming language on the latest Raspberry Pi 5 platform precludes the use of the programs in the book from working on older versions of Raspberry Pi computers.
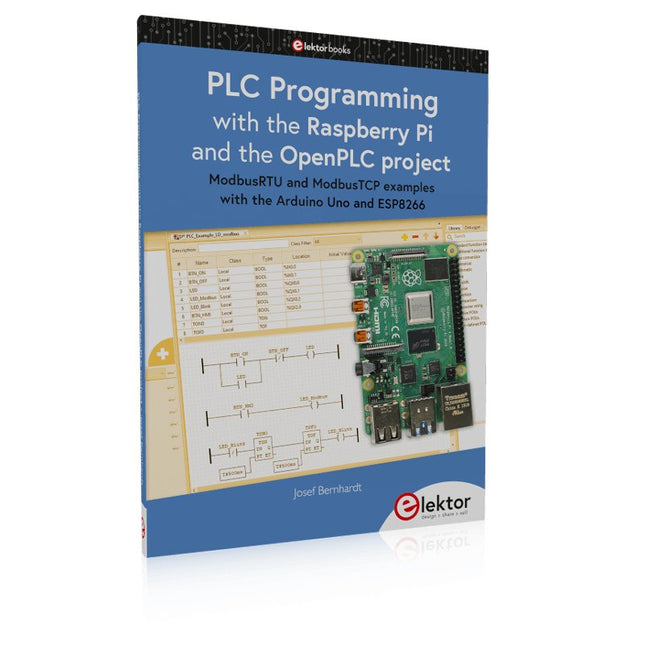
ModbusRTU and ModbusTCP examples with the Arduino Uno and ESP8266
Introduction to PLC programming with OpenPLC, the first fully open source Programmable Logic Controller on the Raspberry Pi, and Modbus examples with Arduino Uno and ESP8266
PLC programming is very common in industry and home automation. This book describes how the Raspberry Pi 4 can be used as a Programmable Logic Controller. Before taking you into the programming, the author starts with the software installation on the Raspberry Pi and the PLC editor on the PC, followed by a description of the hardware.
You'll then find interesting examples in the different programming languages complying with the IEC 61131-3 standard. This manual also explains in detail how to use the PLC editor and how to load and execute the programs on the Raspberry Pi. All IEC languages are explained with examples, starting with LD (Ladder Diagram) over ST (Structured Control Language) to SFC (Special Function Chart). All examples can be downloaded from the author's website.
Networking gets thorough attention too. The Arduino Uno and the ESP8266 are programmed as ModbusRTU or ModbusTCP modules to get access to external peripherals, reading sensors and switching electrical loads. I/O circuits complying with the 24 V industry standard may also be of interest for the reader.
The book ends with an overview of commands for ST and LD. After reading the book, the reader will be able to create his own controllers with the Raspberry Pi.
Schrittweise Einführung in das praktische Schaltungsdesign
Der Einstieg in die Elektronik ist nicht so schwierig, wie man vielleicht denkt. Mit diesem Buch werden die wichtigsten Konzepte der Elektrotechnik und Elektronik auf spielerische Weise erkundet, indem verschiedene Experimente durchgeführt und Schaltungen simuliert werden. Es vermittelt Elektronik praxisnah, ohne in komplexen Fachjargon oder lange Berechnungen einzutauchen. Dadurch werden schon bald eigene Projekte ermöglicht.
Es sind keine Vorkenntnisse in Elektronik erforderlich; lediglich einige grundlegende Algebra-Kenntnisse werden in wenigen einfachen Berechnungen verwendet. Viele getestete und funktionierende Projekte und Simulationen werden vorgestellt, um mit dem Aufbau elektronischer Schaltungen vertraut zu werden. Für problemloses Experimentieren – ohne die Gefahr, etwas zu beschädigen – werden zudem frühzeitig auch softwarebasierte Schaltungssimulationen vorgestellt.
Lernziele:
Konzepte von Spannung, Strom und Leistung
Wechselstrom (AC) und Gleichstrom (DC)
Grundlegende Lampenschaltungen mit Schaltern
Passive Bauteile: Widerstände, Kondensatoren und Induktivitäten
RC- und RCL-Schaltungen und Elektromagnetismus
Lautsprecher, Relais, Summer und Transformatoren
Aktive Bauteile: Dioden und LEDs, Bipolartransistoren und MOSFETs
Transistorbasierte Schaltungen
Optokoppler-Schaltungen
Astabile und monostabile Multivibratoren
Verwendung des 555-Timer-ICs
Operationsverstärkertechnik
Digitale Logik
Beispiele: Verstärker, Oszillatoren, Filter und Sensoren
Test- und Messwerkzeuge
Mikrocontroller: Arduino Uno, ESP32, Raspberry Pi Pico und Raspberry Pi
Datenblätter lesen und Auswahl von Komponenten
EMV & EMI sowie Normen & Vorschriften
Datenbankmodelle und -software für Elektronikanwendungen
Mit seiner Energieeffizienz und seinem reichen Spektrum an quelloffener Software eignet sich der Einplatinencomputer Raspberry Pi auch für die Speicherung von Daten und deren grafische Aufbereitung lokal oder im World Wide Web (WWW).
Dieses Buch stellt verschiedene Datenbankmodelle und diverse Datenbanksoftware vor:
SQL: MariaDB, SQLite
InfluxDB: Telegraf
Grafana
MQTT
Verschlüsselung mit RPi
Apache
PHP
Node RED
Docker
Es zeigt darüber hinaus ausgewählte Ansätze, gespeicherte Daten anzuzeigen und zu verwalten. Ein eigener Abschnitt ist sowohl der SSL-Verschlüsselung der Verbindung als auch dem Betrieb von Servern im WWW gewidmet.
Das Buch richtet sich an alle,
die neugierig sind und gerne die Möglichkeiten des Raspberry Pi ausloten möchten,
die einen Einstieg in das Datenmanagement mit Datenbanken suchen,
die mit einfachen Mitteln schnell loslegen möchten,
die Alternativen aufgezeigt bekommen möchten,
die in komprimierter Form Tipps für eigene Entwicklungen suchen,
die Freude am eigenen Entwickeln und Realisieren haben.
Programmierkenntnisse und -erfahrungen sind für die Installation der Software nicht erforderlich. Jeder einzelne Schritt wird detailliert beschrieben und mit Screenshots visuell unterlegt.
USB-Logikanalysatoren am PC mit Arduino, Raspberry Pi und Co
Schritt-für-Schritt-Anleitungen führen Sie in die Analyse moderner Protokolle von I²C, SPI, UART, RS-232, NeoPixel, WS28xx, HD44780 und 1-Wire ein. Anhand von zahlreichen Experimentierschaltungen mit dem Raspberry Pi Pico, Arduino Uno und dem Bus Pirate üben Sie die praxisnahe Anwendung gängiger USB-Logikanalysatoren ein.
Alle in diesem Buch vorgestellten Experimentierschaltungen wurden vollständig getestet und sind funktionsfähig. Die notwendigen Programmlistings sind enthalten, es sind keine besonderen Programmier- oder Elektronikkenntnisse für diese Schaltungen notwendig. Es werden die Programmiersprachen MicroPython und C mit den Entwicklungsumgebungen Thonny und Arduino IDE eingesetzt.
Dieses Buch verwendet mehrere Modelle flexibler und weit verbreiteter USB-Logikanalysatoren und zeigt die Stärken und Schwächen jeder Preisklasse. Sie werden kennenlernen, welche Kriterien für Ihre Arbeit wichtig sind und in der Lage sein, das für Sie passende Gerät zu finden.
Egal ob Arduino, Raspberry Pi oder Raspberry Pi Pico: Die abgebildeten Beispielschaltungen ermöglichen einen schnellen Start in die Protokollanalyse und können auch als Grundlage für eigene weitere Experimente dienen.
Sie werden alle wichtigen Begriffe und Zusammenhänge kennenlernen, eigene Experimente durchführen, selbstständig Protokolle analysieren und nach der Lektüre dieses Buches – im Bereich der digitalen Signale und Protokolle – ein umfassendes Wissen aufgebaut haben.
Mehr als 50 Grundlagenprojekte mit MicroPython und dem RP2040-Mikrocontroller
Der Raspberry Pi Pico ist eine leistungsstarke Mikrocontroller-Platine, die speziell für das Physical Computing – also hardwarenahe Anwendungen – entwickelt wurde. Der Raspberry Pi Pico kann so programmiert werden, dass er eine einzelne Aufgabe sehr effizient ausführt und ermöglicht so schnelle Steuerungs- und Überwachungsanwendungen in Echtzeit. Der 'Pico', wie wir ihn nennen, basiert auf dem schnellen, effizienten und kostengünstigen Dual-Core ARM Cortex-M0+ RP2040 Mikrocontroller-Chip, der mit bis zu 133 MHz läuft und über 264 KB SRAM und 2 MB Flash-Speicher verfügt. Neben dem großen Speicher hat der Pico noch weitere attraktive Eigenschaften, darunter eine große Anzahl von GPIO-Pins sowie gängige Schnittstellen wie ADC, SPI, I²C, UART und PWM. Als Krönung bietet der Chip schnelle und genaue Timer, eine Hardware-Debug-Schnittstelle und einen internen Temperatursensor.
Zur Programmierung lassen sich leicht die gängigen Hochsprachen wie MicroPython oder C/C++ verwenden. Dieses Buch ist eine Einführung in die Verwendung des Pico mit der Programmiersprache MicroPython. In allen Projekten wird die Thonny-Entwicklungsumgebung (IDE) eingesetzt. Über 50 Projekte decken folgende Themen ab:
Installation von MicroPython auf dem Raspberry Pi Pico
Timer-Interrupts und externe Interrupts
Projekte mit Analog-Digital-Wandler (ADC)
Verwendung des internen sowie externer Temperatursensoren
Datenlogger
Projekte zur PWM, UART, I²C-Bus und SPI-Bus
Wi-Fi und Bluetooth für die Kommunikation mit Smartphones
Projekte mit dem Digital-Analog-Wandler (DAC)
Alle in diesem Buch vorgestellten Projekte wurden vollständig getestet und sind funktionsfähig. Es werden keine Programmier- oder Elektronikkenntnisse vorausgesetzt, um sie nachzuvollziehen. Für alle beschriebenen Projekte gibt es kurze Beschreibungen, Blockdiagramme, detaillierte Schaltpläne und vollständige MicroPython-Programmlistings. Die Listings sind auch auf der zum Buch gehörenden Elektor-Webseite zu finden.
Practical Multitasking Fundamentals
Programming embedded systems is difficult because of resource constraints and limited debugging facilities. Why develop your own Real-Time Operating System (RTOS) as well as your application when the proven FreeRTOS software is freely available? Why not start with a validated foundation?
Every software developer knows that you must divide a difficult problem into smaller ones to conquer it. Using separate preemptive tasks and FreeRTOS communication mechanisms, a clean separation of functions is achieved within the entire application. This results in safe and maintainable designs.
Practicing engineers and students alike can use this book and the ESP32 Arduino environment to wade into FreeRTOS concepts at a comfortable pace. The well-organized text enables you to master each concept before starting the next chapter. Practical breadboard experiments and schematics are included to bring the lessons home. Experience is the best teacher.
Each chapter includes exercises to test your knowledge. The coverage of the FreeRTOS Application Programming Interface (API) is complete for the ESP32 Arduino environment. You can apply what you learn to other FreeRTOS environments, including Espressif’s ESP-IDF. The source code is available from GitHub. All of these resources put you in the driver’s seat when it is time to develop your next uber-cool ESP32 project.
What you will learn:
How preemptive scheduling works within FreeRTOS
The Arduino startup “loopTask”
Message queues
FreeRTOS timers and the IDLE task
The semaphore, mutex, and their differences
The mailbox and its application
Real-time task priorities and its effect
Interrupt interaction and use with FreeRTOS
Queue sets
Notifying tasks with events
Event groups
Critical sections
Task local storage
The gatekeeper task
The author, Johan Basse Bergqvist, is an engineer, a musician, and an audiophile with a knack for building projects that produce the desired results. The combination of these skills leads to a uniquely valuable perspective on audio design that is routinely reflected in the book and passed on to the readers.
Several design projects are provided, 40 in total. The designs are explained, and the unique features or methods he uses are described in further detail. Each design includes detailed schematics and a complete parts list. Many of the projects also include layout documentation in the form of CAD photos of the PCB layouts. The range of projects is very diverse and includes something that will appeal to everyone. Stereo amplifiers, guitar and bass amplifiers, preamplifiers for phono, and microphones are all covered. Several variants for each type are included, and the power amplifier designs range from a few watts to several hundred watts, which meet almost any power level you might tackle.
Open-Source-Code mit Arduino IDE und PlatformIO
Autonomes Fahren: GPS, Accelerometer, Gyroskop
PS3-Controller
Mikrocontroller wie der Arduino und Einplatinenrechner wie der Raspberry Pi haben sich zu beliebten Komponenten entwickelt. Dritter im Bunde ist der ESP32 der Firma Espressif. Mikrocontroller dieser Baureihe zeichnen sich durch eine Vielzahl implementierter Funktionen aus, die bei einem Arduino konventioneller Prägung mit einem Atmel-AVR-Mikrocontroller erst mit weiterer Hardware möglich sind. Prominentes Beispiel sind hier die WiFi- und Bluetooth-Funktionalitäten. Gegenüber einem Raspberry Pi zeichnen sie sich durch einen deutlich geringeren Preis aus.
Allgemeine Informationen für die Realisierung eines Roboterauto-Projekts mit dem ESP32 sind leicht zu finden. Dabei handelt es sich aber oft nur um Ausführungen zu einem Teilaspekt, ohne inhaltliche oder funktionale Abstimmung. So ist nicht nur die Beschaffung der benötigten Informationen mühselig und zeitaufwändig, sie kann auch außerordentlich fehlerträchtig sein.
Ansatzpunkt dieses Buches ist, diese Lücke zu schließen. Es geht auf verschiedene Möglichkeiten eines Chassis ein, vermittelt nötige Kenntnisse und führt schrittweise von einer einfachen Motorsteuerung zu einem komplexen sensor- und sprachgesteuerten Roboterauto. Hacks rund um GPS und eine PlayStation 3 runden die Sache ab.
Inhalt
Bei der Reihenfolge der Kapitel wurde versucht – beginnend bei der Darstellung von grundlegenden Informationen – über die Lösung einfacher Aufgaben zu etwas anspruchsvolleren Techniken zu führen.
Der Mikrocontroller ESP32
Die Software erstellen
Die Stromversorgung
Rund um die Hardware
Das Chassis
Der Gleichstrommotor
Kabellose Steuerung über WiFi
Mit Sensoren Hindernisse erkennen
Eine eigene Roboterauto-App
Servo und Lichtsensor
GPS
Accelerometer / Gyroskop
PS3-Controller
Roboterauto-App
Hinweis zur Software
Die Dateien haben das Suffix (.cpp). Grund ist die Entwicklung mit PlatformIO. Mit Copy & Paste sollten sie auch in der Arduino-IDE verwendet werden können.