This complete ESP32 microcontroller programming course features a textbook, a component kit, hands-on projects, and a comprehensive online course with simulations. It is ideal for step-by-step learning of embedded systems programming with Arduino using a practical, hands-on approach.
A Practical Introduction to Embedded Systems with the ESP32
This course is designed for people who are new to embedded systems and looking for a structured, example-driven way to get started.
A kit of parts comprising LEDs and resistors, switches, sensors and actuators, displays, a breadboard and wires, and more is included. These are used in the course to illustrate example applications.
No prior experience with Arduino or embedded development is required. Each section features hands-on examples and mini projects designed to reinforce key concepts and inspire deeper exploration. By the end of the course, you’ll be able not only to reproduce the examples but also to build on them with your own ideas and applications.
What Will You Learn?
Microcontroller programming with the ESP32 using the Arduino IDE
Working with Digital I/O, read buttons and encoders, control LEDs and relays
Read analog inputs, voltages, and analog sensors
Generating analog output signals and PWM
Use serial communication like UART, I²C and SPI to control displays and read digital sensors and SD cards
Managing time
Working with interrupts
Real-time sensor input and control via buttons, LEDs, and displays
Control actuators like relays and servo motors
Who Is It For?
Students and self-learners exploring embedded systems
Makers and IoT enthusiasts looking to improve their hardware skills
Educators and trainers seeking ready-to-teach material
What's Inside the Box?
Access to the full course on the Elektor Academy Pro Learning Platform
ESP32 microcontroller board + USB cable
Book: Programming Microcontrollers in C/C++ Using Arduino
Downloadable project files for every module
Component Box:
2× LED, red, 5 mm
LED, green, 5 mm
3× Resistor, 470 Ω, 0.25 W
LDR
Potentiometer, 10 kΩ, linear
Pushbutton
Rotary encoder module
Relay module
DHT22 Humidity & Temperature Sensor
TM1637-compatible 4-digit 7-segment display
MPU-6050 IMU with headers
SSD1306-compatible I²C OLED display
Micro SD card adapter with header
Buzzer
SG90 Micro Servo
ILI9341-compatible SPI 240×320 TFT display
20× Jumper wires
Breadboard
All Programming Courses (and differences in content)
Course
Arduino
Raspberry Pi Pico with Arduino C/C++
ESP32 with Arduino C/C++
Raspberry Pi Pico with MicroPython
ESP32 with MicroPython
Online Course
Access to Arduino Course
Access to Pico with Arduino C/C++ Course
Access to ESP32 with Arduino C/C++ Course
Access to Pico with MicroPython Course
Access to ESP32 with MicroPython Course
Board
Uno R3
Raspberry Pi Pico
ESP32
Raspberry Pi Pico
ESP32
Book
Programming Microcontrollers in C/C++ Using Arduino
Programming Microcontrollers in C/C++ Using Arduino
Programming Microcontrollers in C/C++ Using Arduino
Programming Microcontrollers in MicroPython
Programming Microcontrollers in MicroPython
Kit
40-piece Component Box
40-piece Component Box
40-piece Component Box
40-piece Component Box
40-piece Component Box
Elektor GREEN and GOLD members can download their digital edition here.
Not a member yet? Click here.
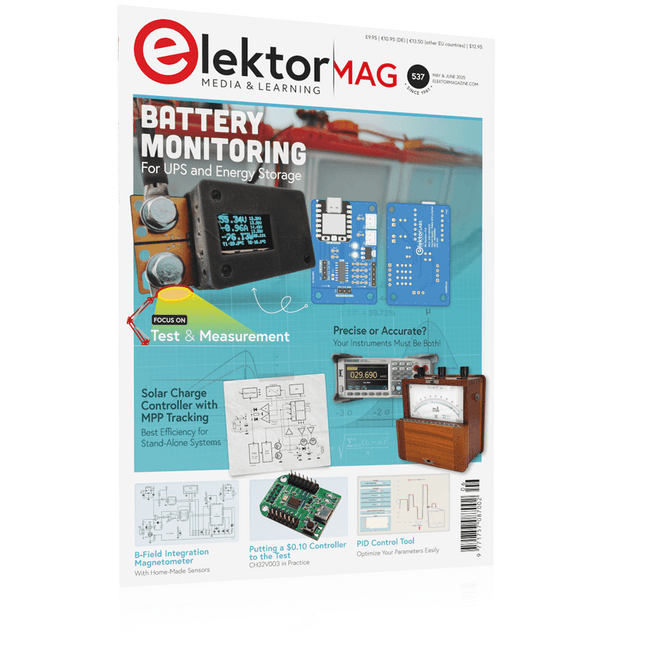
PbMonitor v1.0A Battery-Monitoring System for UPS and Energy Storage Applications
Solar Charge Controller with MPPT (1)Basic Principles of a Solar Controller for Stand-Alone Systems
B-Field Integration Magnetometer With Home-Made Sensors
Precise or Accurate?Your Instruments Need to Be Both!
AD7124 A Precision ADC in PracticeFeatures for Sensor Signal Conditioning
PID Control ToolOptimize Your Parameters Easily
embedded world 2025
Starting Out in Electronics……Continues with Tone Control
Academy Pro BoxBook + Online Course + Hardware
Milliohmmeter AdapterUses the Precision of Your Multimeter
The Next Leap in SemiconductorsOnward Toward 1.4 nm
Through-Hole Technology ConnectorsThe Best of Two Worlds: THR
Frequency CounterPortable and Auto-Calibrating Via GPS
Analog MetersPeculiar Parts, the Series
Stand-Alone Crystal TesterHow Accurate Is Your Clock Source?
Low-Cost I²C TesterConnect I²C Devices Directly to Your PC
From Life’s ExperienceWho Doesn’t Honor the Small Things?
2025: An AI OdysseyThe Transformative Impact on Software Development
Err-lectronicsCorrections, Updates, and Readers’ Letters
Raspberry Pi Standalone MIDI Synthesizer (2)Enhancing Our Setup with Intelligence
Nortonized Wien Bridge OscillatorSmall Changes Yield Significant Improvements
Putting a $0.10 Controller to the TestThe CH32V003 RISC-V Microcontroller and MounRiver Studio in Practice
An FPGA-Based Audio Player with Equalizer (2)Adding Volume Control, Advanced Mixing, and a Web Interface
BEELDVERWERKING MET DE NVIDIA JETSON NANO (DEEL 2)Beeldherkenning met Edge Impulse
NIEUWS VAN ELEKTOR JUMPSTARTERNieuwe campagnes
EEN OPEN SOURCE-PLATFORM VOOR GPS-TRACKINGMet Traccar voertuigen volgen zonder gebruik te maken van een cloudserver
JOY-IT LCR-T7 MULTIFUNCTIONELE TESTERVoor passieve componenten, discrete halfgeleiders en IR
RUISSYNTHESIZERVan ruis naar muziek met de PRBSynth1
ALLE BEGIN......speelt verder met de spoel
KENNISMAKING MET NEURONEN IN NEURALE NETWERKEN (DEEL 2)Logische Neuronen
BEVEILIGINGSPROBLEMEN? BESTRIJD VUUR MET VUUR!Met flitslampje beveiligde analoge geheugenuitbreiding voor de verzendbox met manipulatie-indicatie LCR METER POSTER
BLUETOOTH-BAKENS IN DE PRAKTIJKindoor-plaatsbepaling
PROGRAMMEREN IN C OP DE RASPBERRY PICommunicatie via WiFi (een hoofdstuk als voorbeeld)
EMC PRE-COMPLIANCE TEST VOOR UW DC-GEVOED PROJECT (DEEL 2)De hardware en het gebruik ervan
KENNISMAKING MET DE PARALLAX PROPELLER 2 (DEEL 5)Smart Pin-Functie
MODBUS VIA WLAN (DEEL 1)Hardware en programmering
OOST WEST LAB BEST... waar de Junior Computer weer tot leven is gewekt
BOUW ZELF EEN NAUWKEURIGE KALIBRATOR-10 V tot +10 V, 0 tot 40 mA, 0,001%
REVIEW: ARDUINO NANO RP2040 CONNECTRaspberry Pi RP2040 + WiFi + Bluetooth DE FYSIEKE KANT VAN KUNSTMATIGE INTELLIGENTIE
PROJECT 2.0Correcties, Updates en Brieven van lezers
MAAK GUI'S MET PYTHONIntroductie in guizero
CO2-METER-BOUWKIT VOOR IN DE KLASEen ESP8266-project van de University of Applied Sciences Aachen
NOSTALGISCHE MK484 MW/LW-RADIO...Altijd leuk om te bouwen!
ELEKTOR @ 60Laat er licht zijn!
HEXADOKUThe Original Elektorized Sudoku
Construisez votre station météo idéale ou explorez les données environnementales avec le monde entier. Avec de nombreux projets pratiques pour Arduino, Raspberry Pi, NodeMCU, ESP32 et autres cartes de développement.
Les stations météo jouissent d’une grande popularité depuis des décennies. Tous les magazines d’électronique, qu’ils soient récents ou non, ont publié et publient régulièrement des articles sur la construction d’une station météo. Au fil des années, elles sont devenues de plus en plus sophistiquées et peuvent aujourd’hui être entièrement intégrées dans la maison intelligente. Ceci implique toutefois souvent une fidélité à un fabricant de produits de marque (coûteux) pour tous les composants.
Cependant, avec votre propre station météo, vous pouvez facilement suivre le rythme et même capturer des relevés que les appareils commerciaux ne peuvent pas réaliser. Le plaisir ne manque pas : vous développerez de manière ludique vos connaissances en électronique, en cartes de développement de microcontrôleurs modernes et en langages de programmation. Pour moins de dix euros, vous pouvez collecter des données environnementales initiales et étendre votre système au fur et à mesure que votre intérêt grandit.
Dans ce numéro
Sur la route du vent et de la météo
Écran météo OpenWeatherMap à affichage fluorescent
Les composés organiques volatils dans l‘air que nous respirons
Travailler avec les capteurs MQ : mesurer le monoxyde de carbone
Détecteur de CO2 avec connexion IdO vers ThingSpeak
Un arrosage automatique pour vos plantes
Un climat intérieur sain : la température et l‘humidité de l‘air sont importants
Thermomètre avec tubes Nixie
Une maison météo rétro pour toute la famille
Mesurez la pression atmosphérique et la température avec précision
Un détecteur de coups de soleil
Capteur maison pour la durée d‘ensoleillement
Le smartphone l‘indique : brouillard ou bonne visibilité ?
Détecter les tremblements de terre
Les niveaux des cours d‘eau et des réservoirs
Évaluer la valeur du pH de l’eau
Détecter les rayonnements radioactifs
Avec le GPS, vous savez où se trouve votre capteur
Enregistrer les fichiers journaux avec horodatage sur des cartes SD
LoRaWAN, The Things Network et ThingSpeak
Exploiter la passerelle LoRaWAN pour le TTN
Affichage géant à led avec prévisions météo
Temporary Delay in the Delivery of Unitree Robots
Like many other suppliers, we are currently experiencing delays in the delivery of Unitree robots. A shipment from our supplier is currently held in customs, which has unfortunately led to later-than-planned deliveries for previously placed orders. We are actively working with our supplier to resolve this issue and expect more clarity soon, but at this time, we cannot provide any guarantees.
Additionally, a new shipment is already on its way, though it will take some time to arrive. Since other suppliers are facing similar challenges, switching to a different provider is unlikely to result in a faster solution. Our top priority remains fulfilling existing orders.
If you have any questions or would like to update your order, please do not hesitate to contact our customer service team. We will keep you informed of any further developments.
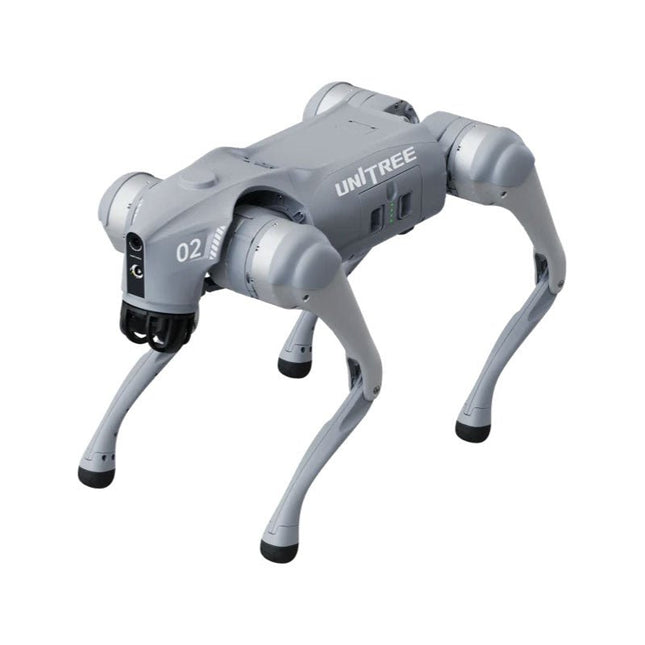
Unitree Go2 series consists of quadruped robots for the research & development of autonomous systems in the fields of human-robot interaction (HRI), SLAM & transportation. Due to the four legs, as well as the 12DOF, this robot can handle a variety of different terrains. The Go2 comes with a perfected drive & power management system, which enables a speed (depending on the version) of up to 3.7 m/s or 11.88 km/h with an operating time of up to 4 hours. Furthermore, the motors have a torque of 45 N.m at the body/thighs and at the knees, which also allow jumps or backflips.
Features
Super Recognition System: 4D LIDAR L1
Max Running Speed: approx. 5 m/s
Peak Joint Torque: approx. 45 N.m
Wireless Module: WiFi 6/Bluetooth/4G
Ultra-long battery Endurance: approx. 2-4 h (long battery life measured in real life)
Intelligent Side-follow System: ISS 2.0
Specifications
Tracking module: Remote-controlled or automatic tracking
Front camera: Image tansmission Resolution 1280x720, FOV 120°, Ultra wide angle lens deliver rich clarity
Front lamp: Brightly lights the way ahead
4D LiDAR L1: 360°x90° omnidirectional ultra-wide-angle scanning allows automatic avoidance with small blind spot and stable operation
12 knee joint motors: Strong and powerful, Beautiful and simple, Brandy new visual experience
Intercom microphone: Effective communication with no scenario restrictions
Self-retracting strap: Easy to carry and load things
More stable, more powerful with advanced devices: 3D LiDAR, 4G ESIM Card, WiFi 6 with Dual-band, Bluetooth 5.2 for stable connection and remote control
Powerful Computing Core: Motion controller, High-performance ARM processor, Improved Al algorithm processor, External ORIN NX/NANO
Smart battery: Standard 8000 mAh battery, Long-endurance 15000 mAh battery, Protection from over-temp, overcharge and short-circuit
Speaker for music play: Listen to music as your pleasure
Unitree Go2 Variants
The Go2 impresses not only with its technical capabilities, but also with a modern and slim design that gives it a futuristic look and makes it a real eye-catcher. The Go2 Air is specially designed for demos and presentations. With its basic features, it offers a solid basis for demonstrating the movement capabilities and functionality of a four-legged robot. Important: The Go2 Air is delivered without a controller. This can be purchased optionally.
With a powerful 8-core high-performance CPU, the Pro and Edu offer impressive computing power required for complex tasks and demanding calculations. This enables faster and more efficient data processing and makes the Pro and Edu a reliable partner for your projects.
From the Edu version onwards, the Go2 is programmable and opens up endless possibilities for developing and researching your own robotics applications. The Go2 is also able to handle a step height of up to 14 cm. This makes it an ideal tool for research, education and entry into the world of robotics.
The Go2 Edu comes with a remote controller that gives you easy and intuitive control. You also get a docking station with impressive computing power of 100 TOPS, which is equipped with powerful AI algorithms and offers you technical support.
Go2 Edu is equipped with a powerful 15000 mAh battery that gives it an impressive runtime of up to 4 hours. This long operating time allows the robot to carry out longer exploration missions and complete demanding tasks.
Model Comparison
Air
Pro
Edu/Edu Plus
Dimensions (standing)
70 x 31 x 40 cm
70 x 31 x 40 cm
70 x 31 x 40 cm
Dimensions (crouching)
76 x 31 x 20 cm
76 x 31 x 20 cm
76 x 31 x 20 cm
Material
Aluminium alloy + High strength engineering plastic
Aluminium alloy + High strength engineering plastic
Aluminium alloy + High strength engineering plastic
Weight (with battery)
about 15 kg
about 15 kg
about 15 kg
Voltage
28~33.6 V
28~33.6 V
28~33.6 V
Peaking capacity
about 3000 W
about 3000 W
about 3000 W
Payload
≈7 kg (MAX ~ 10 kg)
≈8 kg (MAX ~ 10 kg)
≈8 kg (MAX ~ 12 kg)
Speed
0~2.5 m/s
0~3.5 m/s
0~3.7 m/s (MAX ~ 5 m/s)
Max Climb Drop Height
about 15 cm
about 16 cm
about 16 cm
Max Climb Angle
30°
40°
40°
Basic Computing Power
N/A
8-core High-performance CPU
8-core High-performance CPU
Aluminum knee joint motor
12 set
12 set
12 set
Intra-joint circuit (knee)
✓
✓
✓
Joint Heat Pipe Cooler
✓
✓
✓
Range of Motion
Body: −48~48°
Body: −48~48°
Body: −48~48°
Thigh: −200°~90°
Thigh: −200°~90°
Thigh: −200°~90°
Shank: −156°~−48°
Shank: −156°~−48°
Shank: −156°~−48°
Max Torque
N/A
about 45 N.m
about 45 N.m
Super-wide-angle 3D LiDAR
✓
✓
✓
Wireless Vector Positioning Tracking Module
N/A
✓
✓
HD Wide-angle Camera
✓
✓
✓
Foot-end force sensor
N/A
N/A
✓
Basic Action
✓
✓
✓
Auto-scaling strap
N/A
✓
N/A
Upgraded Intelligent OTA
✓
✓
✓
RTT 2.0 Image Transmission
✓
✓
✓
App Basic Remote Control
✓
✓
✓
App Data Viewing
✓
✓
✓
App Graphical Programme
✓
✓
✓
Front Lamp (3 W)
✓
✓
✓
WiFi 6 with Dual-band
✓
✓
✓
Bluetooth 5.2/4.2/2.1
✓
✓
✓
4G Module
N/A
CN/GB
CN/GB
Voice Function
N/A
✓
✓
Music Playback
N/A
✓
✓
ISS 2.0 Intelligent side-follow system
N/A
✓
✓
Intelligent detection and avoidance
✓
✓
✓
Secondary development
N/A
N/A
✓
Manual controller
Optional
Optional
✓
High computing power module
N/A
N/A
Edu: 40 TOPS computing power
Edu Plus: 100 TOPS computing power
NVIDIA Jetson Orin (optional)
Smart Battery
Standard (8000 mAh)
Standard (8000 mAh)
Long endurance (15000 mAh)
Battery Life
1-2 h
1-2 h
2-4 h
Charger
Standard (33.6 V, 3.5 A)
Standard (33.6 V, 3.5 A)
Fast charge (33.6 V, 9 A)
Included
1x Unitree Go2 Edu Plus
1x Unitree Go2 Remote Controller
1x Unitree Go2 Battery (15000 mAh)
1x Unitree Docking station with 100 TOPS computing power
Downloads
Documentation
iOS/Android apps
GitHub
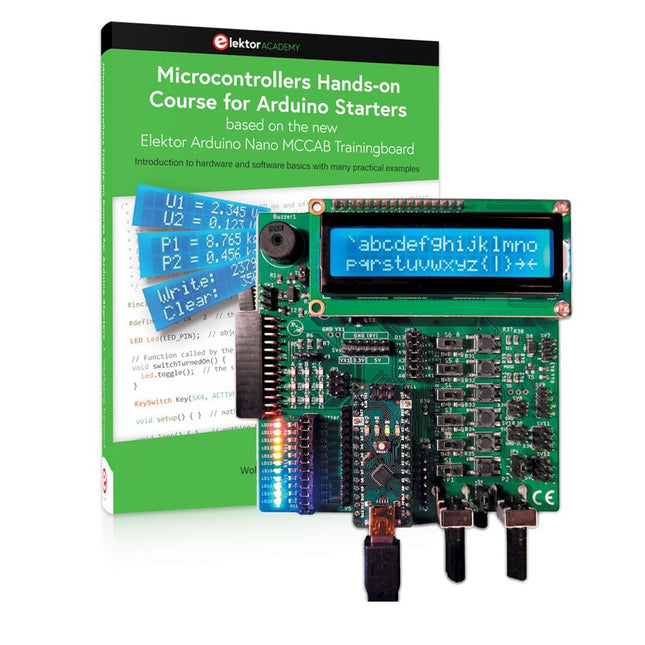
Realize your own projects with the Elektor Arduino Nano MCCAB Training Board
The microcontroller is probably the most fascinating subfield of electronics. Due to the multitude of functions, it combines on its chip, it is a universal multi-tool for developers to realize their projects. Practically every device of daily use today is controlled by a microcontroller. However, for an electronic layman, realizing his own ideas with a microcontroller has so far remained a pipe dream due to its complexity. The Arduino concept has largely simplified the use of microcontrollers, so that now even laymen can realize their own electronics ideas with a microcontroller.
Book & Hardware in the Bundle: 'Learning by Doing'
This book, which is included in the bundle, shows how you can realize your own projects with a microcontroller even without much experience in electronics and programming languages. It is a microcontrollers hands-on course for starters, because after an overview of the internals of the microcontroller and an introduction to the programming language C, the focus of the course is on the practical exercises. The reader acquires the necessary knowledge by 'learning by doing': in the extensive practical section with 12 projects and 46 exercises, what is learned in the front part of the book is underpinned with many examples. The exercises are structured in such a way that the user is given a task to solve using the knowledge built up in the theoretical part of the book. Each exercise is followed by a sample solution that is explained and commented on in detail, which helps the user to solve problems and compare it with his own solution.
Arduino IDE
The Arduino IDE is a software development environment that can be downloaded for free to your own PC and that contains the entire software package needed for your own microcontroller projects. You write your programs ('apps') with the IDE’s editor in the C programming language. You translate them into the bits and bytes that the microcontroller understands using the Arduino IDE's built-in compiler, and then load them into the microcontroller's memory on the Elektor Arduino MCCAB Nano Training Board via a USB cable.
Query or control external sensors, motors or assemblies
In addition to an Arduino Nano microcontroller module, the Elektor Arduino Nano MCCAB Training Board contains all the components required for the exercises, such as light-emitting diodes, switches, pushbuttons, acoustic signal transmitters, etc. External sensors, motors or assemblies can also be queried or controlled with this microcontroller training system.
Specifications (Arduino Nano MCCAB Training Board)
Power Supply
Via the USB connection of the connected PC or an external power supply unit (not included)
Operating Voltage
+5 Vcc
Input Voltage
All inputs
0 V to +5 V
VX1 and VX2
+8 V to +12 V (only when using an external power supply)
Hardware periphery
LCD
2x16 characters
Potentiometer P1 & P2
JP3: selection of operating voltage of P1 & P2
Distributor
SV4: Distributor for the operating voltagesSV5, SV6: Distributor for the inputs/outputs of the microcontroller
Switches and buttons
RESET button on the Arduino Nano module 6x pushbutton switches K1 ... K6 6x slide switches S1 ... S6 JP2: Connection of the switches with the inputs of the microcontroller
Buzzer
Piezo buzzer Buzzer1 with jumper on JP6
Indicator lights
11 x LED: Status indicator for the inputs/outputs LED L on the Arduino Nano module, connected to GPIO D13 JP6: Connection of LEDs LD10 ... LD20 with GPIOs D2 ... D12
Serial interfacesSPI & I²C
JP4: Selection of the signal at pin X of the SPI connector SV12 SV9 to SV12: SPI interface (3.3 V/5 V) or I²C interface
Switching output for external devices
SV1, SV7: Switching output (maximum +24 V/160 mA, externally supplied) SV2: 2x13 pins for connection of external modules
3x3 LED matrix(9 red LEDs)
SV3: Columns of the 3x3 LED matrix (outputs D6 ... D8) JP1: Connection of the rows with the GPIOs D3 ... D5
Software
Library MCCABLib
Control of hardware components (switches, buttons, LEDs, 3x3 LED matrix, buzzer) on the MCCAB Training Board
Operating Temperature
Up to +40 °C
Dimensions
100 x 100 x 20 mm
Specifications (Arduino Nano)
Microcontroller
ATmega328P
Architecture
AVR
Operating Voltage
5 V
Flash Memory
32 KB, of which 2 KB used by bootloader
SRAM
2 KB
Clock Speed
16 MHz
Analog IN Pins
8
EEPROM
1 KB
DC Current per I/O Pins
40 mA on one I/O pin, total maximum 200 mA on all pins together
Input Voltage
7-12 V
Digital I/O Pins
22 (6 of which are PWM)
PWM Output
6
Power Consumption
19 mA
Dimensions
18 x 45 mm
Weight
7 g
Included
Elektor Arduino Nano MCCAB Training Board
Arduino Nano
Book: Microcontrollers Hands-on Course for Arduino Starters
This complete STM32 microcontroller programming course features a textbook, a component kit, hands-on projects, and a comprehensive online course. It is ideal for step-by-step learning of embedded systems programming with Arduino using a practical, hands-on approach.
A Practical Introduction to Embedded Systems with the STM32
This course is designed for people who are new to embedded systems and looking for a structured, example-driven way to get started. A kit of parts comprising LEDs and resistors, switches, sensors and actuators, displays, a breadboard and wires, and more is included. These are used in the course to illustrate example applications.
No prior experience with Arduino or embedded development is required. Each section features hands-on examples and mini projects designed to reinforce key concepts and inspire deeper exploration. By the end of the course, you’ll be able not only to reproduce the examples but also to build on them with your own ideas and applications.
What Will You Learn?
Microcontroller programming in C/C++ with the STM32 using the Arduino IDE
Working with Digital I/O, read buttons and encoders, control LEDs and relays
Read analog inputs, voltages, and analog sensors
Generating analog output signals and PWM
Use serial communication like UART, I²C and SPI to control displays and read digital sensors and SD cards
Managing time
Working with interrupts
Real-time sensor input and control via buttons, LEDs, and displays
Control actuators like relays and servo motors
Debug programs using breakpoints and stepping through code
Who Is It For?
Students and self-learners exploring embedded systems
Makers and IoT enthusiasts looking to improve their hardware skills
Educators and trainers seeking ready-to-teach material
What's Inside the Box?
Access to the full course on the Elektor Academy Pro Learning Platform
STM32 NUCLEO-F411RE microcontroller board
Book: Arduino for STM32
Downloadable project files for every module
Component Box:
2× LED, red, 5 mm
LED, green, 5 mm
3× Resistor, 470 Ω, 0.25 W
LDR
Potentiometer, 10 kΩ, linear
Pushbutton
Rotary encoder module
Relay module
DHT22 Humidity & Temperature Sensor
TM1637-compatible 4-digit 7-segment display
MPU-6050 IMU with headers
SSD1306-compatible I²C OLED display
Micro SD card adapter with header
Buzzer
SG90 Micro Servo
ILI9341-compatible SPI 240×320 TFT display
20× Jumper wires
Breadboard
Open-Source-Code mit Arduino IDE und PlatformIO
Autonomes Fahren: GPS, Accelerometer, Gyroskop
PS3-Controller
Mikrocontroller wie der Arduino und Einplatinenrechner wie der Raspberry Pi haben sich zu beliebten Komponenten entwickelt. Dritter im Bunde ist der ESP32 der Firma Espressif. Mikrocontroller dieser Baureihe zeichnen sich durch eine Vielzahl implementierter Funktionen aus, die bei einem Arduino konventioneller Prägung mit einem Atmel-AVR-Mikrocontroller erst mit weiterer Hardware möglich sind. Prominentes Beispiel sind hier die WiFi- und Bluetooth-Funktionalitäten. Gegenüber einem Raspberry Pi zeichnen sie sich durch einen deutlich geringeren Preis aus.
Allgemeine Informationen für die Realisierung eines Roboterauto-Projekts mit dem ESP32 sind leicht zu finden. Dabei handelt es sich aber oft nur um Ausführungen zu einem Teilaspekt, ohne inhaltliche oder funktionale Abstimmung. So ist nicht nur die Beschaffung der benötigten Informationen mühselig und zeitaufwändig, sie kann auch außerordentlich fehlerträchtig sein.
Ansatzpunkt dieses Buches ist, diese Lücke zu schließen. Es geht auf verschiedene Möglichkeiten eines Chassis ein, vermittelt nötige Kenntnisse und führt schrittweise von einer einfachen Motorsteuerung zu einem komplexen sensor- und sprachgesteuerten Roboterauto. Hacks rund um GPS und eine PlayStation 3 runden die Sache ab.
Inhalt
Bei der Reihenfolge der Kapitel wurde versucht – beginnend bei der Darstellung von grundlegenden Informationen – über die Lösung einfacher Aufgaben zu etwas anspruchsvolleren Techniken zu führen.
Der Mikrocontroller ESP32
Die Software erstellen
Die Stromversorgung
Rund um die Hardware
Das Chassis
Der Gleichstrommotor
Kabellose Steuerung über WiFi
Mit Sensoren Hindernisse erkennen
Eine eigene Roboterauto-App
Servo und Lichtsensor
GPS
Accelerometer / Gyroskop
PS3-Controller
Roboterauto-App
Hinweis zur Software
Die Dateien haben das Suffix (.cpp). Grund ist die Entwicklung mit PlatformIO. Mit Copy & Paste sollten sie auch in der Arduino-IDE verwendet werden können.
Bauen Sie Ihre perfekte Wetterstation oder forschen Sie zusammen mit der ganzen Welt an Umweltdaten. Mit vielen praktischen Projekten für Arduino, Raspberry Pi, NodeMCU, ESP32 und weiteren Developmentboards.
Wetterstationen erfreuen sich seit Jahrzehnten großer Beliebtheit. Ob in aktuellen oder längst eingestellten Elektronik-Magazinen – regelmäßig finden sich Beiträge zum Eigenbau einer Wetterstation. Im Laufe der Jahre wurden diese Systeme immer ausgefeilter und können heute nahtlos in das Smart Home integriert werden. Allerdings erfordert dies oft die Bindung an einen (teuren) Markenhersteller, der sämtliche Komponenten abdeckt.
Mit Ihrer eigenen Wetterstation können Sie jedoch mühelos mithalten – und sogar Messwerte erfassen, die kommerzielle Geräte nicht bieten. Dabei kommt der Spaß nicht zu kurz: Sie erweitern spielerisch Ihr Wissen über Elektronik, moderne Mikrocontroller-Developmentboards und Programmiersprachen. Schon für weniger als zehn Euro können Sie erste Umweltdaten erfassen und Ihr System Schritt für Schritt mit wachsendem Interesse weiter ausbauen.
Aus dem Inhalt:
Wind und Wetter auf der Spur
Wetterdisplay mit OpenWeatherMap und Vakuum-Fluoreszenzanzeige
Flüchtige organische Verbindungen in der Atemluft
Mit MQ-Sensoren arbeiten: Kohlenmonoxid messen – geruchlos aber extrem giftig
CO2-Ampel mit ThingSpeak-IoT-Anbindung
Ein Gießautomat für Ihre Pflanzen
Gutes Raumklima: Temperatur und Luftfeuchtigkeit sind wichtige Kriterien
Schickes Thermometer mit alter Röhrentechnik
Nostalgisches Wetterhäuschen für die ganze Familie
Luftdruck und Temperatur genau messen
Sonnenbrand-Warngerät
DIY-Sensor für die Sonnenscheindauer
Das Smartphone zeigt’s an: Nebel oder klare Sicht?
Erdbeben erkennen
Pegelstände von Gewässern und Behältern
pH-Wert von Gewässern bestimmen
Radioaktive Strahlung erkennen
Mit GPS wissen Sie weltweit, wo ihr Sensor ist
Logdateien mit Zeitstempel auf SD-Karten speichern
LoRaWAN, The Things Network und ThingSpeak
LoRaWAN-Gateway für TTN betreiben
Mega-Display mit Wettervorhersage
Verwirklichen Sie Ihre Projekt-Träume: Der Kilometerzähler fürs Hamsterrad, eine vollautomatische Steuerung Ihrer Ameisenfarm mit Webinterface, oder den Sandwich-O-Mat – eine Maschine, die Sandwich-Toasts nach Wahl belegt und überbackt.
Mit dem Arduino und der DIY- oder Maker-Bewegung wurde nicht nur der Einstieg in die Mikrocontroller-Programmierung kinderleicht, auch eine zweite Entwicklung fand statt: Findige Entwickler brachten kleine Boards – sogenannte Shields oder Module – auf den Markt, die den Einsatz von zusätzlicher Hardware stark vereinfachten. Die kleinen Baugruppen enthalten alle wichtigen elektronischen Teile, um mit ein paar Steckkabeln an den Mikrocontroller angeschlossen zu werden, so dass ein frickeliger und aufwändiger Aufbau auf dem Steckboard entfällt. Zudem ist es so möglich, auch winzig kleine Bauteile zu handhaben, die keine Anschlussbeinchen mehr haben (sogenannte SMDs).
Enthaltene Projekte
Arduino sucht Anschluss
BMP, Einführung in Bibliotheken und I²C
Mit dem Mehrzweck-Shield I/O-Grundlagen kennenlernen
I²C-LCD-Adapter und Punktmatrixanzeigen
LCD Keypad Shield
Level-Konverter
W5100: Internetanbindung
I/O-Erweiterungs-Shields
Relais und Solid-State-Relais
Das Multi-Funktions-Shield: eine universelle Bedieneinheit
SD-Kartenleser über SPI anbinden
Tasten und 7-Segmentanzeigen
16-Bit ADC
DAC MCP4725
16-fach PWM Servo-Treiber
MP3-Player
GPS-Datenlogger mit SD-Karte
Touch-Sensor
Joystick
SHT31: Temperatur und Luftfeuchtigkeit
UV A-Sensor VEML6070
VL53L0X Time-of-Flight
Ultraschallsensor-Entfernungsmesser
LED-Punktmatrixanzeige mit MAX7219
RTC DS3231
Port-Expander MCP23017
433 MHz Funk
MPU-650: Gyroskop
Beschleunigungssensor ADXL345
WS2812 RGB-LEDs
Spannungsversorgung
MQ-xx Gassensoren
CO2-Gassensor
ACS712 Stromstärkesensor
INA219 Stromstärkesensor
L298 Motortreiber
MFRC522 RFID
28BYJ-48 Stepper-Motor
TMC2209 Silent-Step-Stick
X9C10x Digitales Poti
Farb-TFT-Display mit ST7735
e-Paper Display
Bluetooth
Geigerzähler
SIM800L GSM-Modul
I²C-Multiplexer
Controller Area Network
Le téléchargement intégral de ce numéro est disponible pour nos membres GOLD et GREEN sur le site Elektor Magazine !
Pas encore membre ? Cliquez ici.
carte de développement MultiRFUne plateforme pour évaluer les protocoles sans fil à courte et longue portée
Elektor fête ses 65 ansAu cœur de l'électronique depuis 1961
détection de personnes par Wifi sur un ESP32Quand votre routeur devient un capteur de mouvement
balances sans filQuatre petites balances = une grande balance
Walter, le module IoT compactSoC ESP32-S3, modem 5G LTE-M/NB-IoT et récepteur GNSS
conditionnement des capteurs RTD à 3 et 4 filsAvec ajustement d’échelle et compensation des câbles
oscilloscope/générateur/multimètre à 2 voies 3-en-1Revue du Fnirsi 2D15P
electronica Fast Forward 2026 ouvre ses candidatures aux startups et partenaires industriels
EcologgingUne station IoT environnementale modulaire pour la recherche de terrain
la connectivité sans fil dans les applications médicalesAu rythme du pouls avec le Bluetooth LE
audiotroniqueRéduction du ronflement
optimiser les rendements agricoles grâce à la modélisation par IA et aux capteursAméliorer la productivité agricole
OPC UA : un aperçuÉchange de données indépendant des plateformes
redox-mètre
amplificateur d’instrumentation pour expériences de physique et d’ingénierie
filtres audio actifs différentielsPour les crossovers et plus encore
perspectives de la communauté Elektor sur l’IdO et les capteurs
module d’interface pour chauffe-eau piloté via TelegramUne solution basée sur un ESP32 et Arduino
2026 : une odyssée de l'IALa logique floue a-t-elle disparu ?
projet 2.0
injecteur de signal d’alarme plus secteuroutils pour localiser les coupures de fil
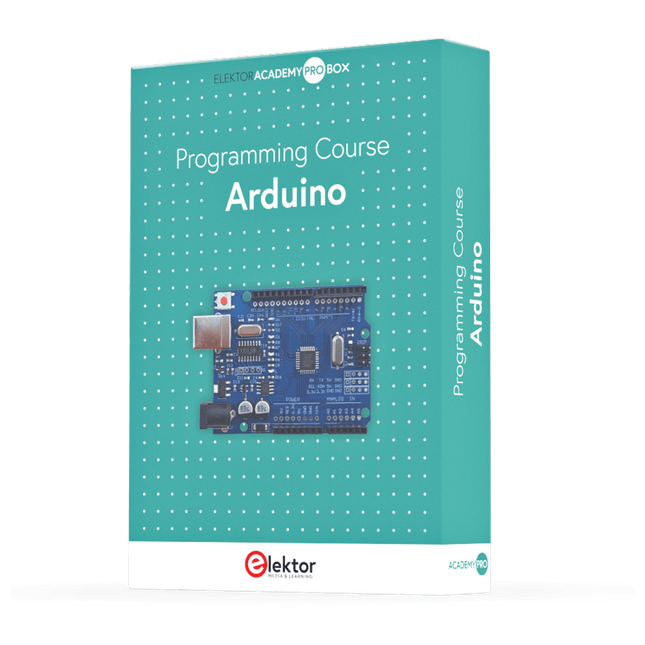
This complete Arduino Uno-based microcontroller programming course features a textbook, a component kit, hands-on projects, and a comprehensive online course with simulations. It is ideal for step-by-step learning of embedded systems programming with Arduino using a practical, hands-on approach.
A Practical Introduction to Embedded Systems with the Arduino Uno
This course is designed for people who are new to embedded systems and looking for a structured, example-driven way to get started.
A kit of parts comprising LEDs and resistors, switches, sensors and actuators, displays, a breadboard and wires, and more is included. These are used in the course to illustrate example applications.
No prior experience with Arduino or embedded development is required. Each section features hands-on examples and mini projects designed to reinforce key concepts and inspire deeper exploration. By the end of the course, you’ll be able not only to reproduce the examples but also to build on them with your own ideas and applications.
What Will You Learn?
Microcontroller programming with Arduino using the Uno R3 board
Working with Digital I/O, read buttons and encoders, control LEDs and relays
Read analog inputs, voltages, and analog sensors
Generating analog output signals and PWM
Use serial communication like UART, I²C and SPI to control displays and read digital sensors and SD cards
Managing time
Working with interrupts
Real-time sensor input and control via buttons, LEDs, and displays
Control actuators like relays and servo motors
Who Is It For?
Students and self-learners exploring embedded systems
Makers and IoT enthusiasts looking to improve their hardware skills
Educators and trainers seeking ready-to-teach material
What's Inside the Box?
Access to the full course on the Elektor Academy Pro Learning Platform
Uno R3 microcontroller board + USB cable
Book: Programming Microcontrollers in C/C++ Using Arduino
Downloadable project files for every module
Component Box:
2× LED, red, 5 mm
LED, green, 5 mm
3× Resistor, 470 Ω, 0.25 W
LDR
Potentiometer, 10 kΩ, linear
Pushbutton
Rotary encoder module
Relay module
DHT22 Humidity & Temperature Sensor
TM1637-compatible 4-digit 7-segment display
MPU-6050 IMU with headers
SSD1306-compatible I²C OLED display
Micro SD card adapter with header
Buzzer
SG90 Micro Servo
ILI9341-compatible SPI 240×320 TFT display
20× Jumper wires
Breadboard
All Programming Courses (and differences in content)
Course
Arduino
Raspberry Pi Pico with Arduino C/C++
ESP32 with Arduino C/C++
Raspberry Pi Pico with MicroPython
ESP32 with MicroPython
Online Course
Access to Arduino Course
Access to Pico with Arduino C/C++ Course
Access to ESP32 with Arduino C/C++ Course
Access to Pico with MicroPython Course
Access to ESP32 with MicroPython Course
Board
Uno R3
Raspberry Pi Pico
ESP32
Raspberry Pi Pico
ESP32
Book
Programming Microcontrollers in C/C++ Using Arduino
Programming Microcontrollers in C/C++ Using Arduino
Programming Microcontrollers in C/C++ Using Arduino
Programming Microcontrollers in MicroPython
Programming Microcontrollers in MicroPython
Kit
40-piece Component Box
40-piece Component Box
40-piece Component Box
40-piece Component Box
40-piece Component Box