Diese Ausgabe steht allen GOLD- und GREEN-Mitgliedern auf der ElektorMagazine-Website zum Download bereit!
Sie sind noch kein Mitglied? Hier klicken!
Super-Servo-TesterBis zu vier Servos einzeln oder eingebaut testen
Analoge Signale und der MikrocontrollerADCs, DACs, Strommessung und mehr
embedded world 2023
Sub-Nyquist-Sampling in der PraxisHöhere Frequenzen mittels Unterabtastung sicher erfassen
Hier Android-Smartphone, dort ESP32?Praxisprojekt mit der Android WiFi-API
Aktives 1-kHz-Filter für VerzerrungsmessungenBessere Messungen durch Optimierung des Messsignals
Aller Anfang...muss nicht schwer sein: Wir multivibrieren weiter!
Projekt 2.0Korrekturen, Updates und Leserbriefe
Das neue I3C-ProtokollWürdiger I2C-Nachfolger oder viel Rauch um Nichts?
BlueRC: IR-Fernsteuerung mit Smartphone und ESP32Anpassungsfähig und universell
Mikrocontroller-Dokumentationen verstehenTeil 2: Register und Blockschaltbilder
Automatisierung der Prüf- und MesstechnikProgrammieren von Prüfgeräten, damit sie tun, was Sie wollen
Infografik: Messen und Testen
Überspannungsschutz für sicheren BetriebTransientenschutz für nicht-isolierte DC/DC-Leistungsmodule
Mess- und Prüfgeräte von WihaInstallationstester und Messgeräte, auf die Sie sich verlassen können
Automatisierung von Tests und Zusammenarbeit bei Testergebnissen
Aus dem Leben gegriffenElektronik auf hohem Niveau
EnergieloggerEnergie messen und aufzeichnen
Aufgebaut: Das 4tronix M.A.R.S. Rover Kit
Parkscheibe mit E-Paper DisplayEin innovativer digitaler Ersatz
eCO2-Telegram-BotLuftqualitätsmessung mit Telegram-Anbindung
Hinter den Kulissen von High-End-Audio im EigenbauElektor-Ingenieur Ton Giesberts im Interview über die hohe Kunst des Analogdesigns
Das besondere ProjektEs gibt noch viel zu tun!
RFID-Tag lesen und RFID-TürschlossProjektbeispiele aus dem Arduino-Experimentierpaket von Elektor
Oszilloskop-Stromsonde für HFHochfrequenz-Strommessung leichtgemacht
Nichts für Anfänger – Makerfabs 6 DOF Robot ArmMit Raspberry Pi Pico und MicroPython
Generative KIWer hat das eigentlich gemacht?
Hexadoku
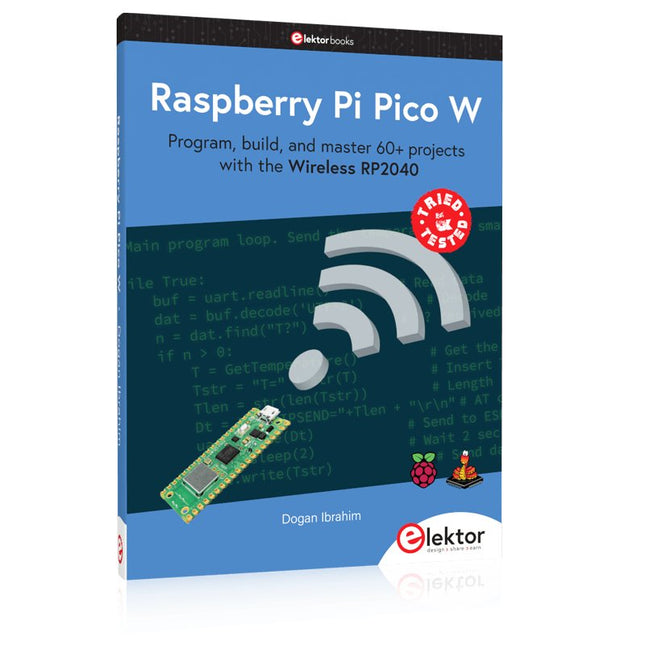
Program, build, and master 60+ projects with the Wireless RP2040
The Raspberry Pi Pico and Pico W are based on the fast, efficient, and low-cost dual-core ARM Cortex M0+ RP2040 microcontroller chip running at up to 133 MHz and sporting 264 KB of SRAM and 2 MB of Flash memory. Besides spacious memory, the Pico and Pico W offer many GPIO pins, and popular peripheral interface modules like ADC, SPI, I²C, UART, PWM, timing modules, a hardware debug interface, and an internal temperature sensor.
The Raspberry Pi Pico W additionally includes an on-board Infineon CYW43439 Bluetooth and Wi-Fi chipset. At the time of writing this book, the Bluetooth firmware was not yet available. Wi-Fi is however fully supported at 2.4 GHz using the 802.11b/g/n protocols.
This book is an introduction to using the Raspberry Pi Pico W in conjunction with the MicroPython programming language. The Thonny development environment (IDE) is used in all of the 60+ working and tested projects covering the following topics:
Installing the MicroPython on Raspberry Pi Pico using a Raspberry Pi or a PC
Timer interrupts and external interrupts
Analogue-to-digital converter (ADC) projects
Using the internal temperature sensor and external sensor chips
Using the internal temperature sensor and external temperature sensor chips
Datalogging projects
PWM, UART, I²C, and SPI projects
Using Bluetooth, WiFi, and apps to communicate with smartphones
Digital-to-analogue converter (DAC) projects
All projects are tried & tested. They can be implemented on both the Raspberry Pi Pico and Raspberry Pi Pico W, although the Wi-Fi-based subjects will run on the Pico W only. Basic programming and electronics experience are required to follow the projects. Brief descriptions, block diagrams, detailed circuit diagrams, and full MicroPython program listings are given for all projects.
Multilingual DIY Kit (incl. 27 RGB LEDs + Raspberry Pi Pico)
Bring some engineering magic to your festive season with the Wordy LED Christmas Tree, a unique DIY electronics kit designed by Elektor. This beautifully engineered 3D Christmas tree combines eleven PCBs, a Raspberry Pi Pico, and 27 addressable RGB LEDs to illuminate Christmas greetings in seven languages: Danish, Dutch, English, French, German, Italian, and Spanish.
Unlike ordinary LED trees, each word inside the tree has its own light chamber, creating a refined, softly glowing display without sound or flicker. The LEDs are fully WS2812-compatible and driven via the popular Adafruit NeoPixel library, making custom animations and color effects easy to create.
Perfect for makers, tinkerers, and festive electronics fans, this kit offers both an enjoyable build and a striking, conversation-worthy decoration. The Wordy Christmas Tree is your perfect holiday maker project!
Features
Multilingual greetings (7 languages) milled into the front panel
3D construction from 11 interlocking PCBs
Powered by Raspberry Pi Pico
27 individually addressable RGB LEDs (pre-mounted)
Smooth fade-in and fade-out animations
Fully programmable using the Arduino IDE
A 5-V power supply (with micro-USB connector) capable of ≥1 A is recommended for maximum brightness (not included)
Dimensions (H x W x D): 130 x 115 x 75 mm
Included
All required PCBs with LEDs and other SMD parts mounted
Raspberry Pi Pico (to be soldered & programmed by the user)
3-way pin header (to be soldered by the user)
3-way pin socket (to be soldered by the user)
4x Self-adhesive dome bumpers
Project Page
Elektor Labs
Praxisnahe Projekte, Profi-Tricks und eigene Anwendungen
Dieses Buch führt Sie Schritt für Schritt in die faszinierende Welt der State Machines ein und zeigt, wie Sie Hardware direkt und effizient ansteuern können – jenseits klassischer CPU-gesteuerter Ansätze.
In diesem Buch lernen Sie:
LEDs und NeoPixel kreativ steuern: Blinken, Dimmen, Farbwechsel und komplexe Animationen
Taster und Encoder zuverlässig auslesen und in Echtzeit in Ihre Projekte integrieren
Analoge Eingänge (ADC) nutzen und Signale digital steuern
Servos präzise ansteuern und Bewegungsabläufe automatisieren
SPI mit PIO umsetzen, um Displays, Sensoren und Module anzusteuern
Menüsysteme und Submenüs auf SPI-Displays realisieren, inklusive Navigation über mehrere Taster
PWM, Signalgenerierung und Frequenzsteuerung für akustische oder visuelle Effekte
Debugging-Strategien und Tipps, um Ihre PIO-Programme effizient zu entwickeln
Alle Beispiele sind praxisnah, sofort umsetzbar und zuverlässig. Mit klaren Anleitungen, Hintergrundwissen und fertigen Codebeispielen lernen Sie, die PIO-Fähigkeiten des Pico maximal zu nutzen – egal ob für Maker-Projekte, Prototypen oder professionelle Anwendungen.
Erleben Sie, wie Sie komplexe Hardwaresteuerung elegant mit dem Pico realisieren können – schneller, flexibler und leistungsfähiger als je zuvor.
Open-Source-Code mit Arduino IDE und PlatformIO
Autonomes Fahren: GPS, Accelerometer, Gyroskop
PS3-Controller
Mikrocontroller wie der Arduino und Einplatinenrechner wie der Raspberry Pi haben sich zu beliebten Komponenten entwickelt. Dritter im Bunde ist der ESP32 der Firma Espressif. Mikrocontroller dieser Baureihe zeichnen sich durch eine Vielzahl implementierter Funktionen aus, die bei einem Arduino konventioneller Prägung mit einem Atmel-AVR-Mikrocontroller erst mit weiterer Hardware möglich sind. Prominentes Beispiel sind hier die WiFi- und Bluetooth-Funktionalitäten. Gegenüber einem Raspberry Pi zeichnen sie sich durch einen deutlich geringeren Preis aus.
Allgemeine Informationen für die Realisierung eines Roboterauto-Projekts mit dem ESP32 sind leicht zu finden. Dabei handelt es sich aber oft nur um Ausführungen zu einem Teilaspekt, ohne inhaltliche oder funktionale Abstimmung. So ist nicht nur die Beschaffung der benötigten Informationen mühselig und zeitaufwändig, sie kann auch außerordentlich fehlerträchtig sein.
Ansatzpunkt dieses Buches ist, diese Lücke zu schließen. Es geht auf verschiedene Möglichkeiten eines Chassis ein, vermittelt nötige Kenntnisse und führt schrittweise von einer einfachen Motorsteuerung zu einem komplexen sensor- und sprachgesteuerten Roboterauto. Hacks rund um GPS und eine PlayStation 3 runden die Sache ab.
Inhalt
Bei der Reihenfolge der Kapitel wurde versucht – beginnend bei der Darstellung von grundlegenden Informationen – über die Lösung einfacher Aufgaben zu etwas anspruchsvolleren Techniken zu führen.
Der Mikrocontroller ESP32
Die Software erstellen
Die Stromversorgung
Rund um die Hardware
Das Chassis
Der Gleichstrommotor
Kabellose Steuerung über WiFi
Mit Sensoren Hindernisse erkennen
Eine eigene Roboterauto-App
Servo und Lichtsensor
GPS
Accelerometer / Gyroskop
PS3-Controller
Roboterauto-App
Hinweis zur Software
Die Dateien haben das Suffix (.cpp). Grund ist die Entwicklung mit PlatformIO. Mit Copy & Paste sollten sie auch in der Arduino-IDE verwendet werden können.
Raspberry Pi-based Eye Catcher
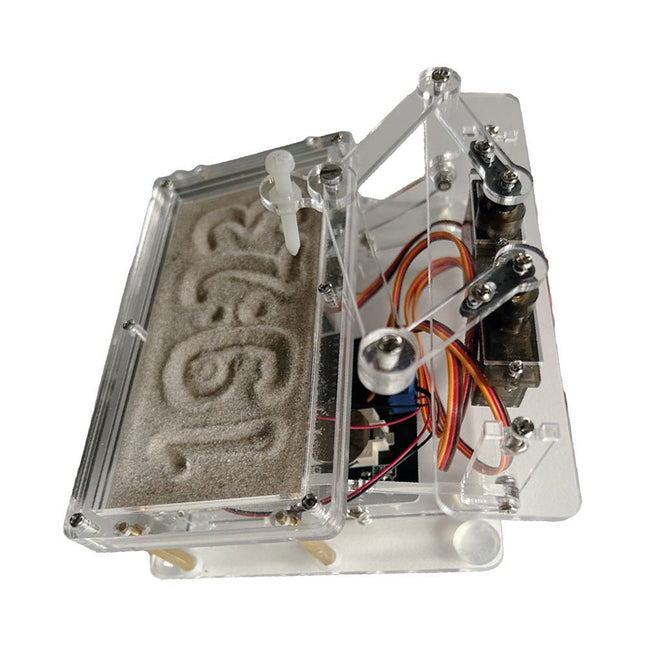
A standard sand clock just shows how time passes. In contrast, this Raspberry Pi Pico-controlled sand clock shows the exact time by “engraving” the four digits for hour and minute into the layer of sand. After an adjustable time the sand is flattened out by two vibration motors and everything begins all over again.
At the heart of the sand clock are two servo motors driving a writing pen through a pantograph mechanism. A third servo motor lifts the pen up and down. The sand container is equipped with two vibration motors to flatten the sand. The electronic part of the sand clock consists of a Raspberry Pi Pico and an RTC/driver board with a real-time clock, plus driver circuits for the servo motors.
A detailed construction manual is available for downloading.
Features
Dimensions: 135 x 110 x 80 mm
Build time: approx. 1.5 to 2 hours
Included
3x Precut acrylic sheets with all mechanical parts
3x Mini servo motors
2x Vibration motors
1x Raspberry Pi Pico
1x RTC/driver board with assembled parts
Nuts, bolts, spacers, and wires for the assembly
Fine-grained white sand
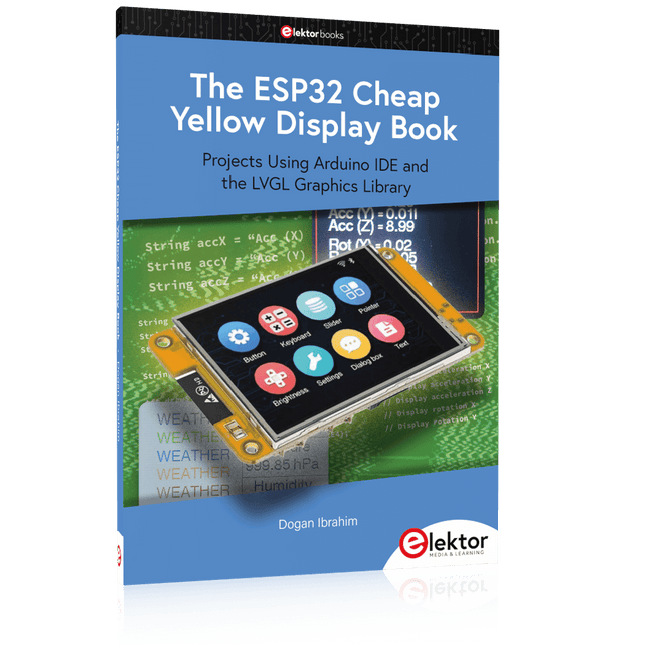
Projects Using Arduino IDE and the LVGL Graphics Library
The ESP32 is probably one of the most popular microcontrollers used by many people, including students, hobbyists, and professional engineers. Its low cost, coupled with rich features makes it a popular device to use in many projects. Recently, a board called the ESP32 Cheap Yellow Display (CYD for short) is available from its manufacturers. The board includes a standard ESP32 microcontroller together with a 320x240 pixel TFT display. Additionally, the board provides several connectors for interfaces such as GPIO, serial port (TX/RX), power and Ground. The inclusion of a TFT display is a real advantage as it enables users to design complex graphics-based projects without resorting to an external LCD or graphics displays.
The book describes the basic hardware of the ESP32 CYD board and provides details of its on-board connectors. Many basic, simple, and intermediate-level projects are given in the book based on the ESP32 CYD, using the highly popular Arduino IDE 2.0 integrated development environment. The use of both the basic graphics functions and the use of the popular LVGL graphics library are discussed in the book and projects are given that use both types of approaches.
All the projects given in the book have been tested and are working. The block diagram, circuit diagram, and the complete program listings and program descriptions of all the projects are given with explanations. Readers can use the LVGL graphics library to design highly popular eye-catching full-color graphics projects using widgets such as buttons, labels, calendars, keypads, keyboards, message boxes, spinboxes, sliders, charts, tables, menus, bars, switches, drop-down lists, animations, and many more widgets.
Praxisnahe Projekte, Profi-Tricks und eigene Anwendungen
Dieses Buch führt Sie Schritt für Schritt in die faszinierende Welt der State Machines ein und zeigt, wie Sie Hardware direkt und effizient ansteuern können – jenseits klassischer CPU-gesteuerter Ansätze.
In diesem Buch lernen Sie:
LEDs und NeoPixel kreativ steuern: Blinken, Dimmen, Farbwechsel und komplexe Animationen
Taster und Encoder zuverlässig auslesen und in Echtzeit in Ihre Projekte integrieren
Analoge Eingänge (ADC) nutzen und Signale digital steuern
Servos präzise ansteuern und Bewegungsabläufe automatisieren
SPI mit PIO umsetzen, um Displays, Sensoren und Module anzusteuern
Menüsysteme und Submenüs auf SPI-Displays realisieren, inklusive Navigation über mehrere Taster
PWM, Signalgenerierung und Frequenzsteuerung für akustische oder visuelle Effekte
Debugging-Strategien und Tipps, um Ihre PIO-Programme effizient zu entwickeln
Alle Beispiele sind praxisnah, sofort umsetzbar und zuverlässig. Mit klaren Anleitungen, Hintergrundwissen und fertigen Codebeispielen lernen Sie, die PIO-Fähigkeiten des Pico maximal zu nutzen – egal ob für Maker-Projekte, Prototypen oder professionelle Anwendungen.
Erleben Sie, wie Sie komplexe Hardwaresteuerung elegant mit dem Pico realisieren können – schneller, flexibler und leistungsfähiger als je zuvor.
This bundle contains the AI Fusion Lab Kit – which includes over 450 components – and the book Physical AI with Raspberry Pi, offering a comprehensive, hands-on introduction to AI, electronics, and Python programming.
Build practical projects that combine computer vision, voice interaction, sensors, motors, and large language models. The included book guides you step by step from Raspberry Pi setup and hardware control to advanced applications using OpenCV, MediaPipe, YOLO, OpenAI services, and local Ollama models.
SunFounder AI Fusion Lab Kit for Raspberry Pi (450+ parts)
The AI Fusion Lab Kit transforms a Raspberry Pi into a complete platform for learning artificial intelligence, electronics, and Python programming. It supports Raspberry Pi 5, 4B, 3B+, 3B, and Zero 2 W, as well as popular AI models and services including ChatGPT, Gemini, Grok, DeepSeek, Qwen, Doubao, and Ollama.
With its camera, Pan-Tilt HAT, 10-axis sensor module, microphone, speaker, and electronic components, the kit enables users to build interactive AI projects that combine voice, vision, movement, and sensor data. It is suitable for beginners, students, makers, and anyone who wants to explore practical AI applications.
Build Multimodal AI Projects
Combine large language models with speech recognition, text-to-speech, camera vision, sensors, and breadboard circuits. Create projects that can listen, speak, see, react, and interact with their environment while learning how modern AI systems work.
Explore AI Vision and Object Tracking
Use YOLO, OpenCV, and MediaPipe to detect and track objects, colors, faces, and human movement. The motorized Pan-Tilt HAT allows the camera to follow targets automatically, demonstrating how computer vision and motion control work together.
Voice AI with the Fusion HAT+
The Fusion HAT+ simplifies hardware control through a unified Python library and supports safe Raspberry Pi shutdown. Its integrated microphone and speaker make it easy to develop voice-controlled assistants and other conversational AI applications.
Compatible with Raspberry Pi 5, 4B, 3B+, 3B, and Zero 2 W
Supports multiple cloud-based and local AI models
Includes camera, Pan-Tilt HAT, 10DOF module, microphone, and speaker
Projects covering voice AI, computer vision, sensors, and electronics
Video lessons, documentation, and sample code
Book: Physical AI with Raspberry Pi
Using the Raspberry Pi and the AI Fusion Lab Kit, this book takes you step by step from the fundamentals of hardware interfacing to the development of intelligent systems capable of seeing, listening, speaking, and making decisions. Whether you are a student, educator, maker, or professional engineer, you will gain valuable experience through projects designed to build both knowledge and confidence.
Beginning with system setup, GPIO programming, sensors, displays, motors, and automation techniques, the book gradually introduces more advanced topics, including speech recognition, text-to-speech synthesis, conversational AI, object recognition, and machine learning. Along the way, you will learn how to create voice-controlled devices, intelligent assistants, camera tracking systems, environmental monitoring solutions, and AI-powered embedded applications.
Explore modern technologies such as OpenAI services, Ollama local large language models, OpenCV, MediaPipe, and YOLO object detection while gaining practical experience with real-world applications used in robotics, industrial automation, smart devices, and autonomous systems. You’ll discover how intelligent software can interact with sensors, cameras, motors, and displays to create systems that respond naturally to the world around them.
Rather than simply following code examples, you will be encouraged to experiment, customize, and expand every project. The techniques and skills developed throughout this book provide a solid foundation for future innovation, rapid prototyping, research, and product development. If you are ready to move beyond traditional electronics and explore the future of intelligent embedded systems, this book will guide you every step of the way.
This bundle contains:
SunFounder AI Fusion Lab Kit for Raspberry Pi (normal price: €100)
Book: Physical AI with Raspberry Pi (normal price: €45)
Not included
Raspberry Pi
Mehr als 50 Grundlagenprojekte mit MicroPython und dem RP2040-Mikrocontroller
Der Raspberry Pi Pico ist eine leistungsstarke Mikrocontroller-Platine, die speziell für das Physical Computing – also hardwarenahe Anwendungen – entwickelt wurde. Der Raspberry Pi Pico kann so programmiert werden, dass er eine einzelne Aufgabe sehr effizient ausführt und ermöglicht so schnelle Steuerungs- und Überwachungsanwendungen in Echtzeit. Der 'Pico', wie wir ihn nennen, basiert auf dem schnellen, effizienten und kostengünstigen Dual-Core ARM Cortex-M0+ RP2040 Mikrocontroller-Chip, der mit bis zu 133 MHz läuft und über 264 KB SRAM und 2 MB Flash-Speicher verfügt. Neben dem großen Speicher hat der Pico noch weitere attraktive Eigenschaften, darunter eine große Anzahl von GPIO-Pins sowie gängige Schnittstellen wie ADC, SPI, I²C, UART und PWM. Als Krönung bietet der Chip schnelle und genaue Timer, eine Hardware-Debug-Schnittstelle und einen internen Temperatursensor.
Zur Programmierung lassen sich leicht die gängigen Hochsprachen wie MicroPython oder C/C++ verwenden. Dieses Buch ist eine Einführung in die Verwendung des Pico mit der Programmiersprache MicroPython. In allen Projekten wird die Thonny-Entwicklungsumgebung (IDE) eingesetzt. Über 50 Projekte decken folgende Themen ab:
Installation von MicroPython auf dem Raspberry Pi Pico
Timer-Interrupts und externe Interrupts
Projekte mit Analog-Digital-Wandler (ADC)
Verwendung des internen sowie externer Temperatursensoren
Datenlogger
Projekte zur PWM, UART, I²C-Bus und SPI-Bus
Wi-Fi und Bluetooth für die Kommunikation mit Smartphones
Projekte mit dem Digital-Analog-Wandler (DAC)
Alle in diesem Buch vorgestellten Projekte wurden vollständig getestet und sind funktionsfähig. Es werden keine Programmier- oder Elektronikkenntnisse vorausgesetzt, um sie nachzuvollziehen. Für alle beschriebenen Projekte gibt es kurze Beschreibungen, Blockdiagramme, detaillierte Schaltpläne und vollständige MicroPython-Programmlistings. Die Listings sind auch auf der zum Buch gehörenden Elektor-Webseite zu finden.
Zeitsteuerung, Scheduler, PIO und Zustandsmaschinen
Multitasking ist der Schlüssel zu leistungsfähigen Embedded-Systemen, und zugleich eine der größten Herausforderungen in der Mikrocontroller-Programmierung. Dieses Buch zeigt Ihnen Schritt für Schritt, wie Sie von einem einfachen Ein-Task-Programm zu einem strukturierten, reaktionsfähigen und skalierbaren System gelangen. Dabei steht nicht nur das Wie, sondern vor allem das Warum im Mittelpunkt.
Sie lernen:
warum scheinbare Parallelität entsteht
weshalb blockierende Programme instabil werden
wie Aufgaben effizient und kontrolliert parallel ablaufen
Ausgehend vom klassischen Superloop vermittelt das Buch moderne Multitasking-Strategien – von nicht-blockierender Programmierung und Tick-Systemen bis zu Task-Schedulern, Zustandsmaschinen und ereignisgesteuerten Konzepten.
Der Fokus liegt auf der Praxis: Sensoren, Displays, Kommunikation und reale Anwendungen werden Schritt für Schritt integriert und mit verständlich kommentierten Beispielprogrammen erklärt.
Fortgeschrittene Themen umfassen:
Multicore-Programmierung mit dem Raspberry Pi Pico
asynchrones Programmieren mit uasyncio
RTOS-Grundlagen mit FreeRTOS
die Kombination aus Multicore und RTOS
Dabei werden auch die Grenzen dieser Techniken, insbesondere unter MicroPython, klar aufgezeigt.
Das Buch richtet sich an ambitionierte Einsteiger und fortgeschrittene Entwickler, die Embedded-Systeme fundiert verstehen und robuste, wartbare Multitasking-Anwendungen entwickeln möchten.
Elektor GREEN en GOLD leden kunnen deze uitgave hier downloaden.
Nog geen lid? Klik hier om een lidmaatschap af te sluiten.
De ESP-BLASTEen mini ESP32 raketdrone die ruim 100 km/u vliegt
STM32Cube Innovation-ChallengeDoe mee met je beste STM32C5-ontwerp
Wireless workshop (1)Radiomodules uitgelegd: 433 MHz CC1101 sub-GHz-transceiver
AM-zenderMet sinus- en blokgolfgenerator op Raspberry Pi Pico
AudiotronicaDe vervormingsfactor
CoffeeCallerOmroepsysteem met mesh-netwerk en Zephyr gebaseerde software
Elektor wordt 65Projecten uit voorgaande september- en oktobermaanden
Bluetooth Channel Sounding voor het volgen van objectenAfstandsmeting met centimeterprecisie voor het IoT van de volgende generatie
2026: Een AI-odysseeKwantumcomputing is geen volgende GPU
Om de cloud te beveiligen, is edge-beveiliging nodig
Eerste ervaringen met de HackRF ProPraktische tests met de nieuwe SDR-hardware
Modemupgrade van GPRS/2G naar LTE/4GEen draadloos alarmsysteem als voorbeeld
Lusvormige antenne met RF-bouwstenenDeel 1: Een zelfbouw kortegolfantenne met instelbare richtingsgevoeligheid
Internetradio naar AM-converterMet een ESP32-S3 als zender
Err-lectronics
Mioty, een overzichtFraunhofer's aanpak van LPWAN
WerkbankwijsheidPraktische tips van experts
Walter, de compacte IoT-moduleDeel 2: Toegang tot weer- en datadiensten