This complete STM32 microcontroller programming course features a textbook, a component kit, hands-on projects, and a comprehensive online course. It is ideal for step-by-step learning of embedded systems programming in MicroPython using a practical, hands-on approach.
A Practical Introduction to Embedded Systems with the STM32
This course is designed for people who are new to embedded systems and looking for a structured, example-driven way to get started. A kit of parts comprising LEDs and resistors, switches, sensors and actuators, displays, a breadboard and wires, and more is included. These are used in the course to illustrate example applications.
No prior experience with MicroPython or embedded development is required. Each section features hands-on examples and mini projects designed to reinforce key concepts and inspire deeper exploration. By the end of the course, you’ll be able not only to reproduce the examples but also to build on them with your own ideas and applications.
What Will You Learn?
Microcontroller programming in MicroPython on the STM32 using the Thonny IDE
Working with Digital I/O, read buttons and encoders, control LEDs and relays
Read analog inputs, voltages, and analog sensors
Generating analog output signals and PWM
Use serial communication like UART, I²C and SPI to control displays and read digital sensors and SD cards
Managing time
Working with interrupts
Real-time sensor input and control via buttons, LEDs, and displays
Control actuators like relays and servo motors
Who Is It For?
Students and self-learners exploring embedded systems
Makers and IoT enthusiasts looking to improve their hardware skills
Educators and trainers seeking ready-to-teach material
What's Inside the Box?
Access to the full course on the Elektor Academy Pro Learning Platform
STM32 NUCLEO-F411RE microcontroller board
Book: MicroPython for STM32
Downloadable project files for every module
Component Box:
2× LED, red, 5 mm
LED, green, 5 mm
3× Resistor, 470 Ω, 0.25 W
LDR
Potentiometer, 10 kΩ, linear
Pushbutton
Rotary encoder module
Relay module
DHT22 Humidity & Temperature Sensor
TM1637-compatible 4-digit 7-segment display
MPU-6050 IMU with headers
SSD1306-compatible I²C OLED display
Micro SD card adapter with header
Buzzer
SG90 Micro Servo
ILI9341-compatible SPI 240×320 TFT display
20× Jumper wires
Breadboard
A Project-Based Introduction to Microcontrollers and Drone Control
A Practical Introduction to Embedded Systems with the ESP32
This book is intended for readers who are new to embedded systems and looking for a structured, example-driven way to begin. If you’ve explored general-purpose electronics or Arduino-based resources but found them too broad or lacking in practical application, this guide offers a more focused alternative.
With a small, affordable set of components – such as LEDs, sensors, an OLED screen and a motion sensor – you’ll build and work with the same hardware setup throughout the book. This allows you to focus on learning and experimenting without constant reconfiguration.
Topics include:
Understanding and programming the ESP32 microcontroller
Using the Arduino IDE to write and deploy code
Exploring cyber-physical systems, culminating in basic drone control
No prior experience with Arduino or embedded development is required. Each section includes hands-on examples and mini-projects designed to reinforce core concepts and encourage deeper exploration. By the end, you’ll be equipped not only to reproduce the book’s examples, but also to extend them toward your own ideas and applications.
Whether your interest is in learning embedded programming, building interactive systems, or exploring educational drone control, this book provides a clear and practical path to getting started.
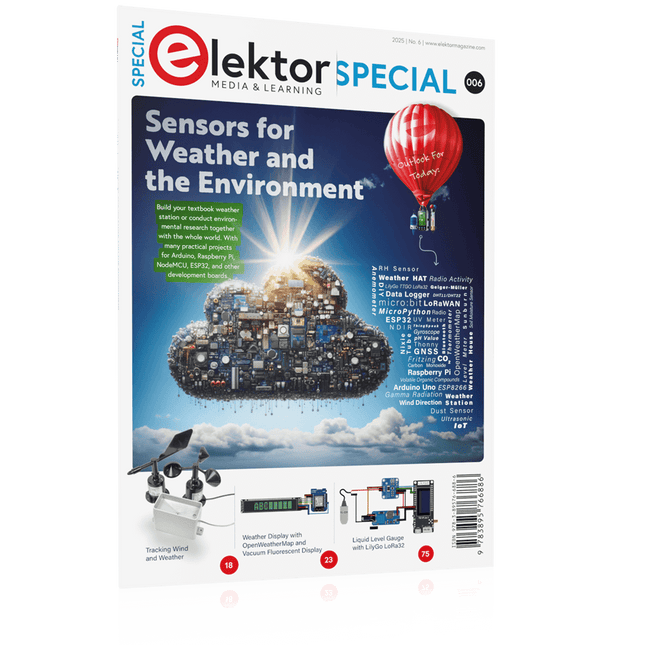
Build your textbook weather station or conduct environmental research together with the whole world. With many practical projects for Arduino, Raspberry Pi, NodeMCU, ESP32, and other development boards.
Weather stations have enjoyed great popularity for decades. Every current and even every long discontinued electronics magazine has regularly featured articles on building your own weather station. Over the years, they have become increasingly sophisticated and can now be fully integrated into an automated home — although this often requires loyalty to an (expensive) brand manufacturer across all components.
With your own weather and environmental data, you can keep up and measure things that no commercial station can. It’s also fun: expand your knowledge of electronics, current microcontroller development boards and programming languages in a fun and meaningful way. For less than 10 euros you can get started and record your first environmental data — with time and growing interest, you will continue to expand your system.
In this Edition
Which Microcontroller Fits My Project?
The Right Development Environment
Tracking Wind and Weather
Weather Display with OpenWeatherMap and Vacuum Fluorescent Display
Volatile Organic Compounds in the Air We Breathe
Working with MQ Sensors: Measuring Carbon Monoxide — Odorless but Toxic
CO2 Traffic Light with ThingSpeak IoT Connection
An Automatic Plant Watering System
Good Indoor Climate: Temperature and Humidity are Important criteria
Classy Thermometer with Vintage Tube Technology
Nostalgic Weather House for the Whole Family
Measuring Air Pressure and Temperature Accurately
Sunburn Warning Device
DIY Sensor for Sunshine Duration
Simple Smartphone Says: Fog or Clear View?
Identifying Earthquakes
Liquid Level Measurement for Vessels and Reservoirs
Water pH Value Measurement
Detecting Radioactive Radiation
GPS: Sensor Location Service Across the Globe
Saving and Timestamping Log Files on SD Cards
LoRaWAN, The Things Network, and ThingSpeak
Operating a LoRaWAN Gateway for TTN
Defying "Wind and Weather"
Mega Display with Weather Forecasz
Elektor GREEN en GOLD leden kunnen deze uitgave hier downloaden.
Nog geen lid? Klik hier om een lidmaatschap af te sluiten.
CaptureCountobjectdetector en -teller op de Raspberry Pi 5
Spanningsreferentie met Arduino Pro Minilineariseer en kalibreer analoge ingangen
FPGA’s voor beginnersvan MCU naar FPGA-programmering
Update: STM32 Wireless Innovation Design Contest 2024
Bluetooth LE met MAUIbesturingsapps voor Android en co.
Port Expander breakout-boardmeer I/O’s op je development board
AI-specialistmachine learning met de Jetson Nano
2024: een AI-odysseeeen eerste verkenning van TensorFlow
262.144 manieren om Game of Life te spelenlezersproject in het kort
Uit het leven gegrepende Chinese draak
Draaien met die (DC-borstel)motor!voorbeeldprojecten uit de Elektor Motor Control Development Bundle
ESP32/RS-232-adapterdraadloze verbinding voor klassieke meetinstrumenten
Alle begin......gaat verder met de opamp
Aanbevolen ESP-bibliotheken
Piëzo-elektrische componentenvreemde onderdelen
Slimme objecttellereenvoudige beeldherkenning met Edge Impulse
Oplossingen voor de lastigste uitdagingen bij embedded ontwikkeling
ESP32 Terminalhandheld met aanraakscherm
Aan de slag met Zephyr RTOSkrachtig – maar lastig...
Bekroonde ethiekeen vraaggesprek met Alexander Gerfer, CTO van Würth Elektronik eiSos, over het faciliteren van innovatie en bewust gedrag
Project 2.0correcties, updates en brieven van lezers
Le téléchargement intégral de ce numéro est disponible pour nos membres GOLD et GREEN sur le site Elektor Magazine !
Pas encore membre ? Cliquez ici.
adaptateur de mesure USBTest du courant et des signaux des ports USB
sortie boucle de courant 4-20 mA pour Arduino UnoUne interface de boucle de courant fiable et insensible aux interférences électromagnétiques
commande automatique pour aspirateurGardez votre établi propre
générateur DDS avec ATtiny
testeur d'ampli-op V2Nouveau circuit imprimé – désormais compatible avec les CMS
amplificateur audio à tube 550 mWson chaleureux des tubes à vide
surveillance des fusiblesavec une LED clignotante
préamplificateur RIAA HQExploitez tout le potentiel sonore de vos disques vinyles !
Outil de réglage pour platines vinylesGénérateur de lumière stroboscopique 100–120 Hz basé sur Arduino
Elektor Classics : ampli vidéo
gradateur à télécommande infrarougeContrôlez votre éclairage avec confort et précision
comment utiliser switch…case avec des chaînes de caractères en C++/EDI Arduino
détecteur d’aimantsAvec un simple capteur à effet Hall
bouton de mise sous tension intelligent pour Raspberry PiUne solution pour Raspberry Pi jusqu’au modèle 4
astuces clés pour makersDes conseils pros pour vos projets
projets pratiques avec le timer 555Commande de moteur CC et jeux de rapidité
moniteur de charge CA simpleÉconomisez de l'énergie grâce à un appareil simple
batteries externes en parallèleTrois jours d’autonomie
VFO jusqu’à 15 MHzRéalisation avec un Raspberry Pi Pico
accordeur de violon avec ATtiny202
Elektor Classics : ampli vidéo pour TV N&B
capacimètre20 pF à 600 nF
horloge quasi analogique Mk IIDeux anneaux LED pour les heures et les minutes
concevez sans limites(grâce à l’écosystème complet d’Arduino)
dé à lampes néon
Elektor Classics : indicateur d'accord RTTY
solutions matérielles inspirantes pour vos projets ESP
Elektor Classics : alimentation 3 A
LED RGB avec circuit de commande intégréLumière de précision : les ICLED établissent de nouvelles normes
expérience : un Thérémine analogico-numérique ?Combiner des capteurs numériques modernes avec l’intemporel générateur analogique XR2206
carte émetteur-récepteur audio ESP32 (1)Démo : lecture de fichiers WAV depuis une carte SD
infographies : Circuits et conception de circuits 2025
petit mixeur audioUne conception polyvalente et modulable
minuteur intelligent pour éclairage d’escalierÉconomisez encore plus sur votre facture d’énergie !
modernisez vos voletsContrôlez les systèmes Velux avec un ESP32 et MQTT
chauffe-pieds à transistorsConfort économe en énergie
le quadricoptère M5Stamp Fly est-il le prochain drone Tello ? (Revue)
optimiser la portée Wi-Fi de l’ESP32-C3 SuperMiniUne modification d’antenne simple et efficace
station de soudage à air chaud ZD-8968Un outil de travail économique ou uniquement de l'air chaud ?
testeur de radar de reculDétecter les pannes du système d’aide au stationnement d’un véhicule
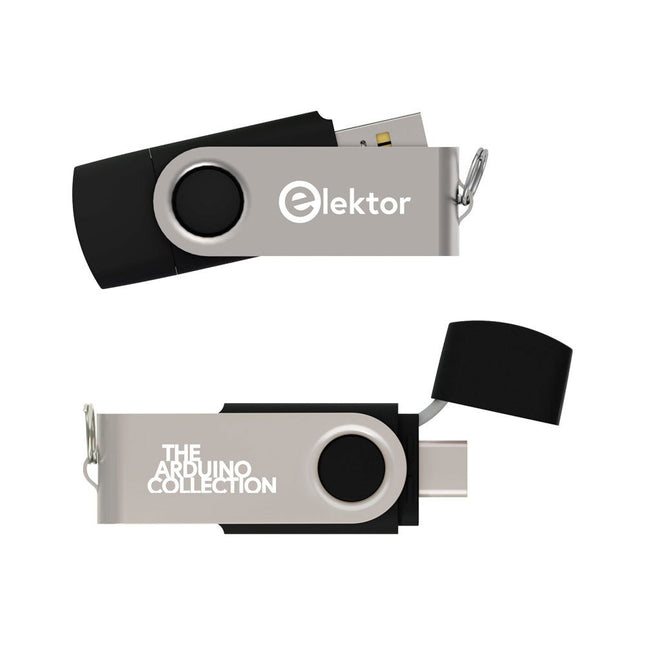
This USB Stick contains more than 300 Arduino-related articles published in Elektor Magazine. The content includes both background articles and projects on the following topics:
Software & hardware development: Tutorials on Arduino software development using Arduino IDE, Atmel Studio, Shields, and essential programming concepts.
Learning: The Microcontroller Bootcamp offers a structured approach to programming embedded systems.
Data acquisition & measurement: Projects such as a 16-bit data logger, lathe tachometer, and an AC grid analyzer for capturing and analyzing real-time signals.
Wireless communication: Learn how to implement wireless networks, create an Android interface, and communicate effectively with microcontrollers.
Robotics and automation: This covers the Arduino Nano Robot Controller, supporting boards for automation, and explores various Arduino shields to enhance functionality.
Self-build projects: Unique projects such as laser projection, Numitron clock and thermometer, ELF receiver, Theremino, and touch LED interfaces highlight creative applications.
Whether you're a beginner or an experienced maker, this collection is a valuable resource for learning, experimenting, and pushing the boundaries of Arduino technology.
Open-Source-Code mit Arduino IDE und PlatformIO
Autonomes Fahren: GPS, Accelerometer, Gyroskop
PS3-Controller
Mikrocontroller wie der Arduino und Einplatinenrechner wie der Raspberry Pi haben sich zu beliebten Komponenten entwickelt. Dritter im Bunde ist der ESP32 der Firma Espressif. Mikrocontroller dieser Baureihe zeichnen sich durch eine Vielzahl implementierter Funktionen aus, die bei einem Arduino konventioneller Prägung mit einem Atmel-AVR-Mikrocontroller erst mit weiterer Hardware möglich sind. Prominentes Beispiel sind hier die WiFi- und Bluetooth-Funktionalitäten. Gegenüber einem Raspberry Pi zeichnen sie sich durch einen deutlich geringeren Preis aus.
Allgemeine Informationen für die Realisierung eines Roboterauto-Projekts mit dem ESP32 sind leicht zu finden. Dabei handelt es sich aber oft nur um Ausführungen zu einem Teilaspekt, ohne inhaltliche oder funktionale Abstimmung. So ist nicht nur die Beschaffung der benötigten Informationen mühselig und zeitaufwändig, sie kann auch außerordentlich fehlerträchtig sein.
Ansatzpunkt dieses Buches ist, diese Lücke zu schließen. Es geht auf verschiedene Möglichkeiten eines Chassis ein, vermittelt nötige Kenntnisse und führt schrittweise von einer einfachen Motorsteuerung zu einem komplexen sensor- und sprachgesteuerten Roboterauto. Hacks rund um GPS und eine PlayStation 3 runden die Sache ab.
Inhalt
Bei der Reihenfolge der Kapitel wurde versucht – beginnend bei der Darstellung von grundlegenden Informationen – über die Lösung einfacher Aufgaben zu etwas anspruchsvolleren Techniken zu führen.
Der Mikrocontroller ESP32
Die Software erstellen
Die Stromversorgung
Rund um die Hardware
Das Chassis
Der Gleichstrommotor
Kabellose Steuerung über WiFi
Mit Sensoren Hindernisse erkennen
Eine eigene Roboterauto-App
Servo und Lichtsensor
GPS
Accelerometer / Gyroskop
PS3-Controller
Roboterauto-App
Hinweis zur Software
Die Dateien haben das Suffix (.cpp). Grund ist die Entwicklung mit PlatformIO. Mit Copy & Paste sollten sie auch in der Arduino-IDE verwendet werden können.
Elektor GREEN and GOLD members can download their digital edition here.
Not a member yet? Click here.
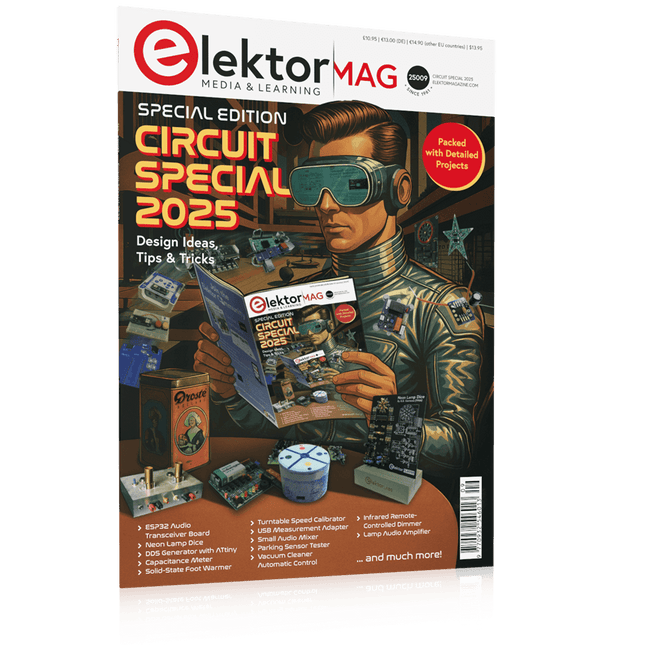
USB Measurement AdapterTesting Current and Signal Quality of USB Ports
4...20 mA Current Output for Arduino UnoA Reliable, EMI-Insensitive Current Loop Interface
Vacuum Cleaner Automatic ControlKeep Your Tools’ Work Area Clean
DDS Generator with ATtiny
Opamp-Tester V2New PCB – Now Also Suitable for SMDs
550-mW “Lamp” Audio AmplifierGet the Warm Sound of Vacuum Tubes With Ease
Fuse GuardMonitoring a Fuse with a Flashing LED
HQ RIAA PreamplifierGet the Most Out of Your Vinyl Records!
Turntable Speed CalibratorAn Arduino-Based 100–120 Hz Strobe Light Generator
Elektor Classics: video buffer/repeater
Infrared Remote-Controlled DimmerControl Your Halogen or LED Floor Lamp Effortlessly and With Style
How to Use switch…case on Strings in C++/Arduino IDE
Magnet FinderWith a Simple Hall-Effect Sensor
Raspberry Pi Smart Power ButtonA Solution for Raspberry Pi Up to Model 4
Essential Maker TipsProfessional Insights for Everyday Making
Practical Projects with the 555 TimerDC Motor Control and Fast Reaction Challenges
Basic AC-Load-On MonitorSave Energy with a Simple Device
Power Banks in ParallelA Three-Day Continuous Power Solution
VFO Up to 15 MHzAn Implementation With Raspberry Pi Pico
Violin Tuner with ATtiny202
Elektor Classics: video amplifier for B/W television sets
Capacitance Meter20 pF to 600 nF
Quasi-Analog Clockwork Mk IITwo LED Rings for Hours and Minutes
You Can Do Anything You Want(with the Arduino Ecosystem at Your Side)
Neon Lamp Dice
Elektor Classics: RTTY calibrator indicator
Inspiring Hardware Designs for Your ESPs
Elektor Classics: variable 3 A power supply
RGB LEDs with Integrated Control CircuitLight with Precision: ICLEDs Set Standards
Experiment: Towards a Mixed-Signal Theremin?Blending Modern Time-of-Flight Sensors With the Timeless XR2206 Analog Generator
ESP32 Audio Transceiver Board (Part 1)SD Card WAV File Player Demo
Infographics: Circuits and Circuit Design 2025
Small Audio MixerA Simple and Versatile Scalable Design
Smart Staircase Light TimerSave More Money on the Energy Bill!
Smarten Up Your ShuttersControlling Velux Hardware With an ESP32 and MQTT
Solid-State Foot WarmerEnergy-Efficient Comfort
Is the M5Stamp Fly Quadcopter the Next Tello?
Boosting Wi-Fi Range of the ESP32-C3 SuperMiniA Simple and Effective Antenna Mod
ZD-8968 Hot-Air Soldering StationA Budget-Friendly Workhorse or Just Hot Air?
Parking Sensor TesterFinding Defects in the PDC System of a Car
Bauen Sie Ihre perfekte Wetterstation oder forschen Sie zusammen mit der ganzen Welt an Umweltdaten. Mit vielen praktischen Projekten für Arduino, Raspberry Pi, NodeMCU, ESP32 und weiteren Developmentboards.
Wetterstationen erfreuen sich seit Jahrzehnten großer Beliebtheit. Ob in aktuellen oder längst eingestellten Elektronik-Magazinen – regelmäßig finden sich Beiträge zum Eigenbau einer Wetterstation. Im Laufe der Jahre wurden diese Systeme immer ausgefeilter und können heute nahtlos in das Smart Home integriert werden. Allerdings erfordert dies oft die Bindung an einen (teuren) Markenhersteller, der sämtliche Komponenten abdeckt.
Mit Ihrer eigenen Wetterstation können Sie jedoch mühelos mithalten – und sogar Messwerte erfassen, die kommerzielle Geräte nicht bieten. Dabei kommt der Spaß nicht zu kurz: Sie erweitern spielerisch Ihr Wissen über Elektronik, moderne Mikrocontroller-Developmentboards und Programmiersprachen. Schon für weniger als zehn Euro können Sie erste Umweltdaten erfassen und Ihr System Schritt für Schritt mit wachsendem Interesse weiter ausbauen.
Aus dem Inhalt:
Wind und Wetter auf der Spur
Wetterdisplay mit OpenWeatherMap und Vakuum-Fluoreszenzanzeige
Flüchtige organische Verbindungen in der Atemluft
Mit MQ-Sensoren arbeiten: Kohlenmonoxid messen – geruchlos aber extrem giftig
CO2-Ampel mit ThingSpeak-IoT-Anbindung
Ein Gießautomat für Ihre Pflanzen
Gutes Raumklima: Temperatur und Luftfeuchtigkeit sind wichtige Kriterien
Schickes Thermometer mit alter Röhrentechnik
Nostalgisches Wetterhäuschen für die ganze Familie
Luftdruck und Temperatur genau messen
Sonnenbrand-Warngerät
DIY-Sensor für die Sonnenscheindauer
Das Smartphone zeigt’s an: Nebel oder klare Sicht?
Erdbeben erkennen
Pegelstände von Gewässern und Behältern
pH-Wert von Gewässern bestimmen
Radioaktive Strahlung erkennen
Mit GPS wissen Sie weltweit, wo ihr Sensor ist
Logdateien mit Zeitstempel auf SD-Karten speichern
LoRaWAN, The Things Network und ThingSpeak
LoRaWAN-Gateway für TTN betreiben
Mega-Display mit Wettervorhersage
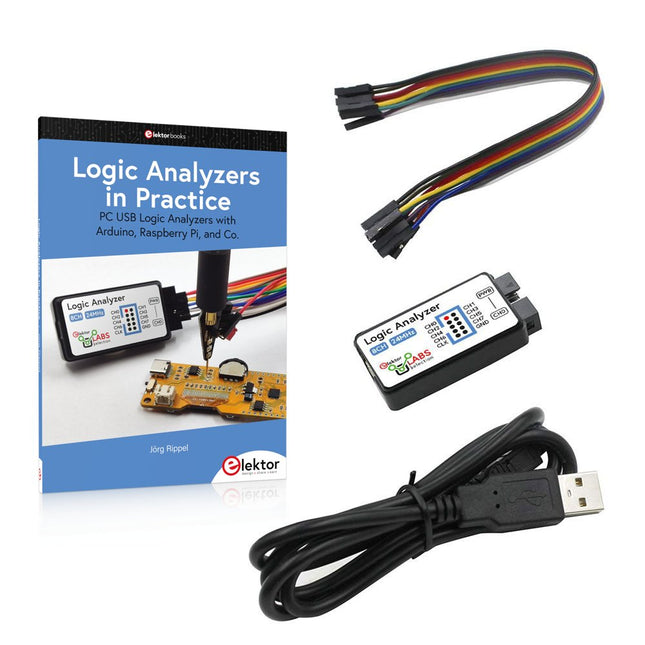
Book: Logic Analyzers in Practice
Step-by-step instructions guide you through the analysis of modern protocols such as I²C, SPI, UART, RS-232, NeoPixel, WS28xx, HD44780 and 1-Wire. With the help of numerous experimental circuits based on the Raspberry Pi Pico, Arduino Uno and the Bus Pirate, you will learn the practical application of popular USB logic analyzers.
All the experimental circuits presented in this book have been fully tested and are fully functional. The necessary program listings are included – no special programming or electronics knowledge is required for these circuits. The programming languages used are MicroPython and C along with the development environments Thonny and Arduino IDE.
This book uses several models of flexible and widely available USB logic analyzers and shows the strengths and weaknesses of each price range.
You will learn about the criteria that matter for your work and be able to find the right device for you.
Whether Arduino, Raspberry Pi or Raspberry Pi Pico, the example circuits shown allow you to get started quickly with protocol analysis and can also serve as a basis for your own experiments.
After reading this book, you will be familiar with all the important terms and contexts, conduct your own experiments, analyze protocols independently, culminating in a comprehensive knowledge set of digital signals and protocols.
USB Logic Analyzer (8-ch, 24 MHz)
This USB Logic Analyzer is an 8-channel logic analyzer with each input dual purposed for analog data recording. It is perfect for debugging and analyzing signals like I²C, UART, SPI, CAN and 1-Wire. It operates by sampling a digital input connected to a device under test (DUT) at a high sample rate. The connection to the PC is via USB.
Specifications
Channels
8 digital channels
Maximum sampling rate
24 MHz
Maximum input voltage
0 V ~ 5 V
Operating temperature
0°C ~ 70°C
Input impedance
1 MΩ || 10 pF
Supported protocols
I²C, SPI, UART, CAN, 1-Wire, etc.
PC connection
USB
Dimensions
55 x 28 x 14 mm
Downloads
Software
This bundle contains:
Book 'Logic Analyzers in Practice' (normal price: €35)
USB Logic Analyzer (8-ch, 24 MHz) (normal price: €20)
USB Cable
Jumper Wire Ribbon Cable
Diese Ausgabe steht allen GOLD- und GREEN-Mitgliedern auf der ElektorMagazine-Website zum Download bereit!
Sie sind noch kein Mitglied? Hier klicken!
Beschleunigung der IoT-Innovation
Ein WLAN-Bilderrahmen mit farbigem E-Ink-Display
Tutorial ESP-LaunchpadVon Null auf Flash in wenigen Minuten
ESP32 und ChatGPTAuf dem Weg zu einem selbst-programmierenden System
Walkie-Talkie mit ESP-NOWNicht ganz WLAN, nicht ganz Bluetooth, aber...
Von der Idee zur Schaltung mit dem ESP32-S3Ein Leitfaden für die Prototypentwicklung mit Espressif-Chips
AIoT-Chip-InnovationEin Interview mit Espressif-CEO Teo Swee-Ann
ESP32 mit Wokwi simulierenDer virtuelle Zwilling Ihres Projekts
Ausprobiert: die ESP32-S3-BOX-3Eine umfassende AIoT-Entwicklungsplattform
Mein Elektronik-ArbeitsplatzEinblicke und Tipps von Espressif-Ingenieuren
Die ESP-RainMaker-StoryWie wir „Ihre“ IoT-Cloud entwickelten
Zusammenbau des Elektor-Kits Cloc 2.0Ein Elektor-Produkt, ausprobiert von Espressif
Ausgepackt: der ESP32-P4Die nächste Ära der Mikrocontroller
Rust + EmbeddedEin Power-Duo für die Entwicklung
Wer sind die Rust-begeisterten Embedded-Entwickler?Wie Espressif Embedded Rust für den ESP32 kultiviert
Zeitleiste der SoC-Reihe von Espressif
Aufbau einer SPS mit Espressif-LösungenMit den Fähigkeiten und Funktionen des ISOBUS-Protokolls
Das ESP32-S3-VGA-BoardBitlunis aufregende Reise in die Produktentwicklung
Akustischer Fingerabdruck mit ESP32Songerkennung mit dem Open-Source-Projekt Olaf
Zirkularer Weihnachtsbaum 2023Weihnachtszeit, eine High-Tech-Annäherung
Für ein einfacheres und komfortableres LebenEin Amateurprojekt basierend auf dem ESP8266-Modul von Espressif
Wie man IoT-Apps ohne Software-Expertise erstelltMit der Blynk IoT-Plattform und Espressif-Hardware
Erstellung einer intelligenten Benutzeroberfläche auf ESP32
Schnelle und einfache IoT-Entwicklung mit M5Stack
Prototyping eines Energiezählers mit ESP32
Ein Distributor für IoT und mehr – mit Mehrwert
Tiefe Einblicke: Ein Interview mit Arduino über den Nano ESP32Alessandro Ranellucci und Martino Facchin diskutieren über die Zusammenarbeit mit Expressif
IoT-Chip-InnovationenEinblicke von und in Espressif
Rationelle MCU-Programmierung dank ESP Privilege Separation
Ein Open-Source-Spracherkennungsserver...und die ESP-BOX
Das mitdenkende AugeGesichtserkennung und mehr mit ESP32-S3-EYE
Knopfzellen-Sender mit ESP32-C2Entwurf und Leistungsbewertung
Matter – ein Meilenstein für das Smart HomeSo schalten Sie das IoT-Potenzial von Smart Home frei
Tech the Future: Wohin steuert Smart Home IoT?
Projekte mit Arduino, ESPHome, Home Assistant und Raspberry Pi & Co
Dieses E-Book enthält verschiedene Projektbeispiele und beginnt mit einer Einführung in die Elektronik. Es erklärt unter anderem, wie man Home Assistant auf einem Raspberry Pi installiert, wie man Raumklimasensoren für Temperatur und Luftfeuchtigkeit nutzt, das MQTT-Protokoll sowie weitere Schnittstellen einsetzt und ESPHome verwendet, um Sensoren und Aktoren in Home Assistant zu integrieren. Zahlreiche Video-Tutorials ergänzen das Buch.
Grundlagen der Elektrotechnik
Das Buch beginnt mit einer Einführung in die Elektrotechnik. Ihr lernt die Grundlagen von Spannung, Strom, Widerständen, Dioden und Transistoren.
Arduino und Mikrocontroller
Ein kompletter Abschnitt widmet sich dem Arduino Uno. Ihr lernt den Aufbau kennen, schreibt erste Programme und erarbeitet praktische Beispiele.
Home Assistant und Automatisierung
Ihr erfahrt, wie Home Assistant auf einem Raspberry Pi eingerichtet wird, und lernt den Umgang mit Automatisierungen, Szenen und Geräten. Zusätzlich wird auf Zigbee, MQTT und ESP-NOW eingegangen – wichtige Technologien für die Heimautomation.
ESP8266, ESP32 und ESP32-CAM
Die beliebten ESP-Mikrocontroller werden ausführlich behandelt. Nach einer theoretischen Einführung folgen praktische Projekte, die euch zeigen, wie ihr das Beste aus diesen Geräten herausholen könnt.
Sensoren und Aktoren
Das Buch erklärt die Funktionsweise und Anwendung zahlreicher Sensoren wie Temperatur- und Luftfeuchtigkeitssensoren, Bewegungsmelder und RFID-Reader. Bei den Aktoren werden Schrittmotoren, e-ink Displays, Servo-Motoren und vieles mehr beleuchtet. Zu allen Geräten gibt es praxisnahe Anwendungsbeispiele.
ESPHome
Dieses Kapitel zeigt euch, wie ihr Sensoren und Aktoren ohne Programmieraufwand in Home Assistant integriert. Ihr werdet Schritt für Schritt durch die Einrichtung mit ESPHome geführt.
LEDs und Lichttechnik
In diesem Kapitel lernt ihr verschiedene LED-Typen und deren Einsatzmöglichkeiten kennen. Grundlagen der Lichttechnik werden ebenfalls erklärt.
Node-RED
Ein eigenes Kapitel ist Node-RED gewidmet. Ihr erlernt die Grundlagen dieses leistungsstarken Tools und werdet Schritt für Schritt durch die Einrichtung und Nutzung geführt.
Integrierte Schaltkreise (ICs)
In der Elektronik gibt es zahlreiche ICs, die uns das Leben erleichtern. Ihr lernt die wichtigsten kennen und wendet das Wissen in praktischen Projekten an.
Programmieren für Profis
Fortgeschrittene Themen wie die korrekte Verwendung von Tastern, der Einsatz von Interrupts und die Nutzung eines NTP-Servers für Zeit-Synchronisation werden in diesem Kapitel detailliert behandelt.
Downloads
GitHub