Secure, Modular, Open-Source and Self-Sufficient
Ever since the Raspberry Pi was introduced, it has been used by enthusiasts to automate their homes. The Raspberry Pi is a powerful computer in a small package, with lots of interfacing options to control various devices. This book shows you how you can automate your home with a Raspberry Pi. You’ll learn how to use various wireless protocols for home automation, such as Bluetooth, 433.92 MHz radio waves, Z-Wave, and Zigbee. Soon you’ll automate your home with Python, Node-RED, and Home Assistant, and you’ll even be able to speak to your home automation system. All this is done securely, with a modular system, completely open-source, without relying on third-party services. You’re in control of your home, and no one else.
At the end of this book, you can install and configure your Raspberry Pi as a highly flexible home automation gateway for protocols of your choice, and link various services with MQTT to make it your own system. This DIY (do it yourself) approach is a bit more laborious than just installing an off-the-shelf home automation system, but in the process, you can learn a lot, and in the end, you know exactly what’s running your house and how to tweak it. This is why you were interested in the Raspberry Pi in the first place, right?
Turn your Raspberry Pi into a reliable gateway for various home automation protocols.
Make your home automation setup reproducible with Docker Compose.
Secure all your network communication with TLS.
Create a video surveillance system for your home.
Automate your home with Python, Node-RED, Home Assistant and AppDaemon.
Securely access your home automation dashboard from remote locations.
Use fully offline voice commands in your own language.
Download the software and view the errata for the book on GitHub.
Designing, Wiring, and Controlling
Build Your Own Coffee Roaster is a practical guide to constructing and operating the Cobra Smart Roaster and its companion Open Roaster Controller (ORC).
The e-book walks the reader through every stage of the build, from assembling the powerhead and wiring the system to installing and configuring the controller. Along the way, you’ll learn how to use the Raspberry Pi to bring precision and flexibility to your roasting process.
Clear, step-by-step chapters cover:
Powerhead construction and required components
Low- and high-voltage wiring
Installing the ORC, network setup, and using the web interface
Roasting coffee with the Cobra in different setups, including hand-stir and bread-machine roasting
Advanced topics such as manual mode, fixed profiles, Artisan-Scope connections, and ORC system programming
A complete parts list, practical guidance throughout, and concise explanations make this e-book a useful reference for anyone interested in building, modifying, or understanding their own coffee-roasting system.
Elektor GREEN and GOLD members can download their digital edition here.
Not a member yet? Click here.
DIY Solar Energy StorageBuild Your Own Energy Store for a PV Solar Array
Solar Module SimulatorA Solution for Testing and Optimizing MPP Trackers and Inverters
The STM32 Edge AI ContestExplore the new STM32N6 and Compete for a Share of €5,000 in Prizes!
Widening the BandgapWhy There Is So Much Interest in SiC and GaN
Notebook Power BankExtend the Life of Your Aged Laptop
Medical RobotsOvercoming Technical and Regulatory Hurdles
Frost Guard for Fruit Plants With Temperature Data Logger
The Analog ThingThe Arduino of Analog Computing?
Energy Saving Relay DriverSaves 90% of Relay Drive Power
Improving the ET5410A+ DC loadKeep Cool and Be Quiet, Please
electronica 2024 in Review
Electromagnetic CompatibilityEMC in a Nutshell!
Starting Out in Electronics……Filters Actively
Reducing Power Dissipation With Dropping CapacitorsA Clever Use of Capacitive Reactance
The Affordable MCP4725 12-Bit Digital-to-Analog ConverterAn EEPROM Feature Enables Safe Switch-On Behavior
Fnirsi LCR-ST1 Smart LCR SMD Tweezers
Raspberry Pi-Based Private Test & Measurement LabFirst Things First: The ADC
Electronic Load ResistorAn Out-of-the-Box Project
2025: An AI OdysseySome Projects to See in the New Year
AmpVolt v2.0 Project Update100 Amps and Beyond!
Err-lectronicsCorrections, Updates, and Readers’ Letters
Unveiling Ethical TransparencyInsights from Ethics in Electronics’s 2024 Survey
Elektor Audio DSP FX Processor Board (2)Creating Applications
Diese Ausgabe steht allen GOLD- und GREEN-Mitgliedern auf der ElektorMagazine-Website zum Download bereit!
Sie sind noch kein Mitglied? Hier klicken!
Winzige SolarversorgungSonnenlicht rein, 3,3 V raus
Solid-State-Stereo-Audio-SchalterFrei von Klicks und beweglichen Teilen
Große RGB-ZifferMit verbundenen WS2812-LEDs
Mikrofonvorverstärker mit 48-V-PhantomversorgungIdeal für Podcasting und Pro Audio
Rechteckgeneratoren mit Tastverhältnis- und FrequenzeinstellungsteuerungEinfache Schaltungen mit CMOS und TTL
Einfacher Dynamik-KompressorMit sanfter Steuerung und warmem Klang
Einfaches elektronisches Schloss
Aktiver GleichrichterFür 2...40 V bis 3 A mit Rückstromunterdrückung
Ein/Aus-Schalter für Aktivboxen
Unsymmetrisch-Symmetrisch-WandlerMit RFI-Filter und DC-Schutz
2023: Odyssee in der KIWo kommt sie her, wo führt sie hin?
Drehzahlsteller für Lüfter oder VentilatorManuell und mit Thermostat-Modus
Das Neuste vom Arduino Project HubSpannende Projekte aus der Community
Strom-Überlast-MonitorÜberwachung von Leitungen auf übermäßigen Strom
Blinken im Dunkeln ohne TransistorenEin Oszillator nur mit Zweipolen
Morsecode-GeneratorVerwenden Sie ihn als Bake oder zum Lernen!
Programmierbarer Video-DACVerarbeitet jedes Format bis zu RGB888
Ein T(eeny)-Tiny-PianoOhne bewegliche Teile
Doppelwürfel ohne ControllerZwei Würfel auf einer Platine – plus einige Entwicklungstricks
Elektronische Vogelscheuche
Schaltungen, die unterhalten, inspirieren und verblüffen
LC-LP-HA-ThermometerGenaue Messungen und eine binäre Anzeige
THD-GeneratorVerzerrungen absichtlich erzeugen
Übertemperatur-Anzeige mit ThyristorEin unkonventionell verwendetes elektronisches Bauteil
Ein PTC-Flipflop
Komischer VogelEin zwitschernder Elektor-Klassiker
Glimmlampe am Mikrocontroller
Temperaturstabile IC-StromquelleTemperaturdrift integrierter Stromquellen neutralisieren
Einstellbare Höhenanhebung zweiter OrdnungEine spezielle Hörhilfe für ältere Menschen
Edwin kommt nach Hause!Zurück zu den Wurzeln nach 53 Jahren
Einarmiger BanditEin einfacher, lustiger, nostalgischer und lehrreicher Elektor-Klassiker!
Einfacher digital gesteuerter variabler Widerstand
Wasserleck ahoi!Schutz und Alarm in einem
Öko-Timer mit automatischer AbschaltungBenötigt 0,00 mW im Aus-Modus!
ChatGPT und Arduino
Z-Dioden-MessgerätMessen von Z-Spannungen von Z-Dioden ? 100 V
Servo-Tester
ESP32-Windows-Controllermit kostenloser Software
Analoge und gemischte Systeme von MicrochipEnergieeffizientes Versorgungsmanagement und Signalverarbeitung
Schnittstellen-StandardsFilter und Überspannungsschutz für den I²C-Bus
Li-Ion-Batterie-MonitorRestladungsanzeige bietet visuelle Rückmeldung
PS/2-Maus als Drehgeberund andere Kunststücke
Einfacher DämmerungsschalterNachrüstung von Lampen oder Installationen
Wasserpumpen-ControllerBereiten Sie sich auf steigende Wasserstände vor
Solarbetriebene UKW-Radio-WeihnachtsbaumkugelAlles, was Sie sich zu Weihnachten wünschen, ist genau dies
Vibrationssensor mit RelaisTippen oder Schütteln zum Einschalten
DurchgangsprüferEmpfindlich und unaufdringlich
Ein-/Ausschalten mit einem Taster
Drehzahlregler für Mini-Bohrmaschinen reloadedÜberarbeitung eines Entwurfs von 1979
Digitaler VibrationssensorSchwingungen in präzise getaktete Impulse umwandeln
Verpolungsschutz mit geringem Spannungsabfall
Ein billiges Frequenznormal
Winziger DCF77-SimulatorEin präziser Fake-Time-Standard
Review: T-PicoC3 von LilyGOKombination von RP2040, ESP32-C3 und Full-Color-TFT-Display
Hexadoku
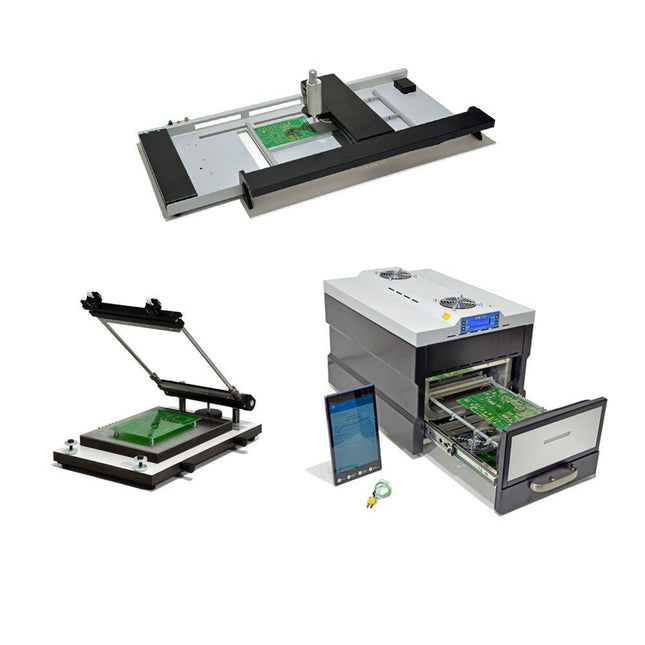
The SMD Starter I prototype production line consists of the stencil printer TSD240, the SMD placement device PlaceMAN and the reflow oven 3LHR10. Stencil printer SD240 (+ Metal Squeegee 155 mm) Stencil size: max. 175 x 255 mm PCB size: max. 180 x 240 mm Size: 410 x 270 x 110 mm Weight: 6.7 kg incl. metal squeegee 155 mm incl. 8 magnets to hold the PCB, 6 of them with M3 grub screw Manual SMD pick-and-place device PlaceMAN for standard components incl. vacuum pump (without feeders, camera, monitor and dispenser) Equipped with smooth-running placement arm, placement head with one-hand operation, rotation of the Z-axis and automatic vacuum switch-off, incl. PCB holder, vacuum unit and 2 placement needles with rubber suction cups. Capacity of feeder (not included) 2x feeder cassette for 10 x 8 mm wheels left 4x feeder cassette for rod feeders for 5 rods each Further feeding systems are possible within the assembly area, e.g. strip-feeder plug-in system Dimensions Base unit (LxWxH): 765 x 390 x 210 mm With feeder cassette for 10 x 8 mm rolls (LxWxH): 765 x 390 x 210 mm With feeder cassette for 10 x 8 mm rolls and feeder cassette for rod feeder (LxWxH): 765 x 430 x 210 mm (height may vary due to rod length) With feeder cassette for 10 x 8 mm rolls incl. holder for 10 rolls and feeder cassette for rod feeder (LxWxH): 765 x 430 x 210 mm (height may vary due to rod length) Specifications Weight of basic unit: approx. 6 kg Axis travel (x,y,z): 470 x 230 x 15 mm Max. working area: 380 x 240 mm Max. PCB size: 230 x 360 mm Power supply: 230/12 V, 800 mA Power supply vacuum pump: 230 V, 6 W 3LHR10 Reflow Oven (programmable for lead-free soldering with manual drawer and tablet control) Reflow oven with IR and convection heating. Forced hot air convection ensures a uniform temperature profile throughout the chamber. After manually opening the door, the fans are turned on and the soldered PCB is quickly cooled. Small reflow oven with manual door Industry 4.0 ready, Bluetooth communication + tablet IR + convection heating Android application to connect to tablet or smartphone 100 different user programs Delivery content: 3LHR10, tablet with app, protective cover for tablet, 4 PCB holders, external thermocouple, manual at tablet Application Connect the oven to the power supply and connect the optionally available extraction system (3LFE10S) to the exhaust air nozzle. After the first turn on, the oven will search for a tablet or smartphone. When both are connected to the Android app, choose the programming of the oven. Here, programmable temperature and preheating time as well as temperature and other data are to be set. Register with the tablet to use the full scope of the software. If the oven is already programmed, the user can control the operation with buttons and display at the front panel. When the reflow process is complete, an audible signal sounds. A signal is also displayed on the tablet/smartphone. The drawer must now be opened manually. The Android application displays process status, time and temperature or other information. Specifications Power supply: 230 V, 50 Hz Maximum power: 3100 W Temperatures: 50-260°C Dimensions: 510 x 370 x 340 mm Maximum weight: 16 kg Grid dimensions: 350 x 220 mm Maximum dimensions of the printed circuit board: 300 x 200 mm Maximum component height on the PCB: 50 mm at the top, 30 mm at the bottom Scope of delivery Stencil printer TSD240 SMD placement device PlaceMAN Reflow oven 3LHR10
A comprehensive course that will teach you how to build a modern IoT application This book will take you on a whirlwind tour of full-stack web application development using Raspberry Pi. You will learn how to build an application from the ground up. You will gain experience and know-how of technologies including: The Linux operating system and command line. The Python programming language. The Raspberry Pi General Purpose Input Output pins (GPIOs). The Nginx web server. Flask Python web application microframework. JQuery and CSS for creating user interfaces. Dealing with time zones. Creating charts with Plotly and Google Charts. Data logging with Google Sheet. Developing applets with IFTTT. Securing your application with SSL. Receiving SMS notifications to your phone using Twilio. This book will also teach you how to set up a remote wireless Arduino sensor node and collect data from it. Your Raspberry Pi web application will be able to process Arduino node data in the same way it processes data from its onboard sensor. Raspberry Pi Full Stack will teach you many skills essential to building Web and Internet of Things applications. The application you will build in this project is a platform that you can extend upon. This is just the start of what you can do with a Raspberry Pi and the software and hardware components that you will learn about. This book is supported by the author via a dedicated discussion space.
Diese Ausgabe steht allen GOLD- und GREEN-Mitgliedern auf der ElektorMagazine-Website zum Download bereit!
Sie sind noch kein Mitglied? Hier klicken!
ESP32-Audio-Transceiver-Board (Teil 2)Drahtlose Audioübertragung
Induktiver AM-SenderPIO des Pico in einem Arduino-Sketch
Navigieren durch drahtlose ProtokolleEin technischer Leitfaden
Satellitenverfolgung mit LoRaDas TinyGS-Netzwerk: Raumfahrtdaten gelangen zur Erde
4G-kompatible SMS-FernbedienungSteuern Sie Ihr Zuhause per Telefon aus der Ferne
Hochgeschwindigkeits-TastkopfHochohmige Eingänge für Signale bis 200 MHz
Aus dem Leben gegriffenKafka
KrakenSDREin phasenkohärenter SDR-Empfänger
Geschwindigkeitstests mit dem RP2350Lohnt sich der Umstieg von Raspberry Pi Pico 1 auf Version 2?
Kontaktlose E-Feld-Messungen (2)Ein Laser-Vibrometer zur Erfassung der Membranschwingungen
Quarze und OszillatorenQuarzgenauigkeit durch die Kondensatorwahl verbessern
Aller Anfang ...... ist gar nicht schwer: Spezielle Audio-ICs
Einstieg ins Programmieren von Selbstbauprojekten
SPECTRAN® V6 MobileModular konfigurierbarer Echtzeit-Spektrum-Analyzer für zuverlässige Messungen in allen Frequenzbereichen
Die Zukunft der KI wird in Silizium geschmiedetEin Interview mit Anastasiia Nosova
Autonomer Sensorknoten v2.0 (Systemarchitektur)Solarbetriebene Sensorplattform mit integriertem GPS, LoRaWAN und weiteren Funktionen
Präzise PositionsbestimmungBluetooth Channel Sounding ausprobiert
Die Zukunft der Wireless-KommunikationDie ultradünnen Festkörperbatterien von BTRY
Testgetriebene Programmierung in der Firmware-Entwicklung
Handy-gesteuertes ModellautoWLAN + ESP32 + Smartphone = Fernsteuerung
2025: Eine KI-OdysseeKI-Denkmodelle: die Gedankenketten-Revolution
Solarladeregler mit MPP-TrackingTeil 3: Software und Inbetriebnahme
Web-Streaming-Kamera mit Raspberry Pi ZeroVerwendung des ZeroTier-VPN
Die Mikrocontrollertechnologie ist eines der wichtigsten Gebiete der modernen Elektronik. Mikrocontroller haben sich in den letzten Jahren in allen Bereichen der modernen Technik etabliert. Der vorliegende Kurs gibt eine umfassende Einführung in die faszinierende Welt der Controllertechnik.
Nach grundlegenden Betrachtungen zur Controllertechnologie wird bereits im ersten Teil des Kurses auf die praktische Umsetzung des Stoffes eingegangen. Als Basis dafür dient ein modernes Entwicklungsboard (XMEGA-A3BU Xplained), das mit einem der aktuellsten Controller des Herstellers Atmel ausgestattet ist.
Der zweite Teil beschäftigt sich detailliert mit der Programmierung des Controllers. Hier kommt die Sprache „C“ zum Einsatz, da diese in der Firmware-Entwicklung eine dominierende Stellung einnimmt. Die bei weitem überwiegende Mehrheit der professionellen Entwicklungsarbeit wird in C ausgeführt. Diese Programmiersprache bietet eine umfassende Grundlage für alle Controlleranwendungen.
Im dritten Teil des Kurses wird schließlich auf die hardwarenahe Programmierung eingegangen. Nach der Durchsprache von Pin-Ansteuerung, Takterzeugung und Oszillatoroptionen werden die anspruchsvolleren Themen wie Interrupts, Timer und Counter, Pulsweitenmodulation und Analog-Digitalwandlung behandelt.
Der Kurs setzt auf die Philosophie des „Learning by Doing“. Er eignet sich dadurch hervorragend als praktische Ergänzung für Unterricht und Vorlesungen in
Weiterführenden Schulen
Technischen Berufsschulen und Fachakademien
Fachhochschulen und Universitäten
Aber auch der ambitionierte, nichtprofessionelle Anwender kann sich mit dem Lernmaterial einen Überblick über den neuesten Stand der Controllertechnik verschaffen.Umfangreiche Praxisbeispiele und Übungsprogramme runden den Kurs ab und lassen keine Fragen offen.
DIE NEURONEN IN NEURONALEN NETZWERKEN VERSTEHENTeil 1. Künstliche Neuronen
EMV-VOR-KONFORMITÄTSTESTER FÜR IHR PROJEKT MIT DC-VERSORGUNGTeil 1: Was ist eine Netznachbildung?
ELEKTRONISCHE LAST FÜR DC UND ACBis zu 400 V und 10 A
ALLER ANFANG …ist gar nicht schwer!
NVIDIA JETSON NANO - BILDVERARBEITUNG FÜR EINSTEIGERTeil 1: Hard- und Software im Überblick
NETZTRANSFORMATOREN AUS DER NÄHE BETRACHTETWie verhalten sie sich beim Ein- und Ausschalten?
PICAN 3 - YES WE CAN!CAN-Zusatzboard für Raspberry Pi 4
BALKONKRAFTWERKSelbst installiert = schnell amortisiert!
FOTOGRAFIEREN UND VIDEO-STREAMING MIT DEM RASPBERRY PI 4Die High-Quality-Kamera des Raspberry Pi in der Praxis
VERWENDUNG VON DISPLAYS IN RASPBERRY-PI-PROJEKTENBeispiel-Kapitel: Organische Leuchtdioden-Displays (OLED)
PARALLAX PROPELLER 2Teil 4: Senden von Strings
60 JAHRE ELEKTOR: SEPTEMBER-RENAISSANCEDer Plan, der Plan, ein leerer Wahn ...
ZUTRITT FÜR UNBEFUGE VERBOTEN ERWÜNSCHTIn Friesland, wo die Röhren blühen ...
HYBRIDE SCHALTUNGENBemerkenswerte Bauteile
KOMPASSROSE MIT DEM GY-271Oder, warum man mit dem Handy Achten gehen muss…
KENNEN SIE IHREN FUSSABDRUCKBerechnen Sie die CO2-Bilanz Ihrer Elektronik
ESP32-VERBUNDENES THERMOSTATLagern Sie Ihren Wein bei der richtigen Temperatur!
MAGNETISCHE LEVITATION DIE DIGITALE ARTEin ESP32 Pico ersetzt den analogen Komparator
ULTIMATE ARDUINO UNO HARDWARE MANUALEin beispielhaftes Kapitel: Bootloader für den Haupt-Mikrocontroller
MICROPYTHON FÜR DEN ESP32 UND CO.Teil 2. Matrix-Displays einfach ansteuern
MADMACHINE SWIFTIO-KARTEModerne Sprache trifft moderne Hardware
AUS DEM LEBEN GEGRIFFENEine elektronische On/Off-Beziehung
HEXADOKUSudoku für Elektroniker
Elektor GREEN en GOLD leden kunnen deze uitgave hier downloaden.
Nog geen lid? Klik hier om een lidmaatschap af te sluiten.
OBD2-sensordashboardOude meters vormden het startpunt van een zoektocht naar echte gegevens
OBD2: voeg een toerenteller en schakelindicator toe aan je autoRetro, maar uiterst nuttig
LiDAR- en Visiesensoren voor Robotica
Sensor+Test 2025 en PCIM 2025
Contactloze E-Veldmetingen (1)Een Trillende Membraan voor het Detecteren van Gelijkspanningen of Statische Elektrische Velden
Draadloze brievenbusmeldervan optische sensoren tot radar: enkele mogelijkheden
Elektor Mini-Wheelieeen zelfbalancerende robot
ZonnecellenVreemde onderdelen, de serie
Aan de slag met een moderne radarsensorStaat een nauwkeurige meting op uw radar?
Uit het leven gegrepenpapierfabriek
CybersecurityZware tijden voor hackers
Infographics: IoT en sensoren 2025
Bluetooth 6.0 brengt verbeterde toepassingen voor afstandsbepalingNieuwe versie biedt betere apparaatpositionerings- en -locatieservices
Draadloze communicatie verkennen met BeagleY-AI
Err-lectronicsCorrecties, updates en lezerspost
Alle begin......sluit het thema opamps af
Een krachtige AI-codeerassistentsneller ontwikkelen met Continue en Visual Studio Code
Zonne-laadregelaar met MPPT (2)Het schema
Ultrasone obstakeldetectoreen eenvoudig project om slechtzienden te helpen
2025: Een AI-odysseeHalfjaaroverzicht
Raspberry Pi Standalone MIDI-synthesizer (3)Het slimmer maken en een gebruikersinterface toevoegen
Meshtastic: een demonstratieprojectEen slim netwerk van LoRa-radio's
Analoge audio-frequentiegeneratorHoogwaardige sinusgenerator met instelbare frequentie
A Beginner's Guide to AI and Edge Computing
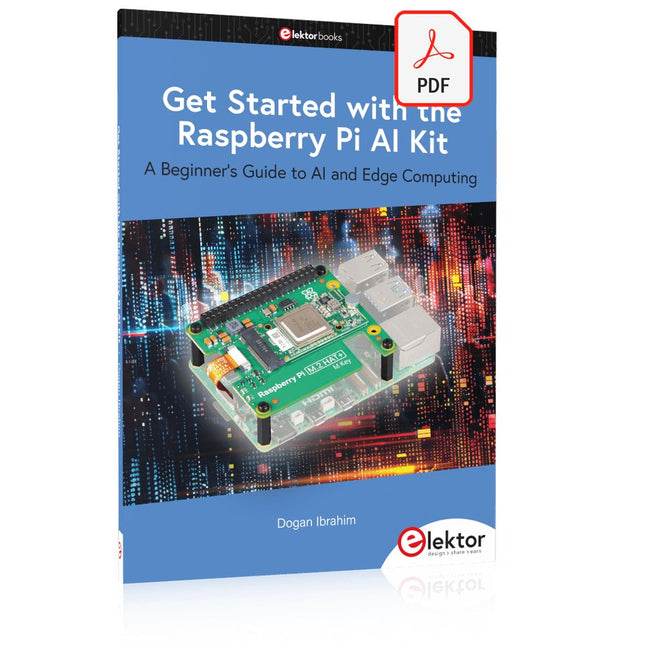
Artificial Intelligence (AI) is now part of our daily lives. With companies developing low-cost AI-powered hardware into their products, it is now becoming a reality to purchase AI accelerator hardware at comparatively very low costs. One such hardware accelerator is the Hailo module which is fully compatible with the Raspberry Pi 5. The Raspberry Pi AI Kit is a cleverly designed hardware as it bundles an M.2-based Hailo-8L accelerator with the Raspberry Pi M.2 HAT+ to offer high speed inferencing on the Raspberry Pi 5. Using the Raspberry Pi AI Kit, you can build complex AI-based vision applications, running in real-time, such as object detection, pose estimation, instance segmentation, home automation, security, robotics, and many more neural network-based applications.
This book is an introduction to the Raspberry Pi AI Kit, and it is aimed to provide some help to readers who are new to the kit and wanting to run some simple AI-based visual models on their Raspberry Pi 5 computers. The book is not meant to cover the detailed process of model creation and compilation, which is done on an Ubuntu computer with massive disk space and 32 GB memory. Examples of pre-trained and custom object detection are given in the book.
Two fully tested and working projects are given in the book. The first project explains how a person can be detected and how an LED can be activated after the detection, and how the detection can be acknowledged by pressing an external button. The second project illustrates how a person can be detected, and how this information can be passed to a smart phone over a Wi-Fi link, as well as how the detection can be acknowledged by sending a message from the smartphone to your Raspberry Pi 5.
Diese Ausgabe steht allen GOLD- und GREEN-Mitgliedern auf der ElektorMagazine-Website zum Download bereit!
Sie sind noch kein Mitglied? Hier klicken!
Relio v1.0 – Anwesenheitserkennung und FernsteuerungEin Matter-fähiger Smart-Controller für Hausgeräte
Bessere Leiterplatten entwerfenEin praxisnaher Leitfaden für Profis und Maker
KiCad 9Die wichtigsten neuen und aktualisierten Funktionen
Präzisions-Picoamperemeter (Teil 1)Mit Kennlinienschreiber-Funktion bis in den pA-Bereich
Analoger Pipeline-VerzerrerEin cooler Audioeffekt für Gitarren und andere Instrumente
Halogene in LötmittelnFakten statt Mythen
100-mV-Durchgangsprüfer
Wer treibt die europäische Elektronik voran?Unternehmen im Fokus
productronica 2025Neuheiten in Elektronikentwicklung und -fertigung
Automatisierung bewältigt Herausforderungenwie Reshoring, Zölle und Arbeitskräftemangel
Mehr als ZukunftssicherheitKreislaufwirtschaft in der Elektronik
Passive BauelementeVerlustarme Induktivitäten für hocheffiziente DC/DC-Wandler
PCB-Produktion im WandelDesktop-Maschinen eröffnen neue Wege für die Leiterplattenfertigung
Aller Anfang ...... braucht Spannung
UHD-Displays mühelos ansteuernIhr Leitfaden, um unterschiedliche TFT-LCDs schnell in Betrieb zu nehmen
Löten im Jahr 2025Praktische Tipps direkt von der Werkbank
Weihnachtsstern 2025Ein Stern wird gelötet
SimulIDEEin All-in-One-Werkzeug für die Schaltungsentwicklung
2025: Eine KI-OdysseeVom Autovervollständiger zum Kollegen
Wortreicher WeihnachtsbaumEin festliches Elektronikprojekt mit verbalem Highlight
Projekt 2.0Korrekturen, Updates und Leserbriefe
ESP32-Audio-Transceiver-Board (Teil 3)Stereosender und Dual Radio