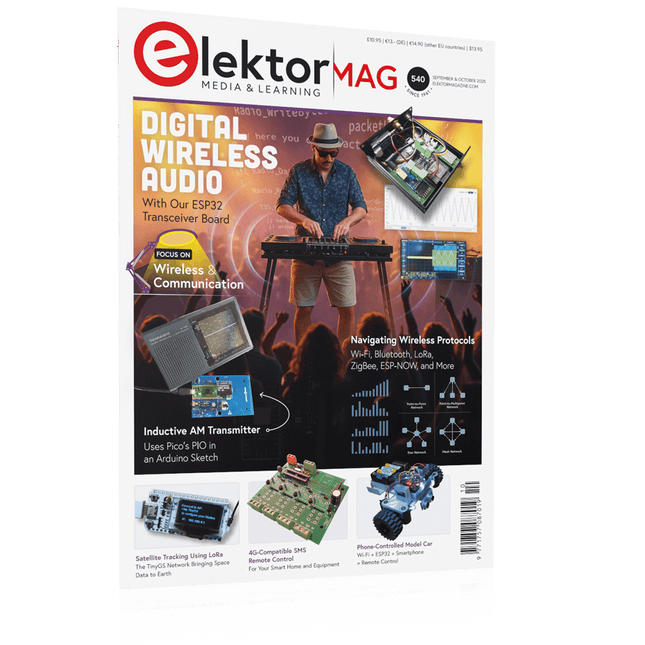
Diese Ausgabe steht allen GOLD- und GREEN-Mitgliedern auf der ElektorMagazine-Website zum Download bereit!
Sie sind noch kein Mitglied? Hier klicken!
PbMonitor v2.0 – UpdateBatterieüberwachung mit verbessertem Analogdesign
Audio-LatenzmessungEigenständiges Werkzeug zur Bewertung von Fehlern und Latenzen bei der Audioübertragung
Rechtecksignal vs. Bode-DiagrammÜberprüfung der Leistungsfähigkeit eines Audiogeräts
embedded world 2026
Clever coden mit KIKI in der Softwareentwicklung für Elektroniker
Audioanalyser QA403Bezahlbare Präzision für Audio-Profis und -Hobbyisten
EasyGimbalAutonomes Kamera-Tracking mit KI, Schrittmotor und Servo
Sigfox-Breakout-Board (Teil 2)Nachrichten senden
SchaltungsschutzÜberspannungen mit TVS-Dioden beherrschen
Neue Ansätze für BatterieprüfungenEine neue Ära der Diagnostik
AudiotronicsEin erster Vorverstärker
CANopenTermEin Open-Source-Werkzeug für CAN – für Maker und Ingenieure
Stabilisierung von Operationsverstärkernbei kapazitiver Last
Projekt 2.0Korrekturen, Aktualisierungen und Leserbriefe
SignalkonditionierungTipps und Tricks zur Anpassung von Spannungsbereichen
TDR-Aufsatz für OszilloskopeLängenmessung, Kurzschluss, Fehlanpassung: Kabel mit Reflexionen messen!
Aus dem Leben gegriffenLED It Be
Lautsprecher-Oszillator und ResonanztesterEin experimentelles Projekt für Ihre Lautsprecher
Elektor-Community-Tipps zu Test und Messung
ESP32-Audio-Transceiver-Board (Teil 5)Audioverarbeitung und Fernsteuerung
2026: Eine KI-OdysseeKI hat ein Kontextproblem
Batteriespeicher für BalkonkraftwerkeKleine Akkus mit großer Wirkung
Elektor GREEN en GOLD leden kunnen deze uitgave hier downloaden.
Nog geen lid? Klik hier om een lidmaatschap af te sluiten.
OBD2-sensordashboardOude meters vormden het startpunt van een zoektocht naar echte gegevens
OBD2: voeg een toerenteller en schakelindicator toe aan je autoRetro, maar uiterst nuttig
LiDAR- en Visiesensoren voor Robotica
Sensor+Test 2025 en PCIM 2025
Contactloze E-Veldmetingen (1)Een Trillende Membraan voor het Detecteren van Gelijkspanningen of Statische Elektrische Velden
Draadloze brievenbusmeldervan optische sensoren tot radar: enkele mogelijkheden
Elektor Mini-Wheelieeen zelfbalancerende robot
ZonnecellenVreemde onderdelen, de serie
Aan de slag met een moderne radarsensorStaat een nauwkeurige meting op uw radar?
Uit het leven gegrepenpapierfabriek
CybersecurityZware tijden voor hackers
Infographics: IoT en sensoren 2025
Bluetooth 6.0 brengt verbeterde toepassingen voor afstandsbepalingNieuwe versie biedt betere apparaatpositionerings- en -locatieservices
Draadloze communicatie verkennen met BeagleY-AI
Err-lectronicsCorrecties, updates en lezerspost
Alle begin......sluit het thema opamps af
Een krachtige AI-codeerassistentsneller ontwikkelen met Continue en Visual Studio Code
Zonne-laadregelaar met MPPT (2)Het schema
Ultrasone obstakeldetectoreen eenvoudig project om slechtzienden te helpen
2025: Een AI-odysseeHalfjaaroverzicht
Raspberry Pi Standalone MIDI-synthesizer (3)Het slimmer maken en een gebruikersinterface toevoegen
Meshtastic: een demonstratieprojectEen slim netwerk van LoRa-radio's
Analoge audio-frequentiegeneratorHoogwaardige sinusgenerator met instelbare frequentie
Programmierung in Assembler und C am Beispiel der ATtiny-Familie
Dieses Buch bietet einen eingehenden Blick auf die 8-Bit-AVR-Architektur in ATtiny- und ATmega-Mikrocontrollern, hauptsächlich aus der Sicht der Software und der Programmierung. Erforschen Sie die AVR-Architektur unter Verwendung von C und Assembler in Microchip Studio (früher Atmel Studio) mit ATtiny-Mikrocontrollern.
Lernen Sie die Details der internen Funktionsweise von AVR-Mikrocontrollern kennen, einschließlich der internen Register und des Speicherplans von ATtiny-Bausteinen.
Programmieren Sie ATtiny-Mikrocontroller mit einem Atmel-ICE-Programmiergerät/Debugger oder verwenden Sie ein preiswertes Hobby-Programmiergerät oder sogar einen Arduino Uno als Programmiergerät.
Die meisten Code-Beispiele können mit dem Microchip Studio AVR-Simulator ausgeführt werden.
Lernen Sie, Programme für ATtiny-Mikrocontroller in Assembler zu schreiben.
Erfahren Sie, wie Assemblersprache in Maschinencodebefehle umgewandelt wird.
Finden Sie heraus, wie Programme, die in der Programmiersprache C geschrieben wurden, in Assemblersprache und schließlich in Maschinencode umgewandelt werden.
Verwenden Sie den Microchip Studio Debugger in Kombination mit einem Hardware-USB-Programmierer/Debugger, um Assembler- und C-Programme zu testen oder verwenden Sie den Microchip Studio AVR-Simulator.
ATtiny-Mikrocontroller im DIP-Gehäuse werden verwendet, um eine einfache Nutzung auf Breadboards zu ermöglichen.
Erfahren Sie mehr über Timing und Taktimpuls in AVR-Mikrocontrollern mit ATtiny-Bausteinen.
Werden Sie zu einem AVR-Experten mit fortgeschrittenen Debugging- und Programmierfähigkeiten.
Elektor GREEN and GOLD members can download their digital edition here.
Not a member yet? Click here.
MultiRF Dev BoardA Platform for Evaluating Short- and Long-Range Wireless Protocols
Elektor at 65Disrupting Electronics Since 1961
Wi-Fi-Based Person Detection on an ESP32When Your Router Becomes a Motion Sensor
Wireless ScalesFour Small Scales = One Big Scale
Walter, the Compact IoT ModuleESP32-S3 SoC, LTE-M/NB-IoT 5G Modem, and GNSS Receiver
3- and 4-Wire RTD Sensors ConditioningWith Full-Scale Adjustment and Cable Compensation
3-in-1 2-Channel Oscilloscope/Generator/MultimeterA Review of The Fnirsi 2D15P
electronica Fast Forward 2026 Invites Startups and Industry Partners
EcologgingA Modular Environmental IoT Station for Field Research
Wireless Connectivity in Medical ApplicationsAlways on the Pulse with Bluetooth LE
AudiotronicsHum Reduction
Increasing Agricultural Efficiency with AI Modeling and SensorsBoosting Agricultural Productivity
OPC UA — An OverviewPlatform-Independent Data Exchange
Redox Meter
Instrumentation Amplifier for Physics and Engineering Experiments
Active Differential Audio FiltersFor Professional Crossovers and More
Elektor Community Perspectives on IoT & Sensors
Telegram-Controlled Water Heater Interface ModuleA Solution Based on an ESP32 and Arduino Software
2026: An AI OdysseyWhatever Happened to Fuzzy Logic?
Err-lectronics
Alarm Signal Injector Plus PowerTools for Finding Broken Wires
Learning circuit design the fun way
Welcome to the world of electronics!
Getting started in electronics is not as difficult as you may think. Using this book, you will explore and learn the most important electrical and electronics engineering concepts in a fun way by doing various experiments and by simulating circuits. It will teach you electronics practically without getting into complex technical jargon and long calculations. As a result, you will be creating your own projects soon.
No prior knowledge of electronics is required, only some basic algebra is used in a few simple calculations. Many tested and working projects and simulations are presented to familiarise yourself with the construction of electronic circuits. Circuit simulation is introduced at an early stage to enable you to experiment with circuits easily without breaking anything.
You will learn:
The concepts of voltage, current, and power
AC and DC
Basic lamp circuits with switches
Passive components: resistors, capacitors & inductors
RC & RCL circuits
Electromagnetism
Loudspeakers, relays, buzzers, and transformers
Active components: diodes & LEDs, bipolar transistors & MOSFETs
Transistor-based switching circuits
Optocoupler circuits
Astable & monostable multivibrators
Using the 555 timer IC
The operational amplifier
Digital logic
Advanced examples: amplifiers, oscillators, filters, and sensors
Test and measurement tools
Microcontrollers: Arduino UNO, ESP32, Raspberry Pi Pico, and Raspberry Pi
Reading datasheets and best practices for selecting components
EMC & EMI and norms & regulations
Diese Ausgabe steht allen GOLD- und GREEN-Mitgliedern auf der ElektorMagazine-Website zum Download bereit!
Sie sind noch kein Mitglied? Hier klicken!
Stromquelle zum Testen von (Z-)DiodenPrüfen von Z-Dioden von 1 bis 54 V bei 1 bis 50 mA
ESD-Armband-TesterEin Tool zur Funktionsprüfung von Erdungsarmbändern
Transientenmesser für LabornetzteileEin reproduzierbarer Lastsprung-Generator für Labornetzteile
3D-Viewer für HTML-SeitenEinfach und fast ohne Code
LED-Blinkleuchte für Tore und mehr mit akustischem Alarm
Benötigen Sie Leiterplatten? Der Elektor-Leiterplattenservice ist für Sie da.
Zahnbürsten-TimerMit einem kleinen PIC
Ein berührungsloses magnetisches Kombinationsschlossmit dem AS5600-Drehpositionssensor
Rauscharmer, batteriebetriebener Vorverstärkerfür dynamische Mikrofone
Das Arduino Nano TestLabMessen, Steuern, Regeln
Rhythmische BassleuchteBetonen Sie den Rhythmus Ihrer Musik
Low-cut-FilterKein Risiko von Audio-Rückkopplungen in Ihrem System
Präziser 1-Hz-Rechteckwellengenerator für SteckbrettEine zuverlässige CMOS-basierte Taktquelle
555 auf den Kopf gestelltTastverhältnisse bis hinunter auf Null
Vom „Halfgeleidergids“ zu Circuit Specials65 Jahre Elektronik-Innovation
Galvanische TrennungCAN-Schnittstelle mit Digitalisolator und Powermodul
SpongillatorEin schwammbasierter Oszillator
Echter Zufallszahlengeneratormit integriertem Chi-Quadrat-Test
Euklidischer Sequencer ohne MikrocontrollerTrigger-Pattern und CV-Sequenzen mit einfacher CMOS-Logik
Programmieren mit TLScriptEine Skriptsprache zum Messen, Testen und Steuern
Schaltungsdesign: Tipps von Experten
RückkopplungWas ist das und warum ist sie wichtig?
Ein Board, endlose Ideen: Arduino UNO QVon Retro-Gaming zur Echtzeit-Umweltüberwachung
So bringen Sie eine Donut-Antenne in Ordnung
Standby-KillerEin echter Ein-/Ausschalter für den Fernseher
Akkus im TestAkkus vermessen mit dem Arduino Nano
Stromversorgung für Audio-EndstufenEin gutes Netzteil ohne Netzbrummen
Lochrasterplatinen für HFSchnelle Aufbauten mit DIY-Prototyping-Boards
T3-ÜberspannungsschutzEin Typ-3-Schutzmodul für empfindliche Geräte
IoT-Raumthermostat-Platinemit dem Xiao-MCU-Modul auf Basis des ESP32-C3/S3
Von starr zu smartFlexible und gedruckte Elektronik – zwischen Vision und industrieller Realität
The Piccolino rapid development board can be used to design microcontroller circuits quickly. The Piccolino has a fast 16f887 PIC microcontroller, voltage regulator, and communications module, and can be easily extended using its four headers.
This e-book contains 30 projects based on the Piccolino. We'll use its unique communications facilities and get the Piccolino to communicate with programs on a PC. On the PC, we use the free programming language Small Basic. You can use this to create Windows programs with buttons and graphs quickly. You will learn how to analyze components such as inductors, capacitors, and OPAMPs, and how to display the measurement results in a graphical format. This will help you to design your circuits easily.
We will then start to adapt to the Piccolino. We'll add components to it to make it more powerful, with extra features such as flow control and digital to analog conversion. The clear instructions will enable you to design and build your adaptations. This way you can make your custom designed Piccolino.
We'll end up making an extension: a PCB that that can be mounted on the Piccolino headers. As an example, we'll design and build an extension for an LCD. You can use the included board layout to make your PCB or have it made for you. At the same time, you will learn how to make your extensions. The only limitation is your imagination!
The clear descriptions along with circuit diagrams and photos, will make the building of these projects an enjoyable experience. Each project has a clear explanation of the reasons why it was designed in a particular way. This helps you learn a lot about the Piccolino, as well as Small Basic, and the components that are used in this e-book. You can adapt the projects to suit your requirements or combine several projects.
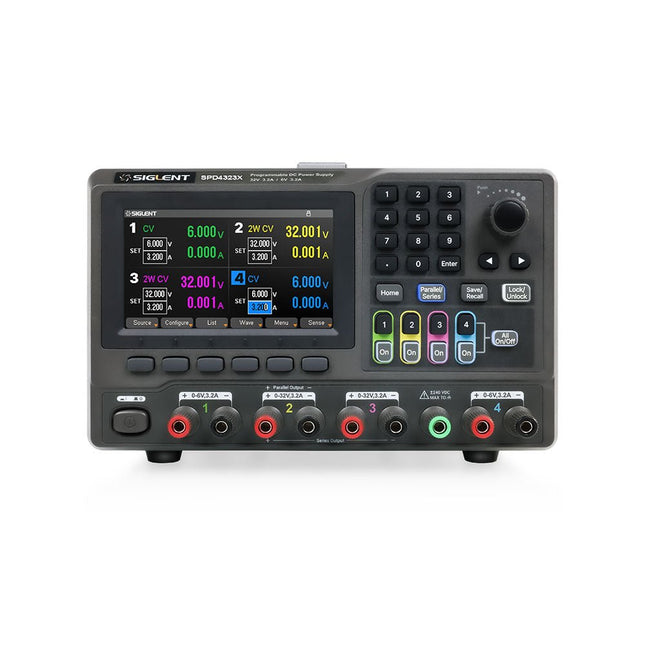
The Siglent SPD4323X is a 4-channel DC Linear Programmable Power Supply equipped with a 4.3-inch TFT-LCD display, friendly human-machine interface, and excellent performance indicators. Real-time waveform display provides engineers with an informative user interface.
SPD4323X offers a total output power of 240 W with a resolution of 1 mV/1 mA. The maximum voltage and current for each channel are as follows:
CH1: 6 V/3.2 A
CH2: 32 V/3.2 A
CH3: 32 V/3.2 A
CH4: 6 V/3.2 A
Features
Rated output power: 240 W
Rated voltage: 32 V, 12 V, 30 V
Up to four high-precision power supplies with independent controllable outputs, supporting CH2 and CH3 series and parallel connections
Clear graphical interface with waveform and timer display modes
5-digit voltage and current display with minimum resolution of 1 mV, 1 mA
Fast output response time: <50us
The high current channel support remote voltage compensation sense function. The maximum compensation voltage is 0.6 V
Overvoltage protection and overcurrent protection or safe and accurate operation
Equipped with a 4.3-inch TFT-LCD display (480 x 272 resolution)
USB and LAN standard communication
USB-GPIB module is optional
Excellent channel density with up to 4 channels in a 3U half rack package
Internal data storage for setups and parameters
Embedded Web Server with instrument communication that doesn’t require software installation
Fully SCPI programming command set support as well as a LabView driver for remote control and system automation
Specifications
SPD4323X
SPD4121X
SPD4306X
Channel Output
CH1: Voltage 0 to 6 V Current 0 to 3.2 ACH2: Voltage 0 to 32 V Current 0 to 3.2 ACH3: Voltage 0 to 32 V Current 0 to 3.2 ACH4: Voltage 0 to 6 V Current 0 to 3.2 A
CH1: Voltage 0 to 15 V Current 0 to 1.5 ACH2: Voltage 0 to 12 V Current 0 to 10 ACH3: Voltage 0 to 12 V Current 0 to 10 ACH4: Voltage 0 to 15 V Current 0 to 1.5 A
CH1: Voltage 0 to 15 V Current 0 to 1.5 ACH2: Voltage 0 to 30 V Current 0 to 6 ACH3: Voltage 0 to 30 V Current 0 to 6 ACH4: Voltage 0 to 15 V Current 0 to 1 A
Resolution
1 mV, 1 mA
1 mV, 1 mA
1 mV, 1 mA
Setting Accuracy
Voltage: ±(0.03% of reading+10) mV, Current: ±(0.3% of reading+10) mA
Voltage: ±(0.03% of reading+10) mV, Current: ±(0.3% of reading+10) mA
Voltage: ±(0.03% of reading+10) mV, Current: ±(0.3% of reading+10) mA
Readback Accuracy
Voltage: ±(0.03% of reading+10) mV, Current: ±(0.3% of reading+10) mA
Voltage: ±(0.03% of reading+10) mV, Current: ±(0.3% of reading+10) mA
Voltage: ±(0.03% of reading+10) mV, Current: ±(0.3% of reading+10) mA
Display
4.3" TFT-LCD 5-digit voltage and current display
4.3" TFT-LCD 5-digit voltage and current display
4.3" TFT-LCD 5-digit voltage and current display
Output power
240 W
285 W
400 W
Included
1x Siglent SPD4323X Power Supply
1x Power cord (EU)
1x Output test cord (3 A)
1x USB cable
1x Quick start guide
Downloads
Datasheet
Manual
Quick start
Elektor GREEN en GOLD leden kunnen deze uitgave hier downloaden.
Nog geen lid? Klik hier om een lidmaatschap af te sluiten.
Audio DSP FX Processor Boarddeel 1: eigenschappen en ontwerp
50 jaar Elektor in het Engels
KiCad 8belangrijkste nieuwe en vernieuwde functies
Elektor @ elektronica 2024electronica Fast Forward 2024, Experts on Stage, Influencer Forums, Live Elektor Lab Talk Shows en meer
Elektor MultiCalculator KitArduino-gebaseerde DHZ-calculator voor elektronici
Goedkope GNSS RTK-systemenmet centimeter-nauwkeurigheid
Printlayout en veiligheidtips voor een veilig en duurzaam ontwerp van uw printen
Opamp-testervoor audio en andere toepassingen
Project-update #4: ESP32-gebaseerde energiemeterenergiemonitoring met MQTT
Real-time spectrumanalyzer met golfgeleider-technologie en multi-interface PC’sAaronia introduceert nieuw productsegment en presenteert eerste prototypes op electronica in München
SMT-spoelenspoelen en ferrieten – selectie gemakkelijk gemaakt
EMC-conformiteit bereiken met EMI-afscherming
De perfecte tool voor elke elektronicaliefhebbereindeloze mogelijkheden met Red Pitaya en 1.000+ Click Boards™
HDI in het middeneen nieuwe kosteneffectieve PCB-poolingservice voor kleine BGA’s
Uitdagingen van DFM-analyse voor flex- en rigid-flex-ontwerpen
Open source-toolsantennesimulator, componentenbeheer, rekenmachine en meer
Elektor infographicprototyping en productie
Uit het leven gegrepenmicrotechnofobie
3D-kerstboomdriedimensionale print met een goedkope 32 bit-microcontroller
Alle begin......houdt nog lang niet op(amp)!
Autonome sensor-node (project-update #1)RTC en voedingsschakelaar
2024: een AI-odysseeeen terugblik op de toekomst
LED-displays met de MAX7219aan de slag met een grandioze chip
Project 2.0correcties, updates en brieven van lezers
Vibrotactiele handschoenendoorbraak voor Parkinson-patiënten
Elektor GREEN and GOLD members can download their digital edition here.
Not a member yet? Click here.
ESP32 Audio Transceiver Board (Part 2)Wireless Audio Transmission
Inductive AM TransmitterUses Pico’s PIO in an Arduino Sketch
Navigating Wireless ProtocolsA Technical Guide
Satellite Tracking Using LoRaThe TinyGS Network Bringing Space Data to Earth
4G-Compatible SMS Remote ControlRemotely Control Your Equipment
High-Speed ProbeHigh-Impedance Inputs for Signals up to 200 MHz
From Life’s ExperienceKafka
KrakenSDR
Performance Tests with the RP2350Is an Upgrade from Raspberry Pi Pico 1 to Pico 2 Worthwhile?
Contact-Free E-Field Measurements (2)A Laser Vibrometer for Assessing the Membrane's Vibrations
Crystals and OscillatorsImproving Crystal Accuracy Through Capacitor Selection
Starting Out in ElectronicsSpecial Audio ICs
Getting Started with Coding a DIY Project
SPECTRAN® V6 MobileModular, Configurable Real-Time Spectrum Analyzer for Reliable Measurements Across All Frequency Ranges
The Future of AI Is Forged in SiliconAn Interview with Anastasiia Nosova
Autonomous Sensor Node v2.0 (System Architecture)Solar-Powered Sensing Platform with Integrated GPS, LoRaWAN, and More
Precise PositioningBluetooth Channel Sounding Tested
Powering the Future of Wireless CommunicationBTRY’s Ultra-Thin Solid-State Batteries
Test-Driven Development in Firmware Writing
Phone-Controlled Model CarWi-Fi + ESP32 + Smartphone = Remote Control
2025: An AI OdysseyAI Reasoning Models: The Chain-of-Thought Revolution
Solar Charge Controller with MPP Tracking (3)Software and Commissioning
Raspberry Pi Zero Web Streaming CameraUsing the ZeroTier VPN
Erste Schritte ins IoT - mit dem ESP32-C3WLAN-Taster und -Relais
IoT-Cloud à la ArduinoErster Kontakt mit der Arduino-Cloud
Arduino-Shield für zwei Geiger-Müller-ZählrohreEin hochempfindlicher, sehr stromsparender Strahlungsmesser
CO2-WächterEin DIY-Ansatz zur Überwachung der Luftqualität
MonkMakes: Luftqualitäts-Messgerätekit für den Raspberry PiMisst Temperatur und CO2e
Aller Anfang ...muss nicht schwer sein: Willkommen bei der Diode!
Beherrschen Sie die Fachsprache?Fünf praktische Tipps für Ingenieure
Tipps & Tricks beim BauteiltestRecycling ohne teures Messequipment
Stromsparende MaulwurfscheucheEin ATtiny13 ersetzt einen 555er
Lichtschalter DeLuxEine Lösung für hochpräzises lichtgesteuertes Schalten
Herausforderungen bei der Markteinführung von IoT-LösungenSorgen um Sicherheit, Skalierbarkeit und Wettbewerb
Infografik 5-6/2022
Lieber doch verkabeltTipps zur Entwicklung einer 1-Gbit/s-Schnittstelle im Industrieumfeld
Objekterkennung in Echtzeit für MCUs mit Edge Impulse FOMO
WanderfeldröhrenBemerkenswerte Bauteile
NB-IoT - ein ÜberblickStandards, Abdeckung, Verträge und Module
Dragino LPS8 Indoor GatewaySchnell zum eigenen LoRaWAN-Gateway
ATtiny-Mikrocontroller mit C und Assembler erforschenBeispiel-Kapitel: I/O-Ports des ATtiny
Projekt 2.0Korrekturen, Updates und Leserbriefe
LoRa-GPS-Tracker - ein UpdateDaten abholen und visualisieren mit dem Raspberry Pi
Schaltungssimulation mit TINA Design Suite und TINACloudBeispiel-Kapitel: Sinusförmige Oszillatoren
WinUI 3: Neues Grafik-Framework für Windows-AppsEine erste App für Elektroniker
GUIs mit Python:Die schlechteste GUI der Welt
Insel-SolaranlagenElektrische Energie unabhängig vom Netz
Das 10-Jahres-HandyErneuern Sie Ihre Erwartungen!
Hexadoku
The X500 V2 ARF Kit is an affordable, lightweight, and robust carbon fiber professional drone kit that is easy to assemble (less than 15 minutes). It comes with the X500 V2 Frame Kit and motors, ESCs, power distribution boards and propellers preinstalled. It is perfectly compatible with various flight controllers such as the Holybro Pixhawk series, Durandal, Pix32 V5, etc. There are numerous improvements compared the previous model.
Specifications
Wheelbase: 500 mm
Motor mount pattern: 16x16 mm
Frame body: 144x144 mm, 2 mm thick
Landing gear height: 215 mm
Space between top and bottom plates: 28 mm
Weight: 610 g
Flight time: ~18 minutes hover with no additional payload. Tested with 5000 mAh battery.
Payload: 1500 g (without battery, 70% throttle)
Battery recommendation: 4S 3000-5000 mAh 20C+ with XT60 Lipo battery (not Included)
Included
X500 V2 Frame Kit
With Preinstalled Items:
4x Motors: Holybro 2216 KV920 Motor (4 pcs) with XT30 Plug
4x ESCs (BLHeli S ESC 20A)
6x 1045 Propellers
Power Distribution Board – XT60 plug for battery & XT30 plug for ESCs & peripherals
Note: Depth camera mount is sold separately.