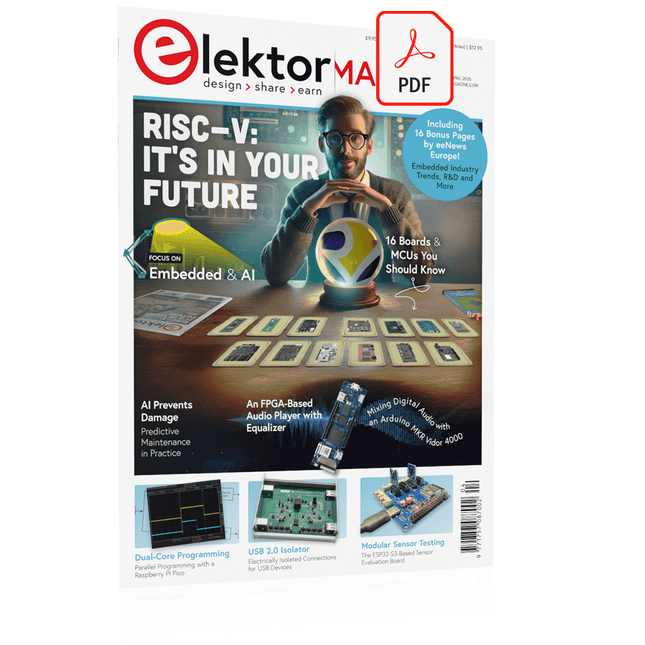
Diese Ausgabe steht allen GOLD- und GREEN-Mitgliedern auf der ElektorMagazine-Website zum Download bereit!
Sie sind noch kein Mitglied? Hier klicken!
MultiRF-EntwicklungsboardEine Plattform zur Evaluierung drahtloser Protokolle für kurze und lange Reichweiten
Elektor wird 65Elektronik im Wandel seit 1961
WLAN-basierte Personenerkennung mit dem ESP32Wenn der Router zum Bewegungsmelder wird
Drahtlose WaagenVier kleine Waagen = eine große Waage
Walter, das kompakte IoT-ModulESP32-S3-SoC, LTE-M/NB-IoT-5G-Modem und GNSS-Receiver
3- und 4-Draht-RTD-Sensoren konditionierenMit Vollbereichsabgleich und Kabelkompensation
Drei in einem: 2-Kanal-Oszilloskop/Generator/MultimeterEin Test des Fnirsi 2D15P
electronica Fast Forward 2026 für Start-ups und Industriepartner
EcologgingEine modulare IoT-Messstation für Umweltdaten
Drahtlos-Anbindung für MedizingeräteImmer am Puls mit Bluetooth LE
AudiotronicsBrummunterdrückung
Mehr Effizienz in der Landwirtschaft durch KI-Modelle und SensorenSteigerung der landwirtschaftlichen Produktivität
OPC UA – ein ÜberblickPlattformunabhängiger Datenaustausch
Redox-Meter
Instrumentenverstärker für Physik- und Engineering-Experimente
Aktive differentielle Audio-FilterFür professionelle Frequenzweichen und mehr
Elektor-Community-Tipps zu IoT und Sensoren
Telegram-gesteuerter WarmwasserbereiterEine Lösung mit ESP32 und Arduino-Software
2026: Eine KI-OdysseeWas wurde eigentlich aus der Fuzzy-Logik?
Projekt 2.0
Alarmsignalinjektor + PowerTools zum Suchen verdeckt verlegter Leitungen
Diese Ausgabe steht allen GOLD- und GREEN-Mitgliedern auf der ElektorMagazine-Website zum Download bereit!
Sie sind noch kein Mitglied? Hier klicken!
Stromquelle zum Testen von (Z-)DiodenPrüfen von Z-Dioden von 1 bis 54 V bei 1 bis 50 mA
ESD-Armband-TesterEin Tool zur Funktionsprüfung von Erdungsarmbändern
Transientenmesser für LabornetzteileEin reproduzierbarer Lastsprung-Generator für Labornetzteile
3D-Viewer für HTML-SeitenEinfach und fast ohne Code
LED-Blinkleuchte für Tore und mehr mit akustischem Alarm
Benötigen Sie Leiterplatten? Der Elektor-Leiterplattenservice ist für Sie da.
Zahnbürsten-TimerMit einem kleinen PIC
Ein berührungsloses magnetisches Kombinationsschlossmit dem AS5600-Drehpositionssensor
Rauscharmer, batteriebetriebener Vorverstärkerfür dynamische Mikrofone
Das Arduino Nano TestLabMessen, Steuern, Regeln
Rhythmische BassleuchteBetonen Sie den Rhythmus Ihrer Musik
Low-cut-FilterKein Risiko von Audio-Rückkopplungen in Ihrem System
Präziser 1-Hz-Rechteckwellengenerator für SteckbrettEine zuverlässige CMOS-basierte Taktquelle
555 auf den Kopf gestelltTastverhältnisse bis hinunter auf Null
Vom „Halfgeleidergids“ zu Circuit Specials65 Jahre Elektronik-Innovation
Galvanische TrennungCAN-Schnittstelle mit Digitalisolator und Powermodul
SpongillatorEin schwammbasierter Oszillator
Echter Zufallszahlengeneratormit integriertem Chi-Quadrat-Test
Euklidischer Sequencer ohne MikrocontrollerTrigger-Pattern und CV-Sequenzen mit einfacher CMOS-Logik
Programmieren mit TLScriptEine Skriptsprache zum Messen, Testen und Steuern
Schaltungsdesign: Tipps von Experten
RückkopplungWas ist das und warum ist sie wichtig?
Ein Board, endlose Ideen: Arduino UNO QVon Retro-Gaming zur Echtzeit-Umweltüberwachung
So bringen Sie eine Donut-Antenne in Ordnung
Standby-KillerEin echter Ein-/Ausschalter für den Fernseher
Akkus im TestAkkus vermessen mit dem Arduino Nano
Stromversorgung für Audio-EndstufenEin gutes Netzteil ohne Netzbrummen
Lochrasterplatinen für HFSchnelle Aufbauten mit DIY-Prototyping-Boards
T3-ÜberspannungsschutzEin Typ-3-Schutzmodul für empfindliche Geräte
IoT-Raumthermostat-Platinemit dem Xiao-MCU-Modul auf Basis des ESP32-C3/S3
Von starr zu smartFlexible und gedruckte Elektronik – zwischen Vision und industrieller Realität
ELEKTOR AIDE L'électronique dans des temps difficiles
AFFICHAGE D'INFORMATION POUR LA MAISON avec Windows sur le Raspberry Pi
DÉMARRER AVEC NODE-RED un outil de programmation open source basé sur des blocs visuels
LA tombola d'ÉTÉ d'ELEKTOR
GREATSCOTT ! CONSTRUIRE UN SYSTÈME D'ALARME LORA
REVUE : ALIMENTATION DE LABORATOIRE JOY-IT RD6006 (KIT)
REVUE : INTERFACEBOARD GREATFET ONE
QUI N'HONNE PAS LES PETITS – XXL de la boîte à suggestions d'Elektor
ANTENNE WIFI EXTERNE 2,4 GHZ POORLUIS
CONTRÔLE FACILE DE LA TEMPÉRATURE MARCHE/ARRÊT AVEC CHAPEAU RASPBERRY PI
COMMENT PRENDRE DE (BONNES) PHOTOS DÈS L'IMPRESSION... ...et les composants électroniques ?
REVUE : NOYAU I2CDRIVER
ÉCRAN TACTILE JOY-VIEW 13 DE JOY-IT
BOOSTER LED POUR MICROCONTRÔLEURS avec un seul composant !
MACHINE À LAVER À ULTRASONS EXPÉRIMENTALE
REVUE : GÉNÉRATEUR DE SIGNAUX JOY-IT JDS2915 générateur de signaux doubles avec compteur de fréquence dans un boîtier métallique
PROGRAMMATION DES FEUX DE SIGNALISATION EN LANGAGE PIC ASSEMBLY
LED CLIGNOTANT PERMANENT
CAPTEUR DE HALL EXPÉRIMENTAL
DÉTECTER LES COURT-CIRCUITS AVEC UN MILLIOHM OU ESR MÈTRE
KIT PRATIQUE ÉLECTRIQUE SDR
PIPELINE DE LABORATOIRES ÉLECTRIQUES
KICK-STARTER ÉLECTRIQUE ....eh bien, vous voyez ce que nous voulons dire.
AVEZ-VOUS VRAIMENT BESOIN DE TOUT ÇA ??? ici, je passe de nombreuses heures sur des projets électroniques...
LABORATOIRE EST OUEST MEILLEUR un aperçu du plus saint des saints, où naissent des projets intéressants
BONJOUR LE MONDE! NOUS SOMMES ELEKTOR ET NOUS SOMMES SOCIAUX
M4 + A7 + GPU : UNE ÉQUIPE DE RÊVE INÉGALE le nouveau SoC STM32MP1 pour les travaux plus lourds
CONFIGURATION DE TEST POUR LE 16F18877 ET AUTRES GRANDES PHOTOS
COMMUNICATION INTER-ΜC AVEC LE BUS SPI ET ATMEGA328P
SIX VARIANTES DE L'OSCILLATEUR LF/AF (et la capacité de M. Miller)
BBC MICRO:BIT oscilloscope absolument minimaliste avec affichage LED
FEU DE RUNNING À LED 'KNIGHT RIDER' AVEC ESP32
GÉNÉRATEUR DE SIGNAUX AM LW/MW AVEC ATTINY13
DIPMÈTRE ABSOLUMENT MINIMALISTE
SCOOTERS ÉLECTRIQUES BON MARCHÉ quelle est la qualité d'un scooter électrique « homologué » à 300 euros de Lidl ?
AIDE AU STATIONNEMENT À ULTRASONS AVEC ARDUINO UNO
PÉDALE DE DISTORSION AVEC AMPLI OP ET TUBES DE CHARGE SPATIALE
INDISPENSABLE POUR CHAQUE LABORATOIRE D'ÉLECTRONIQUE
HEXADOKU
IA POUR DÉBUTANTS (2) réseaux de neurones avec Linux et Python
The software simulation of gauges, control-knobs, meters and indicators which behave just like real hardware components on a PC’s screen is known as virtual instrumentation.
In this book, the Delphi program is used to create these mimics and PIC based external sensors are connected via a USB/RS232 converter communication link to a PC.
Detailed case studies in this Book include a virtual compass displayed on the PC’s screen, a virtual digital storage oscilloscope, virtual -50 to +125 degree C thermometer, and FFT sound analyser, a joystick mouse and many examples detailing virtual instrumentation Delphi components. Arizona’s embedded microcontrollers – the PIC's are used in the projects and include PIC16F84A, PIC16C71, DSPIC30F6012A, PIC16F877, PIC12F629 and the PIC16F887. Much use is made of Microchip’s 44 pin development board (a virtual instrument ‘engine)’, equipped with a PIC16F887 with an onboard potentiometer in conjunction with the PIC’s ADC to simulate the generation of a variable voltage from a sensor/transducer, a UART to enable PC RS232 communications and a bank of 8 LED's to monitor received data is also equipped with an ISP connector to which the ‘PICKIT 2’ programmer may easily be connected.
Full source code examples are provided both for several different PIC’s, both in assembler and C, together with the Pascal code for the Delphi programs which use different 3rd party Delphi virtual components.
Diese Ausgabe steht allen GOLD- und GREEN-Mitgliedern auf der ElektorMagazine-Website zum Download bereit!
Sie sind noch kein Mitglied? Hier klicken!
DIY-SolarakkusÜber den Selbstbau von Energiespeichern für Solaranlagen
Solarmodul-SimulatorFür Test und Optimierung von MPP-Trackern und Invertern
Der STM32-Edge-KI-WettbewerbEntdecken Sie den neuen STM32N6 und nehmen Sie am Wettbewerb um 5.000 € teil!
Erweiterung der BandlückeWarum gibt es so viel Interesse an SiC und GaN?
Power-Bank für NotebooksVerlängern Sie das Leben Ihres alten Laptops!
Medizinische RoboterÜberwindung technischer und regulatorischer Hürden
Frostwächter für ObstpflanzenMit Temperatur-Datenlogger
Das analoge DingDer Arduino des Analog-Computings?
Sparsames NetzrelaisMit über 90% Leistungsreduzierung
Verbesserung der DC-Last ET5410A+Keep cool and be quiet!
electronica 2024 im Rückblick
Elektromagnetische VerträglichkeitEMV kurz und bündig!
Aller Anfang......muss nicht schwer sein: Aktive Filter
Verlustleistung reduzieren mit AbleitkondensatorenEin cleverer Einsatz von kapazitiver Reaktanz
Preiswerter 12-Bit-Digital-Analog-Wandler MCP4725Mit EEPROM-Feature für sicheres Einschaltverhalten
Fnirsi LCR-ST1, die intelligente LCR-SMD-Pinzette
Test- und Messlabor mit Raspberry PiDas Wichtigste zuerst: Der ADC
Elektronischer LastwiderstandEin Projekt aus der Kiste
2025: Eine Odyssee in die KIEinige Projekte für das neue Jahr
Projekt-Update: Modulares DC-Leistungsmessgerät AmpVolt v2.0100 Ampere und mehr!
Projekt 2.0
Ethische Transparenz sichtbar gemachtErgebnisse der Umfrage 2024 von Ethics in Electronics
Elektor Audio-DSP FX-Prozessor-BoardTeil 2: Anwendungen erstellen
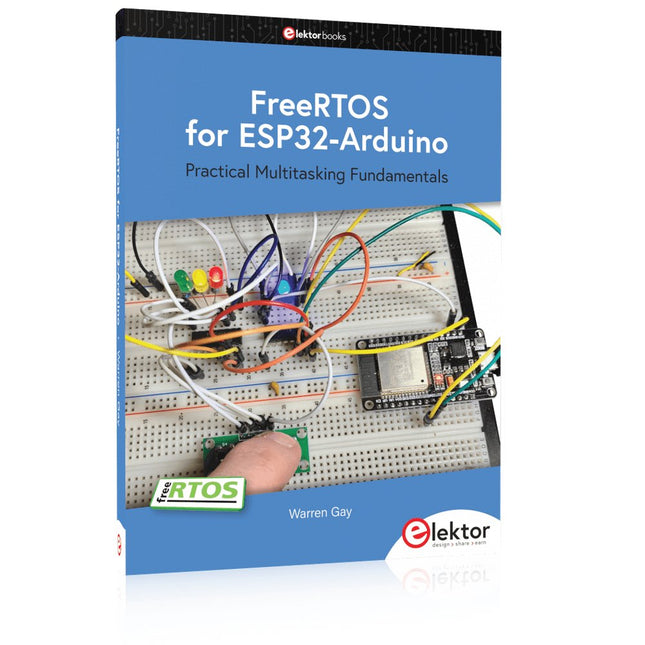
Practical Multitasking Fundamentals
Programming embedded systems is difficult because of resource constraints and limited debugging facilities. Why develop your own Real-Time Operating System (RTOS) as well as your application when the proven FreeRTOS software is freely available? Why not start with a validated foundation?
Every software developer knows that you must divide a difficult problem into smaller ones to conquer it. Using separate preemptive tasks and FreeRTOS communication mechanisms, a clean separation of functions is achieved within the entire application. This results in safe and maintainable designs.
Practicing engineers and students alike can use this book and the ESP32 Arduino environment to wade into FreeRTOS concepts at a comfortable pace. The well-organized text enables you to master each concept before starting the next chapter. Practical breadboard experiments and schematics are included to bring the lessons home. Experience is the best teacher.
Each chapter includes exercises to test your knowledge. The coverage of the FreeRTOS Application Programming Interface (API) is complete for the ESP32 Arduino environment. You can apply what you learn to other FreeRTOS environments, including Espressif’s ESP-IDF. The source code is available from GitHub. All of these resources put you in the driver’s seat when it is time to develop your next uber-cool ESP32 project.
What you will learn:
How preemptive scheduling works within FreeRTOS
The Arduino startup “loopTask”
Message queues
FreeRTOS timers and the IDLE task
The semaphore, mutex, and their differences
The mailbox and its application
Real-time task priorities and its effect
Interrupt interaction and use with FreeRTOS
Queue sets
Notifying tasks with events
Event groups
Critical sections
Task local storage
The gatekeeper task
Open-Source-Code mit Arduino IDE und PlatformIO
Autonomes Fahren: GPS, Accelerometer, Gyroskop
PS3-Controller
Mikrocontroller wie der Arduino und Einplatinenrechner wie der Raspberry Pi haben sich zu beliebten Komponenten entwickelt. Dritter im Bunde ist der ESP32 der Firma Espressif. Mikrocontroller dieser Baureihe zeichnen sich durch eine Vielzahl implementierter Funktionen aus, die bei einem Arduino konventioneller Prägung mit einem Atmel-AVR-Mikrocontroller erst mit weiterer Hardware möglich sind. Prominentes Beispiel sind hier die WiFi- und Bluetooth-Funktionalitäten. Gegenüber einem Raspberry Pi zeichnen sie sich durch einen deutlich geringeren Preis aus.
Allgemeine Informationen für die Realisierung eines Roboterauto-Projekts mit dem ESP32 sind leicht zu finden. Dabei handelt es sich aber oft nur um Ausführungen zu einem Teilaspekt, ohne inhaltliche oder funktionale Abstimmung. So ist nicht nur die Beschaffung der benötigten Informationen mühselig und zeitaufwändig, sie kann auch außerordentlich fehlerträchtig sein.
Ansatzpunkt dieses Buches ist, diese Lücke zu schließen. Es geht auf verschiedene Möglichkeiten eines Chassis ein, vermittelt nötige Kenntnisse und führt schrittweise von einer einfachen Motorsteuerung zu einem komplexen sensor- und sprachgesteuerten Roboterauto. Hacks rund um GPS und eine PlayStation 3 runden die Sache ab.
Inhalt
Bei der Reihenfolge der Kapitel wurde versucht – beginnend bei der Darstellung von grundlegenden Informationen – über die Lösung einfacher Aufgaben zu etwas anspruchsvolleren Techniken zu führen.
Der Mikrocontroller ESP32
Die Software erstellen
Die Stromversorgung
Rund um die Hardware
Das Chassis
Der Gleichstrommotor
Kabellose Steuerung über WiFi
Mit Sensoren Hindernisse erkennen
Eine eigene Roboterauto-App
Servo und Lichtsensor
GPS
Accelerometer / Gyroskop
PS3-Controller
Roboterauto-App
Hinweis zur Software
Die Dateien haben das Suffix (.cpp). Grund ist die Entwicklung mit PlatformIO. Mit Copy & Paste sollten sie auch in der Arduino-IDE verwendet werden können.
De mens is van nature uitgerust met sensoren voor geluid, licht, geur, smaak en gevoel. Zintuigen die met elektronica slechts ten dele gekopieerd kunnen worden. Met de Elektor sensorkit kunnen we wel aardig in de buurt komen.
Sensoren kunnen elektronica aansturen, maar ze kunnen ons ook van informatie voorzien. Daarom vormt niet alleen het meten van grootheden, maar ook het zichtbaar maken ervan via de Arduino seriële monitor een niet onbelangrijk deel van dit boek.
De microprocessor ATtiny85 die de Arduino-taal begrijpt, maakt het experimenteren met sensoren gemakkelijk en goedkoop. We zullen niet snel een Arduino-kaartje vast solderen in een permanente opstelling. Bij een achtpotige ATtiny zal dat geen schuldgevoel opleveren. Dat neemt niet weg dat alle sketches gewoon op elk Arduino-board draaien met mogelijk hier en daar een aanpassing van pennummers omdat die kunnen verschillen met reguliere Arduino-boards.
We zullen uitgebreid aandacht besteden aan het programmeren van de ATtiny. Veel schakelingen zijn bruikbaar in het natuurkundepracticum op school of voor bedrijfsmatige toepassingen. Maar de nadruk ligt toch wel op de (beginnende) elektronicahobbyist die zijn vrije tijd op een leuke maar vooral ook nuttige manier wil besteden. Want meer dan ooit tevoren heeft techniek de toekomst.
STmicroelectronics’ wireless IoT & wearable sensor development kit
‘SensorTile.box’ is a portable multi-sensor circuit board housed in a plastic box and developed by STMicroelectronics. It is equipped with a high-performance 32-bit ARM Cortex-M4 processor with DSP and FPU, and various sensor modules, such as accelerometer, gyroscope, temperature sensor, humidity sensor, atmospheric pressure sensor, microphone, and so on. SensorTile.box is ready to use with wireless IoT and Bluetooth connectivity that can easily be used with an iOS or Android compatible smartphone, regardless of the level of expertise of the users. SensorTile.box is shipped with a long-life battery and all the user has to do is connect the battery to the circuit to start using the box.
The SensorTile.box can be operated in three modes: Basic mode, Expert mode, and Pro mode. Basic mode is the easiest way of using the box since it is pre-loaded with demo apps and all the user has to do is choose the required apps and display or plot the measured data on a smartphone using an app called STE BLE Sensor. In Expert mode users can develop simple apps using a graphical wizard provided with the STE BLE Sensor. Pro mode is the most complex mode allowing users to develop programs and upload them to the SensorTile.box.
This book is an introduction to the SensorTile.box and includes the following:
Brief specifications of the SensorTile.box; description of how to install the STE BLE Sensor app on an iOS or Android compatible smartphone required to communicate with the box.
Operation of the SensorTile.box in Basic mode is described in detail by going through all of the pre-loaded demo apps, explaining how to run these apps through a smartphone.
An introduction to the Expert mode with many example apps developed and explained in detail enabling users to develop their own apps in this mode. Again, the STE BLE Sensor app is used on the smartphone to communicate with the SensorTile.box and to run the developed apps.
The book then describes in detail how to upload the sensor data to the cloud. This is an important topic since it allows the sensor measurements to be accessed from anywhere with an Internet connection, at any time.
Finally, Pro mode is described in detail where more experienced people can use the SensorTile.box to develop, debug, and test their own apps using the STM32 open development environment (STM32 ODE). The Chapter explains how to upload the developed firmware to the SensorTile.box using several methods. Additionally, the installation and use of the Unicleo-GUI package is described with reference to the SensorTile.box. This PC software package enables all of the SensorTile.box sensor measurements to be displayed or plotted in real time on the PC.
Elektor GREEN and GOLD members can download their digital edition here.
Not a member yet? Click here.
The RISC-V Open-Source Processor Architecture16 Boards and MCUs You Should Know
An FPGA-Based Audio Player with Equalizer (1)Mixing Digital Audio with an Arduino MKR Vidor 4000
Laser Head for Pico-Based Sand ClockDrawing with Light
Enter the STM32 Edge AI Contest
A Multi-Sensor Environmental Monitoring System for PlantsWireless Measurement of Water Supply and Light Conditions
Maixduino AI-Powered Automatic DoormanFace Detection with a Camera
Embedded Electronics 2024AI Is Set to Redefine the Industry
Charge-Based In-Memory Compute at EnCharge AI
AI Inferencing at 10 Times Lower Power and 20 Fold Lower Cost
Click Board Helps Develop and Train ML Models for Vibration Analysis
The Elektor Mini-WheelieA Self-Balancing Robot Kit
MCU, I See YouMCUViewer Open-Source Multiplatform Debugging Tool
USB 2.0 IsolatorElectrically Isolated Connections for USB Devices
Intervention Before DamagePredictive Maintenance in Practice
SPoE – Electromagnetic CompatibilitySingle-Pair with Power-Over-Ethernet Through the Eyes of EMC
Color TV: A Wonder of Its TimeCreating a New World
ECG Graph MonitoringAn Implementation with Hexabitz Modules and an STM32CubeMonitor
The Battle for AI at the Edge
HaLow Hits Record 16-km Wi-Fi Distance at 900 MHz
First CHERI RISC-V Embedded Chip and Early Access Programme
Third-Generation Wildfire Detection Uses Satellite Links
From Life’s ExperienceChoice Overload
Starting Out in Electronics……Continues Filtering and Controls Tone
Quasi-Analog ClockworkA Remake of an Elektor Classic
A Modular Approach to Sensor TestingThe ESP32-S3-Based Sensor Evaluation Board
2025: An AI OdysseyThe Rise of Foundation Models and Their Role in Democratizing AI
Raspberry Pi Standalone MIDI Synthesizer (1)Preparing a Platform for Some Edge AI Experiments
Err-lectronicsCorrections, Updates, and Readers’ Letters
Universal AI RISC-V Processor Does It All — CPU, GPU, DSP, FPGA
CEO Interview: Ventiva’s Thin and Cool Tech
Dual-Core Programming with a Raspberry Pi PicoVenture Into the World of Parallel Programming
The XIAO ESP32-C3 board combines the ultra-compact form factor of the XIAO series with the full capabilities of the ESP32-C3 chip, including integrated Wi-Fi and Bluetooth 5.0. This book is a comprehensive, hands-on guide to getting the most out of this powerful yet affordable development board.
The author takes readers from the fundamentals to advanced projects. Starting with LED blinking and dimming, the book progresses to ADC and PWM for precise sensor interfacing and PWM-controlled lighting effects before moving on to building practical, real-world applications, including:
A Wi-Fi weather station with an OLED display and real-time online weather data
An ultrasonic parking assistant with audible feedback
A refrigerator monitoring probe with climate sensing and Deep Sleep for years of battery operation
A retro Pong game controlled by a touch-free sensor
A microphone-based party app that responds to claps
And much more: lighting control, reaction-time measurement, mains frequency analysis, soil moisture sensing, ambient LED lighting, and 7-segment displays