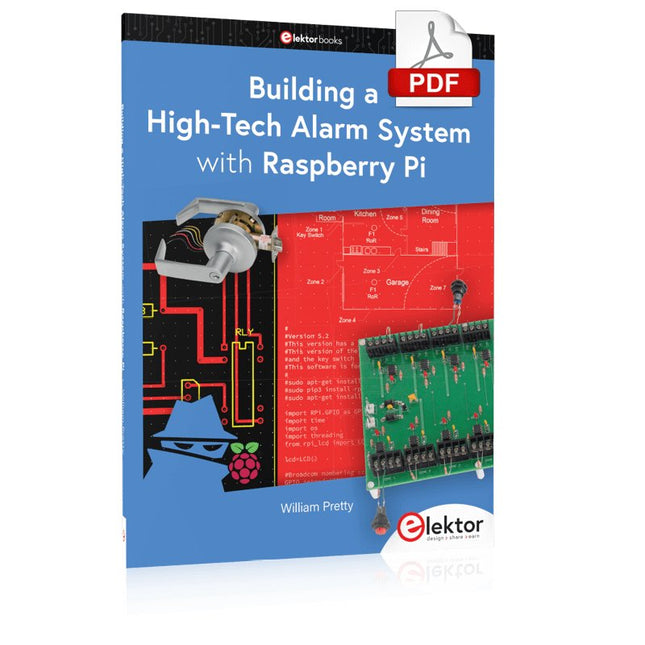
This book discusses the basic components of any alarm system.
All alarm systems have two basic functions. First, they monitor their environment looking for a change such as a door or window opening or someone moving about in the room. Second, they alert the legal owner or user to this change. The system described in this book uses a scanning type software to detect intruders. It behaves like a guard dog, pacing up and down the fence line on the lookout for either an intruder or a familiar person. If you have an alarm key, you can disarm the system and enter.
With the scanning method, the software is easy to write and explain. It can scan eight alarm zones plus two special fire zones in about one second.
You don’t have to be an electrical engineer to install an alarm system, just a decent carpenter, painter, and plasterer! Because this alarm system runs on 12 volts, you don’t have to be a licensed electrician either to install it. The alarm system presented here uses Python software on the Raspberry Pi combined with some elementary electronic circuits. The code described in the book, as well as CAD files and a bill of materials for the alarm panel, are available for free downloading. The book provides the reader with examples of typical configurations coming straight from the author‘s experience. After reviewing the hardware components typically used in common alarm systems, the author shows how to plan one yourself.
To implement a modular alarm, no matter if it is for a single house or for a business or restaurant, the book shows how to skillfully combine a Raspberry Pi with small auxiliary electronic circuits. These are not installation instructions but food for thought that will enable readers to find a solution to their needs.
This clear acrylic case is the official case for the HackRF One/Pro board. It can replace the standard black plastic case of the HackRF One/Pro.
Assembly Instructions
Use a guitar pick or spudger to extract the HackRF One/Pro circuit board from the black plastic case.
Insert one long screw into each corner of the bottom acrylic panel. Secure each long screw with a short (5 mm) spacer on the opposite side of the panel.
Place the HackRF One/Pro circuit board (facing up) on top of the bottom panel, fitting the ends of the long screws through the corner mounting holes of the circuit board.
Secure the circuit board with one long (6 mm) spacer in each corner.
Place the top acrylic panel on top of the circuit board, aligning the cutouts with the circuit board’s expansion headers.
Secure each corner with a short screw.
Note: Do not overtighten! Hand-tighten only at every step.
High-Performance LoRa Communication Device
The Elecrow ThinkNode M5 is a compact, portable LoRa communication device designed for off-grid messaging, location sharing, and outdoor use. Powered by an ESP32-S3 processor and an SX1262 LoRa chip, it comes pre-installed with Meshtastic firmware and can be configured conveniently via Bluetooth using the official Meshtastic app.
The integrated multi-GNSS module supports GPS, GLONASS, BeiDou, and QZSS for reliable positioning and location sharing. Messages and device information are displayed on the energy-efficient 1.54-inch e-paper screen, while the built-in 1,200 mAh rechargeable battery enables extended mobile operation.
With its integrated LoRa antenna, compact housing, RTC, and support for both Meshtastic and MeshCore firmware, the ThinkNode M5 is a practical communication solution for hiking, camping, remote locations, and emergency situations where conventional mobile networks are unavailable.
Features
LoRa communication
Multi-GNSS positioning
1,200 mAh rechargeable battery
1.54-inch e-paper display
Built-in RTC
Compatible with MeshCore
Compatible with Meshtastic
Specifications
Main Processor (ESP32-S3)
CPU/SoC
Xtensa 32-bit LX7 dual-core processor, clocked at up to 240 MHz
System Memory
512 KB SRAM, 8 MB PSRAM
Storage
4 MB Flash, 384 KB ROM
Firmware
Meshtastic firmware is fully compatible, and the signal is transmitted in LoRa mode
EPD (Electronic Paper Display)
Display Size
1.54 inch EPD (monochrome Ink screen)
Display Materials
E-lnk (Electronic Ink)
Resolution
200 x 200
Driver Chip
SSD1681 (via SPI or I²C interface)
Global Fresh Time
2s
Wireless Communication
Bluetooth
Bluetooth Low Energy and Bluetooth 5.0 (phone configuration)
LoRa
SX1262 LoRa Module, EU 868 MHz(external antenna)
Hardware
Interfaces
USB-C, RP-SMA
Function
GPS Location (GPS, GLONASS, BeiDou, QZSS), EPD Display, RTC, USB 2.0, PMU power management (built-in 1200 mAh lithium battery), buzzer, etc.
Button
Knob Switch, Function Button, Page Turn Button, GPS Switch, Reset Button
LED Indicator
Power supply, GPS/LoRa indication
Others
Power Input
5 V/1 A, supports USB or lithium battery power supply
Power consumption
The maximum working current is about 340 mA (CPU + LoRa module), and the low power consumption is about 34 uA
Operating Temperature
-10~50°C
Storage Temperature
-20~60°C
Relative humidity
10-95%, @ 40°C (non-condensing)
Enclosure
ABS Plastic
Dimensions
82 x 51.6 x 26.3 mm
Weight
81 g
Included
1x Elecrow ThinkNode M5
1x LoRa antenna
1x USB-C cable
1x Manual
Downloads
Manual
Die Programmiersprache „Python“ hat in den letzten Jahren einen enormen Aufschwung erlebt. Nicht zuletzt haben verschiedene Einplatinensysteme wie der Raspberry Pi zu deren Bekanntheitsgrad beigetragen. Aber auch in anderen Gebieten, wie der Künstlichen Intelligenz oder dem Machine Learning, hat Python weite Verbreitung gefunden. Es ist daher naheliegend, Python bzw. die Variante „MicroPython“ auch für den Einsatz in SoCs (Systems on Chip) zu verwenden.
Leistungsfähige Controller wie der ESP32 der Firma Espressif Systems bieten eine hervorragende Performance sowie Wi-Fi- und Bluetooth-Funktionalität zu einem günstigen Preis. Mit diesen Eigenschaften wurde die Maker-Szene im Sturm erobert. Im Vergleich zu anderen Controllern weist der ESP32 einen deutlich größeren Flash und SRAM-Speicher, sowie eine wesentlich höhere CPU-Geschwindigkeit auf. Aufgrund dieser Leistungsmerkmale eignet sich der Chip nicht nur für klassische C-Anwendungen, sondern insbesondere auch für die Programmierung mit MicroPython.
Das vorliegende Buch führt in die Anwendung der modernen Ein-Chip-Systeme ein. Neben den technischen Hintergründen steht vor allem MicroPython selbst im Vordergrund. Nach der Einführung in die Sprache werden die erlernten Programmierkenntnisse umgehend in die Praxis umgesetzt. Die einzelnen Projekte sind sowohl für den Einsatz im Labor als auch für Alltagsanwendungen geeignet. Neben dem eigentlichen Lerneffekt steht also auch die Freude am Aufbau kompletter und nützlicher Geräte im Vordergrund. Durch die Verwendung von Laborsteckboards können Schaltungen aller Art mit geringem Aufwand realisiert werden, sodass das Austesten der selbstgebauten Geräte zum lehrreichen Vergnügen wird.
Durch die verschiedenen Anwendungen wie Wetterstationen, Digitalvoltmeter, Ultraschall-Entfernungsmesser, RFID-Kartenleser oder Funktionsgeneratoren sind die vorgestellten Projekte auch für Praktika oder Fach- und Studienarbeiten in den Naturwissenschaften bzw. im Natur- und Technikunterricht bestens geeignet.
Programming and Projects for the Minima and WiFi
Based on the low-cost 8-bit ATmega328P processor, the Arduino Uno R3 board is likely to score as the most popular Arduino family member, and this workhorse has been with us for many years. Eleven years later, the long-overdue successor, the Arduino Uno R4, was released. It is built around a 48 MHz, 32-bit Arm Cortex-M4 microcontroller and provides significantly expanded SRAM and Flash memory. Additionally, a higher-precision ADC and a new DAC are added to the design. The Uno R4 board also supports the CAN Bus with an interface.
Two versions of the board are available: Uno R4 Minima, and Uno R4 WiFi. This book is about using these new boards to develop many different and interesting projects with just a handful of parts and external modules. All projects described in the book have been fully tested on the Uno R4 Minima or the Uno R4 WiFi board, as appropriate.
The project topics include the reading, control, and driving of many components and modules in the kit as well as on the relevant Uno R4 board, including
LEDs
7-segment displays (using timer interrupts)
LCDs
Sensors
RFID Reader
4x4 Keypad
Real-time clock (RTC)
Joystick
8×8 LED matrix
Motors
DAC (Digital-to-analog converter)
LED matrix
WiFi connectivity
Serial UART
CAN bus
Infrared controller and receiver
Simulators
… all in creative and educational ways with the project operation and associated software explained in great detail.
Pfiffige Lösungen mit Arduino Pro Mini und ATmega328-Boards
Mit einem einfachen Arduino Pro Mini Board und ein paar weiteren Bauteilen lassen sich heute für wenig Geld Projekte realisieren, die vor 20 oder 30 Jahren noch undenkbar waren oder ein kleines Vermögen gekostet hätten. Von einfachen LED-Effekten bis zur Ladestation – die den Akku auf Herz und Nieren prüft – ist in diesem Buch vieles dabei.
Als Mikrocontroller dient bei allen beschriebenen Projekten der ATmega328, der mit seinen 20 Ein- und Ausgangsleitungen unzählige Möglichkeiten zum Messen, Schalten und Steuern bietet. Mit einem 7-Segment-Display und ein paar Widerständen lässt sich daraus z. B. ein Voltmeter bauen oder mittels NTC ein Thermometer. Die Arduino-Plattform bietet dabei die perfekte Entwicklungsumgebung zum Programmieren der Boards.
Neben den ganz konkreten Projekten soll das Buch aber auch das nötige Wissen vermitteln, um eigene Ideen zu realisieren. Wie misst man was? Welches ist der geeignete Transistor, um verschiedene Verbraucher zu schalten? Wann ist man mit einem IC besser bedient, oder wie schaltet man Netzspannung? Auch batteriebetriebene Projekte mit LilyPad sind ausführlich thematisiert. Ebenso vielerlei Motoren, vom einfachen Gleichstrommotor bis zum Schrittmotor.
Sensoren sind ein weiteres spannendes Thema. Nur zwei Beispiele: Mit einem winzigen Bauteil lässt sich tatsächlich messen, dass der Luftdruck am Fußboden höher ist als auf Tischhöhe. Mit einem simplen Infrarot-Empfänger kann man ausgedienten Fernbedienungen ein zweites Leben schenken und die Wohnung damit steuern.
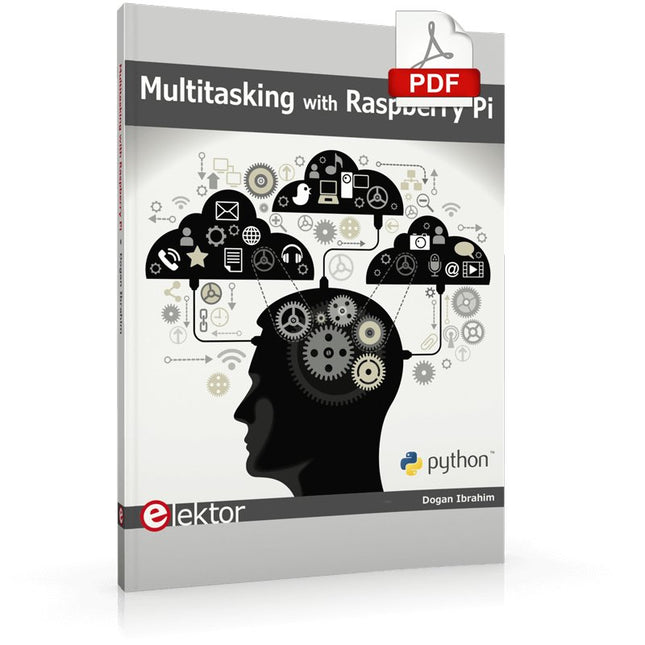
Multitasking and multiprocessing have become a very important topic in microcontroller-based systems, namely in complex commercial, domestic, and industrial automation applications. As the complexity of projects grows, more functionalities are demanded from the projects. Such projects require the use of multiple inter-related tasks running on the same system and sharing the available resources, such as the CPU, memory, and input-output ports. As a result of this, the importance of multitasking operations in microcontroller-based applications has grown steadily over the last few years. Many complex automation projects now make use of some form of a multitasking kernel.
This book is project-based and its main aim is to teach the basic features of multitasking using the Python 3 programming language on Raspberry Pi. Many fully tested projects are provided in the book using the multitasking modules of Python. Each project is described fully and in detail. Complete program listings are given for each project. Readers should be able to use the projects as they are, or modify them to suit their own needs.
The following Python multitasking modules have been described and used in the projects:
Fork
Thread
Threading
Subprocess
Multiprocessing
The book includes simple multitasking projects such as independently controlling multiple LEDs, to more complex multitasking projects such as on/off temperature control, traffic lights control, 2-digit, and 4-digit 7-segment LED event counter, reaction timer, stepper motor control, keypad based projects, car park controller, and many more. The fundamental multitasking concepts such as process synchronization, process communication, and memory sharing techniques have been described in projects concerning event flags, queues, semaphores, values, and so on.
High-quality soldering station with the most important tools and consumables, ideal for universal soldering applications.
Features
1-Channel Power Unit, digital, 70 W
Power unit, 1 channel with soldering iron WEP 70 and safety rest PH 70
70W solder iron with ergonomic handle and providing toolless tip change
ESD safe station, iron and heat-resistant silicon cable for safe handling
Using ET soldering tips
Standby mode and auto setback conserves energy, protects equipment
Password-protected to preserve settings
Specifications
Dimensions: 150 x 120 x 98 mm
Weight: 1.4 kg
Display: Digital LC Display
Temperature range: Adjustable from 100°C - 450°C (200°F - 850°F)
Voltage: 230 V
Channels: 1
Temperature range (depends on tool) °C: 100-450
Temperature range (depends on tool) °F: 200-850
Temperature accuracy °C: Average tip temperature can be „offset“ to +/- 5°C at idle with no load
Temperature accuracy °F: Average tip temperature can be „offset“ to +/- 9°F at idle with no load
Temperature stability °C: ±6
Temperature stability °F: ±10
Heat-up time (ca) in seconds (50-350°C / 120-660°F): 28 sec.
Heating output: 85 W
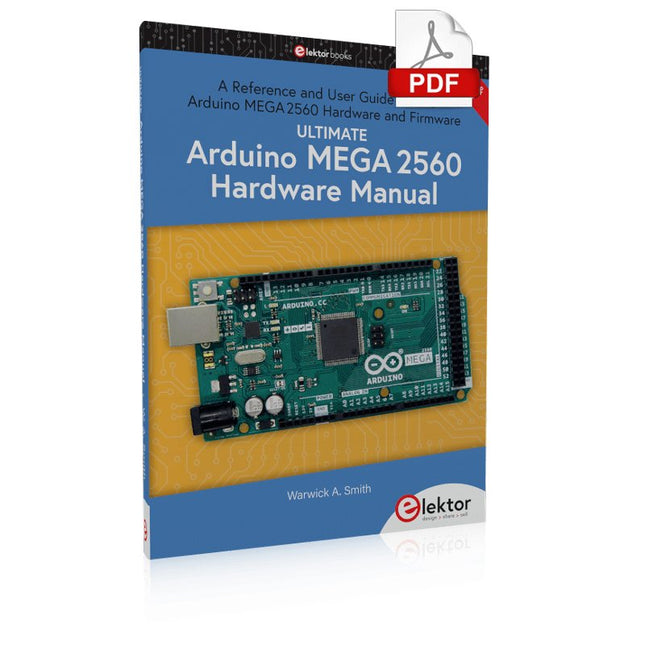
A Reference and User Guide for the Arduino Mega 2560 Hardware and Firmware
A manual providing up-to-date hardware information for the Arduino Mega 2560.
The Arduino Mega 2560 is an upgrade to the popular Arduino Uno board, providing more pins, serial ports and memory. Arduino is the easy to use open-source electronics platform used by hobbyists, makers, hackers, experimenters, educators and professionals.
Get all the information that you need on the hardware and firmware found on Arduino Mega 2560 boards in this handy reference and user guide. Ideal for the workbench or desktop. This manual covers the Arduino Mega 2560 hardware and firmware, and is a companion volume to the Ultimate Arduino Uno Hardware Manual, which covers the Arduino Uno hardware and firmware.
Contains all of the Arduino Mega 2560 hardware information in one place
Covers Arduino / Genuino Mega 2560 revision 3 and earlier boards
Easily find hardware technical specifications with explanations
Pin reference chapter with interfacing examples
Diagrams and illustrations for easy reference to pin functions and hardware connections
Learn to back up and restore firmware on the board, or load new firmware
Basic fault finding and repair procedures for Arduino Mega 2560 boards
Power supply circuits simplified and explained
Mechanical dimensions split into five easy to reference diagrams
Contains circuit diagrams, parts list and board layout to easily locate components
A chapter on shield compatibility explains how shields work across different Arduino boards
electronica fast forward Start- & Scale-Up Awardsde voorbereidingen gaan steeds sneller!
Bluetooth Low Energy met ESP32-C3 en ESP32het hoeft niet altijd WiFi te zijn!
Bluetooth LE-snifferhack een makerdiary nRF52840 MDK USB-dongle
Magische RGB LED-kubushardware ontwerpen rond een RP2040 Auto-aan/uit voor soldeerpasta-compressor
Elektor video-productieslivestreams, webinars en cursussen voor engineers en pro-makers
Elektrificeer je fietsmet een e-bike ombouwset
Alle begin......vermenigvuldigt spanningen
Uit het leven gegrepennevenactiviteiten
Teensy 4.0 – waarom is dat board zo snel?snelheid is geen hekserij!
Simulatie van een audio-eindversterker met TINAeerst uitproberen, dan bouwen
Ontwikkel en beheer je eigen LoRaWAN IoT-nodesvoorbeeldhoofdstuk: Dragino LHT65, LDS01 en LDS02 LoRaWAN modules
Project 2.0correcties, updates en brieven van lezers
5G – alleen voor mijvolledige controle over 5G-implementaties met een eigen cellulair netwerk Elektor Infographics
Tips voor het ontwikkelen van een WiFi-interfacetoepassingen uitrusten met WiFi-interfaces Rijntoren-klok Mk 2
Audio-spectrumanalyzer met dekatronsnieuw leven voor vintage-buisjes
Data naar Telegram sturenmet een ESP32 en een paar onderdelen
Een Fliege-notchfilter voor audiometingenmeet beter met een notchfilter
Veranderende industriële communicatieSingle Pair Ethernet – meer dan zo maar een nieuwe connector
Elektronische mannetjes-PUT-terzo werkt de programmeerbare unijunctie-transistor
Rond touchscreen voor Raspberry PiHyperPixel 2.1 Round van Pimoroni
Remote sensing met detectie van verbindingsverliesmet nRF24L01+ modules
Digitale FM-ontvanger met Arduino en TEA5767stem af met een Arduino Nano OLED-interface ombouwen van SPI naar I²C
Oost West Lab Besteen hobby gaat niet met pensioen...
Tien jaar ethiek in elektronicaTessel Renzenbrink over de digitale samenleving en meer
HexadokuThe Original Elektorized Sudok
Elektor GREEN en GOLD leden kunnen deze uitgave hier downloaden.
Nog geen lid? Klik hier om een lidmaatschap af te sluiten.
De ESP-BLASTEen mini ESP32 raketdrone die ruim 100 km/u vliegt
STM32Cube Innovation-ChallengeDoe mee met je beste STM32C5-ontwerp
Wireless workshop (1)Radiomodules uitgelegd: 433 MHz CC1101 sub-GHz-transceiver
AM-zenderMet sinus- en blokgolfgenerator op Raspberry Pi Pico
AudiotronicaDe vervormingsfactor
CoffeeCallerOmroepsysteem met mesh-netwerk en Zephyr gebaseerde software
Elektor wordt 65Projecten uit voorgaande september- en oktobermaanden
Bluetooth Channel Sounding voor het volgen van objectenAfstandsmeting met centimeterprecisie voor het IoT van de volgende generatie
2026: Een AI-odysseeKwantumcomputing is geen volgende GPU
Om de cloud te beveiligen, is edge-beveiliging nodig
Eerste ervaringen met de HackRF ProPraktische tests met de nieuwe SDR-hardware
Modemupgrade van GPRS/2G naar LTE/4GEen draadloos alarmsysteem als voorbeeld
Lusvormige antenne met RF-bouwstenenDeel 1: Een zelfbouw kortegolfantenne met instelbare richtingsgevoeligheid
Internetradio naar AM-converterMet een ESP32-S3 als zender
Err-lectronics
Mioty, een overzichtFraunhofer's aanpak van LPWAN
WerkbankwijsheidPraktische tips van experts
Walter, de compacte IoT-moduleDeel 2: Toegang tot weer- en datadiensten
High-quality soldering with the most important tools and consumables, ideal for universal soldering applications.
Features
Power unit, 1 channel
1-channel Soldering Station digital 90 W (95 W)
WTP 90: The soldering iron for universal use with power response tips. Tip family XNT & THM (high mass tips)
Lock function
Specifications
Dimensions W x D x H (mm): 149 x 138 x 101
Dimensions W x D x H (inch): 5.87 x 5.43 x 3.98
Weight (ca) in kg: 1.9
Channels: 1
Voltage: 230 V, 50/60 Hz
Heating output: 90 W (95 W)
Temperature accuracy °C: ±9
Display: Backlit LCD
Temperature range: Adjustable from 50°C - 450°C (150°F - 850°C)Adjustable temperature range varies among tools
Temperature stability °C: ±2
Temperature accuracy °F: ±17
Temperature stability °F: ±4
Temperature range (depends on tool) °C: 100-450
Temperature range (depends on tool) °F: 150-850
Equipotential balance: yes
Fuse: 0,5 A
WT compatible: yes
ESD-safe: yes
Power cord: EMEA