
Search results for "raspberry or pi or monitor or white or red"
-

Elektor Digital ESP32 steuert Roboterauto (PDF)
Open-Source-Code mit Arduino IDE und PlatformIO Autonomes Fahren: GPS, Accelerometer, Gyroskop PS3-Controller Mikrocontroller wie der Arduino und Einplatinenrechner wie der Raspberry Pi haben sich zu beliebten Komponenten entwickelt. Dritter im Bunde ist der ESP32 der Firma Espressif. Mikrocontroller dieser Baureihe zeichnen sich durch eine Vielzahl implementierter Funktionen aus, die bei einem Arduino konventioneller Prägung mit einem Atmel-AVR-Mikrocontroller erst mit weiterer Hardware möglich sind. Prominentes Beispiel sind hier die WiFi- und Bluetooth-Funktionalitäten. Gegenüber einem Raspberry Pi zeichnen sie sich durch einen deutlich geringeren Preis aus. Allgemeine Informationen für die Realisierung eines Roboterauto-Projekts mit dem ESP32 sind leicht zu finden. Dabei handelt es sich aber oft nur um Ausführungen zu einem Teilaspekt, ohne inhaltliche oder funktionale Abstimmung. So ist nicht nur die Beschaffung der benötigten Informationen mühselig und zeitaufwändig, sie kann auch außerordentlich fehlerträchtig sein. Ansatzpunkt dieses Buches ist, diese Lücke zu schließen. Es geht auf verschiedene Möglichkeiten eines Chassis ein, vermittelt nötige Kenntnisse und führt schrittweise von einer einfachen Motorsteuerung zu einem komplexen sensor- und sprachgesteuerten Roboterauto. Hacks rund um GPS und eine PlayStation 3 runden die Sache ab. Inhalt Bei der Reihenfolge der Kapitel wurde versucht – beginnend bei der Darstellung von grundlegenden Informationen – über die Lösung einfacher Aufgaben zu etwas anspruchsvolleren Techniken zu führen. Der Mikrocontroller ESP32 Die Software erstellen Die Stromversorgung Rund um die Hardware Das Chassis Der Gleichstrommotor Kabellose Steuerung über WiFi Mit Sensoren Hindernisse erkennen Eine eigene Roboterauto-App Servo und Lichtsensor GPS Accelerometer / Gyroskop PS3-Controller Roboterauto-App Hinweis zur Software Die Dateien haben das Suffix (.cpp). Grund ist die Entwicklung mit PlatformIO. Mit Copy & Paste sollten sie auch in der Arduino-IDE verwendet werden können.
€ 32,80
Members: € 29,52
-

Elektor Digital Elektor November/December 2023 PDF (NL)
Elektor GREEN en GOLD leden kunnen deze uitgave hier downloaden.Nog geen lid? Klik hier om een lidmaatschap af te sluiten. De Raspberry Pi 5veel beter dan zijn voorganger AI in het elektronicalabontwerpen, componenten zoeken en programmeren Arduino Nano-golfvormgeneratorNano + code = functiegenerator Kerstslinger op zonne-energiemilieuvriendelijke oplossing voor op het balkon USB-killer-detectorvoorkomen is beter Een eenvoudige behuizing CNC’enmet Autodesk Fusion 360 voor persoonlijk gebruik Printen in geringe aantallen producerenmet en zonder assemblage IoT-simulatie vereenvoudigd met Wokwiontwikkelaar Uri Shaked over ontwerp, software en meer Een gids voor puristisch programmeren (deel 3)CMSIS-headers, automatisch testen en een webserver LoRa, een Zwitsers zakmesdeel 2: de hard- en software MEMS-microfoonontwerp en constructie Eerst proberen, dan solderengratis simulatie- en 3D-ontwerptools Nieuwe tools van Microchip!PICkit 5 en MPLAB ICD 5 nu verkrijgbaar! Snelle prototypen van flexibele, rekbare elektronicahoe de Voltera NOVA innovatie bij wearables versnelt Galvanische isolatiefototransistor-optocouplers succesvol gebruiken De complexe of de Anybus-oplossing?embedded industrieel ethernet in twee dagen in plaats van maanden De essentiële DFM-checklistontwerpen voor productie – hoe doe je dat? Filamenten voor 3D-printensoorten, kenmerken en gebruik bij prototyping Specialisten voor effectieve signaalanalyse van de ELF- tot de EHF-bandde nieuwste real-time SPECTRAN® V6 serie spectrumanalyzers van Aaronia Uitdagingen van DFM-analyse voor flex- en rigid-flex-ontwerpen Een SMT-productielijn installeren Elektor infographicsprototyping en productie Een revolutie voor de industriede opkomst van autonome mobiele robots Gemaakt voor groteuitdagingenRohde & Schwarz voegt achtkanaals R&S MXO 5 toe aan volgende generatie oscilloscopen Alle begin......versterkt verschillen Mini-reflowplaatvoor assemblage of reparatie van kleine SMD-schakelingen Begin niet met een prototype – begin met een pretotype!kijk of er wel een markt is voor je product voordat je de soldeerbout warmstookt 2023: een AI-odysseehulp bij het ontwerp van een tastbaar project Brussel innoveertsteun voor deep tech
€ 9,95
-
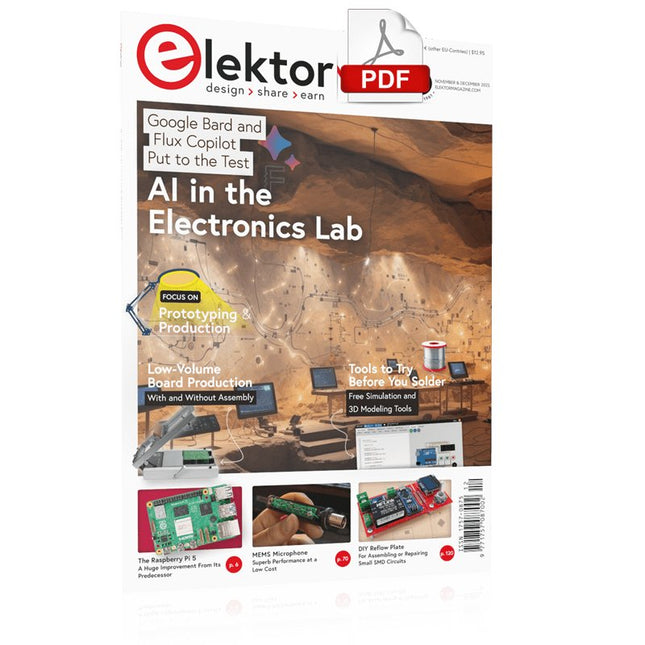
Elektor Digital Elektor November/December 2023 (PDF)
Elektor GREEN and GOLD members can download their digital edition here. Not a member yet? Click here. The Raspberry Pi 5A Huge Improvement From Its Predecessor AI in the Electronics LabGoogle Bard and Flux Copilot Put to the Test Arduino Nano Waveform GeneratorNano + Code = Function Generator Solar-Powered Christmas GarlandAn Eco-Friendly Solution for Garnishing Your Balcony USB Killer DetectorBetter Safe Than Sorry A Simple CNCed EnclosureWith Autodesk Fusion 360 for Personal Use Low-Volume Board ProductionWith and without Assembly IoT Simulation Simplified with WokwiDeveloper Uri Shaked on Design, Software, and More A Bare-Metal Programming Guide (Part 3)CMSIS Headers, Automatic Testing, and a Web Server LoRa, a Swiss Army Knife (2)The Hardware and Software MEMS Microphone Design and Construction Tools to Try Before You SolderSimulation and 3D Modeling Tools That Can Be Used for Free New Tools From Microchip!PICkit 5 and MPLAB ICD 5 Available Now! Rapid Prototyping of Flexible, Stretchable ElectronicsHow the Voltera NOVA Speeds Up Innovation in Wearable Electronic Systems Galvanic IsolationUsing Phototransistor Optocouplers Successfully The Complex Solution or the Anybus Solution?Embedded Industrial Ethernet in 2 Days Rather Than Many Months Your Essential DFM ChecklistHow to Start Designing for Manufacture 3D Printing FilamentsTypes, Features and Use in Prototyping Specialists for Effective Signal Analysis from ELF to EHF BandAaronia’s latest real-time SPECTRAN® V6 series spectrum analyzers Challenges of DFM Analysis for Flex and Rigid-Flex Design Setting Up an SMT Line The Right Combination for a Reliable Assembly Revolutionizing IndustriesThe Rise of Autonomous Mobile Robots (AMRs) Evolved for More ChallengesRohde & Schwarz Adds Eight-Channel R&S MXO 5 to Next-Generation Oscilloscopes Starting Out in Electronics……Amplifying Differences Mini Reflow PlateFor Assembling or Repairing Small SMD Circuits Don’t Start with a Prototype – Start with a Pretotype!Check That a Market Exists for Your Product Before Warming Your Soldering Iron 2023: An AI OdysseyGetting Help Designing a Physical Project Brussels Is InnovatingSupport for Deep Tech
€ 7,50
-

Elektor Digital Smart-Home- und IoT-Technik für den Arduino (PDF)
Smart-Home-Systeme selber bauen Smart Home- und IoT-Technik für den Arduino bietet eine Fülle von Praxisprojekten, die mit einem einzigen Kit aufgebaut werden können. Das "SunFounder Smart Home Internet of Things Kit V2.0 for Arduino" enthält über 30 Komponenten, Bauelemente und Module aus allen Bereichen der modernen Elektronik. Damit lassen sich eine Fülle von Projekten realisieren. Für den Einsteiger werden zunächst einige einfachere Einsteigerexperimente vorgestellt. Der fortgeschrittenere Anwender kann sich dagegen gleich an die komplexeren Themen heranwagen. Neben präzisen digitalen Thermometern, Hygrometern, Belichtungsmessern und verschiedenen Alarmanlagen entstehen auch praktisch einsetzbare Geräte und Anwendungen wie etwa eine vollautomatische Beleuchtungssteuerung ein digitales Thermostat eine multifunktionale Klimamessstation Zudem wird detailliert erklärt, wie Messdaten in das Internet übertragen werden. Dort sind sie grafisch darstellbar und können weltweit abgerufen werden. Auch auf die damit verbundenen Gefahren und die Problematik des Datenschutzes wird eingegangen. Die vorgestellten Praxisprojekte bleiben dabei aber nicht im Status eines „Laborprototyps“ stehen. Durch entsprechende Tipps und Hinweise entstehen vielmehr praxistaugliche Geräte, die in Haushalt, Hobby und Beruf eingesetzt werden können. Selbstverständlich können sämtliche Bauteile auch einzeln beschafft werden, so dass sich die Projekte im Buch auch ohne das komplette IoT-Kit durchführen lassen.
€ 29,80
Members: € 26,82
-

Elektor Digital MicroPython für Mikrocontroller (PDF)
Die Programmiersprache „Python“ hat in den letzten Jahren einen enormen Aufschwung erlebt. Nicht zuletzt haben verschiedene Einplatinensysteme wie der Raspberry Pi zu deren Bekanntheitsgrad beigetragen. Aber auch in anderen Gebieten, wie der Künstlichen Intelligenz oder dem Machine Learning, hat Python weite Verbreitung gefunden. Es ist daher naheliegend, Python bzw. die Variante „MicroPython“ auch für den Einsatz in SoCs (Systems on Chip) zu verwenden. Leistungsfähige Controller wie der ESP32 der Firma Espressif Systems bieten eine hervorragende Performance sowie Wi-Fi- und Bluetooth-Funktionalität zu einem günstigen Preis. Mit diesen Eigenschaften wurde die Maker-Szene im Sturm erobert. Im Vergleich zu anderen Controllern weist der ESP32 einen deutlich größeren Flash und SRAM-Speicher, sowie eine wesentlich höhere CPU-Geschwindigkeit auf. Aufgrund dieser Leistungsmerkmale eignet sich der Chip nicht nur für klassische C-Anwendungen, sondern insbesondere auch für die Programmierung mit MicroPython. Das vorliegende Buch führt in die Anwendung der modernen Ein-Chip-Systeme ein. Neben den technischen Hintergründen steht vor allem MicroPython selbst im Vordergrund. Nach der Einführung in die Sprache werden die erlernten Programmierkenntnisse umgehend in die Praxis umgesetzt. Die einzelnen Projekte sind sowohl für den Einsatz im Labor als auch für Alltagsanwendungen geeignet. Neben dem eigentlichen Lerneffekt steht also auch die Freude am Aufbau kompletter und nützlicher Geräte im Vordergrund. Durch die Verwendung von Laborsteckboards können Schaltungen aller Art mit geringem Aufwand realisiert werden, sodass das Austesten der selbstgebauten Geräte zum lehrreichen Vergnügen wird. Durch die verschiedenen Anwendungen wie Wetterstationen, Digitalvoltmeter, Ultraschall-Entfernungsmesser, RFID-Kartenleser oder Funktionsgeneratoren sind die vorgestellten Projekte auch für Praktika oder Fach- und Studienarbeiten in den Naturwissenschaften bzw. im Natur- und Technikunterricht bestens geeignet.
€ 32,80
Members: € 29,52
-

Elektor Edge Impulse Guest Edition 2025 (FR)
Le téléchargement intégral de ce numéro est disponible pour nos membres GOLD et GREEN sur le site Elektor Magazine ! Pas encore membre ? Cliquez ici. qu’est-ce que l’edge AI ?L’IA, intégrée à l’appareil découvrez Edge Impulse StudioConcevez et déployez facilement des modèles d’IA en périphérie détection de mots-clés avec Edge ImpulseCollecter, entraîner et déployer contrôle d’appareils par commande vocale avec le Nordic Thingy:53 Termes clés pour comprendre l’edge AI et le machine learning cours accéléré : démarrez avec Edge ImpulseApprenez à collecter, entraîner et déployer un modèle ML avec l’Arduino Nano 33 BLE Sense un nouveau chapitre pour ArduinoD’une carte pour amateurs à une plateforme d’edge computing premiers pas avec la détection d’objets sur des appareils edge détection de défauts sur circuits imprimésVision par ordinateur avec Raspberry Pi adapter l’IA aux appareils les plus compacts optimiser l’efficacité énergétique des appareils edge AI alimentés sur batterie grille-pain intelligentL’IA qui reconnaît le toast parfait Thundercomm Rubik Pi 3Raspberry Pi et l’edge AI, enfin réunis Leadership, ML embarqué et révolution de l’IA en périphérie modèles vision-langage en périphérieCascade de modèles pour une meilleure fiabilité découvrez Edge ImpulseQuestions de la communauté Elektor mise à jour du projet n°5 : Compteur d’énergie ESP32Utiliser l’Edge AI pour identifier les charges domestiques reconnaissance de mouvements avec détection d’anomaliesUn tutoriel détaillé système de ventilation intelligent : fusion des données sonores et environnementalesUtilisation d’un microcontrôleur double-cœur et du ML pour l’automatisation des fenêtres et persiennes intégrer la commande vocale aux écouteurs et aux casques l'IA en périphérie : au cœur des appareils de demain
€ 16,50
-

Elektor Digital Elektor Juli/Augustus 2020 (PDF)
ELEKTOR AIDE L'électronique dans des temps difficiles AFFICHAGE D'INFORMATION POUR LA MAISON avec Windows sur le Raspberry Pi DÉMARRER AVEC NODE-RED un outil de programmation open source basé sur des blocs visuels LA tombola d'ÉTÉ d'ELEKTOR GREATSCOTT ! CONSTRUIRE UN SYSTÈME D'ALARME LORA REVUE : ALIMENTATION DE LABORATOIRE JOY-IT RD6006 (KIT) REVUE : INTERFACEBOARD GREATFET ONE QUI N'HONNE PAS LES PETITS – XXL de la boîte à suggestions d'Elektor ANTENNE WIFI EXTERNE 2,4 GHZ POORLUIS CONTRÔLE FACILE DE LA TEMPÉRATURE MARCHE/ARRÊT AVEC CHAPEAU RASPBERRY PI COMMENT PRENDRE DE (BONNES) PHOTOS DÈS L'IMPRESSION... ...et les composants électroniques ? REVUE : NOYAU I2CDRIVER ÉCRAN TACTILE JOY-VIEW 13 DE JOY-IT BOOSTER LED POUR MICROCONTRÔLEURS avec un seul composant ! MACHINE À LAVER À ULTRASONS EXPÉRIMENTALE REVUE : GÉNÉRATEUR DE SIGNAUX JOY-IT JDS2915 générateur de signaux doubles avec compteur de fréquence dans un boîtier métallique PROGRAMMATION DES FEUX DE SIGNALISATION EN LANGAGE PIC ASSEMBLY LED CLIGNOTANT PERMANENT CAPTEUR DE HALL EXPÉRIMENTAL DÉTECTER LES COURT-CIRCUITS AVEC UN MILLIOHM OU ESR MÈTRE KIT PRATIQUE ÉLECTRIQUE SDR PIPELINE DE LABORATOIRES ÉLECTRIQUES KICK-STARTER ÉLECTRIQUE ....eh bien, vous voyez ce que nous voulons dire. AVEZ-VOUS VRAIMENT BESOIN DE TOUT ÇA ??? ici, je passe de nombreuses heures sur des projets électroniques... LABORATOIRE EST OUEST MEILLEUR un aperçu du plus saint des saints, où naissent des projets intéressants BONJOUR LE MONDE! NOUS SOMMES ELEKTOR ET NOUS SOMMES SOCIAUX M4 + A7 + GPU : UNE ÉQUIPE DE RÊVE INÉGALE le nouveau SoC STM32MP1 pour les travaux plus lourds CONFIGURATION DE TEST POUR LE 16F18877 ET AUTRES GRANDES PHOTOS COMMUNICATION INTER-ΜC AVEC LE BUS SPI ET ATMEGA328P SIX VARIANTES DE L'OSCILLATEUR LF/AF (et la capacité de M. Miller) BBC MICRO:BIT oscilloscope absolument minimaliste avec affichage LED FEU DE RUNNING À LED 'KNIGHT RIDER' AVEC ESP32 GÉNÉRATEUR DE SIGNAUX AM LW/MW AVEC ATTINY13 DIPMÈTRE ABSOLUMENT MINIMALISTE SCOOTERS ÉLECTRIQUES BON MARCHÉ quelle est la qualité d'un scooter électrique « homologué » à 300 euros de Lidl ? AIDE AU STATIONNEMENT À ULTRASONS AVEC ARDUINO UNO PÉDALE DE DISTORSION AVEC AMPLI OP ET TUBES DE CHARGE SPATIALE INDISPENSABLE POUR CHAQUE LABORATOIRE D'ÉLECTRONIQUE HEXADOKU IA POUR DÉBUTANTS (2) réseaux de neurones avec Linux et Python
€ 9,95
-

Elektor Digital Elektor AI Guest Edition 2024 (PDF) NL
Elektor GREEN en GOLD leden kunnen deze uitgave hier downloaden. Nog geen lid? Klik hier om een lidmaatschap af te sluiten. Het AlertAlfred AI-beveiligingssysteemmet Raspberry Pi 5 en Hailo 8L-module AI in elektronica-ontwikkelingeen update na slechts één jaar AI-algoritmen – een inleidingprompt: welke algoritmen implementeren AI-tools? Single-board computers voor AI-projectenachtergrond en overzicht Van sensordata naar machine learning-modelgebarendetectie met een versnellingsmeter en Edge Impulse Bouw uw eigen lekkend integreer-en-vuur neuronkunstmatige intelligentie zonder software Elektronica ontwerpen met ChatGPTdoet GPT-4o het beter? Breng AI naar de edgemet ESP32-P4 Spraakfuncties verkennen met een Raspberry Pi Zerooverklokken geeft recht van spreken De groeiende rol van Edge-AIeen trend die de toekomst vormgeeft De kracht van Edge-AI ontsluiteneen gesprek met François de Rochebouët van STMicroelectronics Een VHDL-klok gemaakt met ChatGPThoe AI de manier waarop we leren transformeert De werkelijke impact van AISayash Kapoor over ‘Haarlemmer AI-olie’ en meer Het laatste nieuws van BeagleBoardBeagleY-AI, BeagleV-Fire, BeagleMod, BeaglePlay en BeagleConnect Freedom Muggen detecterenmet open datasets en Arduino Nicla Vision AI nu en morgen:gedachten van Espressif, Arduino en SparkFun Tijdlijn kunstmatige intelligentie BeagleY-AIde nieuwste SBC voor AI-toepassingen AI in beeldgedachten uit de Elektor-community Machine vision met OpenMVmaak een frisdrankblik-detector Een gesprek met het digitale breinChatGPT versus Gemini “Skilling Me Softly with This Bot?”mislukt de AI-revolutie op elektronisch gebied door een gebrek aan sociale precisie?
€ 9,95
-

SunFounder SunFounder Kepler Kit (Ultimate Starter Kit for Raspberry Pi Pico W)
Your gateway to IoT and microcontroller programming With 450+ components and 117 online projects, this comprehensive kit ignites your creativity. The tutorials by Paul McWhorter make learning enjoyable for beginners and advanced users. This kit supports MicroPython, C/C++, and Piper Make, offering diverse programming options. Explore sensors, actuators, LEDs, and LCDs for endless project possibilities. From home automation to robotics, this kit empowers your tech journey. Features IoT Starter Kit for Beginners: This kit offers a rich IoT learning experience for beginners. With 450+ components, 117 projects, and expert-led video lessons, this kit makes learning microcontroller programming and IoT engaging and accessible. Expert-Guided Video Lessons: The kit includes 27 video tutorials by the renowned educator, Paul McWhorter. His engaging style simplifies complex concepts, ensuring an effective learning experience in microcontroller programming. Wide Range of Hardware: The kit includes a diverse array of components like sensors, actuators, LEDs, LCDs, and more, enabling you to experiment and create a variety of projects with the Raspberry Pi Pico W. Supports Multiple Languages: The kit offers versatility with support for three programming languages - MicroPython, C/C++, and Piper Make, providing a diverse programming learning experience. Dedicated Support: Benefit from our ongoing assistance, including a community forum and timely technical help for a seamless learning experience. Included Raspberry Pi Pico W Breadboard Jumper Wires Resistor Transistor Capacitor Diode Li-po Charger Module 74HC595 TA6586 – Motor Driver Chip LED RGB LED LED Bar Graph 7-segment Display 4-Digit 7-Segment Display LED Dot Matrix I²C LCD1602 WS2812 RGB 8 LEDs Strip Buzzer DC Motor Servo DC Water Pump Relay Button Micro Switch Slide Switch Potentiometer Infrared Receiver Joystick Module 4x4 Keypad MPR121 Module MFRC522 Module Photoresistor Thermistor Tilt Switch Reed Switch PIR Motion Sensor Module Water Level Sensor Module Ultrasonic Module DHT11 Humiture Sensor MPU6050 Module Documentation Online Tutorials in 3 languages (EN, DE and JP)
-
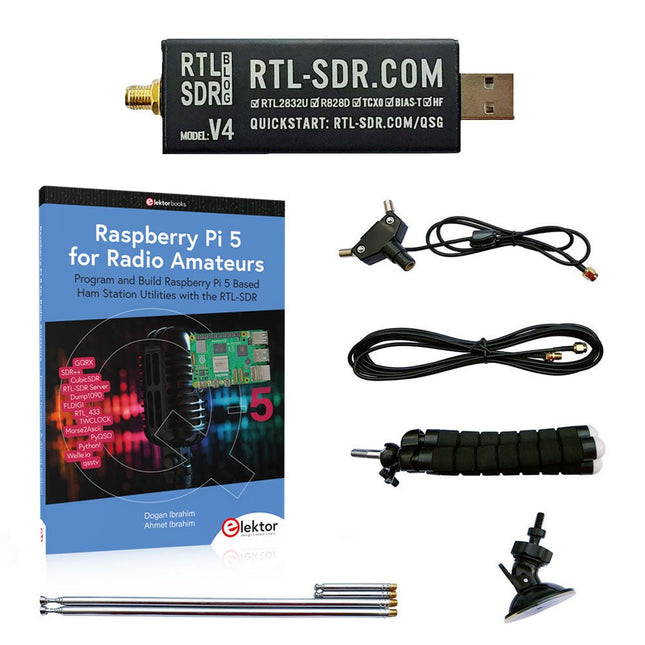
Elektor Bundles Raspberry Pi 5 RTL-SDR V4 (Bundle)
Program and build Raspberry Pi based ham station utilities, tools, and instruments The improved RTL-SDR V4 allows you to receive radio signals between 500 kHz and 1.75 GHz from stations utilizing different bands including MW/SW/LW broadcast, ham radio, utility, air traffic control, PMR, SRD, ISM, CB, weather satellite, and radio astronomy. The book Raspberry Pi 5 for Radio Amateurs gives extensive coverage of deploying the RTL-SDR kit through the use of a Raspberry Pi 5. This bundle contains: RTL-SDR V4 (incl. Dipole Antenna Kit) (normal price: €75) Raspberry Pi 5 for Radio Amateurs (normal price: €40) RTL-SDR V4 (Software Defined Radio) with Dipole Antenna Kit RTL-SDR is an affordable dongle that can be used as a computer-based radio scanner for receiving live radio signals between 500 kHz and 1.75 GHz in your area. The RTL-SDR V4 offers several improvements over generic brands including use of the R828D tuner chip, triplexed input filter, notch filter, improved component tolerances, a 1 PPM temperature compensated oscillator (TCXO), SMA F connector, aluminium case with passive cooling, bias tee circuit, improved power supply, and a built in HF upconverter. RTL-SDR V4 comes with the portable dipole antenna kit. It is great for beginners as it allows for terrestrial and satellite reception and easy to mount outdoors and designed for portable and temporary outside usage. Features Improved HF reception: V4 now uses a built-in upconverter instead of using a direct sampling circuit. This means no more Nyquist folding of signals around 14.4 MHz, improved sensitivity, and adjustable gain on HF. Like the V3, the lower tuning range remains at 500 kHz and very strong reception may still require front end attenuation/filtering. Improved filtering: The V4 makes use of the R828D tuner chip, which has three inputs. The SMA input has been triplexed input into 3 bands: HF, VHF and UHF. This provides some isolation between the 3 bands, meaning out of band interference from strong broadcast stations is less likely to cause desensitization or imaging. Improved filtering x2: In addition to the triplexing, the open drain pin on the R828D can be also used, which allows to add simple notch filters for common interference bands such as broadcast AM, broadcast FM and the DAB bands. These only attenuate by a few dB, but may still help. Improved phase noise on strong signals: Due to an improved power supply design, phase noise from power supply noise has been significantly reduced. Less heat: Another advantage of the improved power supply is low power consumption and less heat generation compared to the V3. Included 1x RTL-SDR V4 dongle (R828D RTL2832U 1PPM TCXO SMA) 2x 23 cm to 1 m telescopic antenna 2x 5 cm to 13 cm telescopic antenna 1x Dipole antenna base with 60 cm RG174 1x 3 m RG174 extension cable 1x Flexible tripod mount 1x Suction cup mount Downloads Datasheet User Guide Quick Start Guide SDR# User Guide Dipole Antenna Guide Book: Raspberry Pi 5 for Radio Amateurs The RTL-SDR devices (V3 and V4) have gained popularity among radio amateurs because of their very low cost and rich features. A basic system may consist of a USB based RTL-SDR device (dongle) with a suitable antenna, a Raspberry Pi 5 computer, a USB based external audio input-output adapter, and software installed on the Raspberry Pi 5 computer. With such a modest setup, it is possible to receive signals from around 24 MHz to over 1.7 GHz. This book is aimed at amateur radio enthusiasts and electronic engineering students, as well as at anyone interested in learning to use the Raspberry Pi 5 to build electronic projects. The book is suitable for both beginners through experienced readers. Some knowledge of the Python programming language is required to understand and eventually modify the projects given in the book. A block diagram, a circuit diagram, and a complete Python program listing is given for each project, alongside a comprehensive description. The following popular RTL-SDR programs are discussed in detail, aided by step-by-step installation guides for practical use on a Raspberry Pi 5: SimpleFM GQRX SDR++ CubicSDR RTL-SDR Server Dump1090 FLDIGI Quick RTL_433 aldo xcwcp GPredict TWCLOCK CQRLOG klog Morse2Ascii PyQSO Welle.io Ham Clock CHIRP xastir qsstv flrig XyGrib FreeDV Qtel (EchoLink) XDX (DX-Cluster) WSJT-X The application of the Python programming language on the latest Raspberry Pi 5 platform precludes the use of the programs in the book from working on older versions of Raspberry Pi computers.
-
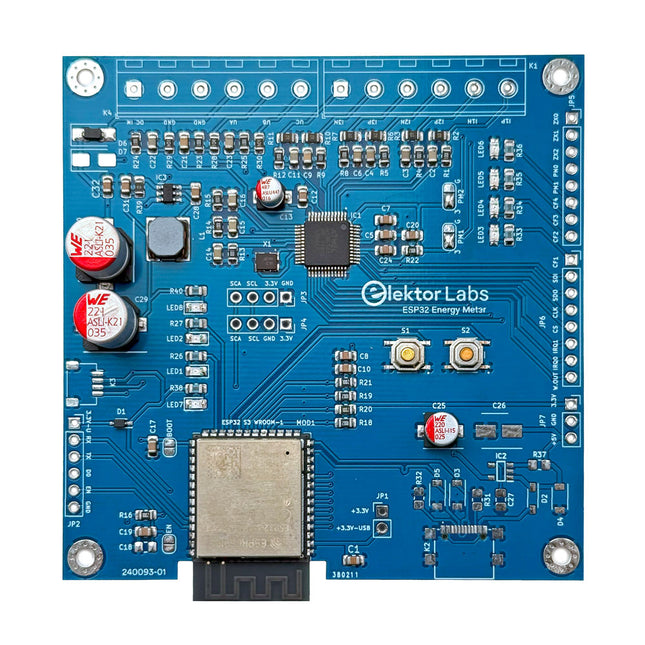
Elektor Labs Elektor ESP32 Energy Meter
The Elektor ESP32 Energy Meter is a device designed for real-time energy monitoring and smart home integration. Powered by the ESP32-S3 microcontroller, it offers robust performance with modular and scalable features. The device uses a 110/230 VAC to 12 VAC step-down transformer for voltage sampling, ensuring galvanic isolation and safety. Its compact PCB layout includes screw-type terminal blocks for secure connections, a Qwiic connector for additional sensors, and a programming header for direct ESP32-S3 configuration. The energy meter is compatible with single-phase and three-phase systems, making it adaptable for various applications. The energy meter is simple to set up and integrates with Home Assistant, offering real-time monitoring, historical analytics, and automation capabilities. It provides accurate measurements of voltage, current, and power, making it a valuable tool for energy management in homes and businesses. Features Comprehensive Energy Monitoring: Get detailed insights into your energy usage for smarter management and cost savings. Customizable Software: Tailor functionality to your needs by programming and integrating custom sensors. Smart Home Ready: Compatible with ESPHome, Home Assistant, and MQTT for full Smart Home integration. Safe & Flexible Design: Operates with a 110/230 VAC to 12 VAC step-down transformer and features a pre-assembled SMD board. Quick Start: Includes one Current Transformer (CT) sensor and access to free setup resources. Specifications Microcontroller ESP32-S3-WROOM-1-N8R2 Energy Metering IC ATM90E32AS Status Indicators 4x LEDs for power consumption indication2x Programmable LEDs for custom status notifications User Input 2x Push buttons for user control Display Output I²C OLED display for real-time power consumption visualization Input Voltage 12~16 VAC (via a step-down transformer 110/230 VAC to 12 VAC) Clamp Current Sensor YHDC SCT013-000 (100 A/50 mA) included Smart Home Integration ESPHome, Home Assistant, and MQTT for seamless connectivity Connectivity Header for programming, Qwiic for sensor expansion Applications Supports single-phase and three-phase energy monitoring systems Dimensions 79.5 x 79.5 mm Included 1x Partly assembled board (SMDs are pre-mounted) 2x Screw terminal block connectors (not mounted) 1x YHDC SCT013-000 current transformer Required Power transformer not included Downloads Datasheet (ESP32-S3-WROOM-1) Datasheet (ATM90E32AS) Datasheet (SCT013-000) Frequently Asked Questions (FAQ) From Prototype to Finished Product What started as an innovative project to create a reliable and user-friendly energy meter using the ESP32-S3 microcontroller has evolved into a robust product. Initially developed as an open-source project, the ESP32 Energy Meter aimed to provide precise energy monitoring, smart home integration and more. Through meticulous hardware and firmware development, the energy meter now stands as a compact, versatile solution for energy management.
-
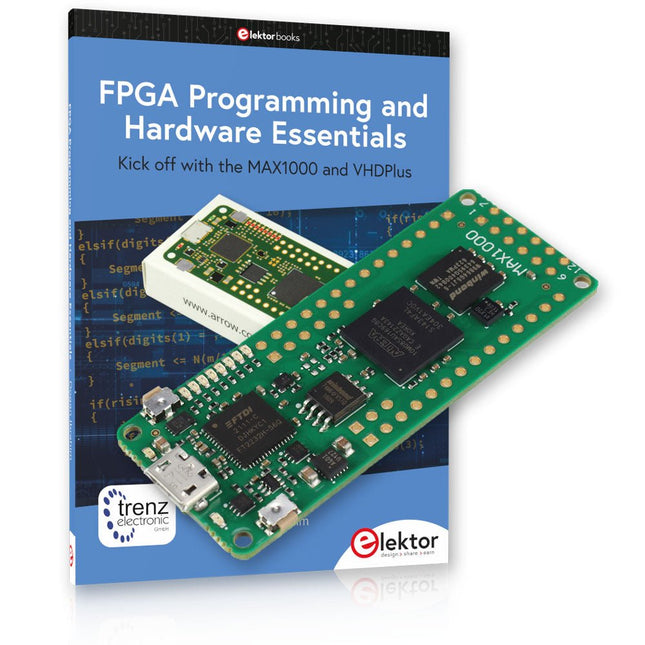
Elektor Bundles MAX1000 FPGA Programming Bundle
Kick off to FPGA Programming with the MAX1000 Board and VHDPlus Ready to master FPGA programming? With this bundle, you'll dive into the world of Field-Programmable Gate Arrays (FPGAs) – a configurable integrated circuit that can be programmed after manufacturing. Bring your ideas to life, from simple projects to complete microcontroller systems! The MAX1000 is a compact and powerful FPGA development board packed with features like memory, user LEDs, push-buttons, and flexible I/O ports. It’s the ideal starting point for anyone wanting to learn about FPGAs and Hardware Description Languages (HDLs). With the enclosed book "FPGA Programming and Hardware Essentials" you'll get hands-on with the VHDPlus programming language – a simpler version of VHDL. You'll work on practical projects using the MAX1000, helping you gain the skills and confidence to unleash your creativity. Projects in the Book Arduino-driven BCD to 7-Segment Display Decoder Use an Arduino Uno R4 to supply BCD data to the decoder, counting from 0 to 9 with a one-second delay Multiplexed 4-Digit Event Counter Create an event counter that displays the total count on a 4-digit display, incrementing with each button press PWM Waveform with Fixed Duty Cycle Generate a PWM waveform at 1 kHz with a fixed duty cycle of 50% Ultrasonic Distance Measurement Measure distances using an ultrasonic sensor, displaying the results on a 4-digit 7-segment LED Electronic Lock Build a simple electronic lock using combinational logic gates with push buttons and an LED output Temperature Sensor Monitor ambient temperature with a TMP36 sensor and display the readings on a 7-segment LED MAX1000 FPGA Development Board The MAX1000 is a customizable IoT/Maker Board ready for evaluation, development and/or use in a product. It is built around the Intel MAX10 FPGA, which is the industry’s first single chip, non-volatile programmable logic device (PLDs) to integrate the optimal set of system components. Users can now leverage the power of tremendous re-configurability paired with a high-performance, low-power FPGA system. Providing internally stored dual images with self-configuration, comprehensive design protection features, integrated ADCs and hardware to implement the Nios II 32-bit microcontroller IP, MAX10 devices are ideal solution for system management, protocol bridging, communication control planes, industrial, automotive and consumer applications. The MAX1000 is equipped with an Arrow USB Programmer2, SDRAM, flash memory, accelerometer sensor and PMOD/Arduino MKR connectors making it a fully featured plug and play solution without any additional costs. Specifications MAX 10 8 kLE - Flash Dual inside - ADC 8x 12 Bit - Temperature Range 0~85°C - Supply USB/pins SDRAM 8 MB 3-axis MEMS LIS3DH USB Programmer on board MEMS Oscillator 12 MHz Switch/LED 2x / 8x Contents of the Bundle Book: FPGA Programming and Hardware Essentials (normal price: €40) MAX1000 FPGA Development Board (normal price: €45) Downloads Software


