
Search results for "the or complete or esp32 or projects or guide"
-

Elektor Publishing Software Defined Radio zum Selbstbau
Praktischer Einstieg mit Arduino, GnuRadio und FPGA Das Thema „Software Defined Radio“ ist facettenreich: Neben der Schaltungstechnik ist auch eine Einarbeitung in die Programmierung von Hardware und PC wichtig. Ein schrittweises Vorgehen erleichtert Ihnen den Einstieg. Mit dem im Buch vorgestellten modularen „RF Bricks“-Konzept werden Sie zum Architekten Ihrer Signalkette. Auf einem Chassis angeordnet gewährleisten die Module einen soliden und gut abgeschirmten Aufbau, den Sie einfach verändern und mit eigenen Ideen anreichern können. Der skalierbare Aufbau bildet Ihr Blockschaltbild auch mechanisch ab – die so gewonnene Übersicht kann in der Aus- und Weiterbildung nützlich sein. Ein Arduino in Ihrem Chassis kommuniziert nach einigen Anpassungen mit üblichen SDR-Programmen, z. B. SDRCPP, GQRX und CubicSDR auf einer Linux-Plattform. Damit können Sie Ihren Empfänger direkt per Mausklick abstimmen. Wenn Sie Blockschaltbilder mögen, ist GnuRadio ein natürlicher Partner der „RF Bricks“. Mit einem selbst programmierten Python-Block gelingt Ihnen in GnuRadio die Fernsteuerung Ihres Empfängers. Im GnuRadio-Universum können Sie Ihre GUI stufenweise ausbauen, behalten dabei aber immer volle Kontrolle über die inneren Abläufe des Programms. Mit einem FPGA können zeitaufwändige Operationen auch direkt in die Hardware verlagert werden. Sie bauen stufenweise einen Doppelsuperhet auf und entwickeln die Filterkoeffizienten für FIR-Filter mit Scilab. Das in VHDL realisierte Weaver-Schema rundet diesen Empfänger ab, der mit hoher Empfindlichkeit und Dynamik aufwarten kann. Mit dem gewonnen Überblick und Ihrer neuen Hardware können Sie die einzelnen Aspekte des Themenkomplexes SDR beliebig weiter vertiefen. Downloads Software
€ 44,80
Best Price
-
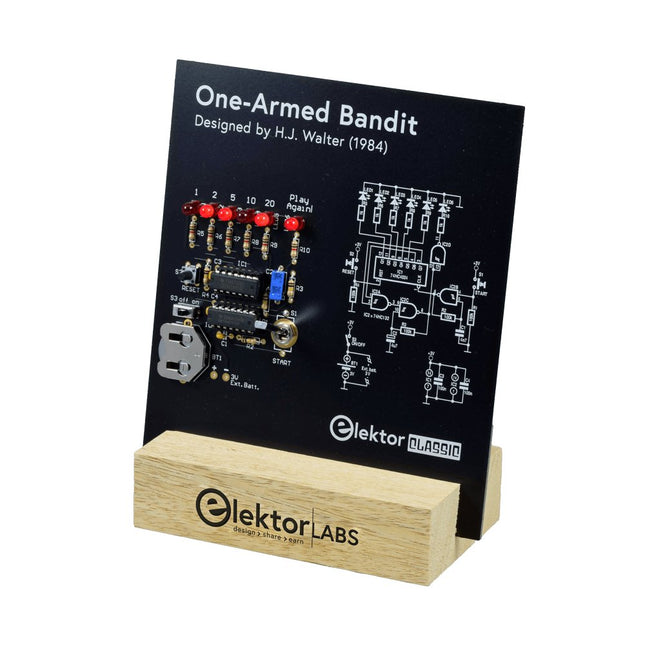
Elektor Labs Elektor One-armed Bandit
Pull Down Lever For Highest Score! This Elektor Circuit Classic from 1984 shows a playful application of CMOS 400x series logic ICs in combination with LEDs, a highly popular combination at the time. The project imitates a spinning-digit type slot machine. The Game To play the game, first agree on the number of rounds. Player 1 actuates the switch lever as long as desired and releases it. The LEDs then show the score which is the sum of the 50-20-10-5 digits lit up. If the Play Again! LED lights, Player 1 has another, “free” round. If not, it’s Player 2’s turn. The players keep tab of their scores, and the highest score wins. Features LEDs Indicate Score Multi-Player and Play Again! Elektor Heritage Circuit Symbols Tried & Tested by Elektor Labs Educational & Geeky Project Through-Hole Parts Only Included Printed Circuit Board All Components Wooden Stand Bill of Materials Resistors (5%, 250 mW) R1,R2,R3,R4 = 100kΩ R5,R6,R7,R8,R9,R10 = 1kΩ Capacitors C1 = 4.7nF, 10%, 50V, 5mm C2 = 4.7μF, 10%, 63V, axial C3,C4 = 100nF, 10 %, 50V, ceramic X7R, 5mm Semiconductors LED1-LED6 = red, 5mm (T1 3/4) IC1 = 74HC4024 IC2 = 74HC132 Miscellaneous S1 = switch, toggle, 21mm lever, SPDT, momentary S2 = switch, tactile, 24V, 50mA, 6x6mm S3 = switch, slide, SPDT IC1,IC2 = IC socket, DIP14 BT1 = PCB-mount CR2032 battery retainer clip Desktop Stand PCB 230098-1 Not included: BT1 = CR2032 coin cell battery
€ 39,95€ 15,98Best Price
-

Elektor Digital Controller Area Network Projects with ARM and Arduino (E-book)
This book details the use of the ARM Cortex-M family of processors and the Arduino Uno in practical CAN bus based projects. Inside, it gives a detailed introduction to the architecture of the Cortex-M family whilst providing examples of popular hardware and software development kits. Using these kits helps to simplify the embedded design cycle considerably and makes it easier to develop, debug, and test a CAN bus based project. The architecture of the highly popular ARM Cortex-M processor STM32F407VGT6 is described at a high level by considering its various modules. In addition, the use of the mikroC Pro for ARM and Arduino Uno CAN bus library of functions are described in detail. This book is written for students, for practising engineers, for hobbyists, and for everyone else who may need to learn more about the CAN bus and its applications. The book assumes that the reader has some knowledge of basic electronics. Knowledge of the C programming language will be useful in later chapters of the book, and familiarity with at least one microcontroller will be an advantage, especially if the reader intends to develop microcontroller based projects using CAN bus. The book should be useful source of reference to anyone interested in finding an answer to one or more of the following questions: What bus systems are available for the automotive industry? What are the principles of the CAN bus? What types of frames (or data packets) are available in a CAN bus system? How can errors be detected in a CAN bus system and how reliable is a CAN bus system? What types of CAN bus controllers are there? What are the advantages of the ARM Cortex-M microcontrollers? How can one create a CAN bus project using an ARM microcontroller? How can one create a CAN bus project using an Arduino microcontroller? How can one monitor data on the CAN bus?
€ 32,95
Members: € 29,66
-

Elektor Digital Raspberry Pi Pico (DE) PDF
Mehr als 50 Grundlagenprojekte mit MicroPython und dem RP2040-Mikrocontroller Der Raspberry Pi Pico ist eine leistungsstarke Mikrocontroller-Platine, die speziell für das Physical Computing – also hardwarenahe Anwendungen – entwickelt wurde. Der Raspberry Pi Pico kann so programmiert werden, dass er eine einzelne Aufgabe sehr effizient ausführt und ermöglicht so schnelle Steuerungs- und Überwachungsanwendungen in Echtzeit. Der 'Pico', wie wir ihn nennen, basiert auf dem schnellen, effizienten und kostengünstigen Dual-Core ARM Cortex-M0+ RP2040 Mikrocontroller-Chip, der mit bis zu 133 MHz läuft und über 264 KB SRAM und 2 MB Flash-Speicher verfügt. Neben dem großen Speicher hat der Pico noch weitere attraktive Eigenschaften, darunter eine große Anzahl von GPIO-Pins sowie gängige Schnittstellen wie ADC, SPI, I²C, UART und PWM. Als Krönung bietet der Chip schnelle und genaue Timer, eine Hardware-Debug-Schnittstelle und einen internen Temperatursensor. Zur Programmierung lassen sich leicht die gängigen Hochsprachen wie MicroPython oder C/C++ verwenden. Dieses Buch ist eine Einführung in die Verwendung des Pico mit der Programmiersprache MicroPython. In allen Projekten wird die Thonny-Entwicklungsumgebung (IDE) eingesetzt. Über 50 Projekte decken folgende Themen ab: Installation von MicroPython auf dem Raspberry Pi Pico Timer-Interrupts und externe Interrupts Projekte mit Analog-Digital-Wandler (ADC) Verwendung des internen sowie externer Temperatursensoren Datenlogger Projekte zur PWM, UART, I²C-Bus und SPI-Bus Wi-Fi und Bluetooth für die Kommunikation mit Smartphones Projekte mit dem Digital-Analog-Wandler (DAC) Alle in diesem Buch vorgestellten Projekte wurden vollständig getestet und sind funktionsfähig. Es werden keine Programmier- oder Elektronikkenntnisse vorausgesetzt, um sie nachzuvollziehen. Für alle beschriebenen Projekte gibt es kurze Beschreibungen, Blockdiagramme, detaillierte Schaltpläne und vollständige MicroPython-Programmlistings. Die Listings sind auch auf der zum Buch gehörenden Elektor-Webseite zu finden.
€ 32,80
Members: € 29,52
-
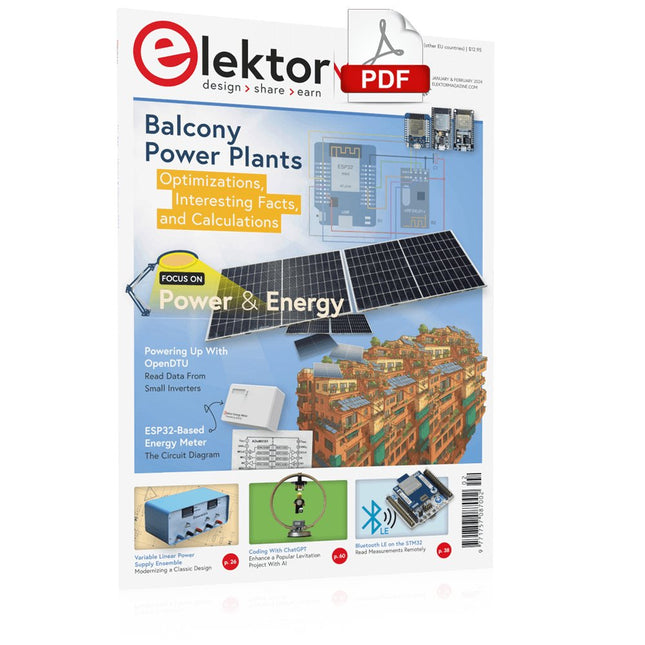
Elektor Digital Elektor January/February 2024 (PDF)
Elektor GREEN and GOLD members can download their digital edition here. Not a member yet? Click here. Project Update: ESP32-Based Energy MeterNext Steps in Prototyping Optimizing Balcony Power PlantsConsiderations, Interesting Facts, and Calculations ESP32 With OpenDTU for Balcony Power PlantsRead Data from Small Inverters Via MCUs Variable Linear Power Supply Ensemble0…50 V / 0…2 A + Dual Symmetrical Supply Energy Storage Today and TomorrowAn Interview With Simon Engelke 2024: An AI OdysseyIt’s Not Letting Up Bluetooth LE on the STM32A Way to Read Measurements Remotely Human-Centric Smart Kitchen Grocery Container MAUI: Programming for PC, Tablet, and SmartphoneThe New Framework in Theory and Practice ChatMagLevThe AI Way of Levitation Simple PV Power RegulatorBuild Your First, Fully Functional PV Energy Management System Cold-Cathode DevicesPeculiar Parts, the Series From Life’s ExperienceNostalgia Starting Out in Electronics……Looking at FETs CAN Bus Tutorial for the Arduino UNO R4Two UNO R4s Hop on the Bus! Infographics: Power & Energy Comprehensive Design and Development SupportArrow Engineering Services Comparing Power Density and Power Efficiency Aluminium Electrolytic CapacitorsInterference Potential in Audio Technology USB Test and MeasurementThe Fnirsi FNB58 The Pixel Pump Pick-and-Place ToolSimplifying Manual SMT Board Assembly HomeLab ToursNot So Long Ago, in a Far-Away Country... “In the world of ethics in electronics, even small steps can make a significant impact.” Ethics in ElectronicsThe OECD Guidelines and Germany’s Supply Chain Due Diligence Act Chadèche: Smart Ni-MH Charger/DischargerA Reader’s Project in Brief Err-lectronicsCorrections, Updates and Readers’ Letters
€ 7,50
-

Elektor Digital H0W2: Get Started with the SensorTile.box (E-book)
STmicroelectronics’ wireless IoT & wearable sensor development kit ‘SensorTile.box’ is a portable multi-sensor circuit board housed in a plastic box and developed by STMicroelectronics. It is equipped with a high-performance 32-bit ARM Cortex-M4 processor with DSP and FPU, and various sensor modules, such as accelerometer, gyroscope, temperature sensor, humidity sensor, atmospheric pressure sensor, microphone, and so on. SensorTile.box is ready to use with wireless IoT and Bluetooth connectivity that can easily be used with an iOS or Android compatible smartphone, regardless of the level of expertise of the users. SensorTile.box is shipped with a long-life battery and all the user has to do is connect the battery to the circuit to start using the box. The SensorTile.box can be operated in three modes: Basic mode, Expert mode, and Pro mode. Basic mode is the easiest way of using the box since it is pre-loaded with demo apps and all the user has to do is choose the required apps and display or plot the measured data on a smartphone using an app called STE BLE Sensor. In Expert mode users can develop simple apps using a graphical wizard provided with the STE BLE Sensor. Pro mode is the most complex mode allowing users to develop programs and upload them to the SensorTile.box. This book is an introduction to the SensorTile.box and includes the following: Brief specifications of the SensorTile.box; description of how to install the STE BLE Sensor app on an iOS or Android compatible smartphone required to communicate with the box. Operation of the SensorTile.box in Basic mode is described in detail by going through all of the pre-loaded demo apps, explaining how to run these apps through a smartphone. An introduction to the Expert mode with many example apps developed and explained in detail enabling users to develop their own apps in this mode. Again, the STE BLE Sensor app is used on the smartphone to communicate with the SensorTile.box and to run the developed apps. The book then describes in detail how to upload the sensor data to the cloud. This is an important topic since it allows the sensor measurements to be accessed from anywhere with an Internet connection, at any time. Finally, Pro mode is described in detail where more experienced people can use the SensorTile.box to develop, debug, and test their own apps using the STM32 open development environment (STM32 ODE). The Chapter explains how to upload the developed firmware to the SensorTile.box using several methods. Additionally, the installation and use of the Unicleo-GUI package is described with reference to the SensorTile.box. This PC software package enables all of the SensorTile.box sensor measurements to be displayed or plotted in real time on the PC.
€ 29,95
Members: € 26,96
-

Elektor Publishing Hochfrequenz-Baubuch
Die Hochfrequenztechnik ist eines der Gebiete, auf denen man auch heute noch eigene Ideen in die Tat umsetzen kann. Unzählige Schaltungsvarianten mit besonderen Zielsetzungen geben Raum für sinnvolle Experimente und Projekte. Vieles kann man nicht einfach kaufen. Detektorradios ohne eigene Energiequelle, einfache Röhrenempfänger mit einem Hauch von Nostalgie, die ersten Empfangsversuche mit dem Software Defined Radio oder Spezialempfänger für den Amateurfunk, all dies lässt sich mit wenig Aufwand realisieren. Lange Zeit war das Radiobasteln der Einstieg in die Elektronik. Inzwischen gibt es auch andere Wege, vor allem über Computer, Mikrocontroller und die Digitaltechnik. Allerdings kommen die analogen Wurzeln der Elektronik oft zu kurz. Die Radiotechnik eignet sich besonders gut als Lernfeld der Elektronik, weil man hier mit den einfachsten Grundlagen beginnen kann. Aber auch die Verbindung zur modernen Digitaltechnik liegt auf der Hand, wenn es z. B. um moderne Abstimmverfahren wie PLL und DDS oder um moderne DSP-Radios geht. Dieses Buch gibt einen Überblick und stellt eine Sammlung einfacher Projekte vor. Der Autor möchte Sie dabei unterstützen, eigene Ideen zu entwickeln, eigene Empfänger zu entwerfen und sie zu erproben.
€ 39,80
Best Price
-

Elektor Digital Elektor Mars/Avril 2022 (PDF)
Construisez votre contrôleur RISC-VDébuter sur le noyau logiciel RISC-V NEORV32 pour FPGA à faible coût Tracer des graphiques avec ArduinoC?est facile avec le traceur sériel d'Arduino Carte CLUE d'AdafruitUne solution intelligente pour les projets IoT Carte tampon pour le Raspberry Pi 400Protection des entrées/sorties Cartes Raspberry Pi RP2040 à gogo Approche DIY de la sécurité et de l'espionnage électroniqueChauffez ou refroidissez la SRAM Identification des composantsTrucs et astuces, bonnes pratiques et autres informations utiles Interrupteur sans contact DIY Démarrer en électronique? (12)Adaptation d?impédance et transformateurs Quoi de neuf dans le développement de l'embarqué ?Rust et mises à jour des déploiements IoT Infographie Les bénéfices de la 5G pour l?industrie et l?automobile Relais à bobine mobile Visite à domicileChacun son tour Voyage dans les réseaux neuronaux (4e partie)Les neurones embarqués Lévitation magnétique : encore plus simpleTroisième version : la plus compacte Programmation d'automates avec le Raspberry Pi et le projet OpenPLCVisualisation des programmes PLC avec AdvancedHMI Sur le vifEmballé, c?est pesé Sous votre radarDes microcontrôleurs que vous devriez connaître Surveillance et débogage sans filUne solution pour Arduino, ESP32 et Cie Station de mesure de température et d'humidité, au format de pocheUtilisation de modules prêts à l'emploi Réparation des batteries au lithiumÉconomisez de l'argent et augmentez la puissance ! Création d?interfaces graphiques en PythonGénérateur de mèmes Trois questions fondamentalesPourquoi, avec quoi, avec qui ? Hexadoku
€ 10,95
-

Elektor Digital Das CAN-Bus Praxisbuch (PDF)
Projekte mit Arduino Uno und Raspberry Pi In diesem Buch werden Anwendungen von Arduino Uno und Raspberry Pi 4 in praxisnahen Projekten auf Basis von CAN-Bus detailliert beschrieben. Durch den Einsatz von entweder Arduino Uno oder Raspberry Pi in Verbindung mit handelsüblichen CAN-Bus-Schnittstellenmodulen werden die Entwicklung, Fehlersuche und Fehlerbeseitigung sowie die Überprüfung von Projekten auf CAN-Bus-Basis erheblich erleichtert. Dieses Buch richtet sich an jeden, der mehr über den CAN-Bus lernen möchte und mit den Grundlagen der Elektronik vertraut ist. Hilfreich ist auch Erfahrung mit den Programmiersprachen C und Python sowie mit der Programmierung von Arduino Uno unter Verwendung seiner IDE und von Raspberry Pi zu haben. Das Buch ist eine nützliche Informationsquelle und ein Nachschlagewerk für jeden, der Antworten auf eine oder mehrere der folgenden Fragen sucht: Welche Bussysteme stehen für die Automobilindustrie zur Verfügung? Was sind die Grundprinzipien des CAN-Bus? Welche Arten von Frames (oder Datenpaketen) stehen in einem CAN-Bussystem zur Verfügung? Wie können Fehler in einem CAN-Bussystem erkannt werden, und wie zuverlässig ist ein CAN-Bussystem? Welche Arten von CAN-Bus-Controllern gibt es? Welches sind die Funktionsprinzipien des MCP2515 CAN-Bus-Controllers? Wie kann ich ein CAN-Bus-Projekt mit Arduino Uno realisieren? Wie kann ich Arduino oder Raspberry Pi CAN-Bus-Projekte mit 2 und 3 Knoten erstellen? Wie kann ich die Daten auf dem CAN-Bus analysieren? Wie kann ich ein CAN-Bus-Projekt mit Raspberry Pi ausführen?
€ 29,80
Members: € 26,82
-

Speciale Elektor / E&M: 33 Progetti Top di Elettronica
Una ricca selezione di articoli dal Mondo Elektor! Gli articoli di questo libro sono una selezione accurata, il "meglio del meglio" di circuiti e progetti recenti, realizzati da tecnici di grande talento provenienti da tutto il mondo. Nel tipico stile di Elektor, questa raccolta offre qualcosa di interessante per tutti, dai progettisti esperti a coloro che praticano l'elettronica nel tempo libero. Sommario Super Servo TesterProva Fino a Quattro Servocomandi, Stand-Alone o in Sistema The TubeUn Insolito Amplificatore a Valvole Cloc 2.0La Sveglia che Avete Sempre Desiderato Stazione Meteo LoRa Low-PowerCostruitevi una Stazione Meteorologica “Long Range” Uscita Video con Microcontrollori (Parte 1)Video Composito Uscita Video con Microcontrollori (Parte 2)Uscita VGA e DVI Un Raspberry Pi Pico come Analizzatore di SpettroFFT su Base Hardware a Basso Costo PIC O’Clock – In Contatto col TempoProgettare un Ricevitore di Segnali Orari SDR Frequenzimetro di Rete ACMisura Frequenza e Tensione della Rete Elettrica Generatore di Funzioni con Arduino NanoNano + Codice = Generatore di Funzioni Monitor CO2Un Approccio Fai-Da-Te per Il Controllo della Qualità dell‘Aria ChatMagLevLa Levitazione Magnetica con AI Alimentatore Lineare Variabile Combinato0…50 V / 0…2 A con Struttura Simmetrica Duale Ricevitore Digitale FM con Arduino e TEA5767Restate in Ascolto con un Arduino Nano Protezione Antigelo per Piante da FruttoCon Registrazione della Temperatura Carico Elettronico con Generatore di clock IntegratoPer Collaudare Alimentatori, Convertitori di Tensione e Batterie 128 Termostato Web con ESP32Mantieni il Vino alla Giusta Temperatura Iniezione di Segnali e di Potenza......per Rilevare le Interruzioni nei Cavi DIY LiPo Supercharger KitDal Prototipo al Mercato di Massa Livella Digitale con Stroboscopio AttivoCalibra il Tuo giradischi con Questo Strumento "Tutto-in-Uno" The Game of Life – 262.144 Modi di GiocareDal Progetto di un Lettore Rilevatore di PerditeCollegato ad Arduino Cloud Orologio di LissajousL’Incedere del Tempo con le Figure di Lissajous Mastermind – Controllato da ArduinoUna Versione Moderna del Classico Gioco di Decifrazione Generatore Audio Analogico 1 kHzOnda Sinusoidale a Bassa Distorsione Aggiorna il tuo Caricabatteria (Parte 1)Non Buttarlo, Modificalo! Aggiorna il tuo Caricabatteria (Parte 2)Non Buttarlo, Modificalo! Sistemi GNSS RTK a Basso CostoCon Accuratezza a Livello Centimetrico Esperimenti a 10 GHz con LNB Satellitari ModificatiSbloccare la Banda X a Basso Costo Telecamera per FerromodellismoInstalla un Modulo ESP32 CAM a Bordo! Monitor di Tensione con MicrocontrolloreProtezione dalla Scarica Profonda per Batterie e Altro Nodo Sensore AutonomoTrasmissione Dati LoRa con Alimentazione a Batterie Solari Layout e Sicurezza sul PCBConsigli per un Progetto Sicuro e Durevole
€ 29,95
Members: € 26,96
-
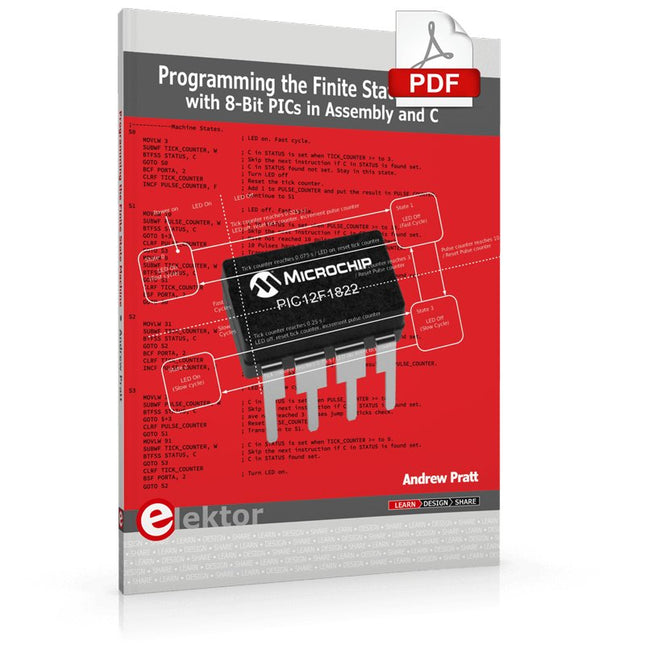
Elektor Digital Programming the Finite State Machine (E-book)
Programming the Finite State Machine with 8-Bit PICs in Assembly and C Andrew Pratt provides a detailed introduction to programming PIC microcontrollers, as well as a thorough overview of the Finite State Machine (FSM) approach to programming. Most of the book uses assembly programming, but do not be deterred. The FSM gives a structure to a program, making it easy to plan, write, and modify. The last two chapters introduce programming in C, so you can make a direct comparison between the two techniques. The book references the relevant parts of the Microchip datasheet as familiarity with it is the best way to discover detailed information. This book is aimed at Microsoft Windows and Linux users. To keep your costs to a minimum and to simplify the toolchain, specific applications are provided as a free download to enable you to use an FTDI serial lead as the programmer. The assembler used is the open-source "gpasm". All programming can be done in a text editor. There are detailed instructions on how to perform the necessary installations on Windows, Linux Debian, and derivatives such as Ubuntu and Fedora. For programming in C, Microchip's XC8 compiler is used from the command line. In addition to the programming applications, two serial read and serial write applications can be used for communicating with the PICs from a computer. A voltmeter project including practical instructions on building a circuit board from scratch is included. All theory is covered beforehand, including how to do integer arithmetic in assembly. Two PICs are covered: the PIC12F1822 and the PIC16F1823. Both can run at 32 MHz with an internal oscillator. You do not need to buy a factory-made development board and programmer. With relatively inexpensive parts including a serial lead, microcontroller, a few resistors, and LEDs, you can get started exploring embedded programming. Links Updated Programmer
€ 32,95
Members: € 29,66
-

Elektor Digital Elektor Mei/Juni 2020 (PDF)
Open-netwerk weerstation mk2deel 1: inleiding en hardware-elementen AI voor beginners (1)objectherkenning met het Maixduino-board Universele triac-stuurmodule met ATmegaschakelen en dimmen van verschillende belastingen Hoe... iets van GitHub downloadenGitHub Voor Dummies My IoT-Button: de knop voor het netdeel 2: prototyping met board en cloud TMS0280 spraaksynthesizervreemde onderdelen Interactiefcorrecties & updates | vragen & antwoorden BASIC voor ESP32/ESP8266 (2)zandloper met ESP8266 en Annex WiFi RDS Developer’s Zonetips & trucs, vakkunstigheden en andere nuttige informatie BalBot: een zelfbalancerende robotmoderne versnellingssensoren vergemakkelijken de bouw Alle begin......hoeft niet zo moeilijk te zijn Wie het kleine niet eertuit de ideeënbus van Elektor Verzendbox met manipulatie-indicatiegegevens veilig met de post verzenden Nieuwe Nauwkeurige Nixie-klok: verbeteringentechnisch nieuwsbulletin voor nieuwe en bestaande enthousiaste gebruikers Multitasking met de ESP32 (3)software-timers Met de vos in het IoT (4)inrichten van het dashboard Start-up update: het Elektor Investment Program Review: Elektronische USB-belasting Joy-IT HD35test de belastbaarheid van USB-poorten CAN-bus + Arduino houden zonnepanelen in de gatenlokaliseer panelen in grote arrays die onderhoud nodig hebben Analoge elektronica ontwerpencase-study #1 – deel 3: optimalisatie van de responsie van de voorversterker en compromissen Sound Blinkdraagbare zelfbouwspeaker met LED-lichtshow USB-stroombewakingintelligente bescherming voor USB-poorten Oost West Lab Besteen blik in het allerheiligste, waar onbevoegden geen toegang hebben... Review: Labvoeding PeakTech 6080 Aveel voeding voor weinig geld Een grote uitdagingveilige producten in het IoT-tijdperk Elektor 1,2-GHz-universeelteller (1992/93)voorbij de magische 1GHz-grens Hexadoku
€ 9,95


