Designing, Wiring, and Controlling
Build Your Own Coffee Roaster is a practical guide to constructing and operating the Cobra Smart Roaster and its companion Open Roaster Controller (ORC).
The e-book walks the reader through every stage of the build, from assembling the powerhead and wiring the system to installing and configuring the controller. Along the way, you’ll learn how to use the Raspberry Pi to bring precision and flexibility to your roasting process.
Clear, step-by-step chapters cover:
Powerhead construction and required components
Low- and high-voltage wiring
Installing the ORC, network setup, and using the web interface
Roasting coffee with the Cobra in different setups, including hand-stir and bread-machine roasting
Advanced topics such as manual mode, fixed profiles, Artisan-Scope connections, and ORC system programming
A complete parts list, practical guidance throughout, and concise explanations make this e-book a useful reference for anyone interested in building, modifying, or understanding their own coffee-roasting system.
Diese Ausgabe steht allen GOLD- und GREEN-Mitgliedern auf der ElektorMagazine-Website zum Download bereit!
Sie sind noch kein Mitglied? Hier klicken!
Cloc 2.0Der Wecker, den Sie sich schon immer gewünscht haben
Raspberry Pi Pico: PIO in der PraxisExperimente mit der Programmable I/O des RP2040
ChipTweaker des armen MannesBillige Wege, sie zum Sprechen zu bringen
Echter Zufallszahlen-Generator mit USBZwei PICs zum Preis von einem AVR
Pimp my mike...Pegelanhebung selbst gebaut
FFT mit MaixduinoFrequenzspektren erfassen
Aus dem Leben gegriffenEntwurfslogik (oder Un-Logik)
Schrittmotor-Treiber UCN5804Bemerkenswerte Bauteile
Schaltungssimulation mit Micro-CapErste Schritte in eine komplizierte Welt
Der PAUL Award 2022Junge Techniktalente und ihre kreativen Lösungen
Mein erstes Software-definiertes RadioGebaut in weniger als 15 Minuten
Mikrocontroller-Dokumentation verstehenTeil 1: Aufbau einer Dokumentation
KI und eingebettete Systeme - Was kommt als Nächstes?Werkzeuge, Plattformen und das Ende der Textarbeiter
Digitalisierung der vertikalen Landwirtschaft
Infografik: Embedded und KI, heute und morgen
Einführung in TinyML
Casestudy KwickPOS
High-Performance in jeder KlasseComputer-on-Module-Standards
Aller Anfang...muss nicht schwer sein: Werden wir aktiv!
I²C-Kommunikation mit Node.js und einem Raspberry PiSehen Sie Ihre Sensordaten in einem Browser
Videoausgabe mit MikrocontrollernTeil 2: VGA- und DVI-Ausgabe
Das Echtzeit-Betriebssystem MetronomEin RTOS für AVR-Prozessoren
DVI auf dem RP2040Ein Interview mit Luke Wren, Chip-Entwickler bei Raspberry Pi
Display HAT MiniZeigt die Wettervorhersage auf dem Raspberry Pi
WEEF 2022 Awards: Feiern Sie das Gute!
Hexadoku
Elektor GREEN en GOLD leden kunnen deze uitgave hier downloaden.Nog geen lid? Klik hier om een lidmaatschap af te sluiten.
Raspberry Pi Pico als spectrumanalyzerFFT’s met goedkope hardware
±40 V lineaire spanningsregelaaralternatieve voeding voor de Fortissimo-100 eindversterker... en andere!
Flexibele draadloze communicatie met een MCUEEPROM opent netwerkmogelijkheden voor draadloze MCU’s
€ 5000 voor het oprapen!doe mee aan de STM32 Wireless Innovation Design Contest
2023: een AI-odysseeaan de slag met Code Interpreter van ChatGPT
LoRa – een Zwitsers zakmesdeel 1: het LoRa-protocol en zijn voordelen
Instelbare current sink met geïntegreerde klokgeneratortest voedingen, spanningsconverters en accu’s
Twee nieuwe Arduino UNO R4-boards: Minima en WiFi
Logaritmische potentiometersze zijn exponentieel!
Motordriver breakout-boardeen BoB voor een 5 A DC-motordriver van 3×3 mm
Uit het leven gegrepenelektronica periculosa
Biedt cellulair het laagste stroomverbruik voor IoT?energie-eisen van LTE-M en NB-IoT in LPWAN-implementaties
Draadloze communicatie in IoT-systemen met Arduino MKR-moduleshet juiste board voor WiFi, LoRa en andere standaarden
AC-verliezen in magnetische componentenvoorkom hete spoelen!
Meten voor optimale cloud-connectiviteit
Matter implementatie: Wat is er nodig om Matter-devices in te zetten?
YARD Stick Onesub-1 GHz draadloos testtool
Houdrelaisvreemde onderdelen
PIC voor tien – precies op tijdontwerp van een SDR-tijdseinontvanger
Due Diligence DirectiveBusiness as Usual Will Not Do
Alle begin......versterkt spanningen
Infrageluid-recorder met de Arduino Pro Minieen voorbeeldproject uit de Elektor-uitgave “Arduino & Co”
Cloud-gebaseerde energiemetermet een ESP32-module en een PZEM-004T spanning/stroom-sensor
Een gids voor puristisch programmeren (deel 2)nauwkeurige timing, de UART en debugging
Projekte mit Arduino, ESPHome, Home Assistant und Raspberry Pi & Co
Dieses E-Book enthält verschiedene Projektbeispiele und beginnt mit einer Einführung in die Elektronik. Es erklärt unter anderem, wie man Home Assistant auf einem Raspberry Pi installiert, wie man Raumklimasensoren für Temperatur und Luftfeuchtigkeit nutzt, das MQTT-Protokoll sowie weitere Schnittstellen einsetzt und ESPHome verwendet, um Sensoren und Aktoren in Home Assistant zu integrieren. Zahlreiche Video-Tutorials ergänzen das Buch.
Grundlagen der Elektrotechnik
Das Buch beginnt mit einer Einführung in die Elektrotechnik. Ihr lernt die Grundlagen von Spannung, Strom, Widerständen, Dioden und Transistoren.
Arduino und Mikrocontroller
Ein kompletter Abschnitt widmet sich dem Arduino Uno. Ihr lernt den Aufbau kennen, schreibt erste Programme und erarbeitet praktische Beispiele.
Home Assistant und Automatisierung
Ihr erfahrt, wie Home Assistant auf einem Raspberry Pi eingerichtet wird, und lernt den Umgang mit Automatisierungen, Szenen und Geräten. Zusätzlich wird auf Zigbee, MQTT und ESP-NOW eingegangen – wichtige Technologien für die Heimautomation.
ESP8266, ESP32 und ESP32-CAM
Die beliebten ESP-Mikrocontroller werden ausführlich behandelt. Nach einer theoretischen Einführung folgen praktische Projekte, die euch zeigen, wie ihr das Beste aus diesen Geräten herausholen könnt.
Sensoren und Aktoren
Das Buch erklärt die Funktionsweise und Anwendung zahlreicher Sensoren wie Temperatur- und Luftfeuchtigkeitssensoren, Bewegungsmelder und RFID-Reader. Bei den Aktoren werden Schrittmotoren, e-ink Displays, Servo-Motoren und vieles mehr beleuchtet. Zu allen Geräten gibt es praxisnahe Anwendungsbeispiele.
ESPHome
Dieses Kapitel zeigt euch, wie ihr Sensoren und Aktoren ohne Programmieraufwand in Home Assistant integriert. Ihr werdet Schritt für Schritt durch die Einrichtung mit ESPHome geführt.
LEDs und Lichttechnik
In diesem Kapitel lernt ihr verschiedene LED-Typen und deren Einsatzmöglichkeiten kennen. Grundlagen der Lichttechnik werden ebenfalls erklärt.
Node-RED
Ein eigenes Kapitel ist Node-RED gewidmet. Ihr erlernt die Grundlagen dieses leistungsstarken Tools und werdet Schritt für Schritt durch die Einrichtung und Nutzung geführt.
Integrierte Schaltkreise (ICs)
In der Elektronik gibt es zahlreiche ICs, die uns das Leben erleichtern. Ihr lernt die wichtigsten kennen und wendet das Wissen in praktischen Projekten an.
Programmieren für Profis
Fortgeschrittene Themen wie die korrekte Verwendung von Tastern, der Einsatz von Interrupts und die Nutzung eines NTP-Servers für Zeit-Synchronisation werden in diesem Kapitel detailliert behandelt.
Downloads
GitHub
Elektor GREEN en GOLD leden kunnen deze uitgave hier downloaden.
Nog geen lid? Klik hier om een lidmaatschap af te sluiten.
PIO programmeren op de Raspberry Pi PicoNegen instructies, veel mogelijkheden
AI buiten de browser brengenAI-CLI's gebruiken voor het coderen, compileren en valideren van embedded projecten
De Scrutiny DebuggerDebuggen, visualiseren en testen van code in Embedded C/C++
Sigfox breakout board (1)Een zelfgebouwde radio BoB
Low-Noise voeding (2)Constructie, montage en praktische implementatie
Eenvoudige signaalgenerator met de RP2040Analoge en digitale signalen voor ongeveer €10
De toekomst van slimme huizen verkennen met Matter en Edge AIBieden de nieuwste updates van Matter en de opkomst van Edge AI technici eindelijk de tools om de intelligente, slimme huizen te bouwen die gebruikers zijn beloofd?
Differentiële druksensorenVoorspellend onderhoud in HVAC-systemen
Security by designTechnische basisprincipes beperken storingen
Embedded security is niet langer optioneel
CRA en PQC herzien prioriteiten voor embedded securityWaarom zelfs kleine IoT- en industriële bedrijven een upgradeplan nodig hebben
embedded world 2026Een interview met Benedikt Weyerer, Executive Director embedded world
Praktijkervaring met I3CGebruik van hardware van ST en Microchip
Het BLEnky-projectSnelle prototyping voor Bluetooth Low Energy toepassingen
Pulsbreedtemodulatievan een eenvoudige aan/uit-thermostaat naar een rimpelloos DC-signaal
AudiotronicaOorstrelende elektronica voor zelfbouw
Uit het leven gegrepenRead the f...ing manual!
ESP32 audio transceiver board (Deel 4)Afstemmen van de kloksignalen en een bekabelde versie
2026: An AI OdysseyDe kater van Vibe-Coding in 2025
Symmetrische DC-belastingStatische of dynamische en symmetrische gelijkstroombelasting
Gezichten tellen met MaixCAMEen eenvoudige methode om de omvang van het publiek vast te leggen
Book: Mastering the Arduino Uno R4
Based on the low-cost 8-bit ATmega328P processor, the Arduino Uno R3 board is likely to score as the most popular Arduino family member, and this workhorse has been with us for many years. Eleven years later, the long-overdue successor, the Arduino Uno R4, was released. It is built around a 48 MHz, 32-bit Arm Cortex-M4 microcontroller and provides significantly expanded SRAM and Flash memory. Additionally, a higher-precision ADC and a new DAC are added to the design. The Uno R4 board also supports the CAN Bus with an interface.
Two versions of the board are available: Uno R4 Minima, and Uno R4 WiFi. This book is about using these new boards to develop many different and interesting projects with just a handful of parts and external modules. All projects described in the book have been fully tested on the Uno R4 Minima or the Uno R4 WiFi board, as appropriate.
The project topics include the reading, control, and driving of many components and modules in the kit as well as on the relevant Uno R4 board, including
LEDs
7-segment displays (using timer interrupts)
LCDs
Sensors
RFID Reader
4x4 Keypad
Real-time clock (RTC)
Joystick
8×8 LED matrix
Motors
DAC (Digital-to-analog converter)
LED matrix
WiFi connectivity
Serial UART
CAN bus
Infrared controller and receiver
Simulators
… all in creative and educational ways with the project operation and associated software explained in great detail.
Arduino Uno R4 WiFi
The Arduino Uno R4 is powered by the Renesas RA4M1 32-bit ARM Cortex-M4 processor, providing a significant boost in processing power, memory, and functionality. The WiFi version comes with an ESP32-S3 WiFi module in addition to the RA4M1, expanding creative opportunities for makers and engineers.
The Arduino Uno R4 runs at 48 MHz, which provides a 3x increase over the popular Uno R3. Additionally, SRAM has been upgraded from 2 kB to 32 kB, and flash memory from 32 kB to 256 kB to support more complex projects. Responding to community feedback, the USB port is now USB-C, and the maximum power supply voltage has been raised to 24 V with an enhanced thermal design. The board includes a CAN bus and an SPI port, enabling users to reduce wiring and perform parallel tasks by connecting multiple shields. A 12-bit analog DAC is also provided on the board.
Specifications
Microcontroller
Renesas RA4M1 (ARM Cortex-M4)
USB
USB-C
Programming Port
Pins
Digital I/O Pins
14
Pins
Analog input pins
6
DAC
1
RTC
1
PWM pins
6
Communication
UART
1x
I²C
1x
SPI
1x
Qwiic I²C connector
1x
CAN
1x CAN Bus
Power
Circuit operating voltage
5 V
Input voltage (VIN)
6-24 V
DC Current per I/O Pin
8 mA
Clock speed
Main core
48 MHz
Memory
RA4M1
256 kB Flash, 32 kB RAM
LED Matrix
12 x 8 (96 red LEDs)
Dimensions
68.9 x 53.4 mm
Downloads
Datasheet
Schematics
This bundle contains:
Book: Mastering the Arduino Uno R4 (normal price: €45)
Arduino Uno R4 WiFi (normal price: €30)
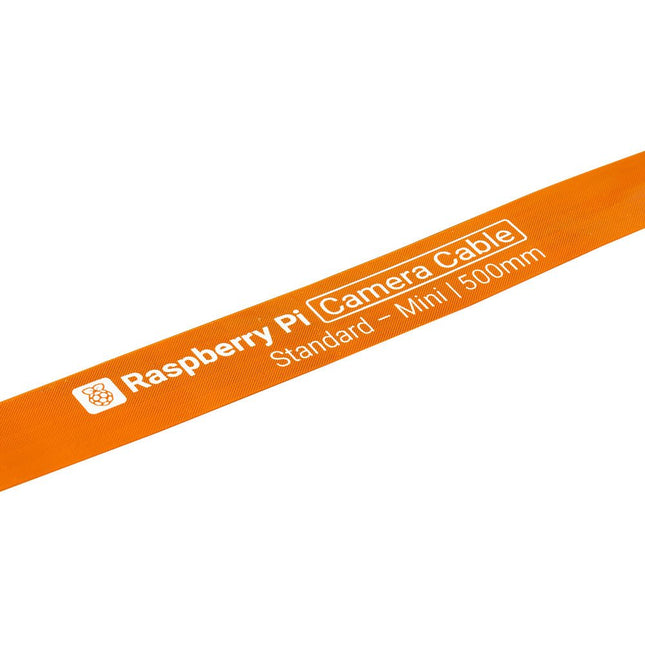
Raspberry Pi 5 provides two four-lane MIPI connectors, each of which can support either a camera or a display. These connectors use the same 22-way, 0.5 mm-pitch “mini” FPC format as the Compute Module Development Kit, and require adapter cables to connect to the 15-way, 1 mm-pitch “standard” format connectors on current Raspbery Pi camera and display products.These mini-to-standard adapter cables for cameras and displays (note that a camera cable should not be used with a display, and vice versa) are available in 200 mm, 300 mm and 500 mm lengths.
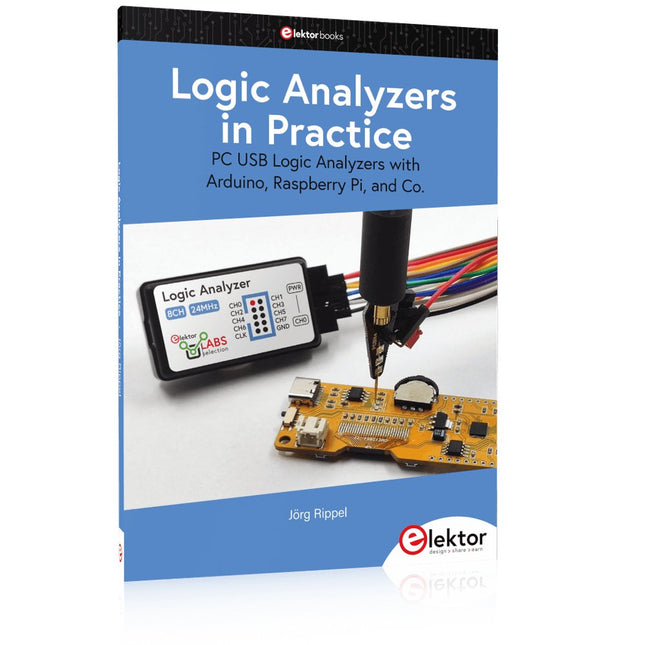
PC USB Logic Analyzers with Arduino, Raspberry Pi, and Co.
Step-by-step instructions guide you through the analysis of modern protocols such as I²C, SPI, UART, RS-232, NeoPixel, WS28xx, HD44780 and 1-Wire. With the help of numerous experimental circuits based on the Raspberry Pi Pico, Arduino Uno and the Bus Pirate, you will learn the practical application of popular USB logic analyzers.
All the experimental circuits presented in this book have been fully tested and are fully functional. The necessary program listings are included – no special programming or electronics knowledge is required for these circuits. The programming languages used are MicroPython and C along with the development environments Thonny and Arduino IDE.
This book uses several models of flexible and widely available USB logic analyzers and shows the strengths and weaknesses of each price range.
You will learn about the criteria that matter for your work and be able to find the right device for you.
Whether Arduino, Raspberry Pi or Raspberry Pi Pico, the example circuits shown allow you to get started quickly with protocol analysis and can also serve as a basis for your own experiments.
After reading this book, you will be familiar with all the important terms and contexts, conduct your own experiments, analyze protocols independently, culminating in a comprehensive knowledge set of digital signals and protocols.
Le téléchargement intégral de ce numéro est disponible pour nos membres GOLD et GREEN sur le site Elektor Magazine !
Pas encore membre ? Cliquez ici.
carte émetteur-récepteur audio ESP32 (2)Transmission audio sans fil
émetteur AM par inductionUtiliser les PIO du Pico dans un croquis Arduino
les protocoles sans filUn guide technique
suivi de satellites avec LoRaTinyGS, le réseau open source qui capte les données spatiales
télécommande par sms compatible 4GContrôlez votre équipement à distance
sonde haute vitesseMesure à haute impédance jusqu’à 200 MHz
sur le vifKafka
KrakenSDR
tests de performance avec le RP2350Pico 2 : une vraie amélioration ?
mesures de champ électrique sans contact (2)Un vibromètre laser pour l’analyse des vibrations de la membrane
quartz et oscillateursAméliorer la précision des quartz grâce au choix des condensateurs
démarrer en électroniqueCI audio originaux
se lancer dans le codage d'un projet DIY
SPECTRAN® V6 MobileAnalyseur de spectre temps réel modulaire et configurable pour des mesures fiables sur l’ensemble des plages de fréquences
l’avenir de l’IA repose sur le siliciumEntretien avec Anastasiia Nosova
nœud de capteurs autonome v2.0 (architecture du système)Plateforme de mesure autonome alimentée par énergie solaire, avec GPS intégré, LoRaWAN et plus encore
positionnement précisTests du sondage de canal Bluetooth
développement logiciel piloté par les tests
voiture miniature contrôlée par SmartphoneWi-Fi + ESP32 + Smartphone = contrôle à distance
2025 : une odyssée de l’IAModèles de raisonnement en IA : la révolution de la chaîne de pensée
contrôleur de charge solaire avec MPPT (3)Logiciel et mise en service
caméra Web Raspberry Pi ZeroStreaming avec VPN ZeroTier
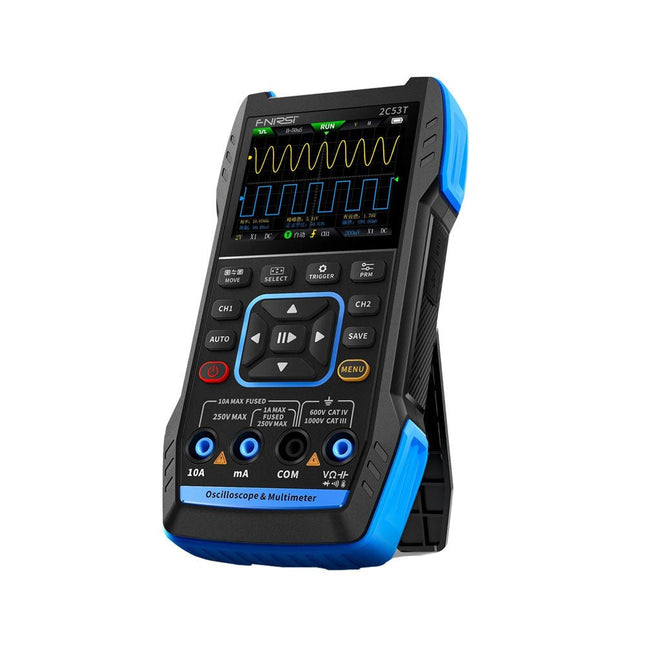
The FNIRSI 2C53T, an enhanced version of its 10 MHz predecessor, is a compact and versatile 3-in-1 device. It combines a dual-channel 50 MHz oscilloscope, a 4.5-digit True RMS multimeter, and a signal generator with 13 waveform types, making it an essential tool for maintenance and research professionals.
Oscilloscope: Features 50 MHz bandwidth, 250 MS/s sampling rate, ±400 V protection, FPGA + ARM + ADC architecture, and waveform saving for analysis.
Multimeter: 4.5-digit True RMS with 19999 counts, supports AC/DC voltage, current, capacitance, resistance, diode, and continuity measurements.
Signal Generator: Outputs 13 signal types up to 50 KHz, with adjustable frequency, amplitude, and duty cycle.
With a 2.8-inch LCD, 3000 mAh battery (6-hour runtime), and a portable design, it delivers powerful functionality in a user-friendly package.
Specifications
Oscilloscope
Channels
2
Analog Bandwidth
50 MHz
Real-time Sampling Rate
250 MS/s
Storage Depth
1 Kpts
Impedance
1 MΩ
Time Base Range
10ns-20s
Vertical Sensitivity
10 mV/div-10 V/div (x1)
Maximum Measured Voltage
±400 V
Trigger Mode
Auto/Normal/Single
Trigger Type
Rising edge, Falling edge
Display Mode
Y-T/Rolling/X-Y
Coupling Method
AC/DC
Persistence
OFF, 500ms, 1s, ∞
Math
8 Basic Operations + FFT
Supported
Waveform Screenshot Save, Export Waveform Image, Cursor Measurement, Infinite Afterglow
Multimeter
DC Voltage
1.9999V/19.999V/199.99V/1000V
±(0.5%+3)
AC Voltage
1.9999V/19.999V/199.99V/750.0V
±(1%+3)
DC Current
19.999mA/199.99mA/1.9999A/9.999A
±(1.2%+3)
AC Current
19.999mA/199.99mA/1.9999A/9.999A
±(1.5%+3)
Resistance
19.999MΩ/1.9999MΩ/199.99KΩ/19.999KΩ
±(0.5%+3)
1.9999KΩ/199.99Ω
±(2.0%+3)
Capacitance
999.9uF/99.99uF/9.999uF/999.9nF/99.99nF/9.999nF
±(2.0%+5)
9.999mF/99.99mF
±(5.0%+20)
Temperature
−55~1300°C (−67~2372°F)
±(2.5%+5)
Continuity Test
Yes
Diode
Yes
Signal Generator
13 Signal Waveforms
Sine wave, rectangular wave, sawtooth wave, half wave, full wave, positive step wave, reverse step wave, exponential rise, exponential fall, DC, multi-audio, Sinker pulse, Lorentz wave
Output Frequency
0-50 KHz
Output Amplitude
0-3 V
Output Duty Cycle
0-100%
General
Display
2.8" HD color screen
Resolution
320 x 240
Charging
USB-C (5 V/1 A)
Battery
3000 mAh Lithium battery
Standby Time
6 hours
Languages
English, Chinese
Dimensions
167 x 89 x 35 mm
Weight
300 g
Differences New vs Old Version
Model
2C53T Upgrade
2C53T Predecessor
Bandwidth
50 MHz
10 MHz
Display Mode
Y-T/Rolling/X-Y
Y-T/Rolling
Math
8 Basic Operations + FFT
N/A
Cursor Function
Yes
N/A
XY Lissau Graph
Yes
N/A
Afterglow Function
Yes
N/A
Multimeter Accuracy
19999 Counts
9999 Counts
Signal Generator
50 KHz
2 MHz
Included
1x FNIRSI 2C53T Oscilloscope (50 MHz)
2x P6100 Oscilloscope probes (10X)
1x Multimeter probe
1x Alligator clip probe
1x USB-C charging cable
1x Storage bag
1x Manual
Downloads
Manual
Firmware V1.2.0
This complete ESP32 microcontroller programming course features a textbook, a component kit, hands-on projects, and a comprehensive online course with simulations. It is ideal for step-by-step learning of embedded systems programming with Arduino using a practical, hands-on approach.
A Practical Introduction to Embedded Systems with the ESP32
This course is designed for people who are new to embedded systems and looking for a structured, example-driven way to get started.
A kit of parts comprising LEDs and resistors, switches, sensors and actuators, displays, a breadboard and wires, and more is included. These are used in the course to illustrate example applications.
No prior experience with Arduino or embedded development is required. Each section features hands-on examples and mini projects designed to reinforce key concepts and inspire deeper exploration. By the end of the course, you’ll be able not only to reproduce the examples but also to build on them with your own ideas and applications.
What Will You Learn?
Microcontroller programming with the ESP32 using the Arduino IDE
Working with Digital I/O, read buttons and encoders, control LEDs and relays
Read analog inputs, voltages, and analog sensors
Generating analog output signals and PWM
Use serial communication like UART, I²C and SPI to control displays and read digital sensors and SD cards
Managing time
Working with interrupts
Real-time sensor input and control via buttons, LEDs, and displays
Control actuators like relays and servo motors
Who Is It For?
Students and self-learners exploring embedded systems
Makers and IoT enthusiasts looking to improve their hardware skills
Educators and trainers seeking ready-to-teach material
What's Inside the Box?
Access to the full course on the Elektor Academy Pro Learning Platform
ESP32 microcontroller board + USB cable
Book: Programming Microcontrollers in C/C++ Using Arduino
Downloadable project files for every module
Component Box:
2× LED, red, 5 mm
LED, green, 5 mm
3× Resistor, 470 Ω, 0.25 W
LDR
Potentiometer, 10 kΩ, linear
Pushbutton
Rotary encoder module
Relay module
DHT22 Humidity & Temperature Sensor
TM1637-compatible 4-digit 7-segment display
MPU-6050 IMU with headers
SSD1306-compatible I²C OLED display
Micro SD card adapter with header
Buzzer
SG90 Micro Servo
ILI9341-compatible SPI 240×320 TFT display
20× Jumper wires
Breadboard
All Programming Courses (and differences in content)
Course
Arduino
Raspberry Pi Pico with Arduino C/C++
ESP32 with Arduino C/C++
Raspberry Pi Pico with MicroPython
ESP32 with MicroPython
Online Course
Access to Arduino Course
Access to Pico with Arduino C/C++ Course
Access to ESP32 with Arduino C/C++ Course
Access to Pico with MicroPython Course
Access to ESP32 with MicroPython Course
Board
Uno R3
Raspberry Pi Pico
ESP32
Raspberry Pi Pico
ESP32
Book
Programming Microcontrollers in C/C++ Using Arduino
Programming Microcontrollers in C/C++ Using Arduino
Programming Microcontrollers in C/C++ Using Arduino
Programming Microcontrollers in MicroPython
Programming Microcontrollers in MicroPython
Kit
40-piece Component Box
40-piece Component Box
40-piece Component Box
40-piece Component Box
40-piece Component Box
Le téléchargement intégral de ce numéro est disponible pour nos membres GOLD et GREEN sur le site Elektor Magazine !
Pas encore membre ? Cliquez ici.
programmation PIO sur le Raspberry Pi PicoNeuf instructions, de multiples possibilités
l'IA en ligne de commandeDéveloppement, compilation et validation de projets embarqués depuis le terminal
le Scrutiny DebuggerDéboguer, visualiser et tester du code C/C++ embarqué
carte breakout Sigfox (1)Développement d’une BoB radio
alimentation à faible bruit (2)Construction, assemblage et mise en œuvre pratique
générateur de signaux simple basé sur le RP2040Signaux analogiques et numériques
à la découverte du futur de la domotique avec Matter et l’IA EdgeLes dernières versions de Matter et l’essor de l’IA en périphérie de réseau (edge) donnent-ils enfin aux ingénieurs les outils nécessaires pour construire les maisons intelligentes et parfaitement intégrées promises aux utilisateurs ?
capteurs de pression différentielleLa maintenance prédictive appliquée aux systèmes CVC
la sécurité dès la conceptionPrincipes d’ingénierie pour limiter les défaillances
la sécurité des systèmes embarqués n’est plus une option
la CRA et la PQC redéfinissent les priorités de la sécurité embarquéePourquoi même les petites entreprises IoT et industrielles doivent prévoir une mise à niveau
embedded world 2026Entretien avec Benedikt Weyerer, directeur d’embedded world
prise en main du bus I3CUtilisation de matériel de ST et Microchip
le projet BLEnkyPrototypage rapide d’applications Bluetooth Low Energy
modulation de largeur d’impulsionDu thermostat tout ou rien à un signal analogique continu filtré
audiotroniqueDes circuits audio agréables à l’écoute, à réaliser soi-même
sur le vifLisez donc le manuel !
carte émetteur-récepteur audio ESP32 (4)Réglage des horloges et une option filaire
2026 : une odyssée de l’IAConséquences du vibe coding
charge CC symétriqueCharge CC symétrique, statique ou dynamique
comptage de visages avec MaixCAMUne méthode simple pour estimer la taille d’un public