The SEQURE HT140 is a highly versatile 2-in-1 soldering tool that combines the functionality of hot tweezers and a soldering iron. It is specifically engineered for precise SMD soldering and desoldering tasks.
With independent control for single-sided heating, it operates as a traditional soldering iron when fitted with a standard tip. When configured for dual-sided heating, it transforms into hot tweezers – perfect for the efficient and accurate removal of SMD components.
Features
Working Temperature: 50-500°C (122-932°F)
Supports multiple power inputs: PD 3.1/3.0/2.0, QC 3.0/2.0, (5-28 V DC), LiPo batteries, and power adapters.
The HT140 combines hot tweezers and a soldering iron, with independent single- or dual-sided heating. Use it as a soldering iron with a tip, or as hot tweezers for easy SMD desoldering.
Voltage and current can be adjusted based on the power source.
Features dual temperature control, presets, quick temperature increase, and fine-tuning.
128 x 32 OLED screen with adjustable brightness, and orientation. Switchable °C/°F.
High-precision heating element with ±1% accuracy. Melts solder in just 2 seconds.
Smart standby, sleep, and wake-up functions extend tip lifespan and boost efficiency.
Supports temperature calibration and compensation for precise work.
Includes a 1.5 m heat-resistant PD 150 W silicone cable and a sturdy all-metal HT Station.
Swappable tips and adjustable angles for various SMD soldering tasks.
Specifications
Working Voltage
5-28 V DC
Maximum Power
140 W
Working Temperature
50-500°C (122-932°F)
Tin Melting Time
2s
Interface Type
USB-C, DC5525
Power Supply
PD 3.1/3.0/2.0, QC 3.0/2.0, 28 V DC max
Display
128 x 32 OLED
Firmware Upgrade
Yes
Menu Languages
English, Russian, Chinese
Dimensions
160 x 27 x 17.5 mm
Weight
50 g
Included
1x SEQURE HT140 Host
2x HT140-IS Tapered Curved Desoldering Tips
1x HT Station
1x Accessory Package
1x Storage Bag
1x 65 W PD Power Supply (EU, UK & US)
1x 24 W PD Silicone Wire (1.5 m)
1x GND Wire Accessory Kit (1.8 m)
Downloads
Manual
Firmware V1.04
Le téléchargement intégral de ce numéro est disponible pour nos membres GOLD et GREEN sur le site Elektor Magazine !
Pas encore membre ? Cliquez ici.
adaptateur de mesure USBTest du courant et des signaux des ports USB
sortie boucle de courant 4-20 mA pour Arduino UnoUne interface de boucle de courant fiable et insensible aux interférences électromagnétiques
commande automatique pour aspirateurGardez votre établi propre
générateur DDS avec ATtiny
testeur d'ampli-op V2Nouveau circuit imprimé – désormais compatible avec les CMS
amplificateur audio à tube 550 mWson chaleureux des tubes à vide
surveillance des fusiblesavec une LED clignotante
préamplificateur RIAA HQExploitez tout le potentiel sonore de vos disques vinyles !
Outil de réglage pour platines vinylesGénérateur de lumière stroboscopique 100–120 Hz basé sur Arduino
Elektor Classics : ampli vidéo
gradateur à télécommande infrarougeContrôlez votre éclairage avec confort et précision
comment utiliser switch…case avec des chaînes de caractères en C++/EDI Arduino
détecteur d’aimantsAvec un simple capteur à effet Hall
bouton de mise sous tension intelligent pour Raspberry PiUne solution pour Raspberry Pi jusqu’au modèle 4
astuces clés pour makersDes conseils pros pour vos projets
projets pratiques avec le timer 555Commande de moteur CC et jeux de rapidité
moniteur de charge CA simpleÉconomisez de l'énergie grâce à un appareil simple
batteries externes en parallèleTrois jours d’autonomie
VFO jusqu’à 15 MHzRéalisation avec un Raspberry Pi Pico
accordeur de violon avec ATtiny202
Elektor Classics : ampli vidéo pour TV N&B
capacimètre20 pF à 600 nF
horloge quasi analogique Mk IIDeux anneaux LED pour les heures et les minutes
concevez sans limites(grâce à l’écosystème complet d’Arduino)
dé à lampes néon
Elektor Classics : indicateur d'accord RTTY
solutions matérielles inspirantes pour vos projets ESP
Elektor Classics : alimentation 3 A
LED RGB avec circuit de commande intégréLumière de précision : les ICLED établissent de nouvelles normes
expérience : un Thérémine analogico-numérique ?Combiner des capteurs numériques modernes avec l’intemporel générateur analogique XR2206
carte émetteur-récepteur audio ESP32 (1)Démo : lecture de fichiers WAV depuis une carte SD
infographies : Circuits et conception de circuits 2025
petit mixeur audioUne conception polyvalente et modulable
minuteur intelligent pour éclairage d’escalierÉconomisez encore plus sur votre facture d’énergie !
modernisez vos voletsContrôlez les systèmes Velux avec un ESP32 et MQTT
chauffe-pieds à transistorsConfort économe en énergie
le quadricoptère M5Stamp Fly est-il le prochain drone Tello ? (Revue)
optimiser la portée Wi-Fi de l’ESP32-C3 SuperMiniUne modification d’antenne simple et efficace
station de soudage à air chaud ZD-8968Un outil de travail économique ou uniquement de l'air chaud ?
testeur de radar de reculDétecter les pannes du système d’aide au stationnement d’un véhicule
KI in der Praxis
Tauchen Sie ein in die faszinierende Welt der Robotik und Automatisierung!
Dieses Elektor Special zeigt, wie Sie mit Kreativität, etwas Know-how und günstiger Technik eigene Roboter bauen können. Vom ersten DIY-Projekt mit Arduino oder Raspberry Pi bis hin zu intelligenten Systemen mit KI – dieses Heft macht moderne Robotik verständlich und greifbar.
Entdecken Sie praxisnahe Anleitungen, inspirierende Projekte und spannende Einblicke in die Maker-Szene. Lernen Sie, wie aus Experimentierfreude, Gemeinschaft und Offenheit echte Innovation entsteht – und warum Robotik weit mehr ist als nur ein technisches Hobby.
Inhalt
Phantasie wird Realität
Arduino-controlled Drawing Robot
GalaxyRVR Mars Rover Kit for Arduino
YDLIDAR X4Pro Lidar
xHuskyLens AI Camera
DOF Robot Arm mit Raspberry Pi Pico
Fertigungsroboter mit Fischertechnik
Pneumatischer Industrieroboter
Warum bauen wir immer wieder Roboterhunde?
Elektor Mini-Wheelie
Roboterfahrzeuge und autonomes Fahren
Projects Using Arduino IDE and the LVGL Graphics Library
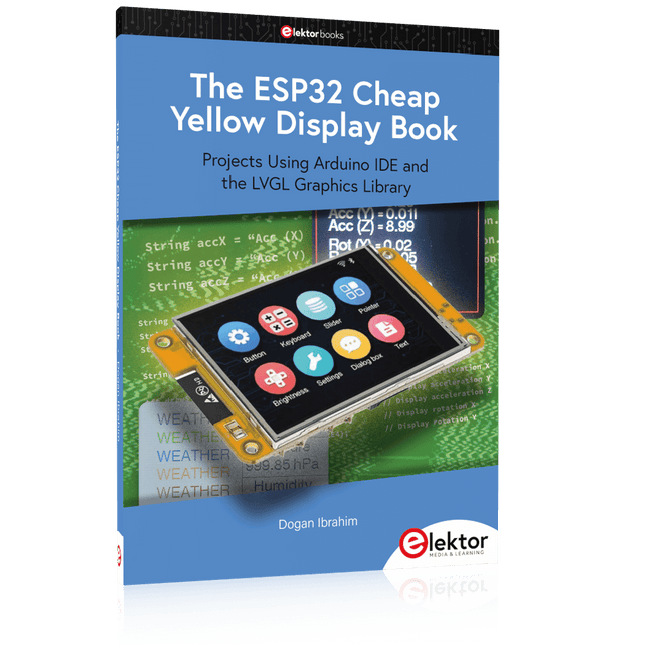
The ESP32 is probably one of the most popular microcontrollers used by many people, including students, hobbyists, and professional engineers. Its low cost, coupled with rich features makes it a popular device to use in many projects. Recently, a board called the ESP32 Cheap Yellow Display (CYD for short) is available from its manufacturers. The board includes a standard ESP32 microcontroller together with a 320x240 pixel TFT display. Additionally, the board provides several connectors for interfaces such as GPIO, serial port (TX/RX), power and Ground. The inclusion of a TFT display is a real advantage as it enables users to design complex graphics-based projects without resorting to an external LCD or graphics displays.
The book describes the basic hardware of the ESP32 CYD board and provides details of its on-board connectors. Many basic, simple, and intermediate-level projects are given in the book based on the ESP32 CYD, using the highly popular Arduino IDE 2.0 integrated development environment. The use of both the basic graphics functions and the use of the popular LVGL graphics library are discussed in the book and projects are given that use both types of approaches.
All the projects given in the book have been tested and are working. The block diagram, circuit diagram, and the complete program listings and program descriptions of all the projects are given with explanations. Readers can use the LVGL graphics library to design highly popular eye-catching full-color graphics projects using widgets such as buttons, labels, calendars, keypads, keyboards, message boxes, spinboxes, sliders, charts, tables, menus, bars, switches, drop-down lists, animations, and many more widgets.
Plus de 50 circuits et projets
Sirène de style américain
Deux codeurs rotatifs sur une seule entrée analogique
Construire un gradateur numérique 220-V CA avec Arduino
Source de courant pour LED
Détecter quatre contacts avec une seule broche
Petit interrupteur marche/arrêt avec protection de batterie
Distributeur de désinfectant DIY pour les mains
Un orgue électronique simple
Ampli stéréo ultrasimple
Interrupteur activé par le son pour amplificateurs
Balanced/Unbalanced Converter
Filtre externe pour réseau électrique
Télécommande comodo
Boîte de direct pour smartphone
Amusez-vous avec les feux de circulation
Commande de thyristor avec un seul bouton
Posemètre quasi analogique pour chambre noire
Circuits à volonté de la communauté Hackster.io
Minuteur analogique de bronzage
Encore une interface LCD à un seul fil
Générateur PWM simple avec AVR ATtiny13
Une seconde vie pour les piles
Interrupteur tactile pour les lampes à LED
Testeur de LED et d?interrupteurs DIP
Testeur de contrôle IR Go/No-Go
Testeur de semiconducteurs de puissance
SPI pour les LED WS2812(B)
Mesure des inductances de puissance
Une seule prise pour le RPi et le CN/A audio
Accessoire de test DIY pour le compteur LCR
Ampèremètre Arduino
Orgue à deux doigts
Calibrateur de CAN à faible bruit
Convertisseur élévateur DC/DC
Deux potentiomètres sur une entrée numérique
Capteur de proximité acoustique
Capteur de radiateur sans pile
Détecter les micros et les caméras sans fil
Minuteur pour éclairage intérieur de voiture
Simulateur de bougie
Minuteur numérique de cuisine
Milliohmmètre
Minuteur de production d?eau chaude
Chargeur simple pour les batteries 2S 18650
Référence de fréquence avec ATtiny
Commutateur IR à faible puissance
Recycler le chargeur de téléphone de votre voiture
Préamplificateur de microphone pour Arduino
Filtres IEM DIY
Dé électronique sans microcontrôleur
Condensateur digital
Clignotant à LED autochargeable
Aussi dans ce numéro
KiCad 6 ? Cinq fonctionnalités à prendre en compte
Flashback ? Ordinateur SC/MP d?Elektor
Interview ? Faire de l?art avec l?électricité
Mon premier circuit imprimé ? Se lancer avec KiCad
Minimiser le matériel avec un logiciel intelligent
Infographie ? Faits et chiffres
Nouveaux dispositifs d?Analog
Flashback ? Le détecteur de métaux d?Elektor
Hexadoku ? Casse-tête pour elektorniciens
Build Your Own RISC-V ControllerFirst Steps with the NEORV32 RISC-V Softcore for Low-Cost FPGAs
How to Use Arduino’s Serial PlotterPlotting Graphs With Arduino Is Easy
CLUE from AdafruitA Smart Solution for IoT Projects
Buffer Board for the Raspberry Pi 400Protect the I/Os Raspberry Pi RP2040 Boards Aplenty
A Handbook on DIY Electronic Security and EspionageSRAM Heated or Deep-Frozen
Component IdentificationTips & Tricks, Best Practices and Other Useful Information DIY Touchless Light Switch
Starting out in ElectronicsMatching and Transforming
What’s New in Embedded Development?Rust and Keeping IoT Deployments Updated Infographics How the Industrial and Automotive Sectors Will Benefit from 5G
Moving Coil RelaysPeculiar Parts, the series
HomeLab ToursEverything Revolves Around the Tools...
Understanding the Neurons in Neural Networks (Part 4)Embedded Neurons
Magnetic Levitation the Very Easy WayThe Third and Most Compact Version
PLC Programming with the Raspberry Pi and the OpenPLC ProjectVisualization of PLC Programs with AdvancedHMI
From Life's ExperiencePack Up and Leave
Under Your RadarMicrocontrollers You Should Know About
Monitor and Debug Over the AirA Solution for Arduino, ESP32 and Co.
Portable Temperature- and Humidity-Measuring DeviceUsing Ready-Made Modules
Lithium Battery Pack RepairSave Money + More Power!
GUIs with PythonMeme-Generator
Three Questions to Build OnWhy, What, and Who?
HexadokuThe Original Elektorized Sudoku
Praktischer Einstieg mit Arduino, GnuRadio und FPGA
Das Thema „Software Defined Radio“ ist facettenreich: Neben der Schaltungstechnik ist auch eine Einarbeitung in die Programmierung von Hardware und PC wichtig. Ein schrittweises Vorgehen erleichtert Ihnen den Einstieg. Mit dem im Buch vorgestellten modularen „RF Bricks“-Konzept werden Sie zum Architekten Ihrer Signalkette. Auf einem Chassis angeordnet gewährleisten die Module einen soliden und gut abgeschirmten Aufbau, den Sie einfach verändern und mit eigenen Ideen anreichern können.
Der skalierbare Aufbau bildet Ihr Blockschaltbild auch mechanisch ab – die so gewonnene Übersicht kann in der Aus- und Weiterbildung nützlich sein. Ein Arduino in Ihrem Chassis kommuniziert nach einigen Anpassungen mit üblichen SDR-Programmen, z. B. SDRCPP, GQRX und CubicSDR auf einer Linux-Plattform. Damit können Sie Ihren Empfänger direkt per Mausklick abstimmen.
Wenn Sie Blockschaltbilder mögen, ist GnuRadio ein natürlicher Partner der „RF Bricks“. Mit einem selbst programmierten Python-Block gelingt Ihnen in GnuRadio die Fernsteuerung Ihres Empfängers. Im GnuRadio-Universum können Sie Ihre GUI stufenweise ausbauen, behalten dabei aber immer volle Kontrolle über die inneren Abläufe des Programms.
Mit einem FPGA können zeitaufwändige Operationen auch direkt in die Hardware verlagert werden. Sie bauen stufenweise einen Doppelsuperhet auf und entwickeln die Filterkoeffizienten für FIR-Filter mit Scilab. Das in VHDL realisierte Weaver-Schema rundet diesen Empfänger ab, der mit hoher Empfindlichkeit und Dynamik aufwarten kann.
Mit dem gewonnen Überblick und Ihrer neuen Hardware können Sie die einzelnen Aspekte des Themenkomplexes SDR beliebig weiter vertiefen.
Downloads
Software
Concrétisez vos rêves, réalisez les projets les plus fous : un odomètre pour la roue de votre hamster, la surveillance complètement automatisée de votre fourmilière avec interface web, ou le Sandwich-O-Mat ? une machine qui grille les sandwichs de votre choix.
Avec les cartes Arduino et le mouvement DIY (« fais-le toi-même ») ou maker, se mettre à programmer des microcontrôleurs est devenu un jeu d?enfant. Une deuxième révolution a eu lieu : des développeurs ingénieux ont mis sur le marché de petites cartes ? appelées « shields » ou modules ? qui simplifient considérablement l?utilisation d?autres dispositifs. Ces petits modules contiennent tous les composants électroniques nécessaires pour la connexion au microcontrôleur ; quelques fils avec des fiches suffisent pour le raccordement, ce qui évite d?avoir à câbler et fait gagner du temps. En outre, il est également possible de manipuler de minuscules composants dépourvus de pattes de connexion (ceux de type CMS).
Projets
Arduino et le monde extérieur
Capteur BMP180, introduction aux bibliothèques et à l?I²C
Initiation aux entrées/sorties avec un shield polyvalent
Adaptateur I²C pour LCD et afficheurs à matrice de points
Shield clavier & LCD
Convertisseur de niveau
W5100 : connexion à internet
Shields d?extension des entrées/sorties
Relais et relais statiques
Shield multifonction : unité de commande universelle
Connexion d?un lecteur de carte SD par SPI
Touches et afficheurs à 7 segments
Convertisseur analogique/numérique à 16 bits
Convertisseur numérique/analogique MCP4725
Pilote de servomoteurs à 16 voies PWM
Lecteur MP3
Enregistreur de données GPS avec stockage sur carte SD
Capteur tactile
Joystick
SHT31 : température et humidité
Capteur d?UV-A VEML6070
Temps de vol VL53L0X
Mesure de distance à ultrasons
Afficheur matriciel à LED à base de MAX7219
Horloge en temps réel DS3231
Circuit d?extension de port MCP23017
Communication radio à 433 MHz
Gyroscope MPU-6050
Accéléromètre ADXL345
LED RVB WS2812
Cartes d?alimentation
Capteurs de gaz MQ-xx
Capteur de dioxyde de carbone (CO2)
Capteur de courant ACS712
Capteur de courant INA219
Pilote de moteur L298
Kit RFID MFRC522
Moteur pas à pas 28BYJ-48
Carte avec pilote de moteur ultra-silencieux TMC2209
Potentiomètre numérique X9C10x
Écran couleur TFT avec contrôleur/pilote ST7735
Écran à encre électronique
Module Bluetooth
Compteur Geiger
Module GSM SIM800L
Multiplexeur I²C
Module CAN (Controller Area Network)
Open-Source-Code mit Arduino IDE und PlatformIO
Autonomes Fahren: GPS, Accelerometer, Gyroskop
PS3-Controller
Mikrocontroller wie der Arduino und Einplatinenrechner wie der Raspberry Pi haben sich zu beliebten Komponenten entwickelt. Dritter im Bunde ist der ESP32 der Firma Espressif. Mikrocontroller dieser Baureihe zeichnen sich durch eine Vielzahl implementierter Funktionen aus, die bei einem Arduino konventioneller Prägung mit einem Atmel-AVR-Mikrocontroller erst mit weiterer Hardware möglich sind. Prominentes Beispiel sind hier die WiFi- und Bluetooth-Funktionalitäten. Gegenüber einem Raspberry Pi zeichnen sie sich durch einen deutlich geringeren Preis aus.
Allgemeine Informationen für die Realisierung eines Roboterauto-Projekts mit dem ESP32 sind leicht zu finden. Dabei handelt es sich aber oft nur um Ausführungen zu einem Teilaspekt, ohne inhaltliche oder funktionale Abstimmung. So ist nicht nur die Beschaffung der benötigten Informationen mühselig und zeitaufwändig, sie kann auch außerordentlich fehlerträchtig sein.
Ansatzpunkt dieses Buches ist, diese Lücke zu schließen. Es geht auf verschiedene Möglichkeiten eines Chassis ein, vermittelt nötige Kenntnisse und führt schrittweise von einer einfachen Motorsteuerung zu einem komplexen sensor- und sprachgesteuerten Roboterauto. Hacks rund um GPS und eine PlayStation 3 runden die Sache ab.
Inhalt
Bei der Reihenfolge der Kapitel wurde versucht – beginnend bei der Darstellung von grundlegenden Informationen – über die Lösung einfacher Aufgaben zu etwas anspruchsvolleren Techniken zu führen.
Der Mikrocontroller ESP32
Die Software erstellen
Die Stromversorgung
Rund um die Hardware
Das Chassis
Der Gleichstrommotor
Kabellose Steuerung über WiFi
Mit Sensoren Hindernisse erkennen
Eine eigene Roboterauto-App
Servo und Lichtsensor
GPS
Accelerometer / Gyroskop
PS3-Controller
Roboterauto-App
Hinweis zur Software
Die Dateien haben das Suffix (.cpp). Grund ist die Entwicklung mit PlatformIO. Mit Copy & Paste sollten sie auch in der Arduino-IDE verwendet werden können.
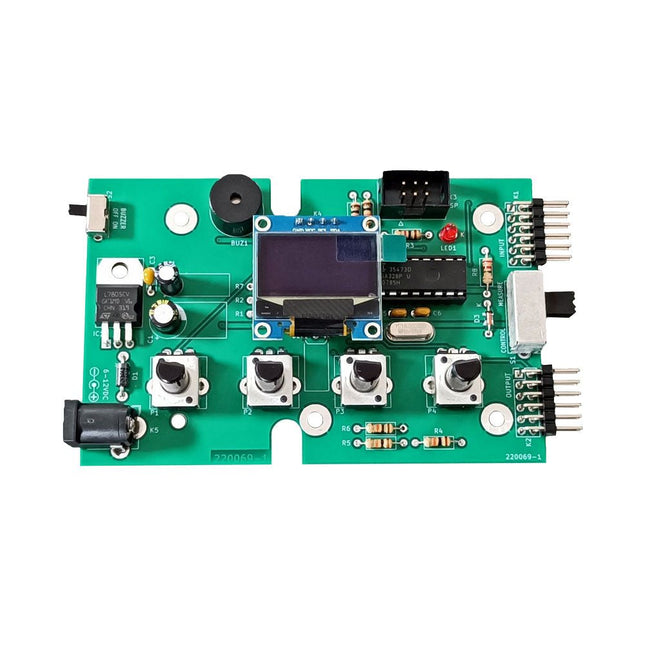
The Elektor Super Servo Tester can control servos and measure servo signals. It can test up to four servo channels at the same time.
The Super Servo Tester comes as a kit. All the parts required to assemble the Super Servo Tester are included in the kit. Assembling the kit requires basic soldering skills. The microcontroller is already programmed.
The Super Servo Tester features two operating modes: Control/Manual and Measure/Inputs.
In Control/Manual mode the Super Servo Tester generates control signals on its outputs for up to four servos or for the flight controller or ESC. The signals are controlled by the four potentiometers.
In Measure/Inputs the Super Servo Tester measures the servo signals connected to its inputs. These signals may come from for instance an ESC, a flight controller, or the receiver or another device. The signals are also routed to the outputs to control the servos or the flight controller or ESC. The results are shown on the display.
Specifications
Operating modes
Control/Manual & Measure/Inputs
Channels
3
Servo signal inputs
4
Servo signal outputs
4
Alarm
Buzzer & LED
Display
0.96' OLED (128 x 32 pixels)
Input voltage on K5
7-12 VDC
Input voltage on K1
5-7.5 VDC
Input current
30 mA (9 VDC on K5, nothing connected to K1 and K2)
Dimensions
113 x 66 x 25 mm
Weight
60 g
Included
Resistors (0.25 W)
R1, R3
1 kΩ, 5%
R2, R4, R5, R6, R7, R9, R10
10 kΩ, 5%
R8
22 Ω, 5%
P1, P2, P3, P4
10 kΩ, lin/B, vertical potentiometer
Capacitors
C1
100 µF 16 V
C2
10 µF 25 V
C3, C4, C7
100 nF
C5, C6
22 pF
Semiconductors
D1
1N5817
D2
LM385Z-2.5
D3
BZX79-C5V1
IC1
7805
IC2
ATmega328P-PU, programmed
LED1
LED, 3 mm, red
T1
2N7000
Miscellaneous
BUZ1
Piezo buzzer with oscillator
K1, K2
2-row, 12-way pinheader, 90°
K5
Barrel jack
K4
1-row, 4-way pin socket
K3
2-row, 6-way boxed pinheader
S1
Slide switch DPDT
S2
Slide switch SPDT
X1
Crystal, 16 MHz
28-way DIP socket for IC2
Elektor PCB
OLED display, 0.96', 128 x 32 pixels, 4-pin I²C interface
Links
Elektor Magazine
Elektor Labs
This upgraded version 2.0 (available exclusively from Elektor) contains the following improvements:
Enhanced protective earthing (PE) for furnace chassis
Extra thermal insulation layer around furnace to reduce odors
Connection to a computer, allowing curve editing on a PC
Features such as constant temperature control and timing functions
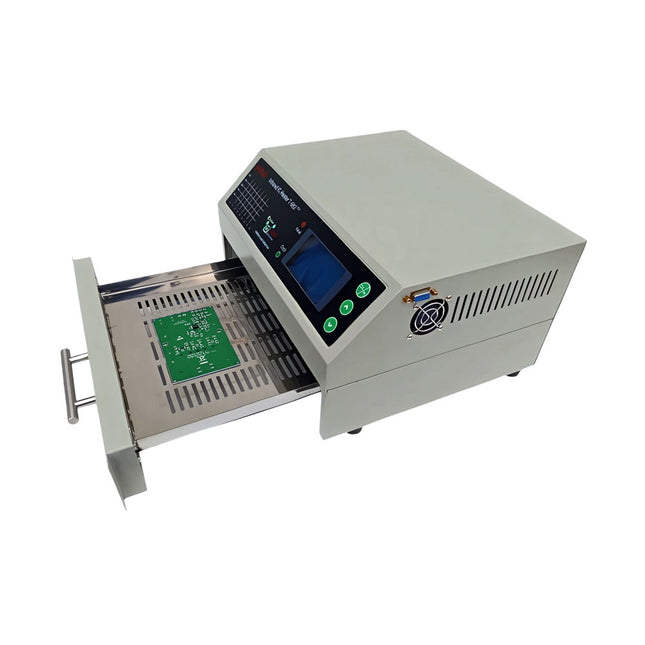
The infrared IC heater T-962 v2.0 is a microprocessor-controlled reflow oven that you can use for effectively soldering various SMD and BGA components. The whole soldering process can be completed automatically and it is very easy to use. This machine uses a powerful infrared emission and circulation of the hot air flow, so the temperature is being kept very accurate and evenly distributed.
A windowed drawer is designed to hold the work-piece, and allows safe soldering techniques and the manipulation of SMDBGA and other small electronic parts mounted on a PCB assembly. The T-962 v2.0 may be used to automatically rework solder to correct bad solder joints, remove/replace bad components and complete small engineering models or prototypes.
Features
Large infrared soldering area
Effective soldering area: 180 x 235 mm; this increases the usage range of this machine drastically and makes it an economical investment.
Choice of different soldering cycles
Parameters of eight soldering cycles are pre defined and the entire soldering process can completed automatically from Preheat, Soak and Reflow through to cool down.
Special heat up and temperature equalization with all designs
Uses up to 800 Watts of energy efficient Infrared heating and air circulation to re-flow solder.
Ergonomic design, practical and easily operated
Good build quality but at the same time light weight and a small footprint allows the T-962 v2.0 to be easily bench positioned transported or stored.
Large number of available functions
The T-962 v2.0 can solder most small parts of PCB boards, for example CHIP, SOP, PLCC, QFP, BGA etc. It is the ideal rework solution from single runs to on-demand small batch production.
Specifications
Soldering area (max)
180 x 235 mm (7.1 x 9.3")
Power (max)
800 W
Temperature range
0-280°C (32-536°F)
Heating method
Infrared
Processing time
1~8 minutes
Power supply
220 V AC/50 Hz
Display
LCD with Backlight
Control mode
8 intelligent temperature curves
Dimensions
310 x 290 x 170 mm (12.2 x 11.4 x 6.7")
Weight
6.2 kg
Included
1x T-962 v2.0 Reflow Soldering Oven (Elektor Version)
2x Fuses
1x Power cord (EU)
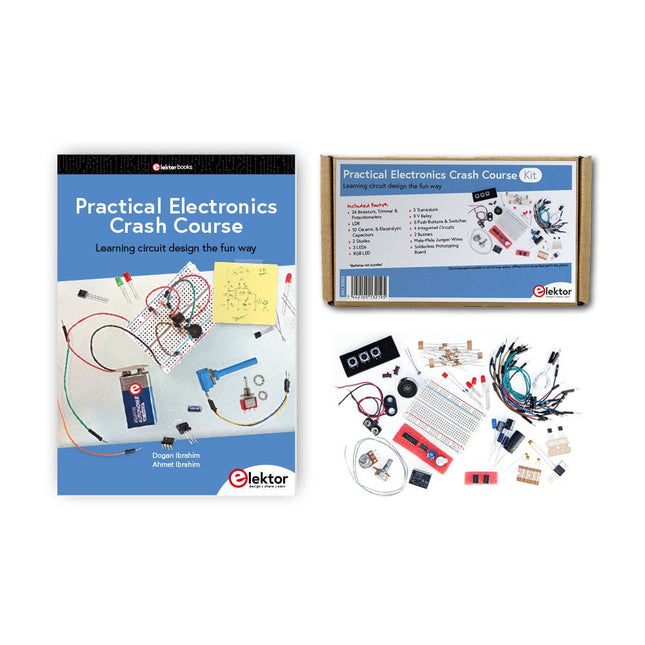
Getting started in electronics is not as difficult as you may think. With this bundle (book + kit of parts), you can explore and learn the most important electrical and electronics engineering concepts in a fun way by doing various experiments. You will learn electronics practically without getting into complex technical jargon and long calculations. As a result, you will be creating your own projects soon.
This kit contains the components required to build most of the detailed examples of the book on a breadboard and try them out for real.
The kit can, of course, also be used without the book for building other circuits and doing your own experiments.
Kit contents
1x 39 Ω, 1 W resistor
1x 47 Ω resistor
1x 180 Ω resistor
1x 330 Ω resistor
3x 1 kΩ resistor
1x 2.2 kΩ resistor
1x 3.9 kΩ resistor
1x 6.8 kΩ resistor
1x 10 kΩ resistor
1x 15 kΩ resistor
1x 22 kΩ resistor
1x 33 kΩ resistor
1x 47 kΩ resistor
1x 56 kΩ resistor
1x 82 kΩ resistor
1x 120 kΩ resistor
1x 680 kΩ resistor
2x 100 kΩ resistor
1x 10 kΩ trimmer
1x 10 kΩ linear potentiometer
1x 100 kΩ linear potentiometer
1x LDR
1x 1 nF ceramic capacitor
2x 10 nF ceramic capacitor
1x 100 nF ceramic capacitor
1x 1 µF, 25 V aluminium electrolytic capacitor
2x 10 µF, 25 V aluminium electrolytic capacitor
1x 100 µF, 25 V aluminium electrolytic capacitor
1x 470 µF, 25 V aluminium electrolytic capacitor
1x 1000 µF, 25 V aluminium electrolytic capacitor
1x RGB LED, Common-Cathode (CC)
1x 1N4148 small signal diode
1x 1N4733A 5.1 V, 1 W Zener diode
3x LED, red
2x BC337 NPN transistor
1x IRFZ44N N-channel MOSFET
2x NE555 timer
1x LM393 comparator
1x 74HCT08 quad AND gate
3x Tactile switch
2x SPDT switch
1x Relay, SPDT, 9 VDC
1x Active buzzer
1x Passive buzzer
50 cm Solid wire, 16 AWG, unjacketed
2x PP3 9 V battery clip
1x Breadboard
20x Jumper wire
This bundle contains:
Practical Electronics Crash Course Kit (valued at: €45)
Book: Practical Electronics Crash Course (normal price: €45)