This bundle is all about designing projects based on the 555 timer IC. The book features over 45 fully tested and documented projects. Together with the kit, which contains more than 130 through-hole components, you can build all the projects described on a breadboard. The setup also makes it easy to modify and experiment with the projects.
Over 45 Builds for the Legendary 555 Chip (and the 556, 558)
Some of the projects in the book are:
Alternately Flashing Two LEDs
Changing LED Flashing Rate
Touch Sensor On/Off Switch
Switch On/Off Delay
Light-Dependent Sound
Dark/Light Switch
Tone Burst Generator
Long Duration Timer
Chasing LEDs
LED Roulette Game
Traffic Lights
Continuity Tester
Electronic Lock
Switch Contact Debouncing
Toy Electronic Organ
Multiple Sensor Alarm System
Metronome
Voltage Multipliers
Electronic Dice
7-Segment Display Counter
Motor Control
7-Segment Display Dice
Electronic Siren
Various Other Projects
Kit Contents
Resistors
1x 15 kΩ
1x 68 kΩ
2x 47 kΩ
1x 82 kΩ
2x 820 Ω
1x 8.2 kΩ
3x 10 kΩ
1x 1.8 kΩ
1x 6.8 kΩ
14x 2.2 kΩ
10x 680 Ω
1x 27 kΩ
1x 5.6 kΩ
1x 560 kΩ
1x 4.7 kΩ
1x 3.3 kΩ
3x 33 kΩ
1x 36 kΩ
2x 100 kΩ
5x 1 kΩ
1x 3.9 kΩ
2x 56 kΩ
2x 12 kΩ
1x 10 kΩ potentiometer
1x 1 MΩ potentiometer
2x 50 kΩ potentiometer
3x 20 kΩ potentiometer
1x 10 kΩ potentiometer
1x 10 kΩ potentiometer
1x 50 kΩ potentiometer
1x 100 kΩ potentiometer
1x 50 kΩ potentiometer
Capacitors
1x 0.33 μF
1x 1 μF
1x 10 nF
1x 22 nF
1x 47 nF
1x 100 nF
1x 10 μF electrolytic
1x 33 μF electrolytic
2x 100 μF electrolytic
LEDs
10x 5 mm red LED
10x 3 mm red LED
3x 3 mm yellow LED
3x 3 mm green LED
1x Common-cathode 7-segment LED
Semiconductors
3x 555 timer
1x CD4017 counter
1x CD4026 counter
1x CD4011 NAND gate
4x 1N4148 diode
1x IRFZ46N MOSFET
1x Thermistor
1x Light dependent resistor (LDR)
Miscellaneous
1x Passive buzzer
1x Active buzzer
1x SG90 servo
1x 8 Ω mini loudspeaker
1x 9 V DC brushed motor
1x 5 V relay
1x 9 V battery clip
7x Pushbutton switches
1x Breadboard
1x Breadboard jumper wires
Le téléchargement intégral de ce numéro est disponible pour nos membres GOLD et GREEN sur le site Elektor Magazine !
Pas encore membre ? Cliquez ici.
programmation PIO sur le Raspberry Pi PicoNeuf instructions, de multiples possibilités
l'IA en ligne de commandeDéveloppement, compilation et validation de projets embarqués depuis le terminal
le Scrutiny DebuggerDéboguer, visualiser et tester du code C/C++ embarqué
carte breakout Sigfox (1)Développement d’une BoB radio
alimentation à faible bruit (2)Construction, assemblage et mise en œuvre pratique
générateur de signaux simple basé sur le RP2040Signaux analogiques et numériques
à la découverte du futur de la domotique avec Matter et l’IA EdgeLes dernières versions de Matter et l’essor de l’IA en périphérie de réseau (edge) donnent-ils enfin aux ingénieurs les outils nécessaires pour construire les maisons intelligentes et parfaitement intégrées promises aux utilisateurs ?
capteurs de pression différentielleLa maintenance prédictive appliquée aux systèmes CVC
la sécurité dès la conceptionPrincipes d’ingénierie pour limiter les défaillances
la sécurité des systèmes embarqués n’est plus une option
la CRA et la PQC redéfinissent les priorités de la sécurité embarquéePourquoi même les petites entreprises IoT et industrielles doivent prévoir une mise à niveau
embedded world 2026Entretien avec Benedikt Weyerer, directeur d’embedded world
prise en main du bus I3CUtilisation de matériel de ST et Microchip
le projet BLEnkyPrototypage rapide d’applications Bluetooth Low Energy
modulation de largeur d’impulsionDu thermostat tout ou rien à un signal analogique continu filtré
audiotroniqueDes circuits audio agréables à l’écoute, à réaliser soi-même
sur le vifLisez donc le manuel !
carte émetteur-récepteur audio ESP32 (4)Réglage des horloges et une option filaire
2026 : une odyssée de l’IAConséquences du vibe coding
charge CC symétriqueCharge CC symétrique, statique ou dynamique
comptage de visages avec MaixCAMUne méthode simple pour estimer la taille d’un public
Open-Source-Code mit Arduino IDE und PlatformIO
Autonomes Fahren: GPS, Accelerometer, Gyroskop
PS3-Controller
Mikrocontroller wie der Arduino und Einplatinenrechner wie der Raspberry Pi haben sich zu beliebten Komponenten entwickelt. Dritter im Bunde ist der ESP32 der Firma Espressif. Mikrocontroller dieser Baureihe zeichnen sich durch eine Vielzahl implementierter Funktionen aus, die bei einem Arduino konventioneller Prägung mit einem Atmel-AVR-Mikrocontroller erst mit weiterer Hardware möglich sind. Prominentes Beispiel sind hier die WiFi- und Bluetooth-Funktionalitäten. Gegenüber einem Raspberry Pi zeichnen sie sich durch einen deutlich geringeren Preis aus.
Allgemeine Informationen für die Realisierung eines Roboterauto-Projekts mit dem ESP32 sind leicht zu finden. Dabei handelt es sich aber oft nur um Ausführungen zu einem Teilaspekt, ohne inhaltliche oder funktionale Abstimmung. So ist nicht nur die Beschaffung der benötigten Informationen mühselig und zeitaufwändig, sie kann auch außerordentlich fehlerträchtig sein.
Ansatzpunkt dieses Buches ist, diese Lücke zu schließen. Es geht auf verschiedene Möglichkeiten eines Chassis ein, vermittelt nötige Kenntnisse und führt schrittweise von einer einfachen Motorsteuerung zu einem komplexen sensor- und sprachgesteuerten Roboterauto. Hacks rund um GPS und eine PlayStation 3 runden die Sache ab.
Inhalt
Bei der Reihenfolge der Kapitel wurde versucht – beginnend bei der Darstellung von grundlegenden Informationen – über die Lösung einfacher Aufgaben zu etwas anspruchsvolleren Techniken zu führen.
Der Mikrocontroller ESP32
Die Software erstellen
Die Stromversorgung
Rund um die Hardware
Das Chassis
Der Gleichstrommotor
Kabellose Steuerung über WiFi
Mit Sensoren Hindernisse erkennen
Eine eigene Roboterauto-App
Servo und Lichtsensor
GPS
Accelerometer / Gyroskop
PS3-Controller
Roboterauto-App
Hinweis zur Software
Die Dateien haben das Suffix (.cpp). Grund ist die Entwicklung mit PlatformIO. Mit Copy & Paste sollten sie auch in der Arduino-IDE verwendet werden können.
Elektor GREEN and GOLD members can download their digital edition here.
Not a member yet? Click here.
USB Measurement AdapterTesting Current and Signal Quality of USB Ports
4...20 mA Current Output for Arduino UnoA Reliable, EMI-Insensitive Current Loop Interface
Vacuum Cleaner Automatic ControlKeep Your Tools’ Work Area Clean
DDS Generator with ATtiny
Opamp-Tester V2New PCB – Now Also Suitable for SMDs
550-mW “Lamp” Audio AmplifierGet the Warm Sound of Vacuum Tubes With Ease
Fuse GuardMonitoring a Fuse with a Flashing LED
HQ RIAA PreamplifierGet the Most Out of Your Vinyl Records!
Turntable Speed CalibratorAn Arduino-Based 100–120 Hz Strobe Light Generator
Elektor Classics: video buffer/repeater
Infrared Remote-Controlled DimmerControl Your Halogen or LED Floor Lamp Effortlessly and With Style
How to Use switch…case on Strings in C++/Arduino IDE
Magnet FinderWith a Simple Hall-Effect Sensor
Raspberry Pi Smart Power ButtonA Solution for Raspberry Pi Up to Model 4
Essential Maker TipsProfessional Insights for Everyday Making
Practical Projects with the 555 TimerDC Motor Control and Fast Reaction Challenges
Basic AC-Load-On MonitorSave Energy with a Simple Device
Power Banks in ParallelA Three-Day Continuous Power Solution
VFO Up to 15 MHzAn Implementation With Raspberry Pi Pico
Violin Tuner with ATtiny202
Elektor Classics: video amplifier for B/W television sets
Capacitance Meter20 pF to 600 nF
Quasi-Analog Clockwork Mk IITwo LED Rings for Hours and Minutes
You Can Do Anything You Want(with the Arduino Ecosystem at Your Side)
Neon Lamp Dice
Elektor Classics: RTTY calibrator indicator
Inspiring Hardware Designs for Your ESPs
Elektor Classics: variable 3 A power supply
RGB LEDs with Integrated Control CircuitLight with Precision: ICLEDs Set Standards
Experiment: Towards a Mixed-Signal Theremin?Blending Modern Time-of-Flight Sensors With the Timeless XR2206 Analog Generator
ESP32 Audio Transceiver Board (Part 1)SD Card WAV File Player Demo
Infographics: Circuits and Circuit Design 2025
Small Audio MixerA Simple and Versatile Scalable Design
Smart Staircase Light TimerSave More Money on the Energy Bill!
Smarten Up Your ShuttersControlling Velux Hardware With an ESP32 and MQTT
Solid-State Foot WarmerEnergy-Efficient Comfort
Is the M5Stamp Fly Quadcopter the Next Tello?
Boosting Wi-Fi Range of the ESP32-C3 SuperMiniA Simple and Effective Antenna Mod
ZD-8968 Hot-Air Soldering StationA Budget-Friendly Workhorse or Just Hot Air?
Parking Sensor TesterFinding Defects in the PDC System of a Car
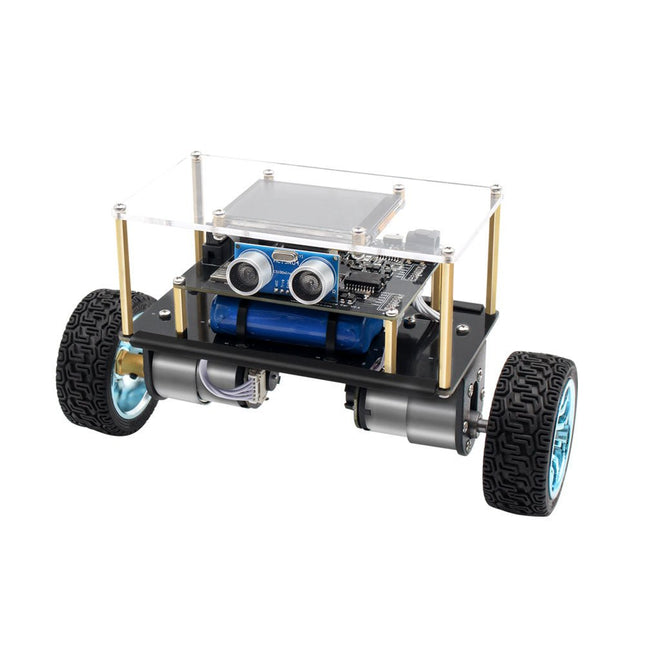
Arduino-compatible, ESP32-controlled, 2-wheeled Balancing Robot
The Elektor Mini-Wheelie is an experimental autonomous self-balancing robot platform. Based on an ESP32-S3 microcontroller, the self-balancing robot is fully programmable using the Arduino environment and open-source libraries. Its wireless capabilities allow it to be controlled remotely over Wi-Fi, Bluetooth or ESP-NOW or to communicate with a user or even another robot.
An ultrasonic transducer is available for detecting obstacles. Its color display can be used for displaying cute facial expressions or, for the more down-to-earth users, cryptic debug messages.
The robot comes as a neat kit of parts that you must assemble yourself. Everything is included, even a screwdriver.
Note: The Mini-Wheelie is an educational development platform intended for learning, experimentation, and robotics development. It is not classified as a toy for children, and its features, documentation, and intended audience reflect this purpose. The product is aimed at students, educators, and developers who wish to explore robotics, programming, and hardware integration in an educational setting.
Specifications
ESP32-S3 microcontroller with Wi-Fi and Bluetooth
MPU6050 6-axis Inertial Measurement Unit (IMU)
Two independently controlled 12 V electric motors with tachometer
Ultrasonic transducer
2.9" TFT color display (320 x 240)
MicroSD card slot
Battery power monitor
3S rechargeable Li-Po battery (11.1 V/2200 mAh)
Battery charger included
Arduino-based open-source software
Dimensions (W x L x H): 23 x 8 x 13 cm
Included
1x ESP32-S3 Mainboard + MPU6050 module
1x LCD board (2.9 inch)
1x Ultrasonic sensor
1x Battery pack (2200 mAh)
1x Battery charger
1x Motor tyre kit
1x Case board
1x Acrylic board
1x Screwdriver
1x Protective strip
1x Flex cable B (8 cm)
1x Flex cable A (12 cm)
1x Flex cable C
4x Copper column A (25 mm)
4x Copper column B (55 mm)
4x Copper column C (5 mm)
2x Plastic nylon column
8x Screws A (10 mm)
24x Screws B (M3x5)
8x Nuts
24x Metal washers
2x Zip tie
1x MicroSD card (32 GB)
Downloads
Documentation
electronica fast forward Start- & Scale-Up Awardsde voorbereidingen gaan steeds sneller!
Bluetooth Low Energy met ESP32-C3 en ESP32het hoeft niet altijd WiFi te zijn!
Bluetooth LE-snifferhack een makerdiary nRF52840 MDK USB-dongle
Magische RGB LED-kubushardware ontwerpen rond een RP2040 Auto-aan/uit voor soldeerpasta-compressor
Elektor video-productieslivestreams, webinars en cursussen voor engineers en pro-makers
Elektrificeer je fietsmet een e-bike ombouwset
Alle begin......vermenigvuldigt spanningen
Uit het leven gegrepennevenactiviteiten
Teensy 4.0 – waarom is dat board zo snel?snelheid is geen hekserij!
Simulatie van een audio-eindversterker met TINAeerst uitproberen, dan bouwen
Ontwikkel en beheer je eigen LoRaWAN IoT-nodesvoorbeeldhoofdstuk: Dragino LHT65, LDS01 en LDS02 LoRaWAN modules
Project 2.0correcties, updates en brieven van lezers
5G – alleen voor mijvolledige controle over 5G-implementaties met een eigen cellulair netwerk Elektor Infographics
Tips voor het ontwikkelen van een WiFi-interfacetoepassingen uitrusten met WiFi-interfaces Rijntoren-klok Mk 2
Audio-spectrumanalyzer met dekatronsnieuw leven voor vintage-buisjes
Data naar Telegram sturenmet een ESP32 en een paar onderdelen
Een Fliege-notchfilter voor audiometingenmeet beter met een notchfilter
Veranderende industriële communicatieSingle Pair Ethernet – meer dan zo maar een nieuwe connector
Elektronische mannetjes-PUT-terzo werkt de programmeerbare unijunctie-transistor
Rond touchscreen voor Raspberry PiHyperPixel 2.1 Round van Pimoroni
Remote sensing met detectie van verbindingsverliesmet nRF24L01+ modules
Digitale FM-ontvanger met Arduino en TEA5767stem af met een Arduino Nano OLED-interface ombouwen van SPI naar I²C
Oost West Lab Besteen hobby gaat niet met pensioen...
Tien jaar ethiek in elektronicaTessel Renzenbrink over de digitale samenleving en meer
HexadokuThe Original Elektorized Sudok
With Examples for Raspberry Pi Pico and ESP32
Creating and programming small electronic systems is now easier than ever before. With inexpensive development boards and modern software tools, anyone curious about embedded design can quickly move from an idea to a working piece of hardware. At the heart of this change is MicroPython—a clear, interactive, and beginner-friendly way to program microcontrollers while still remaining closely connected to the underlying electronics.
This book introduces embedded programming through MicroPython on popular platforms such as the Raspberry Pi Pico and the ESP32. You will discover how to use microcontrollers for reading inputs, processing data, and controlling outputs in a predictable, real-time loop. With just a few lines of code, you can blink LEDs, read sensors, drive motors, and communicate with the outside world. The interactive REPL programming interface encourages experimentation and fast learning, making concepts tangible from the very first chapter.
While different boards offer different capabilities, they all share the same core principles. Timers, GPIO, analog I/O, PWM, interrupts, and communication interfaces form the foundation of every embedded system.
By focusing on these universal building blocks, this book helps you build skills that transfer across platforms and scale naturally toward more advanced development. Whether you are a beginner or an experienced programmer entering embedded systems, you will find that working with MicroPython is both practical and genuinely enjoyable.
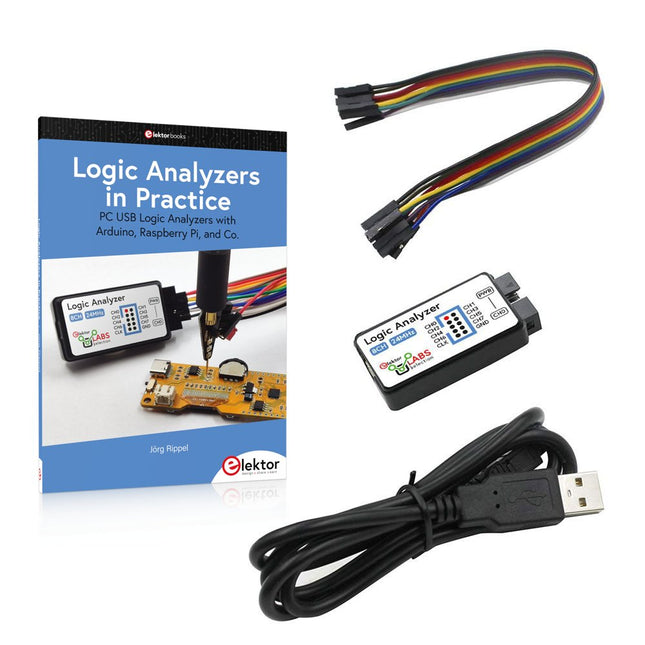
Book: Logic Analyzers in Practice
Step-by-step instructions guide you through the analysis of modern protocols such as I²C, SPI, UART, RS-232, NeoPixel, WS28xx, HD44780 and 1-Wire. With the help of numerous experimental circuits based on the Raspberry Pi Pico, Arduino Uno and the Bus Pirate, you will learn the practical application of popular USB logic analyzers.
All the experimental circuits presented in this book have been fully tested and are fully functional. The necessary program listings are included – no special programming or electronics knowledge is required for these circuits. The programming languages used are MicroPython and C along with the development environments Thonny and Arduino IDE.
This book uses several models of flexible and widely available USB logic analyzers and shows the strengths and weaknesses of each price range.
You will learn about the criteria that matter for your work and be able to find the right device for you.
Whether Arduino, Raspberry Pi or Raspberry Pi Pico, the example circuits shown allow you to get started quickly with protocol analysis and can also serve as a basis for your own experiments.
After reading this book, you will be familiar with all the important terms and contexts, conduct your own experiments, analyze protocols independently, culminating in a comprehensive knowledge set of digital signals and protocols.
USB Logic Analyzer (8-ch, 24 MHz)
This USB Logic Analyzer is an 8-channel logic analyzer with each input dual purposed for analog data recording. It is perfect for debugging and analyzing signals like I²C, UART, SPI, CAN and 1-Wire. It operates by sampling a digital input connected to a device under test (DUT) at a high sample rate. The connection to the PC is via USB.
Specifications
Channels
8 digital channels
Maximum sampling rate
24 MHz
Maximum input voltage
0 V ~ 5 V
Operating temperature
0°C ~ 70°C
Input impedance
1 MΩ || 10 pF
Supported protocols
I²C, SPI, UART, CAN, 1-Wire, etc.
PC connection
USB
Dimensions
55 x 28 x 14 mm
Downloads
Software
This bundle contains:
Book 'Logic Analyzers in Practice' (normal price: €35)
USB Logic Analyzer (8-ch, 24 MHz) (normal price: €20)
USB Cable
Jumper Wire Ribbon Cable
Der ESP8266 von Espressif ist ein Wi-Fi-Mikrochip mit vollem TCP/IP-Stack und Mikrocontroller-Fähigkeit. Es hat mit seinem niedrigen Preis Wellen in der Herstellergemeinschaft geschlagen.
Aber viele Entwickler waren unzufrieden mit dem hohen Stromverbrauch von ESP8266. Der ESP32, ausgestattet mit einem ULP (Ultra Low Power) Coprozessor, bietet eine Lösung.
Dieses E-Book enthält eine Reihe von Projekten mit ESP32 & ESP8266 sowie ein Interview mit dem CEO von Espressif Teo Swee Ann.
Artikel
ESP32 für den Einsatz in Geräten der Industrie 4.0
Scrollende Nachrichtenanzeige, 512 LEDs per WLAN mit ESP-12F ansteuern
Das vernetzte Treibhaus, IoT-Modellprojekt mit MQTT und Node-RED
VFD-Röhren-Uhr mit ESP32, Internet-Zeit auf Vintage-Displays
ESP32 stromsparend, die Programmierung des ULP-Coprozessors
DCF77-Emulator mit ESP8266, DCF durch Internet-Zeit ersetzen
Was steckt hinter dem berühmtem ESP8266?
WLAN-Thermostat, flexible und programmierbare Temperatursteuerung
Timer für den WLAN-Thermostat, sieben Kanäle mit atomarer Genauigkeit
Schweizer Taschenmesser für Mikrocontroller, PlatformIO als universelles Programmier-Tool
ESP32 für Power-User, native Programmierung
Weather-Display, aktuelle Wetterdaten auf einem LC-Display darstellen
GoNotify, ein flexibles IoT-Sensorinterface. Einfach in die Cloud.
Der große Bruder des ESP8266, erste Schritte mit dem ESP32 und der Arduino-IDE
MicroPython, Python für kleine Systeme
RGBDigit Clock, farbenfrohe 7-Segment-Displays zeigen Zeit und Klima
USB-Programmieradapter für die ESP-Module von Espressif
Heizkesselmonitor mit ESP8266, Haustechnik für die Energiewende
WLAN für Mikrocontroller, steuern mit dem ESP8266
Die Rückkehr des WLAN-Controller-Boards, Smartphone steuert IoT-Objekte
WLAN kompakt und autonom, oder: Wie man den ESP8266 auch ohne MCU einsetzen kann
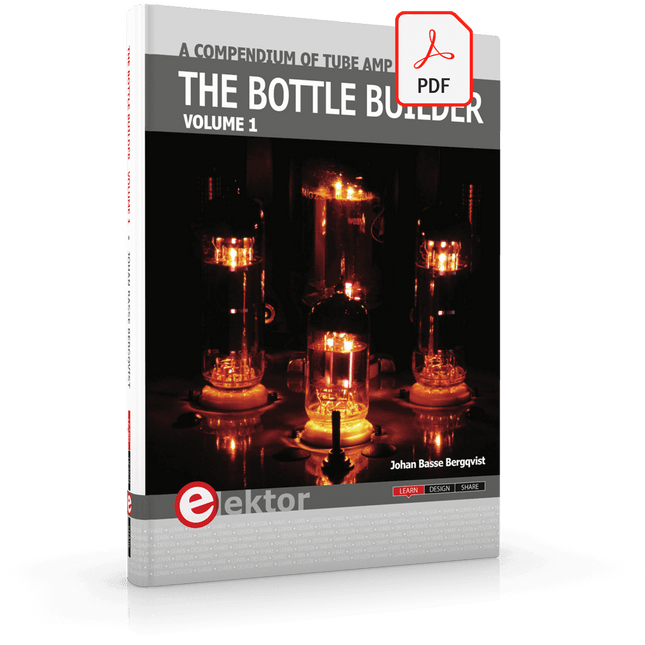
The author, Johan Basse Bergqvist, is an engineer, a musician, and an audiophile with a knack for building projects that produce the desired results. The combination of these skills leads to a uniquely valuable perspective on audio design that is routinely reflected in the book and passed on to the readers.
Several design projects are provided, 40 in total. The designs are explained, and the unique features or methods he uses are described in further detail. Each design includes detailed schematics and a complete parts list. Many of the projects also include layout documentation in the form of CAD photos of the PCB layouts. The range of projects is very diverse and includes something that will appeal to everyone. Stereo amplifiers, guitar and bass amplifiers, preamplifiers for phono, and microphones are all covered. Several variants for each type are included, and the power amplifier designs range from a few watts to several hundred watts, which meet almost any power level you might tackle.
Diese Ausgabe steht allen GOLD- und GREEN-Mitgliedern auf der ElektorMagazine-Website zum Download bereit!
Sie sind noch kein Mitglied? Hier klicken!
High-End aus dem Elektor-Labor
High-End-Verstärker Fortissimo-100Vollsymmetrische Audio-Endstufe mit 100/190 W
Frequenzbestimmung unbekannter Schwingkreise und QuarzeTips & Tricks, Best Practices and Other Useful Information
Platinen entwerfenTipps aus der Praxis
Löten ….na und?Ein etwas genauerer Blick auf die heutige Löttechnik
Bluetooth-Garagentorsteuerung mit niedriger LatenzSteuerung mit kurzen BLE-Nachrichten über ein Smartphone
Ideal Diode Controller„Dioden“ mit geringer Verlustleistung
LED-Girlanden mit ESP32 und FreeRTOSBlinken und variable Helligkeit
Aller Anfang ...... muss nicht schwer sein: Es geht weiter mit den Z-Dioden
UKW/DAB+-EmpfängerDas Beste aus beiden Welten
Aus dem Leben gegriffenElectronica Obscura
Software-Fehlern drahtlos auf der SpurZirkularer Puffer und Webserver auf dem ESP32
Hat Covid einen Innovationsschub im Ingenieurwesen ausgelöst?Innovative Bauteile, Komponenten und Lösungen 2022
Ersa i-CON TRACE – die IoT-Lötstation für Praktiker
Infographics
Was wollen wir mit all diesen Daten machen?
Ansteuerung des E-Paper-Displays von Ynvisible
Immer innovativ mit InnoFaithF&A mit Walter Arkesteijn
Industrielle AutomatisierungEinfache und skalierbare IoT-Nachrüstungen
Das Oszilloskop der nächsten Generation für schnellere EinblickeRohde & Schwarz präsentiert die R&S MXO 4 Serie
Linear-Steckverbinder mit niedrigem Profil lösen Aufgaben im Multi-Signal-Datenmanagement
Smart – Innovativ – KosteneffizientGateMate-FPGAs entwickelt und hergestellt in Deutschland
Vom Layout zum Prototypen an einem Tag4-Lagen-PCBs im Elektronik-Labor
Tools für die kostengünstige Sensorentwicklung
Isolierter Analogausgang für Arduino Uno
Betreten für Unbefugte verboten!Herr Karenovics entdeckt das Theremin
electronica fast forward 2022 - powered by ElektorLine-up und Zeitplan
SenderpeilungVerlorene Funk-Wettersensoren wiederfinden
Das interne Rauschen eines ICs abschätzenMit einer einfachen Methode
Ethik in AktionUnterstützt vom WEEF
Ohne Ethik kein nachhaltiges GeschäftEin Interview mit Professor Stefan Heinemann
Der WEEF-Index 2023
Filter-SoftwareDesign-Tools für analoge Filter
TV-B-Gone!... oder zumindest: B-OFF
RP2040-basierte Luftgütemessung
Kickstart zu Python 3Ein Beispiel-Kapitel: Digitale Bildverarbeitung und Wand-Bibliothek
PolyfusesBemerkenswerte Bauteile
Hexadoku
Bauen Sie Ihre perfekte Wetterstation oder forschen Sie zusammen mit der ganzen Welt an Umweltdaten. Mit vielen praktischen Projekten für Arduino, Raspberry Pi, NodeMCU, ESP32 und weiteren Developmentboards.
Wetterstationen erfreuen sich seit Jahrzehnten großer Beliebtheit. Ob in aktuellen oder längst eingestellten Elektronik-Magazinen – regelmäßig finden sich Beiträge zum Eigenbau einer Wetterstation. Im Laufe der Jahre wurden diese Systeme immer ausgefeilter und können heute nahtlos in das Smart Home integriert werden. Allerdings erfordert dies oft die Bindung an einen (teuren) Markenhersteller, der sämtliche Komponenten abdeckt.
Mit Ihrer eigenen Wetterstation können Sie jedoch mühelos mithalten – und sogar Messwerte erfassen, die kommerzielle Geräte nicht bieten. Dabei kommt der Spaß nicht zu kurz: Sie erweitern spielerisch Ihr Wissen über Elektronik, moderne Mikrocontroller-Developmentboards und Programmiersprachen. Schon für weniger als zehn Euro können Sie erste Umweltdaten erfassen und Ihr System Schritt für Schritt mit wachsendem Interesse weiter ausbauen.
Aus dem Inhalt:
Wind und Wetter auf der Spur
Wetterdisplay mit OpenWeatherMap und Vakuum-Fluoreszenzanzeige
Flüchtige organische Verbindungen in der Atemluft
Mit MQ-Sensoren arbeiten: Kohlenmonoxid messen – geruchlos aber extrem giftig
CO2-Ampel mit ThingSpeak-IoT-Anbindung
Ein Gießautomat für Ihre Pflanzen
Gutes Raumklima: Temperatur und Luftfeuchtigkeit sind wichtige Kriterien
Schickes Thermometer mit alter Röhrentechnik
Nostalgisches Wetterhäuschen für die ganze Familie
Luftdruck und Temperatur genau messen
Sonnenbrand-Warngerät
DIY-Sensor für die Sonnenscheindauer
Das Smartphone zeigt’s an: Nebel oder klare Sicht?
Erdbeben erkennen
Pegelstände von Gewässern und Behältern
pH-Wert von Gewässern bestimmen
Radioaktive Strahlung erkennen
Mit GPS wissen Sie weltweit, wo ihr Sensor ist
Logdateien mit Zeitstempel auf SD-Karten speichern
LoRaWAN, The Things Network und ThingSpeak
LoRaWAN-Gateway für TTN betreiben
Mega-Display mit Wettervorhersage