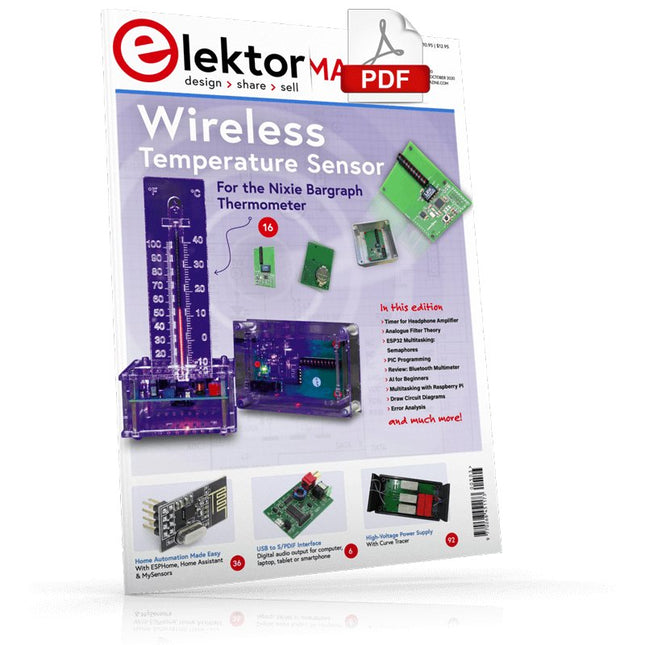
USB to S/PDIF InterfaceDigital audio output for computer, laptop, tablet or smartphone
Practical ESP32 Multitasking (4)Binary semaphores
A Wireless Temperature Sensor for the Nixie Bargraph ThermometerA multipurpose solution with a design trick
Multitasking with Raspberry PiShowcase: a traffic lights controller
Timer for Headphone Amplifier
Open-Network Weather Station Mk.2Part 2: Software
Home Automation Made EasyWith ESPHome, Home Assistant & MySensors
The Storage CRTPeculiar Parts, the series
Artificial Intelligence for Beginners (3)A stand-alone neural network
Programming PICs from the Ground UpAssembler routine to output a sine wave
IKEA Lamp HackEquipping an inexpensive IKEA lamp with NeoPixel LEDs and WLAN
Don't Let Your Hobby Project Collect Dust in a CornerSupply-side time management and spiral development
Starting Out in Electronics (4)Easier than imagined!
Homelab Tours: The Vinyl CutterReturning to the golden age of LPs
The 8-Bit Microcontroller and BeyondInterview with Tam Hanna
Small Circuits RevivalFrom the Elektor suggestions box
Review: Owon OW18E Bluetooth Multimeter
InteractiveCorrections & Updates || Questions & Answers
Steeped in ElectronicsLead-free soldering and EU regulatory zeal
Promising Project: New 50 Hz – 2 MHz LCR meterAccuracy and ease of use
Error AnalysisTips on FMEA, High Current, and More
Developer's ZoneTips & Tricks, Best Practices and Other Useful Information
Review: Siglent SDL1020X Programmable DC Electronic Load
High-Voltage Power Supply with Curve TracerGenerate voltages up to 400 V and trace characteristics curves for valves and transistors
Hexadoku 2009EL
Analogue Electronics DesignCase Study #2 — Part 1: Analogue filter theory
The Elektor StoreNever expensive, always surprising
How to Draw a Circuit Diagram
Elektor GREEN and GOLD members can download their digital edition here.
Not a member yet? Click here.
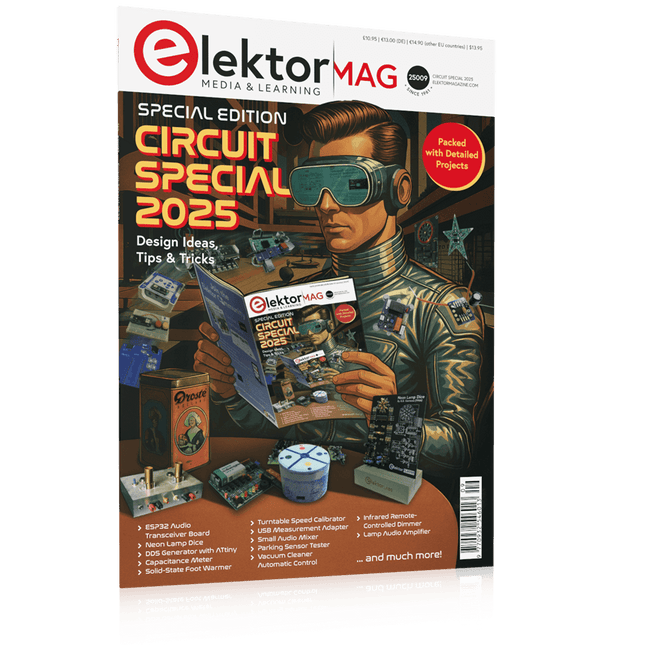
USB Measurement AdapterTesting Current and Signal Quality of USB Ports
4...20 mA Current Output for Arduino UnoA Reliable, EMI-Insensitive Current Loop Interface
Vacuum Cleaner Automatic ControlKeep Your Tools’ Work Area Clean
DDS Generator with ATtiny
Opamp-Tester V2New PCB – Now Also Suitable for SMDs
550-mW “Lamp” Audio AmplifierGet the Warm Sound of Vacuum Tubes With Ease
Fuse GuardMonitoring a Fuse with a Flashing LED
HQ RIAA PreamplifierGet the Most Out of Your Vinyl Records!
Turntable Speed CalibratorAn Arduino-Based 100–120 Hz Strobe Light Generator
Elektor Classics: video buffer/repeater
Infrared Remote-Controlled DimmerControl Your Halogen or LED Floor Lamp Effortlessly and With Style
How to Use switch…case on Strings in C++/Arduino IDE
Magnet FinderWith a Simple Hall-Effect Sensor
Raspberry Pi Smart Power ButtonA Solution for Raspberry Pi Up to Model 4
Essential Maker TipsProfessional Insights for Everyday Making
Practical Projects with the 555 TimerDC Motor Control and Fast Reaction Challenges
Basic AC-Load-On MonitorSave Energy with a Simple Device
Power Banks in ParallelA Three-Day Continuous Power Solution
VFO Up to 15 MHzAn Implementation With Raspberry Pi Pico
Violin Tuner with ATtiny202
Elektor Classics: video amplifier for B/W television sets
Capacitance Meter20 pF to 600 nF
Quasi-Analog Clockwork Mk IITwo LED Rings for Hours and Minutes
You Can Do Anything You Want(with the Arduino Ecosystem at Your Side)
Neon Lamp Dice
Elektor Classics: RTTY calibrator indicator
Inspiring Hardware Designs for Your ESPs
Elektor Classics: variable 3 A power supply
RGB LEDs with Integrated Control CircuitLight with Precision: ICLEDs Set Standards
Experiment: Towards a Mixed-Signal Theremin?Blending Modern Time-of-Flight Sensors With the Timeless XR2206 Analog Generator
ESP32 Audio Transceiver Board (Part 1)SD Card WAV File Player Demo
Infographics: Circuits and Circuit Design 2025
Small Audio MixerA Simple and Versatile Scalable Design
Smart Staircase Light TimerSave More Money on the Energy Bill!
Smarten Up Your ShuttersControlling Velux Hardware With an ESP32 and MQTT
Solid-State Foot WarmerEnergy-Efficient Comfort
Is the M5Stamp Fly Quadcopter the Next Tello?
Boosting Wi-Fi Range of the ESP32-C3 SuperMiniA Simple and Effective Antenna Mod
ZD-8968 Hot-Air Soldering StationA Budget-Friendly Workhorse or Just Hot Air?
Parking Sensor TesterFinding Defects in the PDC System of a Car
Diese Ausgabe steht allen GOLD- und GREEN-Mitgliedern auf der ElektorMagazine-Website zum Download bereit!
Sie sind noch kein Mitglied? Hier klicken!
Für Augen und Ohren
Videoausgabe mit MikrocontrollernTeil 1: Composite Video
electronica 2022Neues von der Weltleitmesse
ESP32-KameraSo einfach, dass sie nicht einmal WLAN braucht
ATX-Netzteil für Raspberry Pi
32-?-KopfhörerverstärkerEinfache, aber hochqualitative 3-Chip-Lösung
SDR-FunkuhrenFünf Zeitzeichen, sechs Anzeigen
Aller Anfang ...muss nicht schwer sein: Spezielle Dioden
Aus dem Leben gegriffenÜber die Qualität der Dinge
Reverse-Engineering eines LED-Displays mit Bluetooth Low EnergyWie man ein BLE-Gerät mit einem Python-Skript steuert
MakePython ESP32 Development KitAlles in einer Box
THD-Messung mit Oszilloskop und FFTDen Klirrfaktor einfach berechnen
Allsehende MaschinenDie Technologie hinter modernen industriellen Bildverarbeitungssystemen
Infografik
Die Entwicklung der Sprach- und Audiosteuerung für elektronische Geräte
WEEF 2022 im Rückblick
Im Rückblick: FFWD electronica 2022Innovatoren beeindrucken weiterhin!
The TubeEin Röhrenverstärker der anderen Art
Biomaterialien in der Elektronik: Bereit oder nicht?
Opera-Cake-Antennenumschalter für HackRF OneSchließen Sie bis zu acht Antennen an Ihr SDR an
Technik mit Arduino und mehrEin Interview mit Autor Ashwin Pajankar
LiDAR-PräzisionsmetermaßMisst bis zu zwölf Meter
Audio mit dem ESP32Das Framework ESP-ADF in der Praxis
Elektor-Leistungsverstärker-Bausatz Fortissimo-100
Licht für Klangeffekte nutzenLDR-basiertes spannungsgesteuertes 24 dB/Okt.-Synthesizer-Filter
Hochleistungsverstärker GigantDer Lauteste von allen!!
Betreten für Unbefugte verboten!Ein volumetrisches Display Made in Canada
Projekt 2.0Korrekturen, Updates und Leserbriefe
Hexadoku
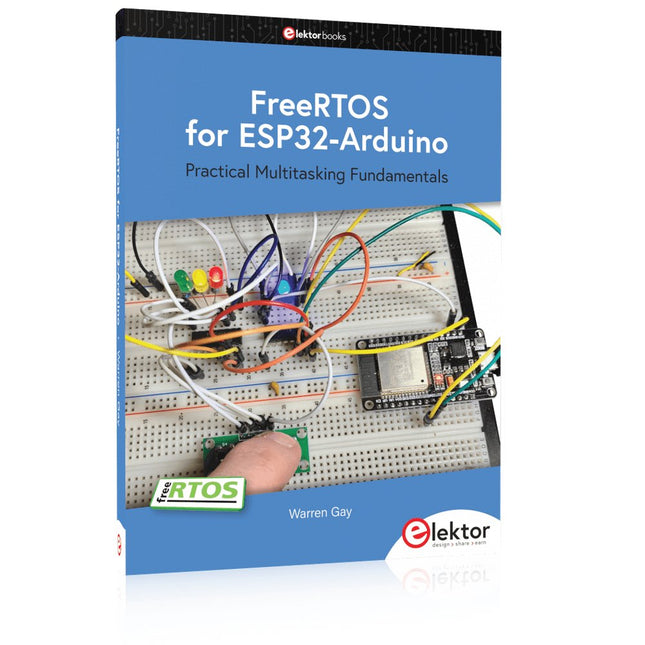
Practical Multitasking Fundamentals
Programming embedded systems is difficult because of resource constraints and limited debugging facilities. Why develop your own Real-Time Operating System (RTOS) as well as your application when the proven FreeRTOS software is freely available? Why not start with a validated foundation?
Every software developer knows that you must divide a difficult problem into smaller ones to conquer it. Using separate preemptive tasks and FreeRTOS communication mechanisms, a clean separation of functions is achieved within the entire application. This results in safe and maintainable designs.
Practicing engineers and students alike can use this book and the ESP32 Arduino environment to wade into FreeRTOS concepts at a comfortable pace. The well-organized text enables you to master each concept before starting the next chapter. Practical breadboard experiments and schematics are included to bring the lessons home. Experience is the best teacher.
Each chapter includes exercises to test your knowledge. The coverage of the FreeRTOS Application Programming Interface (API) is complete for the ESP32 Arduino environment. You can apply what you learn to other FreeRTOS environments, including Espressif’s ESP-IDF. The source code is available from GitHub. All of these resources put you in the driver’s seat when it is time to develop your next uber-cool ESP32 project.
What you will learn:
How preemptive scheduling works within FreeRTOS
The Arduino startup “loopTask”
Message queues
FreeRTOS timers and the IDLE task
The semaphore, mutex, and their differences
The mailbox and its application
Real-time task priorities and its effect
Interrupt interaction and use with FreeRTOS
Queue sets
Notifying tasks with events
Event groups
Critical sections
Task local storage
The gatekeeper task
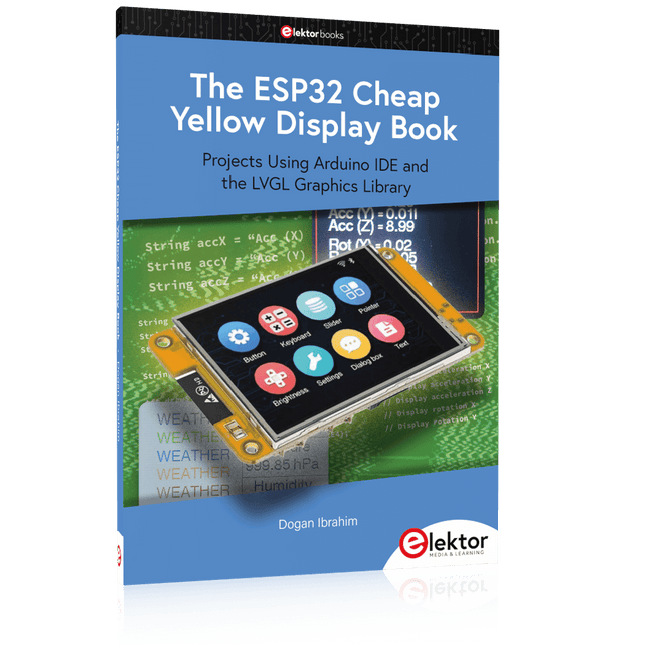
Projects Using Arduino IDE and the LVGL Graphics Library
The ESP32 is probably one of the most popular microcontrollers used by many people, including students, hobbyists, and professional engineers. Its low cost, coupled with rich features makes it a popular device to use in many projects. Recently, a board called the ESP32 Cheap Yellow Display (CYD for short) is available from its manufacturers. The board includes a standard ESP32 microcontroller together with a 320x240 pixel TFT display. Additionally, the board provides several connectors for interfaces such as GPIO, serial port (TX/RX), power and Ground. The inclusion of a TFT display is a real advantage as it enables users to design complex graphics-based projects without resorting to an external LCD or graphics displays.
The book describes the basic hardware of the ESP32 CYD board and provides details of its on-board connectors. Many basic, simple, and intermediate-level projects are given in the book based on the ESP32 CYD, using the highly popular Arduino IDE 2.0 integrated development environment. The use of both the basic graphics functions and the use of the popular LVGL graphics library are discussed in the book and projects are given that use both types of approaches.
All the projects given in the book have been tested and are working. The block diagram, circuit diagram, and the complete program listings and program descriptions of all the projects are given with explanations. Readers can use the LVGL graphics library to design highly popular eye-catching full-color graphics projects using widgets such as buttons, labels, calendars, keypads, keyboards, message boxes, spinboxes, sliders, charts, tables, menus, bars, switches, drop-down lists, animations, and many more widgets.
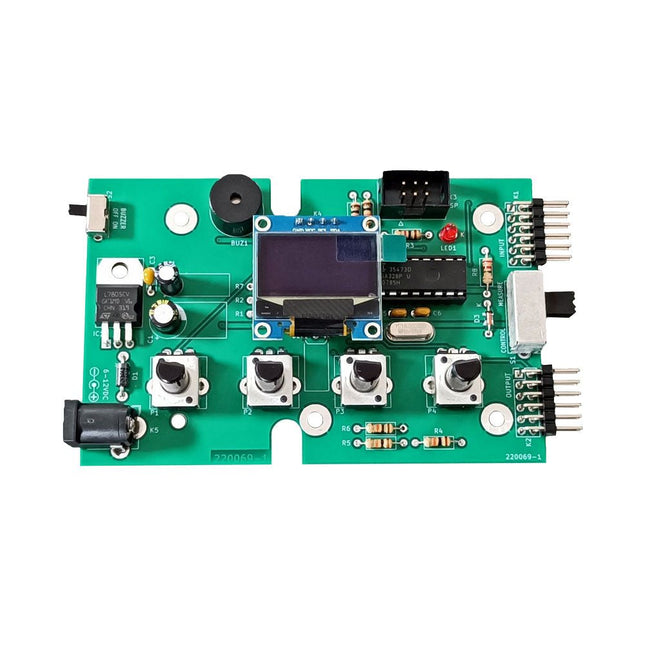
The Elektor Super Servo Tester can control servos and measure servo signals. It can test up to four servo channels at the same time.
The Super Servo Tester comes as a kit. All the parts required to assemble the Super Servo Tester are included in the kit. Assembling the kit requires basic soldering skills. The microcontroller is already programmed.
The Super Servo Tester features two operating modes: Control/Manual and Measure/Inputs.
In Control/Manual mode the Super Servo Tester generates control signals on its outputs for up to four servos or for the flight controller or ESC. The signals are controlled by the four potentiometers.
In Measure/Inputs the Super Servo Tester measures the servo signals connected to its inputs. These signals may come from for instance an ESC, a flight controller, or the receiver or another device. The signals are also routed to the outputs to control the servos or the flight controller or ESC. The results are shown on the display.
Specifications
Operating modes
Control/Manual & Measure/Inputs
Channels
3
Servo signal inputs
4
Servo signal outputs
4
Alarm
Buzzer & LED
Display
0.96' OLED (128 x 32 pixels)
Input voltage on K5
7-12 VDC
Input voltage on K1
5-7.5 VDC
Input current
30 mA (9 VDC on K5, nothing connected to K1 and K2)
Dimensions
113 x 66 x 25 mm
Weight
60 g
Included
Resistors (0.25 W)
R1, R3
1 kΩ, 5%
R2, R4, R5, R6, R7, R9, R10
10 kΩ, 5%
R8
22 Ω, 5%
P1, P2, P3, P4
10 kΩ, lin/B, vertical potentiometer
Capacitors
C1
100 µF 16 V
C2
10 µF 25 V
C3, C4, C7
100 nF
C5, C6
22 pF
Semiconductors
D1
1N5817
D2
LM385Z-2.5
D3
BZX79-C5V1
IC1
7805
IC2
ATmega328P-PU, programmed
LED1
LED, 3 mm, red
T1
2N7000
Miscellaneous
BUZ1
Piezo buzzer with oscillator
K1, K2
2-row, 12-way pinheader, 90°
K5
Barrel jack
K4
1-row, 4-way pin socket
K3
2-row, 6-way boxed pinheader
S1
Slide switch DPDT
S2
Slide switch SPDT
X1
Crystal, 16 MHz
28-way DIP socket for IC2
Elektor PCB
OLED display, 0.96', 128 x 32 pixels, 4-pin I²C interface
Links
Elektor Magazine
Elektor Labs
Build Your Own Vintage Radio Broadcaster
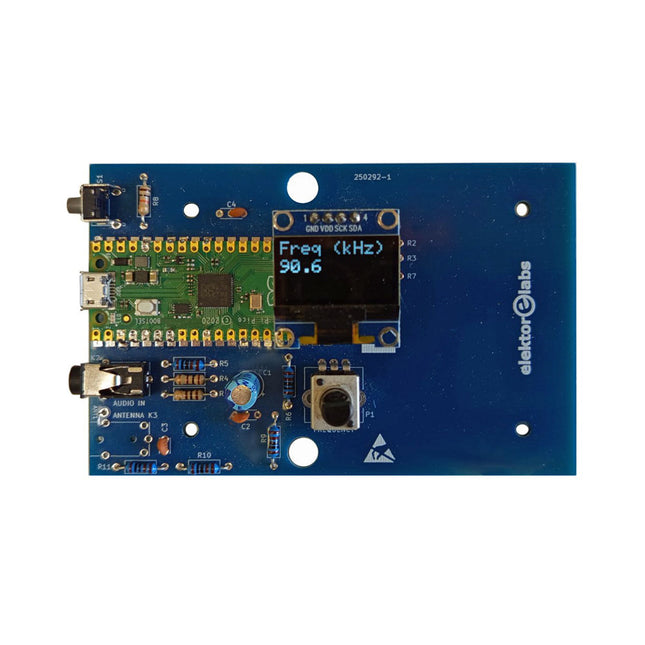
The Elektor AM Transmitter Kit allows streaming audio to vintage AM radio receivers. Based on a Raspberry Pi Pico microcontroller module, the AM Transmitter can transmit on 32 frequencies in the AM band, from 500 kHz up to 1.6 MHz in 32 steps of approx. 35 kHz.
The frequency is selected with a potentiometer and shown on a 0.96" OLED display. A pushbutton allows toggles the transmitting mode between On and Off. The range of the transmitter depends on the antenna. The onboard antenna provides a range of a few centimeters, requiring the AM Transmitter to be placed close to or inside the radio. An external loop antenna (not included) can be connected to increase the range.
The Elektor AM Transmitter Kit comes as a kit of parts that you must solder to the board yourself.
Features
The board is compatible with a Hammond 1593N enclosure (not included).A 5 VDC power supply with micro-USB connector (e.g., an old phone charger) is needed to power the kit (not included). Current consumption is 100 mA.
The Arduino software (requiring Earle Philhower’s RP2040 Boards Package) for the Elektor AM Transmitter Kit plus more information is available at the Elektor Labs page of this project.
Component List
Resistors
R1, R4 = 100 Ω
R2, R3, R8 = 10 kΩ
R5, R6, R9, R10, R11 = 1 kΩ
R7 = optional (not included)
P1 = potentiometer 100 kΩ, linear
Capacitors
C1 = 22 µF 16V
C2, C4 = 10 nF
C3 = 150 pF
Miscellaneous
K1 = 4×1 pin socket
K2, K3 = 3.5 mm socket
Raspberry Pi Pico
pushbutton, angle mount
0.96" monochrome I²C OLED display
PCB 150292-1
Elektor GREEN and GOLD members can download their digital edition here.
Not a member yet? Click here.
CaptureCountAn Object Detector and Counter on the Raspberry Pi 5
Voltage Reference With Arduino Pro MiniLinearize and Calibrate Your Analog Inputs
FPGAs for BeginnersThe Path From MCU to FPGA Programming
Update: STM32 Wireless Innovation Design Contest 2024
Bluetooth LE With MAUIControl Apps for Android & Co.
Port-Expanding Breakout BoardIncrease the Number of I/Os on Your Dev Board
AI SpecialistMachine Learning with the Jetson Nano
2024: An AI OdysseyFirst Forays Into TensorFlow
262,144 Ways to Play The Game of LifeA Reader’s Project in Brief
From Life’s ExperienceThe Chinese Dragon
Get Your (Brushed DC) Motor Running!Sample Projects from the Elektor Motor Control Development Bundle
ESP32-RS-232 AdapterA Wireless Link for Classic Test Equipment
Starting Out in Electronics……More About Opamps
ESP Library Recommendations
Piezoelectric DevicesPeculiar Parts, the Series
A Smart Object CounterImage Recognition Made Easy with Edge Impulse
Resolve Your Trickiest Embedded Development Challenges
ESP32 TerminalA Handheld Device with a Touch-Capable Display
Getting Started With the Zephyr RTOSAs Powerful as It Is Hard to Master
Award-Winning EthicsA Dialog with CTO Alexander Gerfer of Würth Elektronik eiSos on Enabling Innovation and Mindful Behavior
Err-lectronicsCorrections, Updates, and Readers’ Letters
Infographics: Embedded and AI
Square Wave Generation BenchmarksExploring ESP32, Pico, and Other Microcontrollers
Open-Source-Code mit Arduino IDE und PlatformIO
Autonomes Fahren: GPS, Accelerometer, Gyroskop
PS3-Controller
Mikrocontroller wie der Arduino und Einplatinenrechner wie der Raspberry Pi haben sich zu beliebten Komponenten entwickelt. Dritter im Bunde ist der ESP32 der Firma Espressif. Mikrocontroller dieser Baureihe zeichnen sich durch eine Vielzahl implementierter Funktionen aus, die bei einem Arduino konventioneller Prägung mit einem Atmel-AVR-Mikrocontroller erst mit weiterer Hardware möglich sind. Prominentes Beispiel sind hier die WiFi- und Bluetooth-Funktionalitäten. Gegenüber einem Raspberry Pi zeichnen sie sich durch einen deutlich geringeren Preis aus.
Allgemeine Informationen für die Realisierung eines Roboterauto-Projekts mit dem ESP32 sind leicht zu finden. Dabei handelt es sich aber oft nur um Ausführungen zu einem Teilaspekt, ohne inhaltliche oder funktionale Abstimmung. So ist nicht nur die Beschaffung der benötigten Informationen mühselig und zeitaufwändig, sie kann auch außerordentlich fehlerträchtig sein.
Ansatzpunkt dieses Buches ist, diese Lücke zu schließen. Es geht auf verschiedene Möglichkeiten eines Chassis ein, vermittelt nötige Kenntnisse und führt schrittweise von einer einfachen Motorsteuerung zu einem komplexen sensor- und sprachgesteuerten Roboterauto. Hacks rund um GPS und eine PlayStation 3 runden die Sache ab.
Inhalt
Bei der Reihenfolge der Kapitel wurde versucht – beginnend bei der Darstellung von grundlegenden Informationen – über die Lösung einfacher Aufgaben zu etwas anspruchsvolleren Techniken zu führen.
Der Mikrocontroller ESP32
Die Software erstellen
Die Stromversorgung
Rund um die Hardware
Das Chassis
Der Gleichstrommotor
Kabellose Steuerung über WiFi
Mit Sensoren Hindernisse erkennen
Eine eigene Roboterauto-App
Servo und Lichtsensor
GPS
Accelerometer / Gyroskop
PS3-Controller
Roboterauto-App
Hinweis zur Software
Die Dateien haben das Suffix (.cpp). Grund ist die Entwicklung mit PlatformIO. Mit Copy & Paste sollten sie auch in der Arduino-IDE verwendet werden können.
This bundle contains the AI Fusion Lab Kit – which includes over 450 components – and the book Physical AI with Raspberry Pi, offering a comprehensive, hands-on introduction to AI, electronics, and Python programming.
Build practical projects that combine computer vision, voice interaction, sensors, motors, and large language models. The included book guides you step by step from Raspberry Pi setup and hardware control to advanced applications using OpenCV, MediaPipe, YOLO, OpenAI services, and local Ollama models.
SunFounder AI Fusion Lab Kit for Raspberry Pi (450+ parts)
The AI Fusion Lab Kit transforms a Raspberry Pi into a complete platform for learning artificial intelligence, electronics, and Python programming. It supports Raspberry Pi 5, 4B, 3B+, 3B, and Zero 2 W, as well as popular AI models and services including ChatGPT, Gemini, Grok, DeepSeek, Qwen, Doubao, and Ollama.
With its camera, Pan-Tilt HAT, 10-axis sensor module, microphone, speaker, and electronic components, the kit enables users to build interactive AI projects that combine voice, vision, movement, and sensor data. It is suitable for beginners, students, makers, and anyone who wants to explore practical AI applications.
Build Multimodal AI Projects
Combine large language models with speech recognition, text-to-speech, camera vision, sensors, and breadboard circuits. Create projects that can listen, speak, see, react, and interact with their environment while learning how modern AI systems work.
Explore AI Vision and Object Tracking
Use YOLO, OpenCV, and MediaPipe to detect and track objects, colors, faces, and human movement. The motorized Pan-Tilt HAT allows the camera to follow targets automatically, demonstrating how computer vision and motion control work together.
Voice AI with the Fusion HAT+
The Fusion HAT+ simplifies hardware control through a unified Python library and supports safe Raspberry Pi shutdown. Its integrated microphone and speaker make it easy to develop voice-controlled assistants and other conversational AI applications.
Compatible with Raspberry Pi 5, 4B, 3B+, 3B, and Zero 2 W
Supports multiple cloud-based and local AI models
Includes camera, Pan-Tilt HAT, 10DOF module, microphone, and speaker
Projects covering voice AI, computer vision, sensors, and electronics
Video lessons, documentation, and sample code
Book: Physical AI with Raspberry Pi
Using the Raspberry Pi and the AI Fusion Lab Kit, this book takes you step by step from the fundamentals of hardware interfacing to the development of intelligent systems capable of seeing, listening, speaking, and making decisions. Whether you are a student, educator, maker, or professional engineer, you will gain valuable experience through projects designed to build both knowledge and confidence.
Beginning with system setup, GPIO programming, sensors, displays, motors, and automation techniques, the book gradually introduces more advanced topics, including speech recognition, text-to-speech synthesis, conversational AI, object recognition, and machine learning. Along the way, you will learn how to create voice-controlled devices, intelligent assistants, camera tracking systems, environmental monitoring solutions, and AI-powered embedded applications.
Explore modern technologies such as OpenAI services, Ollama local large language models, OpenCV, MediaPipe, and YOLO object detection while gaining practical experience with real-world applications used in robotics, industrial automation, smart devices, and autonomous systems. You’ll discover how intelligent software can interact with sensors, cameras, motors, and displays to create systems that respond naturally to the world around them.
Rather than simply following code examples, you will be encouraged to experiment, customize, and expand every project. The techniques and skills developed throughout this book provide a solid foundation for future innovation, rapid prototyping, research, and product development. If you are ready to move beyond traditional electronics and explore the future of intelligent embedded systems, this book will guide you every step of the way.
This bundle contains:
SunFounder AI Fusion Lab Kit for Raspberry Pi (normal price: €100)
Book: Physical AI with Raspberry Pi (normal price: €45)
Not included
Raspberry Pi
Pull Down Lever For Highest Score!
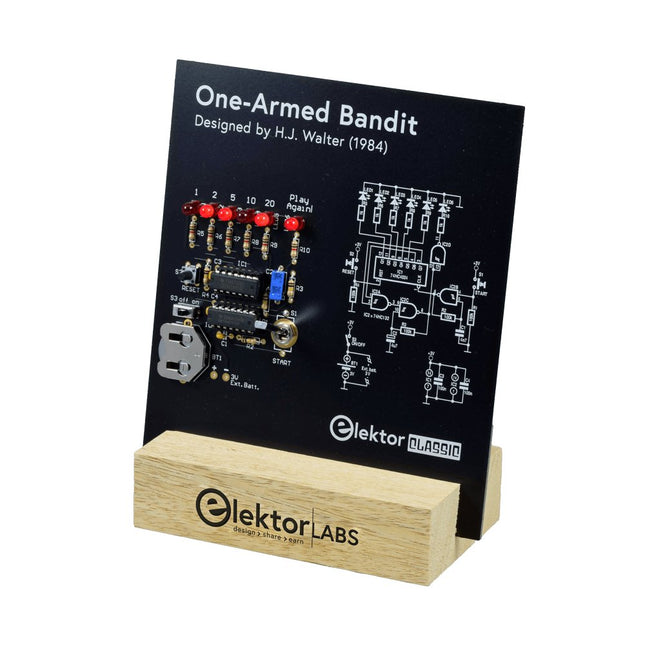
This Elektor Circuit Classic from 1984 shows a playful application of CMOS 400x series logic ICs in combination with LEDs, a highly popular combination at the time. The project imitates a spinning-digit type slot machine.
The Game
To play the game, first agree on the number of rounds. Player 1 actuates the switch lever as long as desired and releases it. The LEDs then show the score which is the sum of the 50-20-10-5 digits lit up. If the Play Again! LED lights, Player 1 has another, “free” round. If not, it’s Player 2’s turn. The players keep tab of their scores, and the highest score wins.
Features
LEDs Indicate Score
Multi-Player and Play Again!
Elektor Heritage Circuit Symbols
Tried & Tested by Elektor Labs
Educational & Geeky Project
Through-Hole Parts Only
Included
Printed Circuit Board
All Components
Wooden Stand
Bill of Materials
Resistors (5%, 250 mW)
R1,R2,R3,R4 = 100kΩ
R5,R6,R7,R8,R9,R10 = 1kΩ
Capacitors
C1 = 4.7nF, 10%, 50V, 5mm
C2 = 4.7μF, 10%, 63V, axial
C3,C4 = 100nF, 10 %, 50V, ceramic X7R, 5mm
Semiconductors
LED1-LED6 = red, 5mm (T1 3/4)
IC1 = 74HC4024
IC2 = 74HC132
Miscellaneous
S1 = switch, toggle, 21mm lever, SPDT, momentary
S2 = switch, tactile, 24V, 50mA, 6x6mm
S3 = switch, slide, SPDT
IC1,IC2 = IC socket, DIP14
BT1 = PCB-mount CR2032 battery retainer clip
Desktop Stand
PCB 230098-1
Not included: BT1 = CR2032 coin cell battery
electronica Fast Forward Start- & Scale-Up AwardsLes préparatifs s?accélèrent?!
Bluetooth Low Energy avec ESP32-C3 et ESP32Vous n?avez pas toujours besoin de choisir le wifi?!
Renifleur BLEReconfiguration du dongle USB nRF52840 MDK de makerdiary
Cube magique de LED RGBcircuit avec un RP2040
Marche/arrêt automatique pour le compresseur de pâte à souder
Contenu vidéo d?ElektorLivestreams, webinaires et cours pour les ingénieurs et les fabricants professionnels
Électrification d?un véloUtilisation d?un kit de modification de vélo électrique
Démarer en électroniqueMultiplication de tensions
Sur le vifTransmutations
Teensy 4.0 ? comment cette carte peut-elle être aussi rapide ?Ou: La vitesse, ce n'est pas sorcier !
Simulation d?amplificateur de puissance audio avec TINA«?simuler avant de construire?»
Développer et utiliser vos n?uds LoRaWAN pour l'Internet des Objets (IdO)Exemple de chapitre : Modules LoRaWAN Dragino LHT65, LDS01 et LDS02
Projet 2.0Corrections, mises à jour et courriers des lecteurs
5G pour mon propre exploitMaîtrise totale du déploiement de la 5G avec les réseaux cellulaires privés
Infographics
Les meilleurs conseils pour développer une interface WiFiComment mon appareil apprend-il à transmettre ?
Horloge Tour du Rhin Mod 2
Analyseur de spectre audio avec dekatronsUne nouvelle façon d'utiliser les tubes rétro
Envoi de données à TelegramAvec un ESP32 et quelques composants
Filtre coupe-bande de Fliege pour les mesures audioFaites de meilleures mesures avec un filtre coupe-bande
Démontage d?un CO2-mètrePeut-on le bidouiller pour vos projets??
Tout mis ensembleLe transistor unijonction programmable expliqué
Écran tactile rond pour Raspberry PiL?HyperPixel 2.1 Round de Pimoroni
Télémesure avec détection des pertes de connexionGrâce aux modules nRF24L01+
Récepteur FM numérique avec Arduino et TEA5767Restez à l?écoute avec un Arduino Nano
Convertir une interface OLED de SPI vers I²C
HomeLab ToursUn passe-temps ne prend pas sa retraite
Une décennie d?éthique en électroniqueLe regard de Tessel Renzenbrink sur la société numérique.
HexadokuThe Original Elektorized Sudoku